
Tea Light Village - Barber Shop Tutorial

Project Description:
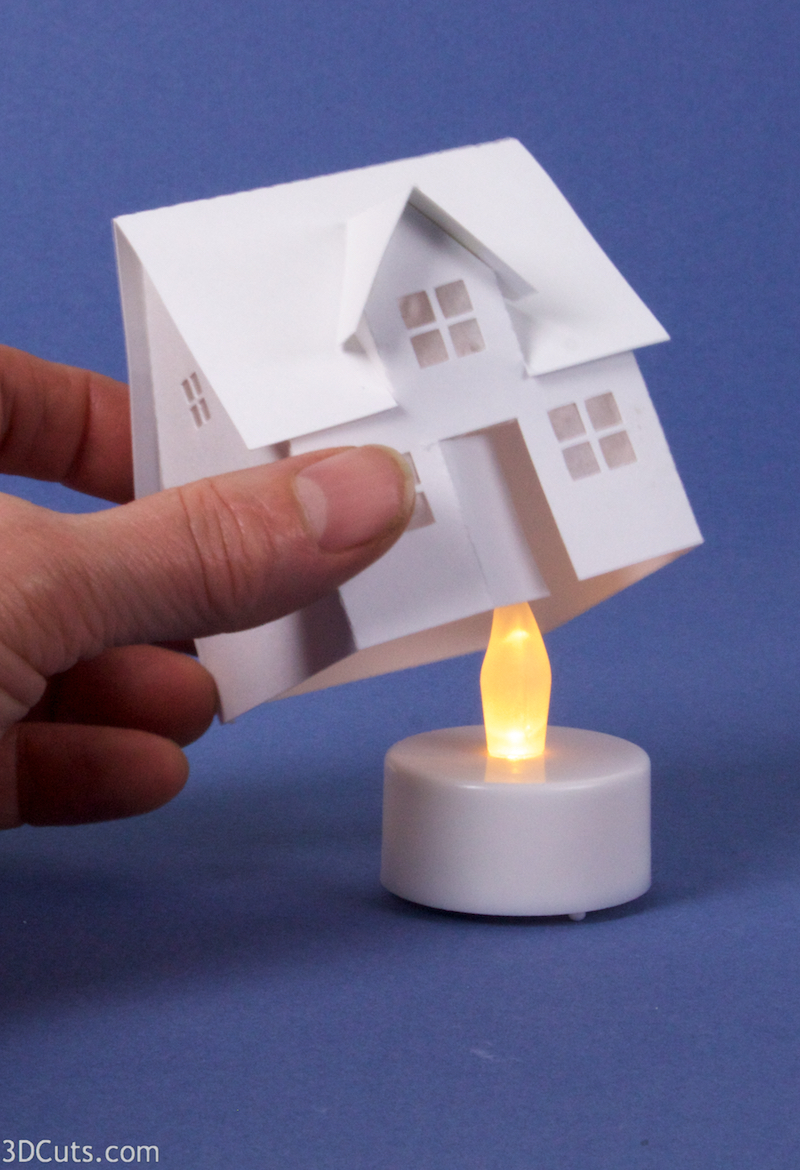
Tea Light Village is a series of tiny buildings designed specifically to fit over small LED Tea Lights so readily available these days. The lights provide a warm glow which brings life to the village display. You can also use string fairy lights.
This tutorial is for the Barber Shop and park bench which were added to the collection in 2018.
There is also a base system for tea light village so they can be adapted to string fairy lights. Go here for more information on the hexagon base system.
Link for this cutting file is here.
Warning: Only use LED Lights. DO NOT use regular candle tea lights.
This specific tutorial is for the assembly of Barber shop.
There are many tutorials for the Tea Light series including:
Tea Light Village Hexagon and Pentagon Bases 2017- updated 2020

Supplies Needed:

Cutting Files - Available at http://3dcuts.com/tea-light-village/2018-additions
ScorTape 1/8" and 1/4"
Card Stock
Wax paper - Tracing paper works as well.
Glue
Scissors
Parts Sizes- See orientation in diagram to right.
All Pieces Grouped - 7.7076” w x 10.1806”h
Main building piece 4.9639" w x 8.3736" h
Main roof: 4.0222" w x 2.5528" h
Awning: 2.0478’ w x 1.4639”h
Large Tree: 3.2417" w x 1.9817" h
Order supplies from Amazon:
Order from Amazon: Neenah Exact Index Card Stock 110lbs. 250 sheets (Affiliate Link)
Order from Amazon: Scor-Tape 1/4" X 27yds (5 Rolls) (Affiliate Link)
Order from Amazon Fairy Lights 2 sets 100 lights with remote in warm white (Affiliate Link)
Order from Amazon: 3D Pop Dots Square 1/4 inch (Affiliate Link)
Order from Amazon: Art Glitter Glue with metal tip (Affiliate Link)
Order from Amazon: Premium Silhouette Blade (Affiliate Link)
Assembly Video:
Below is a YouTube Video of the Assembly process. And further down this page are the photo step-by-step instruction.

Steps for completing the Barber Shop:
Special Note: I update the instructions online. Check here for adjustments and additional information.
1. Download the cutting files for your cutting machine here from the 3dcuts.com store. https://3dcuts.com/tea-light-village . For those of you that are reading this as a pdf I recommend viewing it online at my tutorials page at this url - https://3dcuts.com/tea-light-village-barber-shop-tutorial . There all the links will be live.
2. Load the files into your cutting software following the steps for your cutting machine.
3. Prepare the files:.
For the Silhouette:
SIL Files from upload SVG purchased from 3dcuts.com:
The SVG files may need to be turned into cutting files. Click here for detailed steps on how to use SVG files on your Silhouette. http://www.3dcuts.com/tutorial-upload-svg-silhouette
DXF files can be opened in the basic edition of Silhouette Design Studio but often require modifications. I recommend using the Designer Edition and using svg files. DXF files do not always maintain file sizes and you may need to adjust according to sizes noted above.
For Cricut Explore: Here is a guide for importing into Cricut Design Space. http://www.3dcuts.com/tutorial-adding-3dcuts-files-to-cricut. Remember to ATTACH files before cutting in Cricut.
For Brother ScanNCut: The svg files will need to be transferred to files for your particular machine. You can change SVG files to FCM files at http://www.canvasworkspace.com/ or Google "How to import SVG files into a ScanNCut" for links to tutorials. Some models of Brother Scan N Cut can directly import the SVG files.
4. Cut the files.
All pieces are cut from card stock. I use Neenah Index Card Stock from Amazon.
It is best to have good quality card stock and a good blade and clean, sticky mat. I use the Premium blade and the Nicapa mat. These files do have intricate cuts and you need to know which settings your machine works best with.
I cut using a premium blade. It works wonders on the tiny windows. I set my Silhouette to blade depth of 4, speed of 4 and thickness of 27. I also use a good mat. If it has lost most of its stickiness you will have trouble with the windows.
5. Cover all windows from the inside with wax paper or vellum.
I cut the wax paper into strips and then into squares to fit over the windows.
I apply a coating of a good paper adhesive like Art Glitter glue around the window and then glue the wax paper inside each window.
Be sure to get all windows including doors and attics.
This helps mute the light from the LED tea light.

6. Fold on all the dotted lines
Every dotted line on this file is a fold line and they all get crisply folded in the same direction towards the back side.

7. Apply Scor-Tape to all tabs. Leave the backing on.

I used 1/4" Scor-tape on all the tabs.
The image below shows all the tabs needing Scor-Tape in pink. (Scor-Tape doesn't come in pink. I just highlighted it in the photo for clarity. Don't miss any tabs.
The Scor-Tape gets applied to the outside.

8. Add details- awning and barber shop pole
Fold the awning on the dotted lines. It folds up in the middle and down just above the scolloped trim.

Adhere the awing triangle into the triangle on the front of the shop. The front is the side with the door. The triangle aligned with the dotted fold lines.
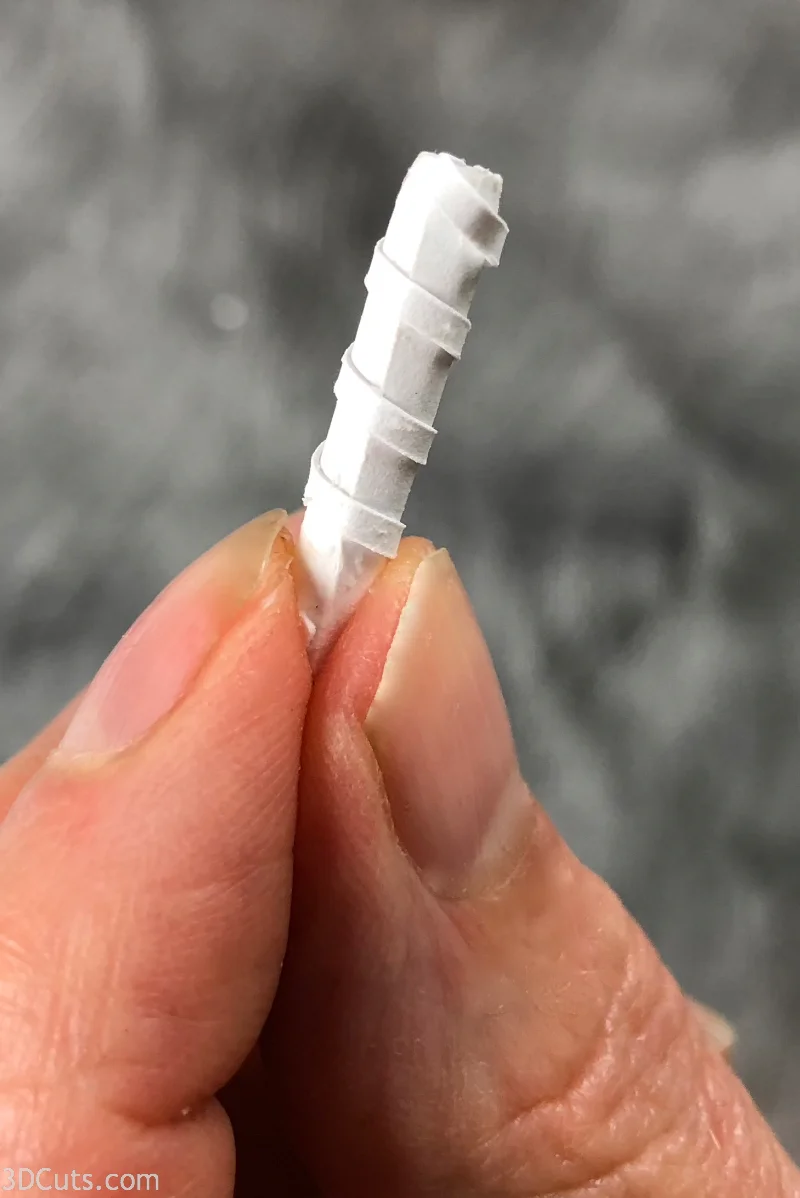
Make the barber shop pole.
These are the pieces needed.They are tiny.
The rectangle piece with the zig-zag edges may need to be out of a thinner weight yardstick. It worked fine with the type I used but if you are working with the heavier weight you might have trouble curling it.
I adjusted the zig-zags after taking this photo so the piece looks a little different now.

Wrap the pole center piece (rectangle with zig-zag edges) around the tooth pick making a cylinder small enough the slide through the holes on the tiny bracket.
The zig-zag edges are the ends.
Apply a line of glue to the end and glue to hold the cylinder then slide off of toothpick.
Hold until it stays adhered.

Fold up both ends of the pole bracket. There are tiny dotted fold lines.

Add the spiral one to the pole. This line is what makes it a barber shop pole.
You might want to make this in red. I kept my village all white so I chose not to. Your choice.
Apply a small amount of glue to one side of the long skinny strip.
Wrap it around the pole forming a spiral.
Clip off the extra length at the end.

Slide the pole into the bracket.


Fold over the tiny tabs on each end and glue them down to the bracket.
If any tabs hang over the edge, snip them off.

Fold the outer bracket and glue it on to the outside of the pole. This will cover all the tabs on each end.
Adhere the pole between the door and window on the front of the shop. It should be placed just below the awning.

10. Assemble the building.
Peel the Scot-Tape backing of the end tab and align it with the opposite edge making the square building. Align bottom and side edges and press in place as shown.

Next peel the eve angles on the roof - start with the two eve edges closest to the roof, peel, and press into place on both sides.

Next peel the backing off the three tabs to adhere the remaining roof. This includes the two eve sides plus the tab which gets tucked inside the side wall.
Press all into place.


Peel the two strips on the roof and adhere the roof working to center it from front to back.
11. Make the bench.
Fold the two tiny bench pieces as shown. Be sure to fold on the lines of the bench piece and not just fold the legs down.
The sides get folded forward on the back/sides piece.

This is hard to see in the image.
The bench seat gets adhered to bench back/sides piece between the sides.
Apply glue to the outside of one u shaped end of the seat and adhere that to the matching u shaped legs of the side.
To help orient you, the photo has me holding the bench back and the bench is upside down with the legs in the air. I have glued one set of legs of the bench to the side.

Add glue to the other u shape at the other end of the bench. Fold around the second side and adhere in place.

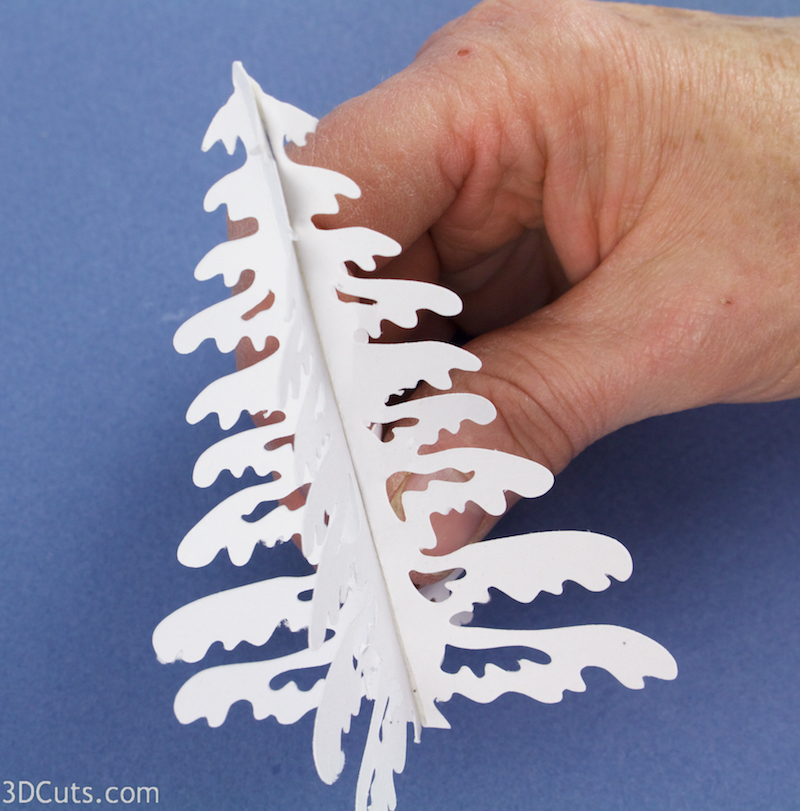
12. Make the Trees.
Fold each half on the the 2 dotted lines in the center. They are close together so this will take some care.

Add a strip of 1/8" Scor-Tape down the outside of the tree between the two fold lines.

Press the two spines together, being careful to make bottoms align, making a 3-D tree.
Your barber shop and bench are complete. What is next?

Now make the other new buildings for tea light village and put them all together with LED tea lights to provide a warm glow.

I have also design a series of hexagon bases to create a show platform for tea light village. It is designed especially for wiring with string lights. Here is a link to that file.
