My files - By others - Tea Light Village

I am always excited when I see the incredible things others do with my files. I have been sent photos or found photos on facebook of some incredible samples during the past month. Check out some of these beautiful creations.

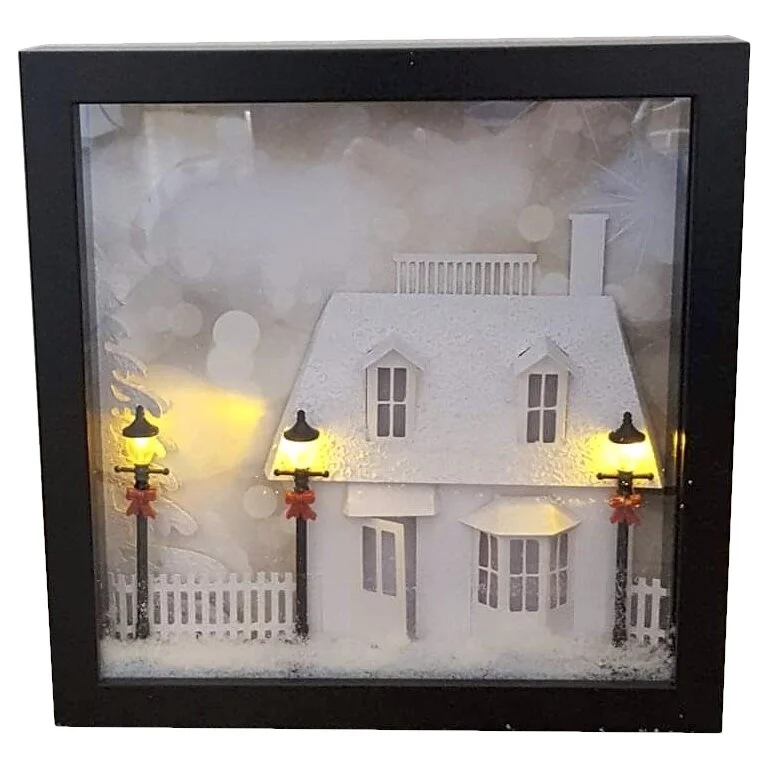
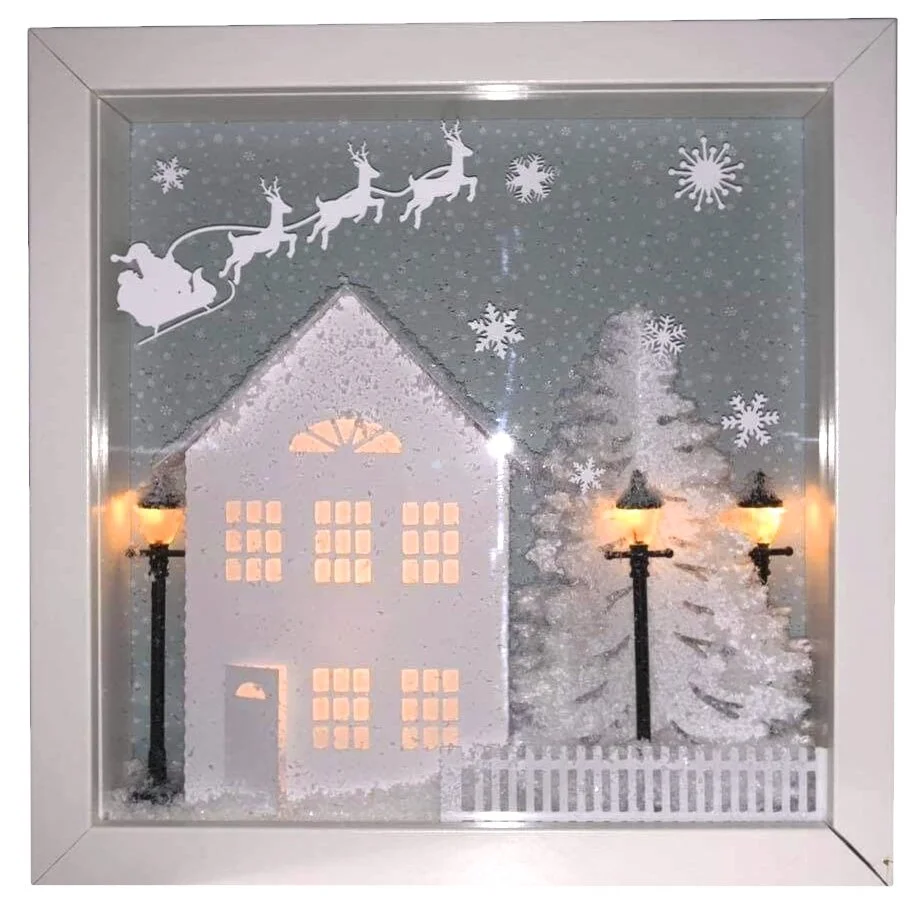
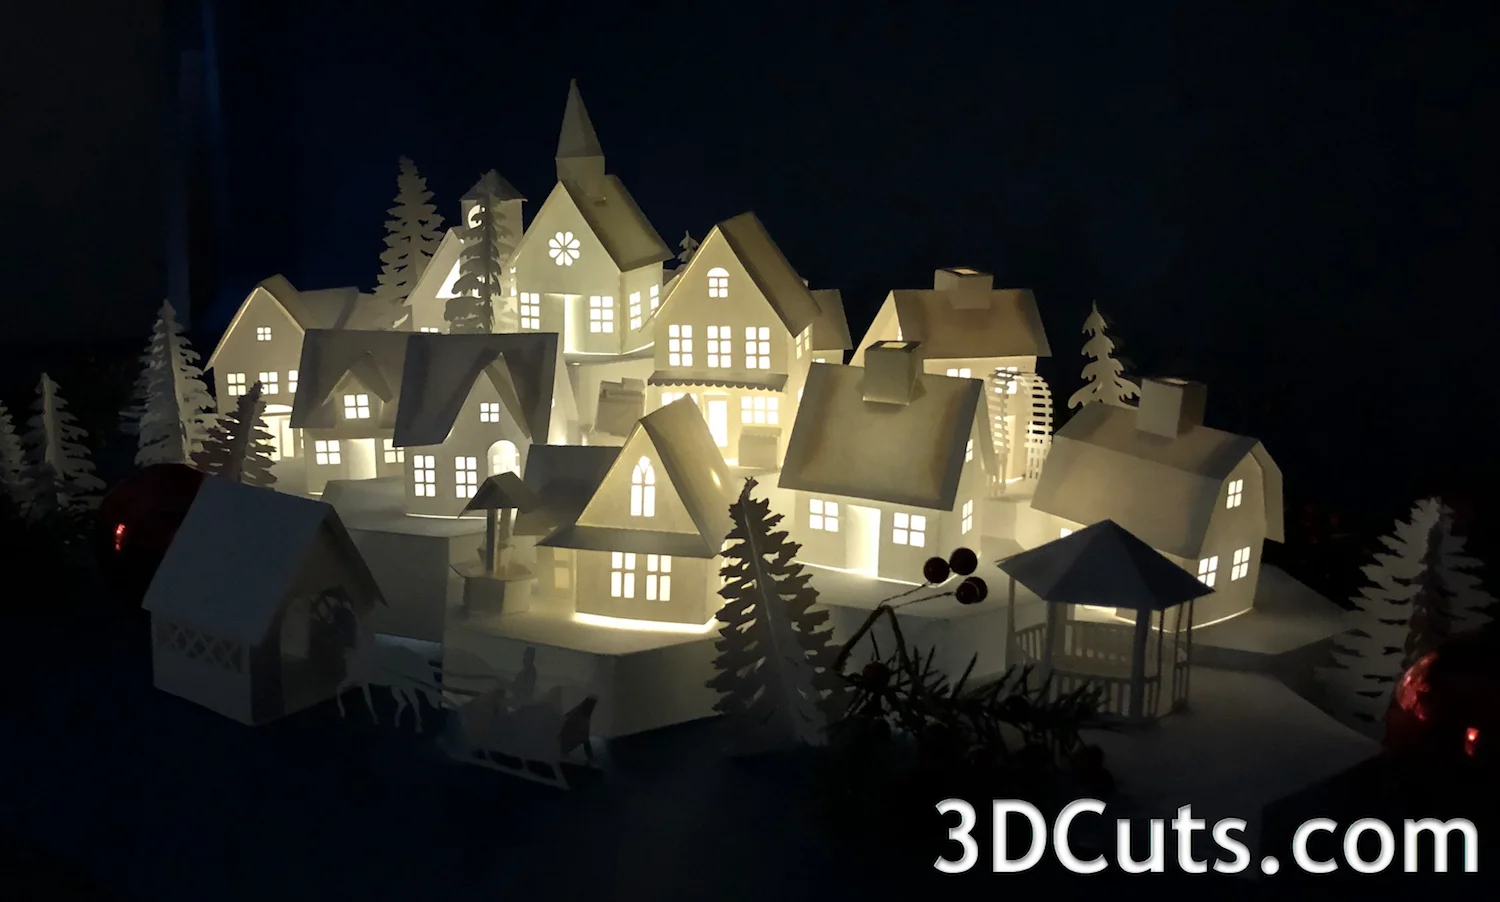
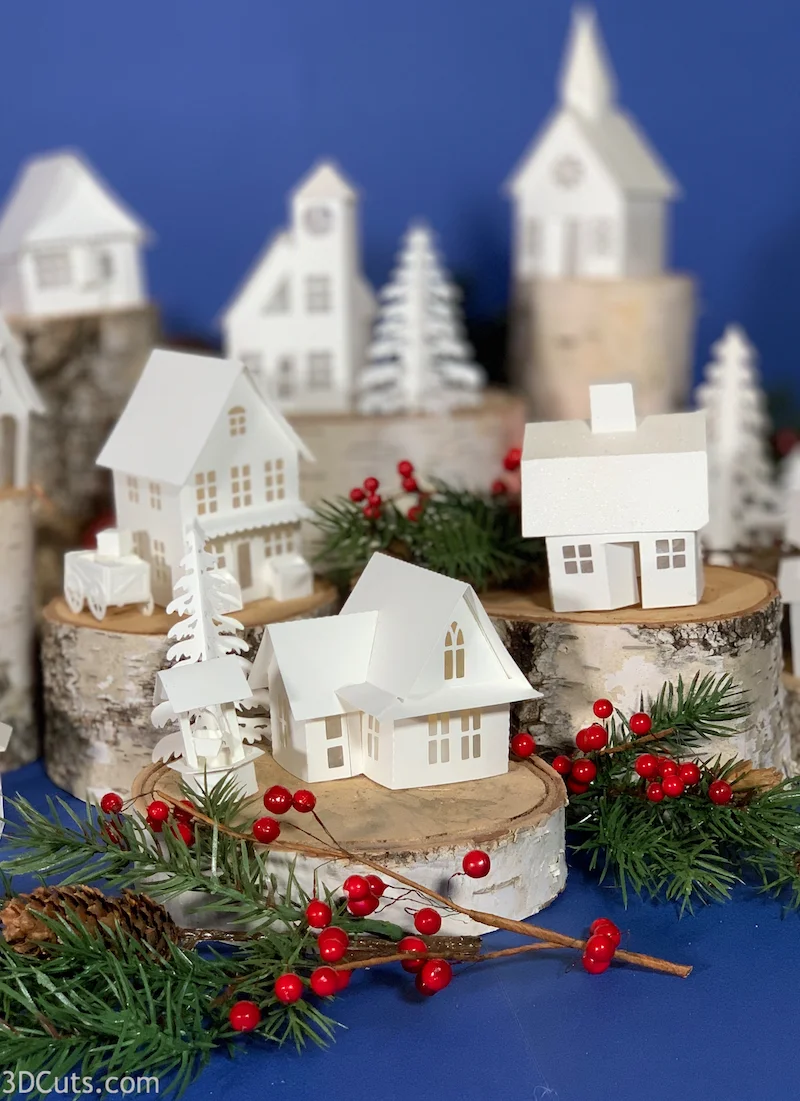
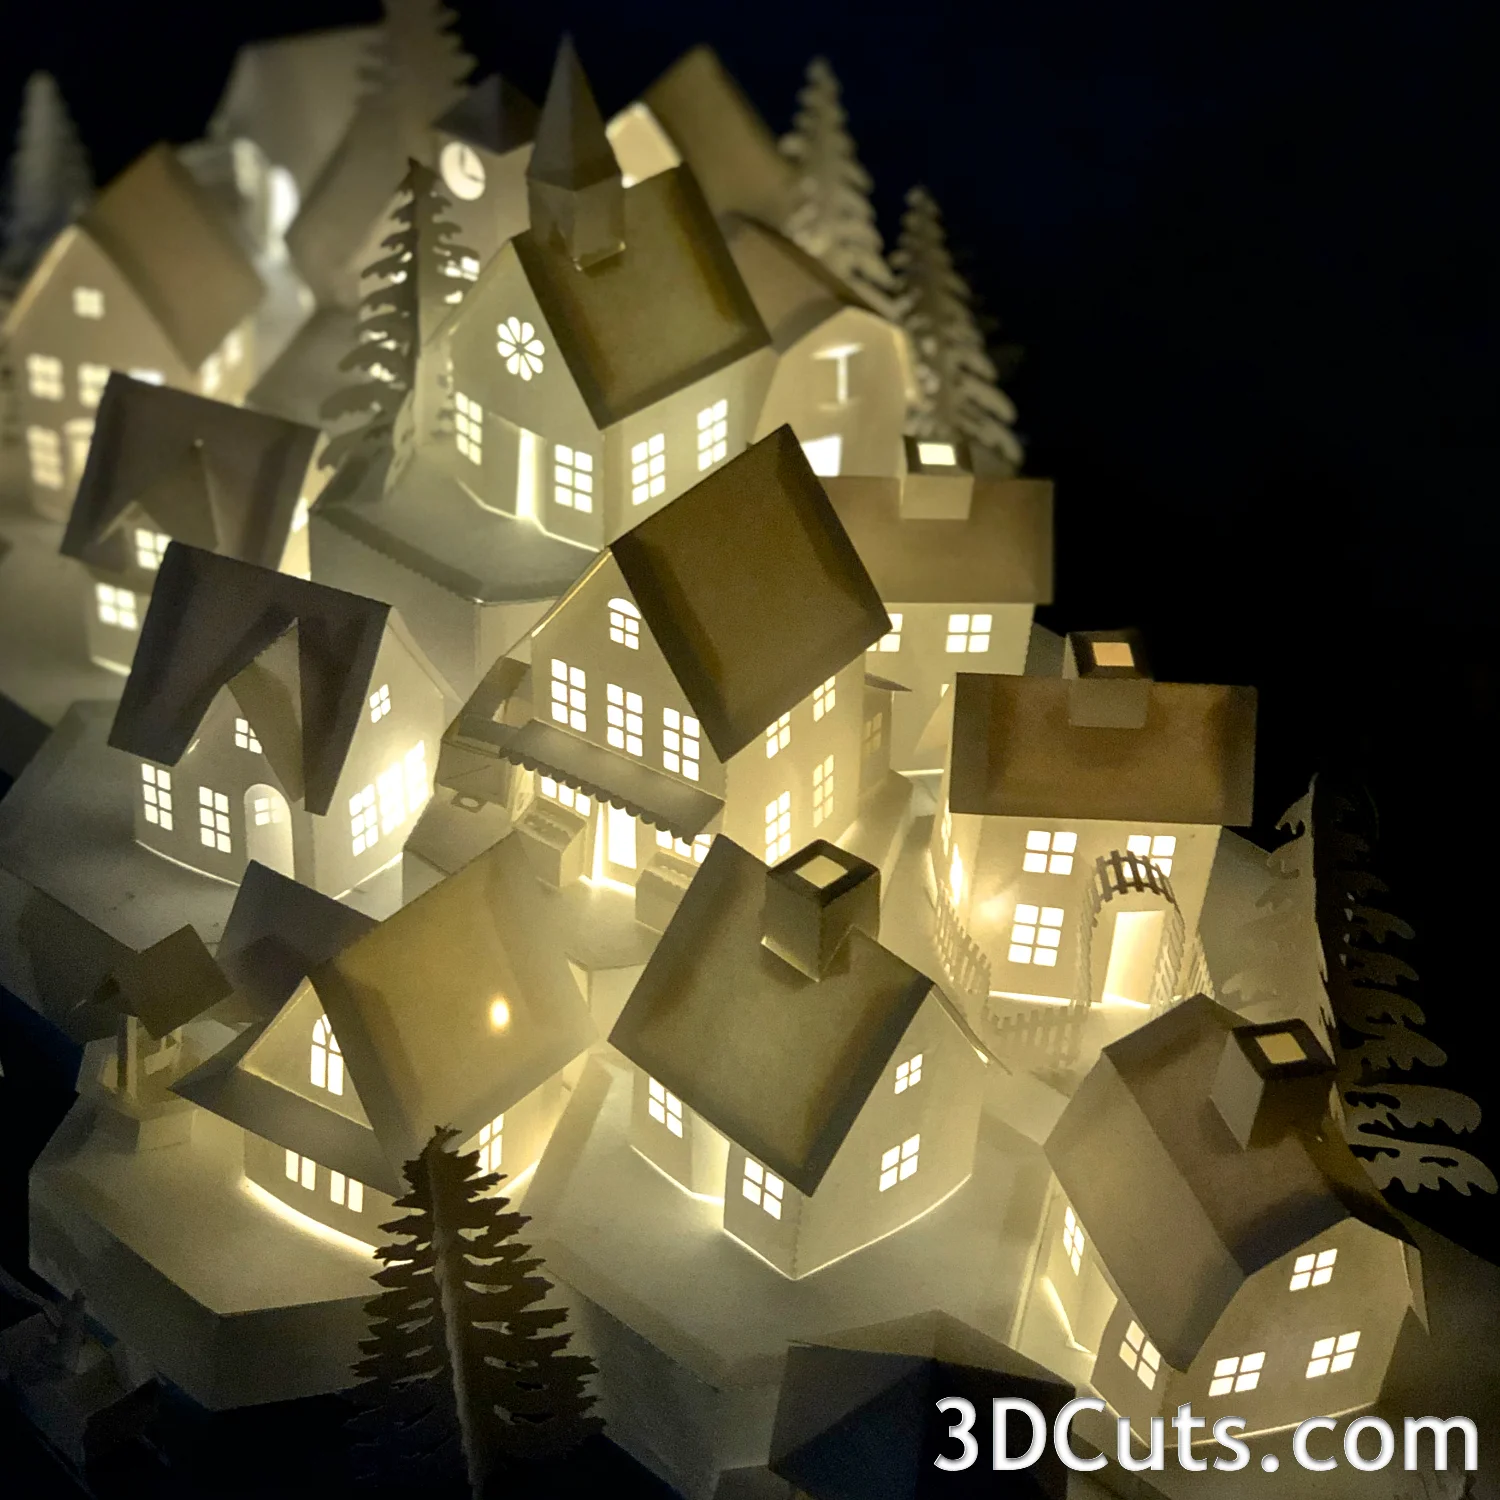
Here are some Tea Light Villages from around the world. (If you want to get these files to create your own version click here.)

Here is a display created by Ruanda Gerritzen of the Netherlands. She arranged the village inside a perfectly sized antique cabinet. I love how the window panes frame the buildings.

Tea Light Village: Display by Ruanda Gerritzen of Netherlands. Cutting files by Marji Roy of 3dcuts.com

Sandra Holms of Michigan used a white corner shelf to display a much larger village on many levels. She did a beautiful job of adding details like the lace on the shelves, the snowflakes , white glittery balls and pine cones.

Sandra Holms Tea Light Village 1.jpg
Sandra Holms Tea Light Village 3.jpg
Sandra Holms Tea Light Village 5.jpg

I love the addition of the snowflakes on the roof and this display on the glass table by Stephanie Pounds.

Tea Light Village cutting files by Marji Roy of 3dcuts.com Assembly and display by Stephanie Punds

Many without cutting machine email asking if these files can be cut by hand. I don’t have that skill set but here is proof that it can be done. Joan Yuil of England made her entire village (below) cutting by hand.

Tea light Village cutting files by Marji Roy 3dcuts.com. Assembly and Display by Joan Yuil

I am always collecting photos of my projects completed by others. Please send me photos of your creations. You can send them directly to marji@3dcuts.com. It also helps a lot to share them to the various crafting groups on facebook.


Ledge Village Shadow Boxes!

I just love it when someone does something creative with one of my files. I found these photos while exploring Pinterest. These are shared by Cheryl Leclere but I don’t know if she created them or just shared them. In each one of my Ledge Village buildings was used in a show box along with some creative textures and lights.

Cheryl Leclere, Ledge Village Shadow Box File by 3dcuts.jpg
Cheryl Leclere, Ledge Village Shadow Box File by 3dcuts 1.jpg

My First Vinyl Project

My impression based on facebook ( could be incorrect) is that more people use their cutting machine for cutting vinyl than paper. I bought mine for paper crafting and have been doing that almost exclusively for over 6 years. But then I had an idea for vinyl. My two granddaughters (ages 6 and 7 were coming for ZeeZee Camp and need a project. It was just before the start of the school year so I thought t-shirts would be fun using their names. But the creative part and the part that excited me was that I would use Illustrator to make circular mandalas based on their names. The goad was an eye-catching design that had their names hidden within.

The girls were thrilled with them and I loved making the designs so I started experimenting with other names. Here are some of the others that I have finished.

These designs would look terrific on t-shirts, or pillows, or notebooks, or wherever you might consider a monogram. The files I completed are available here for 99¢ each. Love to see pictures of any you make.

Tea Light Village in France

I just received an email from the people in the Tourism office in Colmar France. They made a Tea Light Village and used it in the cover photo for there annual poster for the 2019 Christmas Market in Colmar France. Cool!

Affiche-Noel-Colmar-2019.jpg

Tea Light Village is Expanding in 2019

I first designed Tea Light Village with probably five buildings in 2013. It was an exciting year for me because I launched my website 3dcuts.com and was working hard to present a spectrum of designs. Many of you have been with me all those years and here in 2019 Tea Light Village is 6 years old. It is still a best seller and a favorite of mine. I thank all of you for helping to make that happen and for sending the emails around bout September 1 wondering if there will be new buildings for the current year. Yes, there are!

There are two new buildings to join the other 16. First is a grocery store complete with two produce stands out front, an attached shed in the back and an apple cart for deliveries.

I like to have variety in both the business that settle into Tea Light Village but also the house styles. This year I used inspiration from the house in the background of Grant Wood’s iconic American Gothic painting for the 2019 house. American Gothic house includes the gothic window in the peak of the second floor, the over-sized wrap-around porch roof and the kitchen wing to the left. It also has a classic wishing well for the front yard. You will need tweezers to make the bucket!

  • Both files are available in a combination download here for $2.59

  • You can get the entire village (all 18 buildings) here for $13.99

  • The tutorial for the Grocery Store with video is here.

  • The tutorial for the American Gothic House with video is here.

I have found photographing the village to be an annual challenge. It is long and horizontal but most social media wants square or vertical. I have been having fun trying out some different views and lighting. Here are some examples.


A new Nativity - In Zig Zag Format

I have used the Nativity theme a number of times in my paper crafting designs. After the incredible success of the Zig Zag Christmas Village last year I knew I would be following it up with a new theme this year. The first was the obvious extension into a gingerbread house but the idea of a Nativity scene keep me thinking. I wasn’t planning to introduce two zig zag Christmas cards this year but after playing around with the Nativity idea I couldn’t stop myself.

I love the simple elegance of this design. It incorporates so much of what I have learned from all the previous zig-zag designs. It is much easier to assemble taking much less time to make. I have also included the cut files for a custom envelope. While it will fit into a standard 6 x 9 envelope, it is so much nicer to make a smaller envelope out of quality card stock.

Here is the file layout. All the parts fit on 2 12x12” pieces of card stock. I have started using the American Craft Card stock because of its superior cutting qualities.

I’d love to see your finished projects. Be sure to share them on the facebook group posts or by emailing to me at marji@3dcuts.com

Happy Crafting everyone!

Marji

Christmas Designing at last!

Christmas season starts earlier for designers. We need to have new ideas ready before crafters want to start their crafting season. This week I introduced the first of my 2019 Christmas projects. It is a new addition to my zig zag card series themed for the holidays. Check out the new Gingerbread House Zig Zag Card…..

Parts 1 for blog.jpg

I have taken that which I have learned from all the easier zig-zag designs and applied it to this new version. This time round many of the details (the frosting layer) are connected together into one piece. It is much quicker to glue on a single complex piece than many tiny little pieces. To the right is a sample. This is the main wall and its frosting details. The details are combined into 4 pieces which can be quickly adhered using spray glue.

Gingerbread House Zig Zag Card, Candy designs copyright 3DCuts.com, Marji Roy, 3D cutting files in .svg, .dxf, and .pdf formats for use with Silhouette, Cricut and other cutting machines, paper crafting files

Additionally I have provide options for you with all the candy details. You can create them from tiny paper parts. It looks great but takes time. Or you can use the Print and Cut feature of your machine and have these details printed and then cut. Time savings is huge. If you are making one or two cards it doesn’t matter. But if you want to make 20 it makes huge difference.

  • The cutting file for this design is located here.

  • The online tutorial is here. Yes there is a video tutorial for the assembly.

The third additions is now I have made an envelope template that works for all of my zig zag cards. This has always been designed to fit in a standard 6 x 9” booklet envelope available from Amazon. But people have requested an envelope so they can make a custom envelope with high quality card stock.

Download that here.

A 3d Milk Can!

I went looking for a 3d milk can file and couldn’t find one so I designed my own…..

3D Milk Can with Sunflowers by 3dCuts.com, by Marji Roy, 3D cutting files in .svg, .dxf, png and .pdf formats for use with Silhouette, Cricut and Brother cutting machines, paper crafting files, SVG Files

3D Milk Can with Sunflowers by 3dCuts.com, by Marji Roy, 3D cutting files in .svg, .dxf, png and .pdf formats for use with Silhouette, Cricut and Brother cutting machines, paper crafting files, SVG Files

I was thrilled with how authentic it looked. It was hard to even tell it was card stock and not metal. I haven’t done much with Tim Holtz Distress inks but the Photo Vintage did wonders for creating this effect. I then decide to add a few sunflowers…..

And then I got carried away……..

I love this file. And the cutting files and tutorials are available on the website.

  • Cutting files are here.

  • Video Tutorials are here.

Happy crafting everyone!

Marji