
Milk Can with Sunflowers - Tutorial
Project Description
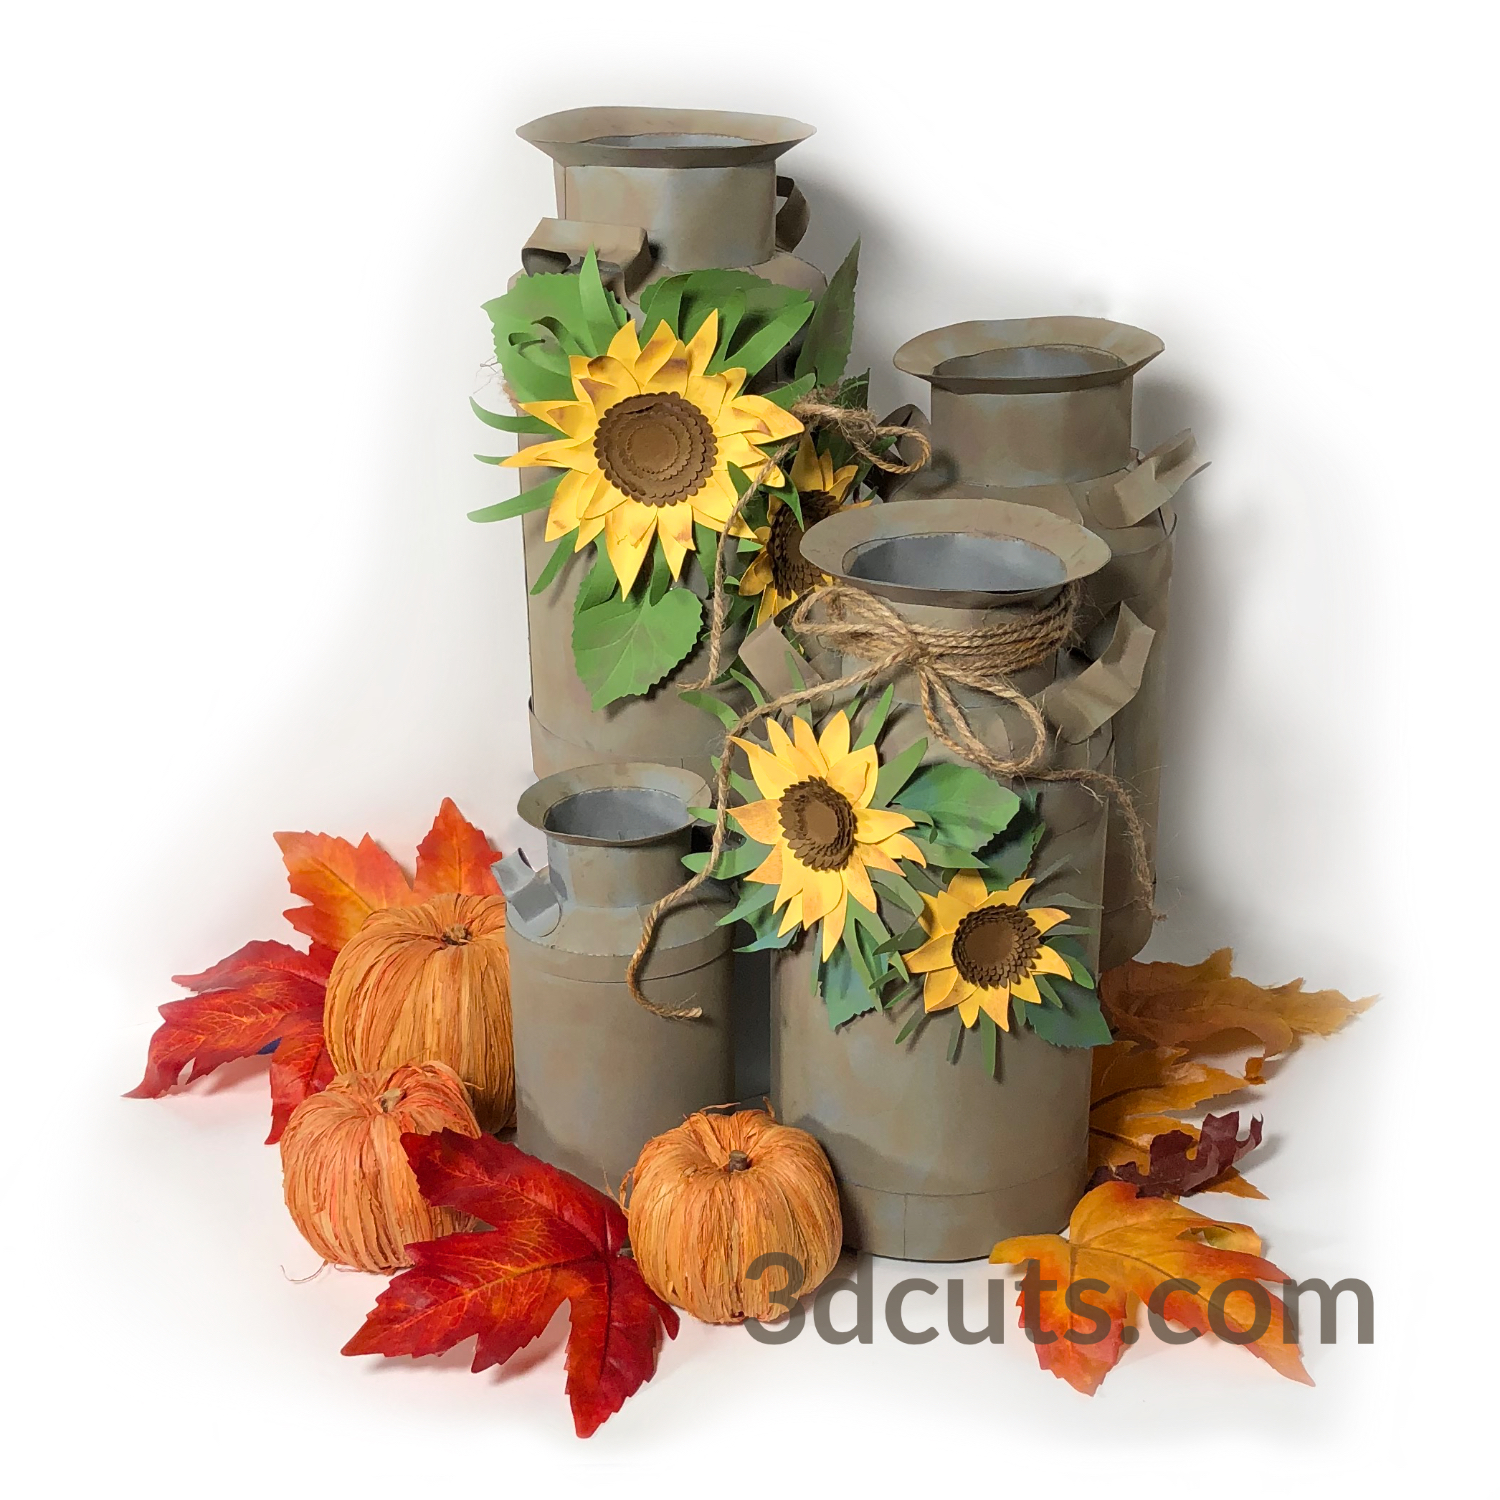
Follow this tutorial to construct this 3d milk can from card stock. Add the sunflowers for a truly stunning country decor piece. You can make both or just the milk can or the sunflowers. This tutorial covers both items.
Download cutting files here at 3DCuts.com. The files comes together or separate depending on your need.
http://3dcuts.com/3d-decor-items-assorted
Supplies Needed:
Cutting File available here from 3dcuts.com.
8.5 x 11" card stock - I used the colored card stock from the Michael’s Recollections Collection also available on Amazon below. I used 6 sheets of grey for the can, 1 sheet of yellow, 1 sheet of green and 1 sheet of brown for the 2 sunflowers.
Tape Adhesive - I used Scor-Tape (1/4" and 1/2”)(Link below)
Liquid adhesive - I used Art Glitter Glue
Distressed Ink Tim Holtz - Vinage Photo
Ink Applicator
Jute (optional)
Links to supplies on Amazon:
(Links for USA customers only. Other countries will need to search in their local Amazon for the products.)
Order from Amazon: Recollections Kraft Grey Cardstock 50 sheets(Affiliate Link)
Order from Amazon: Recollections Citrus Collection 50 sheets (Affiliate Link)
Order from Amazon: Recollections Spice Collection 50 sheets (Affiliate Link)
Order from Amazon: Art Glitter Glue with metal tip (Affiliate Link)
Order from Amazon: Tim Holtz Distress Ink Vintage Photo(Affiliate Link)
Order from Amazon: Tim Holtz Ink Applicator (Affiliate Link)
Order from Amazon: Premium Silhouette Blade (Affiliate Link)
Order from Amazon: Precision Tip Applicator Bottle (Affiliate Link)
Parts Sizes: (need for dxf files)
1 dome piece & 2 flanges grouped - 7.5181" W x 10.0625" H
7 dome and 1 base pieces grouped - 7.6097" W x 10.5097" H -
Internal Supports - 2 grouped - 7.6903" W x 10.45" H
Milk Can Sides grouped - CUT BOTH TWICE - 7.1903" W x 10.4306"
Milk Can Trim and Handles Grouped -5.6347" W x 10.2639" H
Sunflowers Centers grouped - 2.7167’ W x 7.6417” H
Sunflowers Green Pieces Grouped - 7.4166" W x 10.3712" H
Sunflowers Yellow Pieces Grouped - 7.4722" W x 10.2472" H
Note: Many layers have smaller pieces inside them. Keep them grouped together if you must re-size pieces.
Milk Can ALL Files - 21.6056’ W x 25.375” H
Note: Not all software and cutting machine combinations can use the ALL file. Some resizes files to fit in a smaller mat area. Import the individual files if your machine has size limitations. I create the ALL file in case you want to re-size everything.

Steps for Completing the Milk Can with Sunflowers
Special Note: I update the instructions online. Check here for adjustments and additional information. Don't just rely on the pdf file that comes with the download. Learned hints are added to the online tutorial.
1. Download the cutting files for your cutting machine here from the 3dcuts.com store. You can download each separately or both together.
2. Load the files into your cutting software following the steps for your cutting machine. Below are a few links to help if you are not experienced with uploading files.
3. Prepare the files:.
For the Silhouette: The SVG files from this site will need to be turned into cutting files. Click here for detailed steps on how to use SVG files on your Silhouette. http://www.3dcuts.com/tutorial-upload-svg-silhouette. Silhouette users can import the ALL file and move sections onto the cutting mat for quicker importing. Designer Edition or better is required to use the svg files which is recommended.
DXF files can be opened in the basic edition of Silhouette Design Studio but often require modifications especially with sizes. I recommend using the Designer Edition and using svg files.
For Cricut Explore: Here is a guide for importing into Cricut Design Space. http://www.3dcuts.com/tutorial-adding-3dcuts-files-to-cricut. Remember to ATTACH files before cutting in Cricut.
Note to Cricut users - As of 8/1/2019 Cricut Design Space software resizes all files to fit inside a 12 x 12” mat. You need to import the individual files and NOT the ALL option in order to maintain sizing.
For Brother ScanNCut: The svg files will need to be transferred to files for your particular machine. You can change SVG files to FCM files at http://www.canvasworkspace.com/ or Google "How to import SVG files into a ScanNCut" for links to tutorials. Some models of Brother Scan N Cut can directly import the SVG files.
4. Select card stock.
I recommend 65 test colored card stock for this project. I used all Michael’s Recollections card stock. There are links to it above. I do not recommend card stock with a white core.
5. Customizing :
What would you like to do differently? I encourage creativity. Think about that before you begin and make those adjustments to the files before you cut.
Resizing: You can certainly cut these files out in any size that fits your paper. You will notice I made a smaller one in the group pictured above. There are many ways to re-size. I include a “Milk Can All Files” and Sunflower All Files” files in the download. Load one of these into a design program and re- size all parts at once proportionally.
6. Cut the files.
It is best to have good quality card stock and a good blade and clean, sticky mat. I use the Premium blade and the Nicapa mat.
Dashed lines: I use dashed lines for fold lines. On my cutting machine these cut much faster when they are positioned horizontally for cutting.
IMPORTANT - Cut the Milk Can Sides file 2 times.

7. Assemble all the parts: The videos walk you through the assembly step-by-step. You can click the video links below.
Note: If you are reading this on the enclosed pdf file then here are the video urls. I encourage you to use the website tutorial with active links here http://3dcuts.com/milk-can-tutorial.
To access the video for the Milk Can assembly go to this url: https://youtu.be/spHB0wJEVyg
To Access the video for the Sunflowers go to this url: https://youtu.be/XN3C_Jl1AE0 for the Sunflowers assembly.
8. After Making the milk can proceed to the sunflowers:

9. Share!
I love seeing your creative interpretations of my files. I encourage you to share them with the world. You can send photos to me at marji@3dcuts.com and also share them in the Facebook Crafting groups. I will add photos below for interesting and new ideas.
©2019 Marji Roy, 3dCuts.com