
USA T-shirt Design • Hints
Project Description
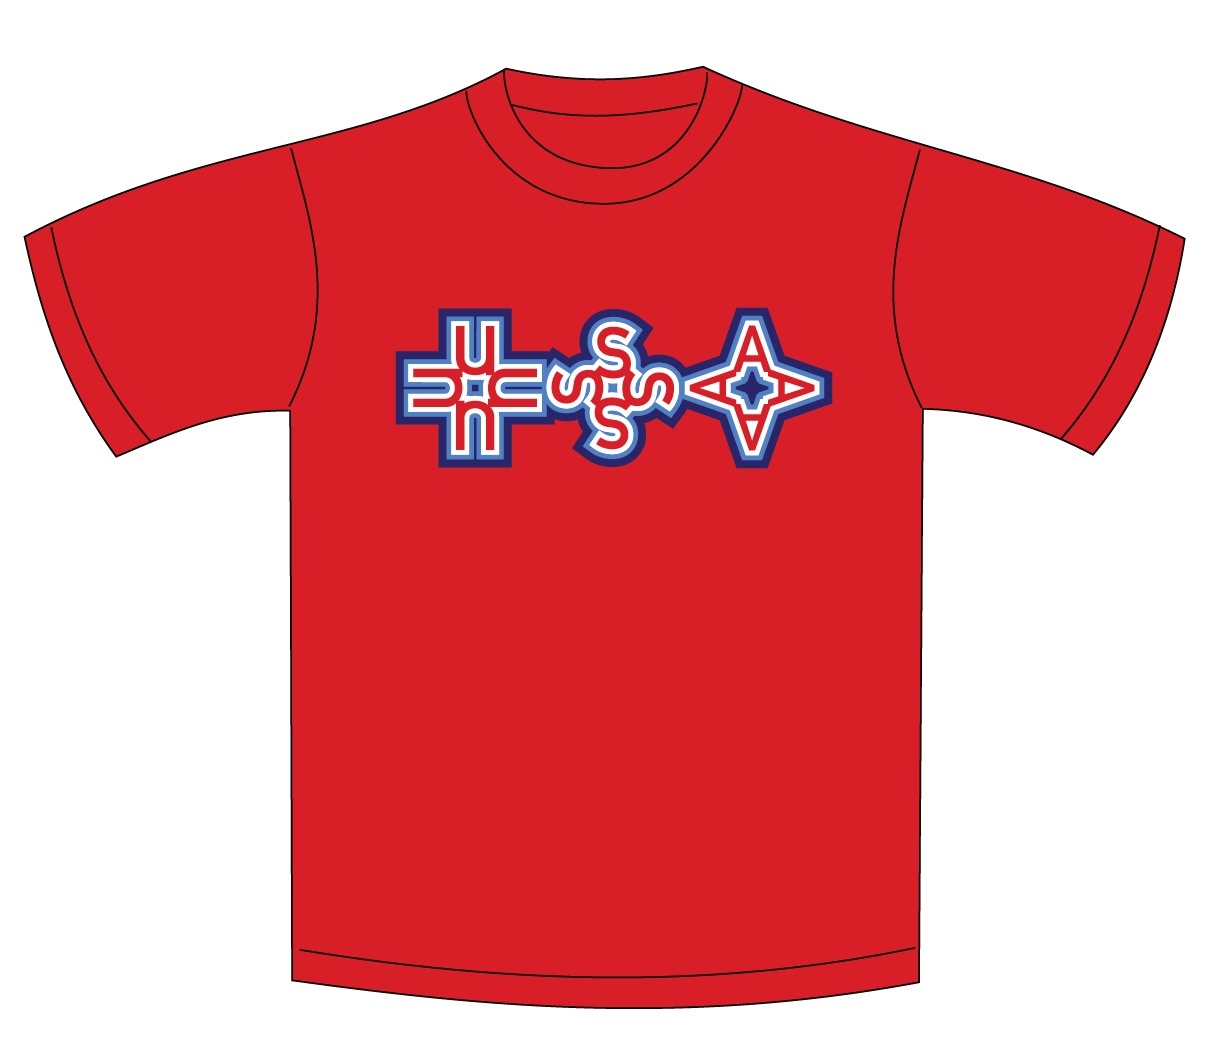
This file uses the monogram alphabet I designed to celebrate the USA in this unique and eye-catching label. U, S and A are combined together from the alphabet. It would be great to cut from vinyl for use on a T-shirt or canvas bag but also can be cut from paper. Additionally, turn the design 90º and it works equally as well in the vertical orientation on the leg of sweat pants.
This project is straight- forward and doesn't really need a tutorial. This is to just give some ideas and hints, and to explain the different files but your own basic knowledge should be enough.
Supplies needed:
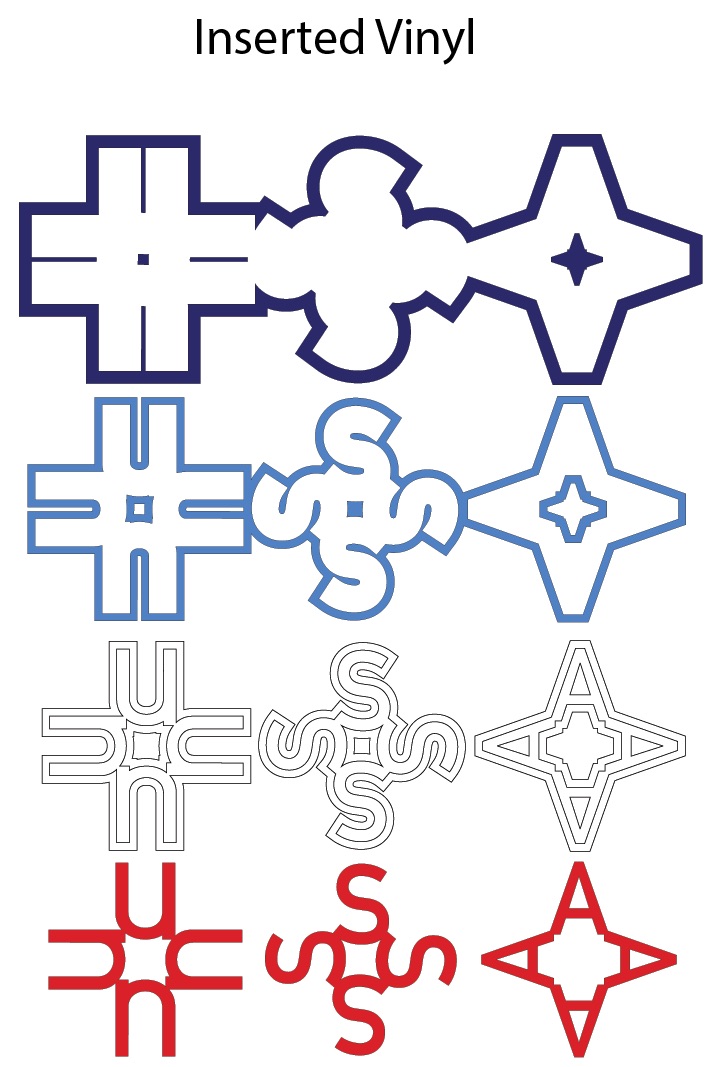
This depends entirely on your chosen application. You will need the file located here at 3dcuts.com/monograms. Note that the download includes the file split into four layers in two formats. The first is solid shapes for layering. You would use these files when you want to layer your material - either paper or vinyl. This approach is quick and easy but creates a thicker design.
The second has each layer inserted into the previous one. Use these files when you don't want to build up layers. This is more complicated and those with experience in vinyl may prefer this method to avoid heavy layers of vinyl.
(NoteI have never worked in htv (heat transfer vinyl) so my experience here is non-exsistant. I have made both files in paper and used them for different things for the Olympic celebrations. I would love to see the design in vinyl so send photos to marji@3dcuts.com or share on Facebook.)

1. Decide on which format you want to use from the two choice above.
2. Load the files into your cutting software following the steps for your cutting machine.
3. Prepare the files:.
- Click here for detailed steps on how to use .SVG files on your Silhouette (with Design Studio).
- Click here for steps on how to use these .SVG files in Design Space with your Cricut Explore.
4. Cut the files:
- If cutting the inserted design, you might want to add guide squares to help with accurate placement. Here is an excellent tutorial from Silhouette School that explains this technique
- http://www.silhouetteschoolblog.com/2014/05/silhouette-layering-vinyl-tutorial-no.html
- Consider sizing. Measure where the design will be used and decide how large you want it. Group all four sections together and resize at the same time and with portions locked.
- You might need to ungroup the sections in order to arrange them in your software to cut each layer from a different color.
- As you cut the pieces and separate them from the mat, be sure to keep track of the centers. You will want to add those to the design.

To assemble the design layers:
If creating the design in paper using the layered file:
- Apply the paper adhesive of your choice to the back of each layer and attach it to the next layer. I like using Aileens Tacky Spray because it has about a 30 second delay to allow you to position pieces a little more carefully.
If creating the inserted design in heat transfer vinyl:
- Start with the largest shape first and apply each layer moving from largest to smallest. This will help you properly position the tiny center pieces and the spacing of the individual letters.