
Great Horned Owl Shadow Box Tutorial
Project Description
Scroll down for link to video tutorial.
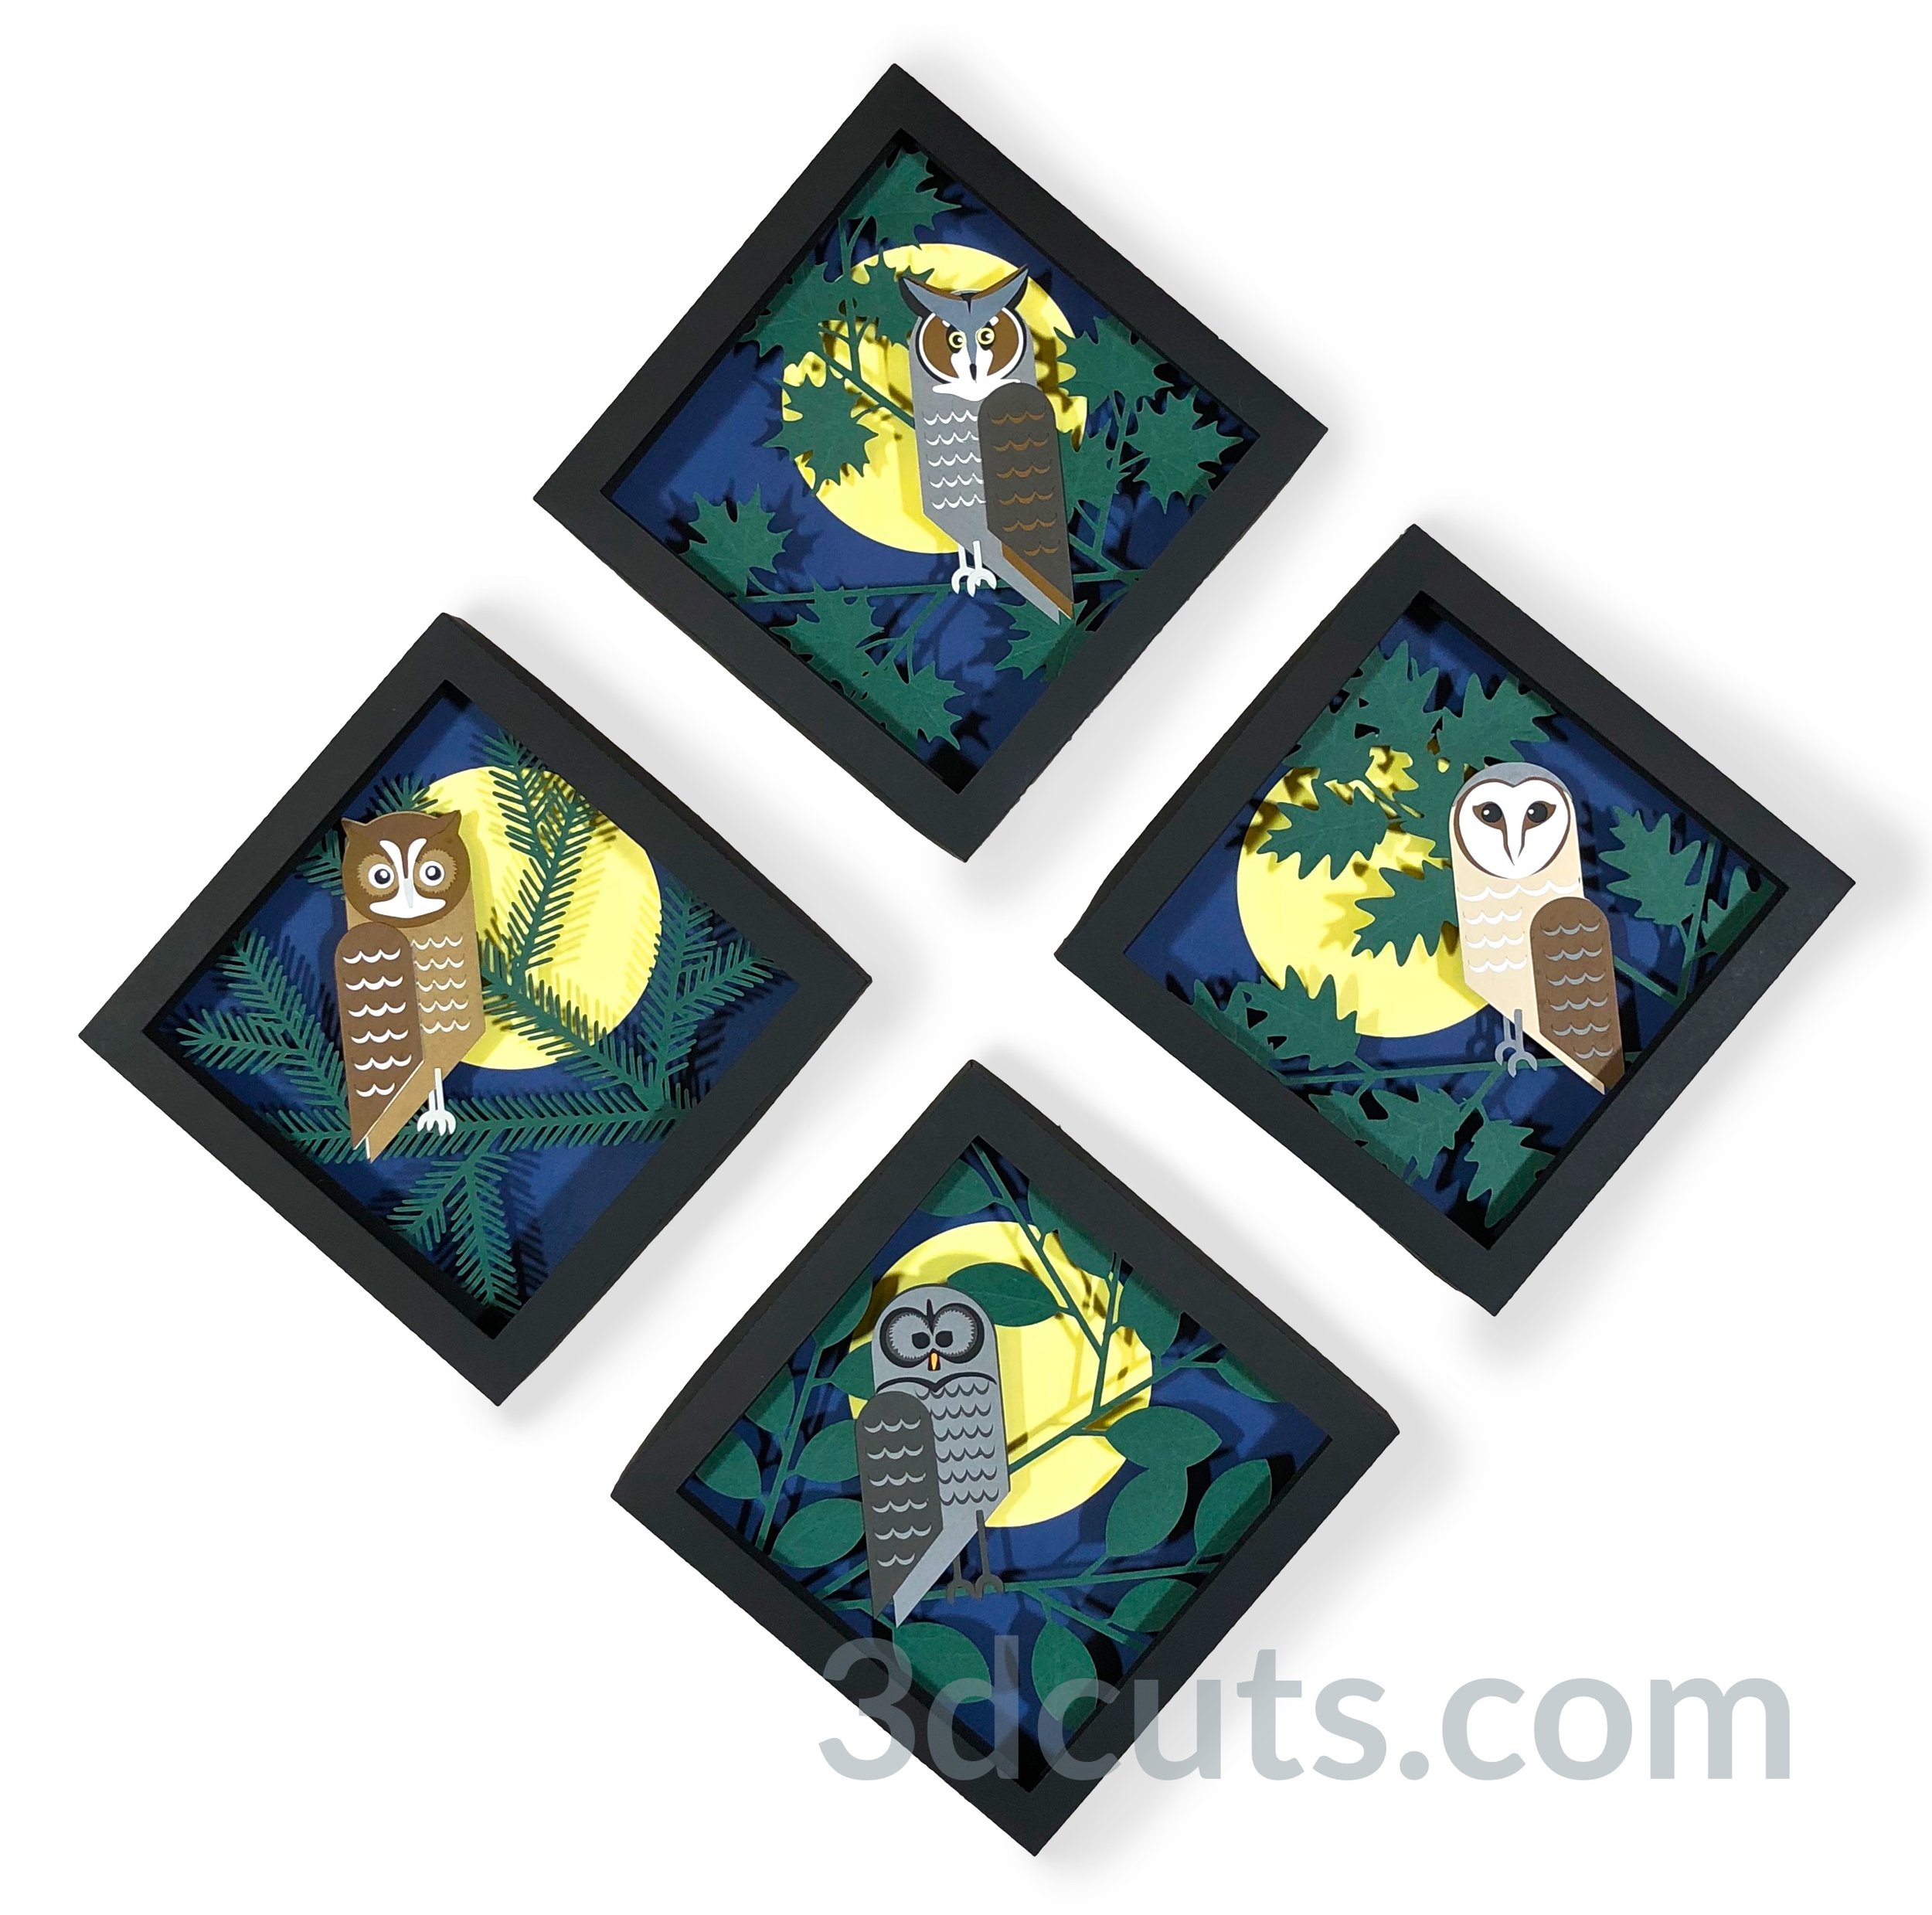
This tutorial is for the 3 layer Great Horned Owl Shadow Box designed by me, Marji Roy of 3Dcuts.com. The assembly process is similar to many of the shadow boxes I have designed but this one has only three layers and an owl that has been graphically stylized to lend to easy card stock construction. It is part of a four piece series of owl shadow boxes that also includes a screech owl, a barn owl, and a barretd owl. All are native to my home state of Connecticut.
This shadow box is about 6 1/2" square when complete. It is designed on a diagonal and can be displayed on a wall using the built-in nail hole on the back. They can be purchased as a group or as a singleton file.
The assembly is easy and basic 3d construction.
Cutting files are available here:
Tutorials are here:


Supplies Needed:
Cutting File available here from 3dcuts.com.
3 pieces black 8.5 x 11” 65 lb card stock
1 piece 6 5/16 x 6 5/16 navy blue card stock
1 piece 8.4 x 11” forest green card stock
1 piece 8.5 x 11” yellow card stock for moon
assorted gray, brown, white and black crd stock scams for owl
Tape Adhesive - I used 1/4” Scor-Tape (Link below)
Liquid adhesive - I used Art Glitter Glue
Foam Pop-dots or weather stripping
Parts Sizes: (need for dxf files)
Layer 1 - 8.2694" W x 8.2694" H
Layer 2 - 7.305" W x 7.305" H
Layer 3 - 8.2014" W x 8.2014" H
Green Leaf Layer - 6.2736" W x 6.2736" H x
Blue Background - 10.2528" W x 4.3306" W
Yellow Sun - 3.635” round
All Owl Parts as Grouped - 6.9111” W x 6.8824” H
Steps for Completing the Great Horned Owl Shadow Box -
Special Note: I update the instructions online. Check here for adjustments and additional information. Don't just rely on the pdf file that comes with the download. Learned hints are added to the online tutorial. If you are reading the pdf go to http://3dcuts.com/great-horned-owl-tutorial.
1. Download the cutting files for your cutting machine here from the 3dcuts.com store.
2. Load the files into your cutting software following the steps for your cutting machine.
3. Prepare the files:.
For the Silhouette: The SVG files from this site will need to be turned into cutting files. Click here for detailed steps on how to use SVG files on your Silhouette. http://www.3dcuts.com/tutorial-upload-svg-silhouette
DXF files can be opened in the basic edition of Silhouette Design Studio but often require size modifications and other challenges. I recommend using the Designer Edition and using svg files.
For Cricut Explore: Here is a guide for importing into Cricut Design Space. http://www.3dcuts.com/tutorial-adding-3dcuts-files-to-cricut. Remember to ATTACH files before cutting in Cricut.
For Brother ScanNCut: The svg files will need to be transferred to files for your particular machine. You can change SVG files to FCM files at http://www.canvasworkspace.com/ or Google "How to import SVG files into a ScanNCut" for links to tutorials. Some models of Brother Scan N Cut can directly import the SVG files.
4. Select card stock.
I recommend 65 lb test colored card stock for this project. I used card stock from the Michael’s Recollection collection. These seem to cut well with the intricate cuts. I do not recommend card stock with a heavy texture or card stock with a white core.
Here is a diagram showing all the parts and their colors. Like colors are grouped together for cutting.

5. Cut the files.
There are some fine lines. It is best to have good quality card stock and a good blade and clean, sticky mat. I use the Premium blade.
Dashed lines: I use dashed lines for fold lines.
I cut duplicates of the tiny pieces because I always lose one.
As I cut the tiny parts in different colors I stuck them onto an old cutting mat to keep them in order.
The detailed leaf layer cut better face down. Make a mirror image and cut that layer face down.
The blue sky background is 6 5/16” square. I found it faster to just cut this on the paper cutter and to push a hole in one corner to match the hole in layer 3.
6. Assemble all the parts: This video walks you through the assembly step-by-step.
The assembly of all the owl parts is simply stacking and gluing. Here is a file you can download and print to help with the correct layering.

7. Assembly steps quick over view:
Make the three boxes.
Add all the details to the green leaf layer by gluing all owl parts onto it.
Emboss veins into the leaves.
Glue the green leaf layer into the backside of layer 2.
Glue blue into layer 3.
Adhere moon in desired location.
Insert layer 2 into layer 3 and adhere in place.
Cover with layer one. Adhere in place.
Which owl shadow box will you make next?
René Rothen made my 4 owls as one of the first projects on his new Cricut Maker. He creatively adapted them with seasonal colors.


©2019 Marji Roy, 3dCuts.com