
3D Butterfly or Star Lantern Tutorial
Project Description:

Using card stock and your cutting machine create this lantern which can be a stand-alone item or combined with others on a ribbon as a string of Lanterns. It is designed to open up and place a battery operated LED light inside so the butterfly or stars are silhouetted against the glowing light.
Each lantern is easy to build using basic 3D construction techniques. They are designed to be cut either from 8.5 x 11" card stock or 12 x 12" card stock and each finished lantern is about 6.5" tall. They are set to be threaded onto a ribbon and displayed at your celebration or used as table or mantle centerpiece.
The Butterfly Lantern has the butterfly pieces cut and added on to allow for color variation. The Stars Lantern has them cut into the actual lantern frame.

Warning: Only use LED Tea Lights. DO NOT use regular candle tea lights.
Also available from 3Dcuts.com is the 3d Lantern Banner Construction set with an alphabet and number set to create celebration banners. These are interchangeable and re-usable for multiple celebrations.


Supplies Needed:

- Cutting File from 3dcuts.com.
- 8.5 x 11" card stock - each lantern takes 4 pieces
- OR 12 x 12 card stock
- patterned paper for the roof panels (optional)
- wax paper (or parchment) for the lantern openings
- Permanent Paper adhesive - I used a variety:
- Spray Glue (Aileen's Tacky Spray)
- Tape Adhesive (Score Tape)
- Glue Dots
- LED Tea Lights
- Satin ribbon for hanging
Part Sizes:
- Use this guide to identify part numbers used in the tutorial below.
- Part 1 - 10.073" w x 9.657" h - lantern front for 12 x 12 card stock
- Part 2 - 5.747" w x 9.343" h - combines with part 3 for lantern front for 8.5 x 11 card stock. Is the same as part 1.
- Part 3 - 7.452"w x 7.90" h - combines with part 2
- Part 4 - 7.411" w x 6.687" h - lantern back insert
- Part 5 - 6.5361" w x .535" h - tea light holder
- Part 6 - 3.106" w x 4.424" h - wax paper edge cover (optional)
- Part 7 - 6.348" w x 5.818" h - lantern top
- Part 8 - 3.017" w x 1.737" h - colored panel for lantern top (optional)
- Part 9 - 3.604" w x 2.111" h -colored panel for lantern top (optional)
- Part 10 - 2.690" w x 3.471" h - template for cutting wax paper
- Large Butterfly - 2.3175" w x 3.3417" h
- Small Butterfly - 1.7442" w x 19944" h
Steps for assembly of the Lanterns-
1. Download the cutting files for your cutting machine.
2. Load the files into your cutting software following the steps for your cutting machine.
3. Prepare the files:.
- Click here for detailed steps on how to use .SVG files on your Silhouette (with Design Studio).
- Click here for steps on how to use these .SVG files in Design Space with your Cricut Explore.
4. Cut the shapes.

- Choose the parts to cut based on your card stock size. Cut part 1 for the front if you have 12" x 12" card stock. Use parts 2 and 3 instead if you have letter sized card stock. You do not need to cut all 3 parts.
- The butterflies are delicate and need a good mat, blade and card stock to get clean cuts. Separate carefully from the mat- especially near the antennae.
For each lantern cut the following:
- Part 1 - Lantern front cut 1 from 12 x 12
- Part 2 & 3 - Lantern front alternate for 8.5 x 11. Cut only Part 1 OR parts 2 & 3. Don't cut both.
- Part 4 - Lantern back insert - cut 1
- Part 5 - Tea Light holder - cut 1
- Part 6 - Wax paper edge cover - Optional - cut 2 for each lantern.
- Part 7 - Lantern top - cut 1
- Part 8 - Cut 2 from patterned paper
- Part 9 - Cut 2 from patterned paper
- Part 10 - Cut from anything scrap. It is a template for cutting wax paper panels.
- Butterflies- your choice. I used 2 large and 2 small. You can also choose to leave them off for a plain lantern.

3D Butterfly Lantern SVG cutting file by 3dcuts.com. This tutorial is the assembly instructions to go with the cutting files for the Butterfly Lantern. For use with Silhouette and Cricut cutting machines. Files in SVG, PDF and dxf formats.
5. Adding Wax paper lantern window filler.
- I used regular kitchen wax paper for the filler in the windows. You can certainly experiment with other materials that are semi-transparent.
- Take the wax paper template (piece #10) and cut two inserts for each lantern that exact shape. I don't try to cut wax paper on my cutting machine but instead traced the template and cut the wax paper using scissors.
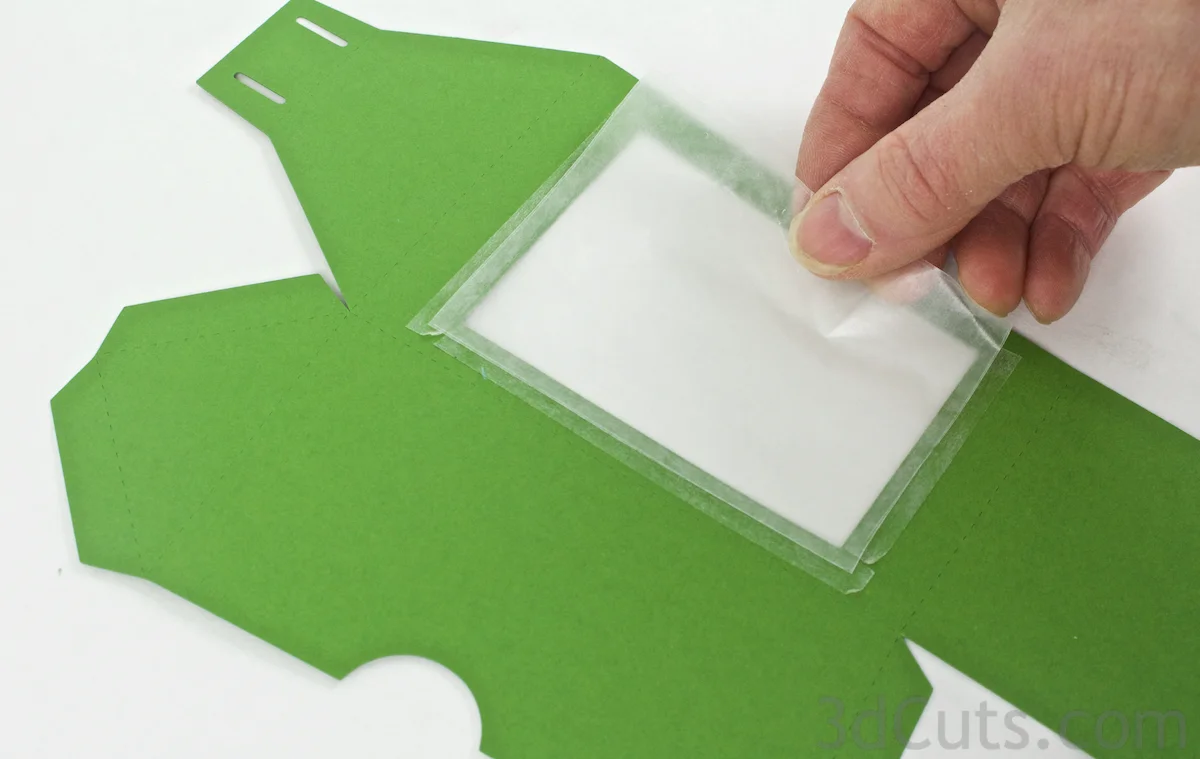
- Use adhesive ( I like 1/4" Score-Tape) and apply to all edges of the lantern window.
- For the photograph I used parts 2&3 from 8.5" paper. If you used the single part 1 then apply this to the inside of the lantern. This is determined by how you fold along the fold lines later.
- Peel the backing and adhere the wax paper. Be sure the wax paper doesn't cover any of the 6 slots.
- (Note: I reduced the sides of the window piece template to fit better after taking the assembly photos!)
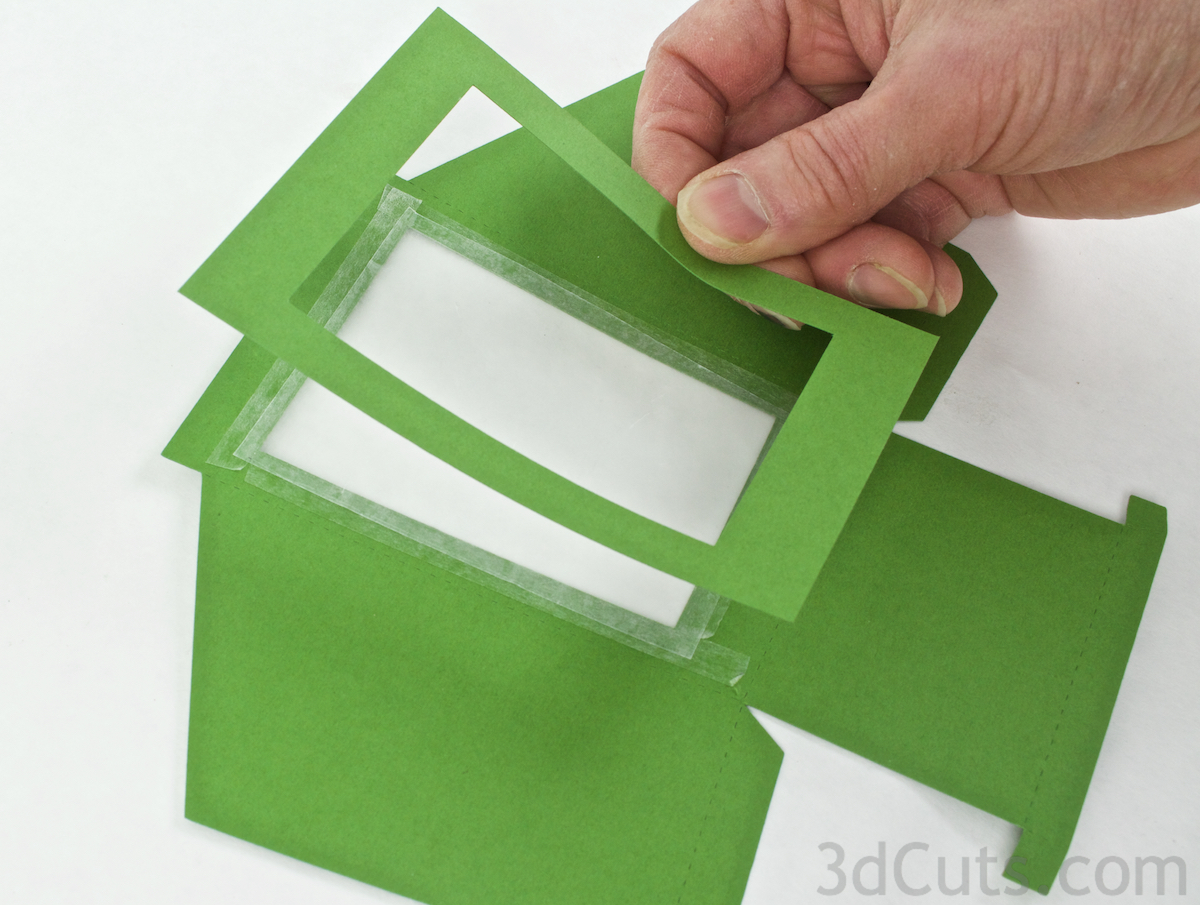
- If making the lantern front from the two pieces - 2 & 3- Glue them together now.
- Piece 3 gets adhered over piece 2. Notice the orientation of the two pieces in the photo.
- Flip piece 3 over and apply adhesive to JUST the backside window frame portion of piece 3.
- I used spray glue for this step. I like Aileen's tacky glue because it gives me some time to adjust the positioning.
- I set up a makeshift spray booth in an old box out in my sunroom so that I have good ventilation. I made 18 lanterns at once so I was doing a lot of spraying.
- I covered the portion of piece 3 that wasn't the window frame area and just sprayed the window frame edges.
- Adhere piece 3 to piece 2 aligning the window openings.


- If using the single large part 1, after adhering the wax paper, you can choose to adhere part 6 - wax paper edge cover - over the wax paper on the inside of the section. This is optional. It just makes the inside of the lantern neater. You do not need Part 6 to cover edges if using parts 2 & 3 together.
- Do the same for the window in Part 4- lantern back. Apply the wax paper to the inside of the back. Inside gets determined by how you fold it.

- Apply adhesive on the back-side of the wax paper edge cover (part 6). I used spray glue here. Adhere the cover in place.
- This step is optional. It just covers the cut edges and makes the inside of the lantern neater.
6. Apply optional color panels to lantern roof.
- While you have the spray area set-up you might want finish spraying tasks before you start assembly.
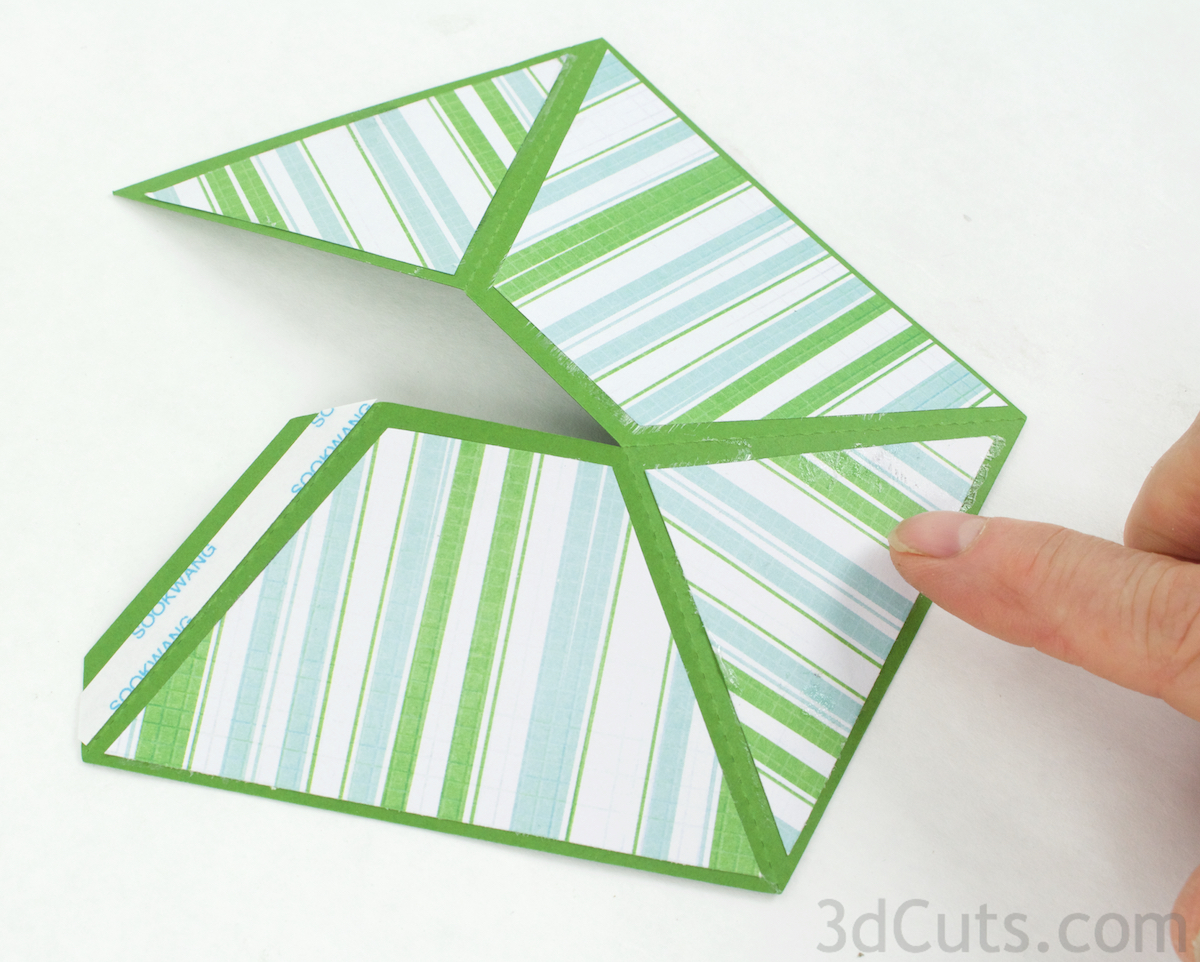
- The four roof panels need to be applied to the 4 sections of the lantern roof. I chose spray glue for this task but other adhesives would works as well (think Xyron). I put nuts on these to hold them down as I applied spray glue. Paper tends to blow away with the spray glue.

- Carefully position each panel in its appropriate spot. They get positioned between the dotted fold lines leaving a strip of card stoack showing. These color panels are optional.

8. Lantern assembly.
- All of the individual parts are now assembled and construction of the lantern can begin. You should have the lantern front with wax paper window, the lantern back with wax paper window, and the top set to go.
- Fold all the dotted fold lines on the lantern front. All folds fold in the same direction except the hanging tab at the top. That folds in the opposite direction.
- If using the single piece front (part 1) fold so the wax paper edges (or the cover) are inside.
- Apply Score-Tape to the tabs paying attention to correct sides.
- Start by applying strips to the inside of the tabs on the bottom of the sides as shown. Leave the tape backing in place.
- Plus add one strip in the center of the hanging tab at the top.

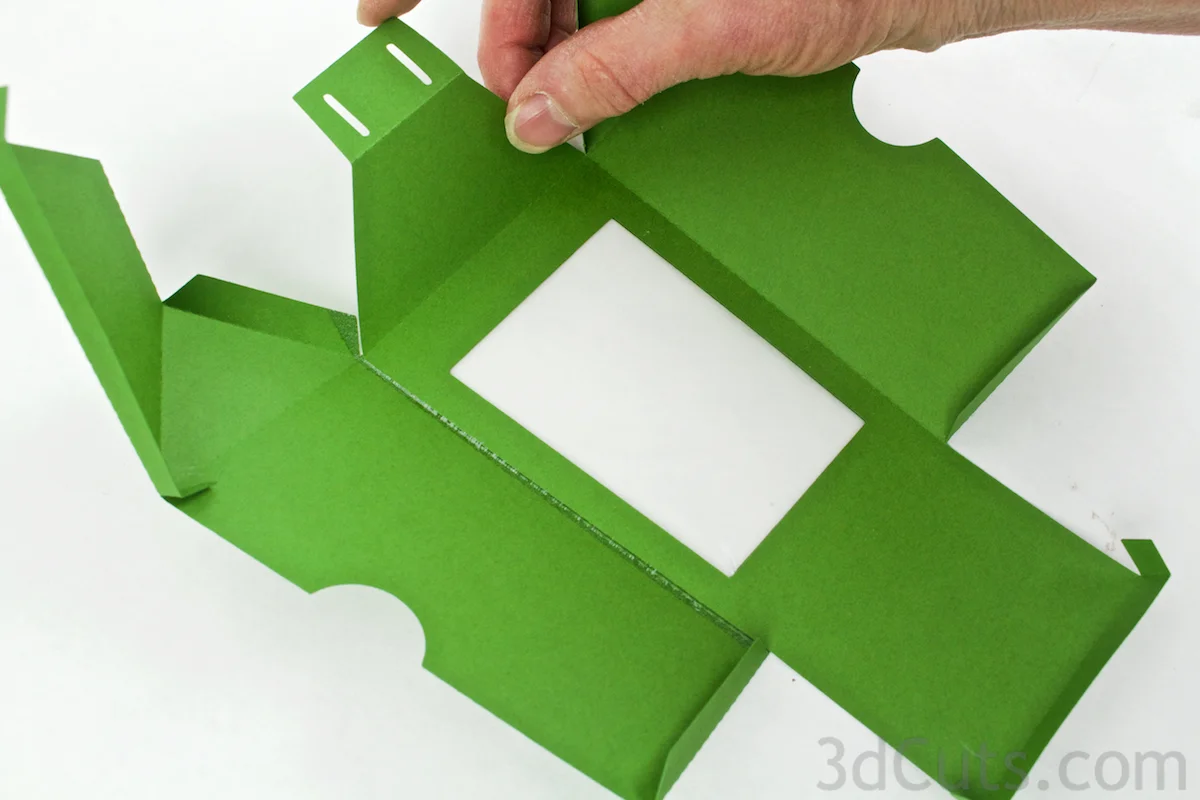
- Flip the piece over and on the outside apply Score-Tape to the 3 angle tabs near the roof line and the four tiny tabs on the edge strips.
- You can see two of these near my fingers. The other two are up in the top left and hard to see in the photo.
- Make sure these are all on the opposite side of the two you applied in the previous step.

- Fold the bottom up into place and wrap the two long side tabs around the bottom.
- Peel the backing tape from the side tabs and press into place on the outside of the bottom.
- Peel the backing from the Score-Tape on the two little tabs and fold those inside the lantern and adhere them into place creating a lower lip to the rear opening.


- Peel the backing from the Score-Tape for the roof angles and adhere those in place. There are 3 edges to adhere.

- There is a support lip along the top of the back opening just like on the bottom. Peel the backing tape from the remaining two tiny tabs, fold them inside and adhere in place to form the top lip.
- Peel the backing from the adhesive between the two hanging tabs and glue those together being careful to keep the slots open.

9. Lantern back assembly.
- Fold all the dotted folds lines on the lantern back (piece 4).
- These all get folded in the same direction so that the wax paper and wax paper edge covers are inside the finished box.
- Apply Score-tape to the INSIDES of the two long tabs along the bottom of the side panels and to the OUTSIDE of the two tiny tabs near the support strip.

- Fold the two longer side tabs around the bottom and press into place.

- Peel the backing from the tiny side tabs, fold those inside the box, and press those into place forming the bottom lip.

Add the tea light holder inside the lantern back piece.
- For this step take part # 5, Fold all the dotted fold lines in the same direction, attach the tiny end tab to the beginning to form a square. I used a glue dot.
- Apply glue dots to the bottom of each tab, and adhere this square holder to the base of the lantern back.

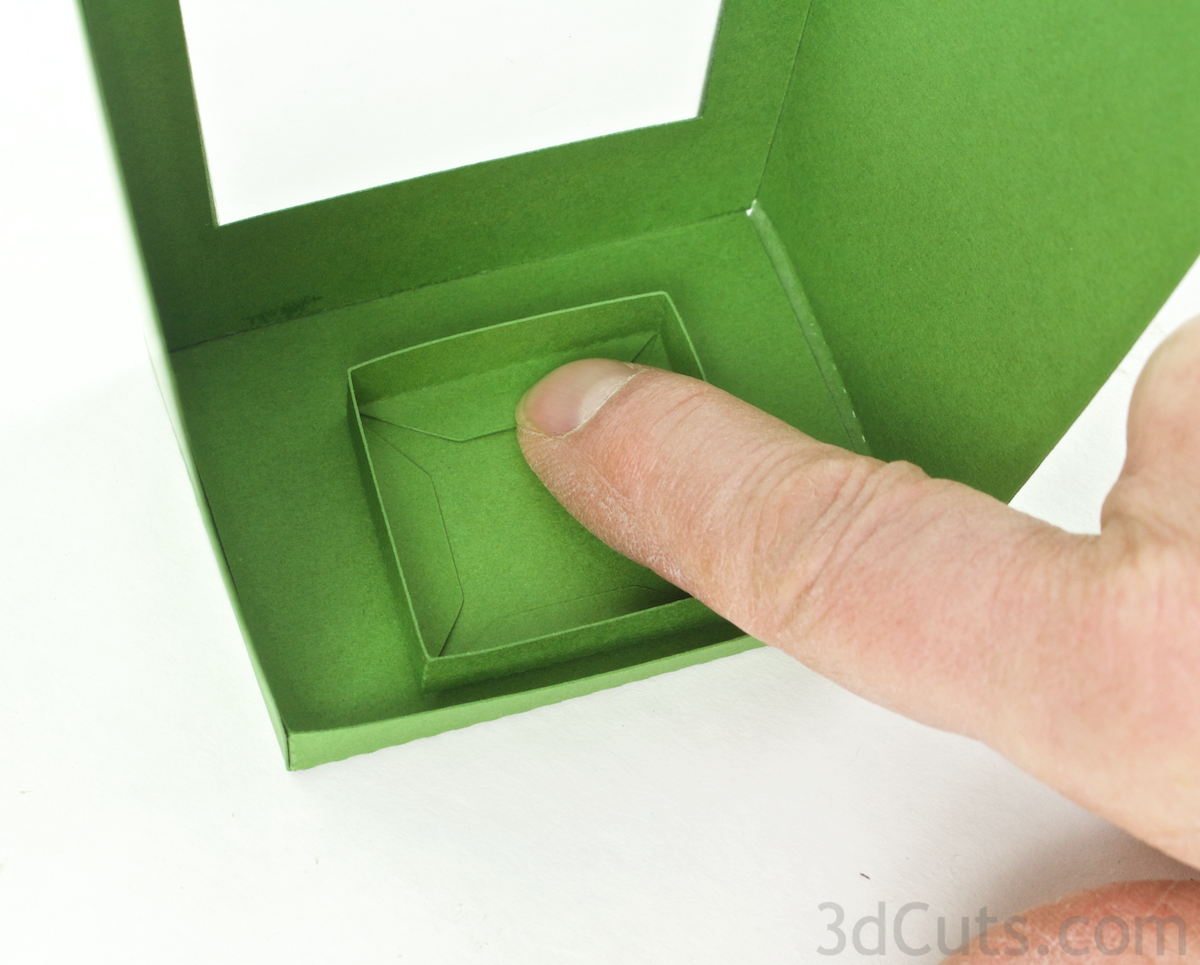
- The finished lantern back gets inserted into the back opening in the lantern front.
- Insert the bottom first placing it behind the bottom lip.
- Rotate the back into the space.
- The top edge of the back rests up against the top lip of the back of the front.

10. Complete lantern roof.

- Fold along all dotted lines on the lantern top.
- Add Score-Tape adhesive to the end tab.
- Peel the backing and glue the tab inside the opposite trangle creating the lantern roof.
- Slide the lantern roof over the hanging tab on the lantern.
- DO NOT glue the roof on top. It should be able to slide up and down. When it is in the down position, it will help hold the lantern back in place. By sliding it up a little, it makes it easier for the lantern back to flip out to allow for access to the LED tea light.

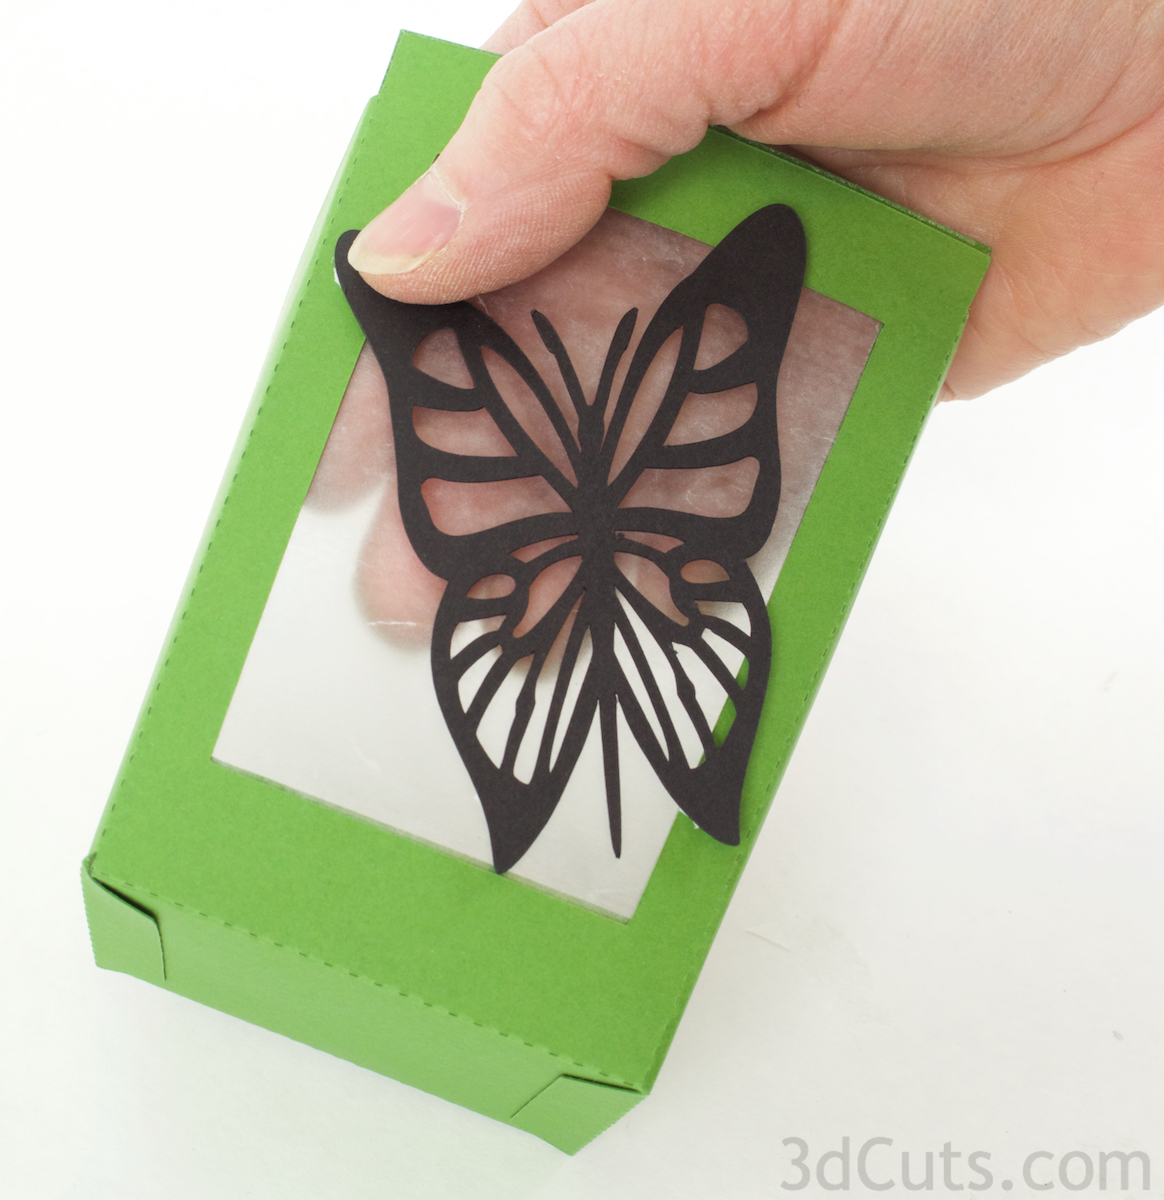
11. Add the butterflies.
- The larger ones get adhered over the window area.
- Attach small foam dots to the back of all 4 wing tips.
- I cut the dots for the bottom corners in half so they wouldn't show on front.
- Apply one on the back window as well.


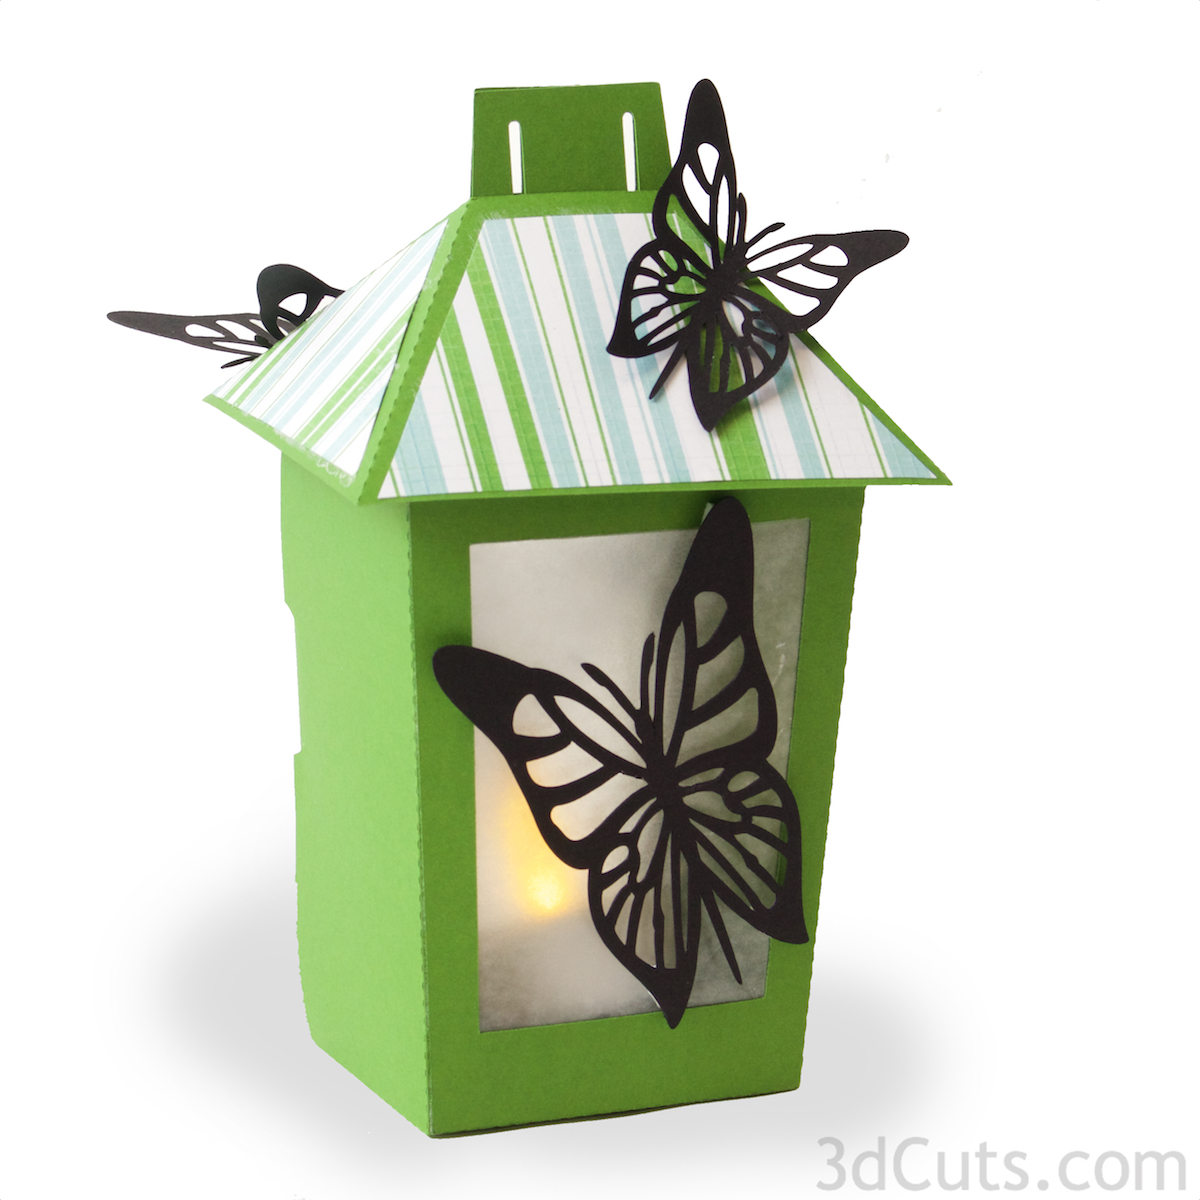
- Add small glue dots to the center of the small butterflies and perch them on the roof bending theirs wings forward to provide dimension.
- Place a battery-operated LED tea light in the back portion and close it up.
- You have completed the first lantern. Are you making a series to be strung on a ribbon or just 1?

- Here is a Lantern Banner with letters complete with ribbon and flower spacers.

- I hope you had fun crafting this project and that you have a wonderful time at your celebration.
- Share images of your completed banner on Pinterest and in Facebook.
- Send me images of your completed banner (marji@3dcuts.com). I love to share photos of creative ways people have assembled or modified my files.