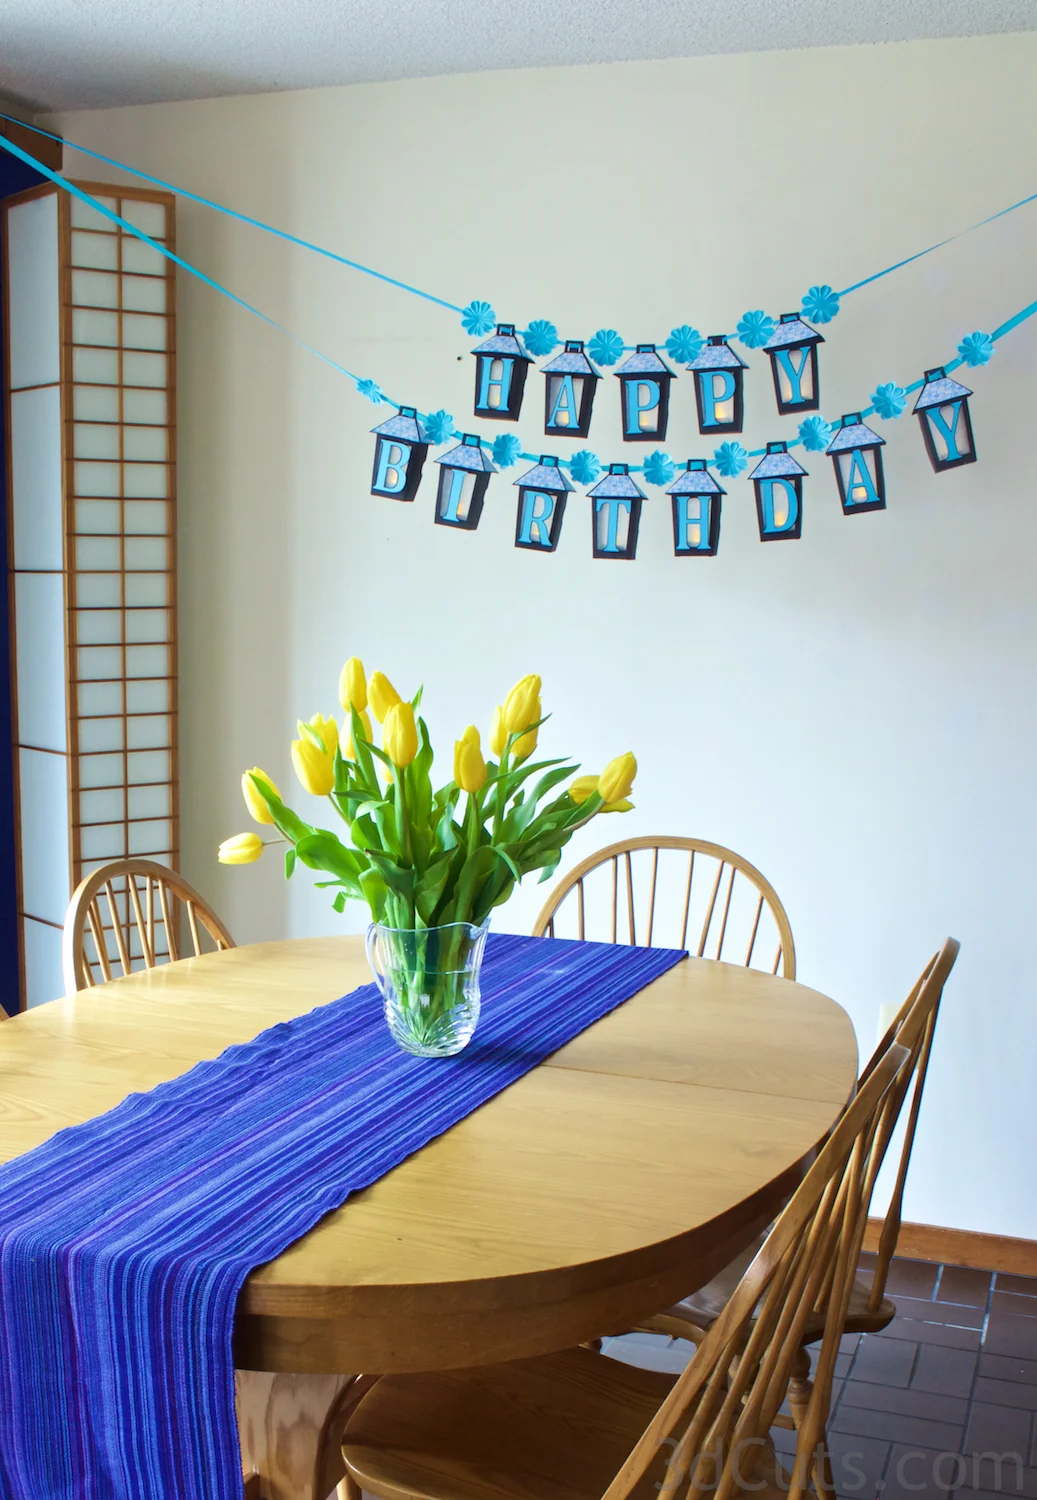
3D Lantern Banner Tutorial
Project Description:
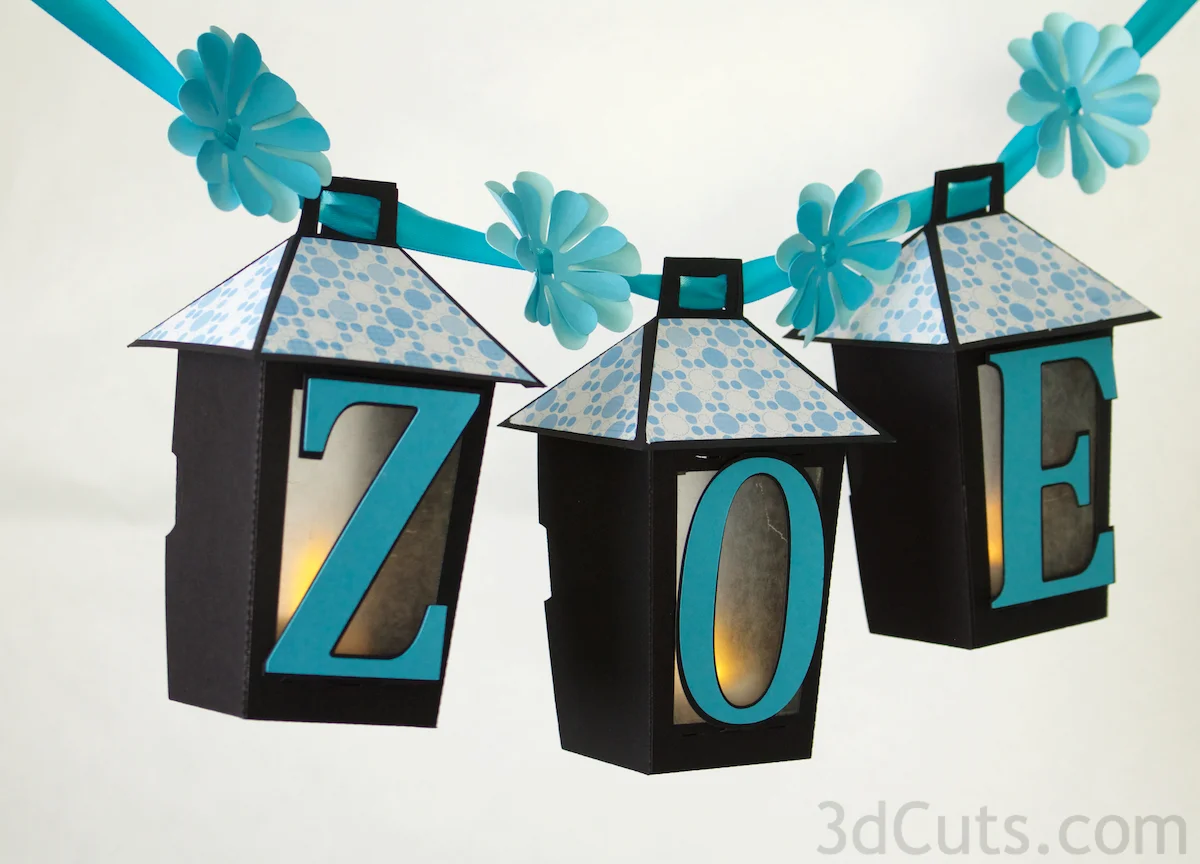
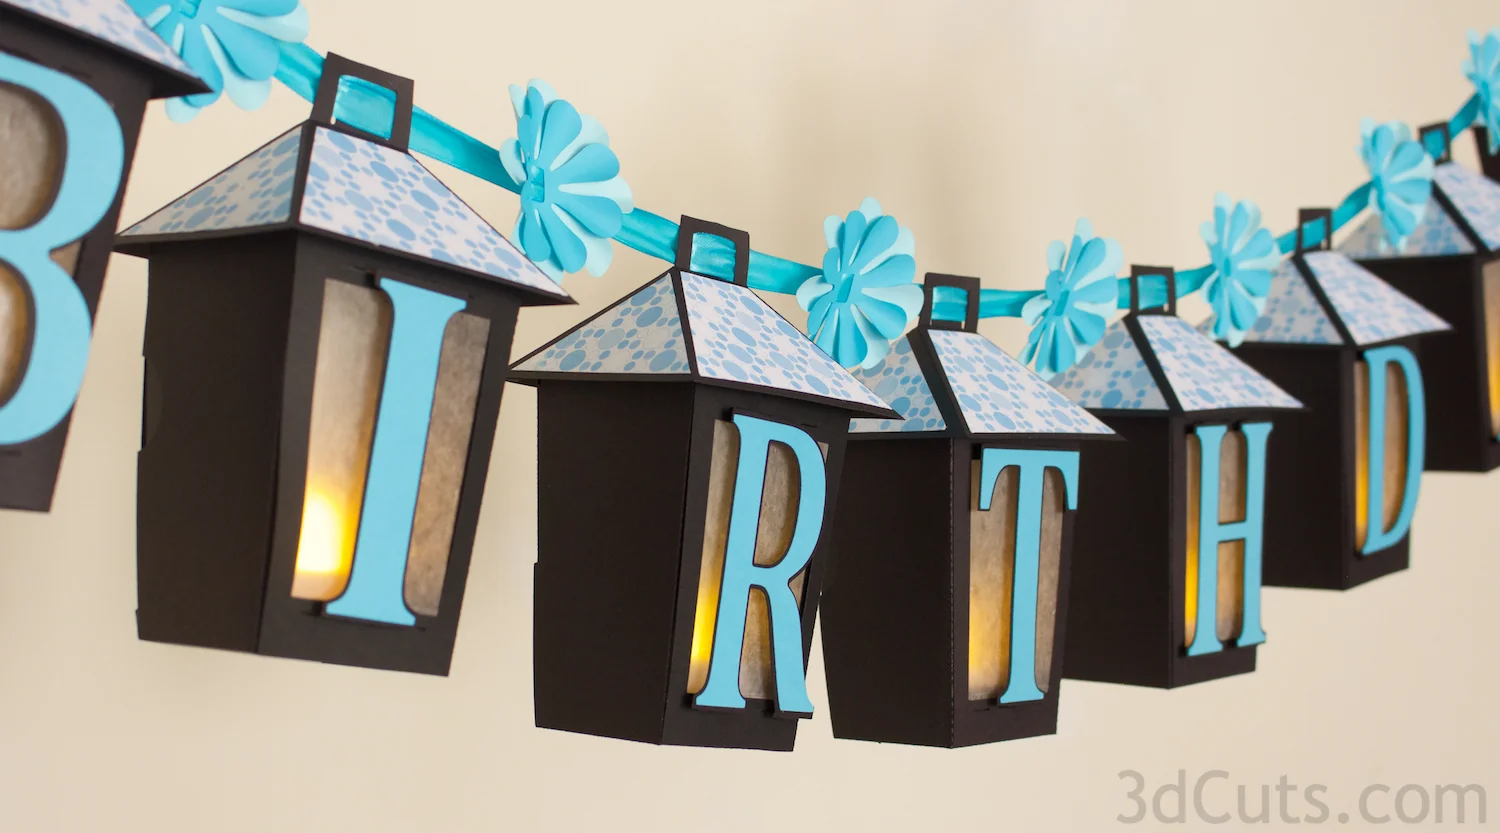
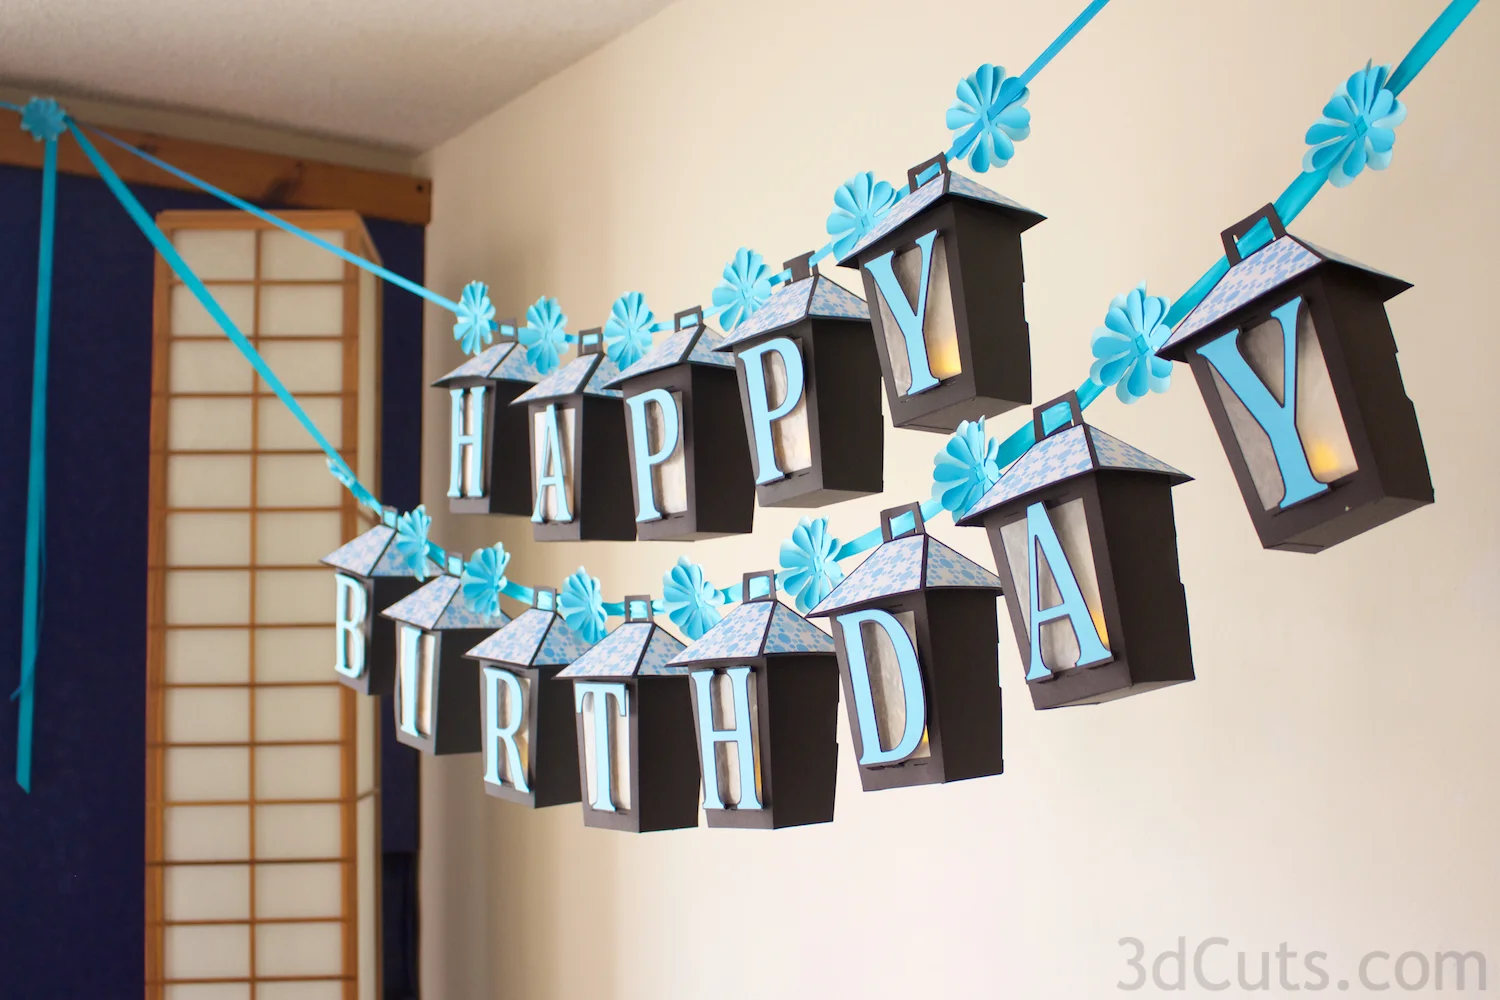
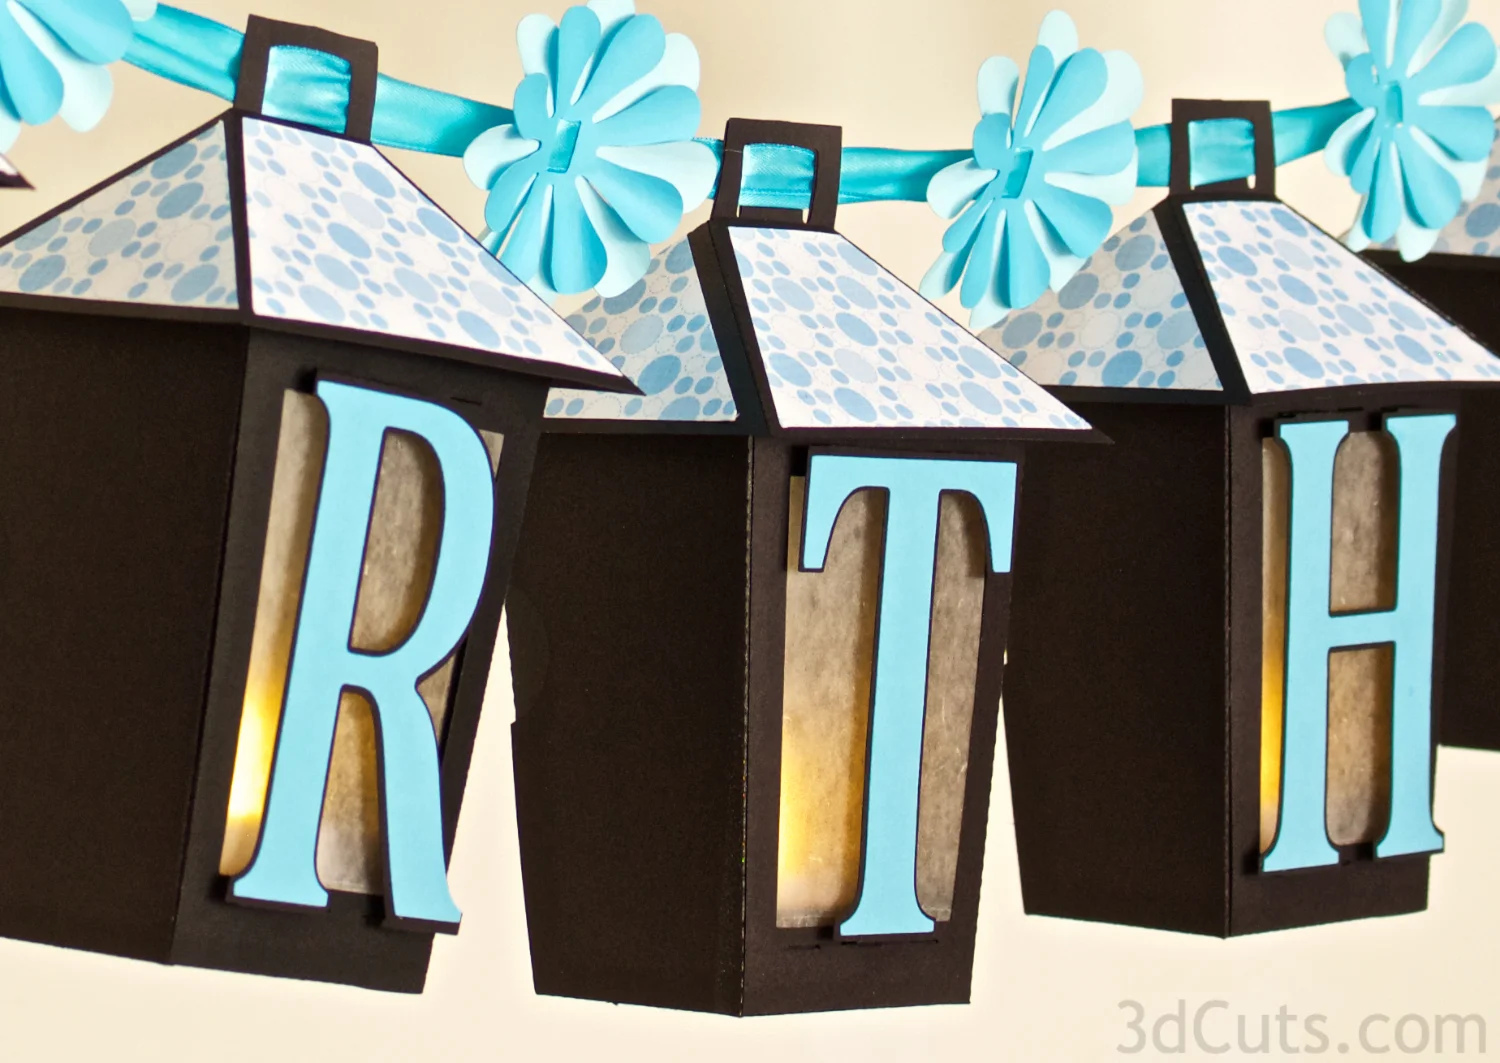
Using card stock and your cutting machine create this versatile lantern banner. It is designed to open up and place a battery operated LED light inside so the text for the banner is silhouetted against the glowing light. The letters are designed to be either permanent or interchangeable depending on your need. Make a group of lanterns and use them for a Happy Birthday banner this month and for an anniversary or retirement party next month. Change the letters to match the color theme of your event. And the back side of all lanterns can be switched around so that if your banner is visible from both sides, it will read correctly (not in reverse on the backside.)
Each lantern is easy to build using basic 3D construction techniques. They are designed to be cut either from 8.5 x 11 card stock or 12 x 12 card stock and each finished lantern is about 6.5" tall. They are set to be threaded onto a ribbon and displayed at your celebration.
Warning: Only use LED Tea Lights. DO NOT use regular candle tea lights.
Supplies Needed:
Cutting File from 3dcuts.com here.
8.5 x 11" card stock - each lantern takes 4 pieces
OR 12 x 12 card stock
patterned paper for the roof panels (optional)
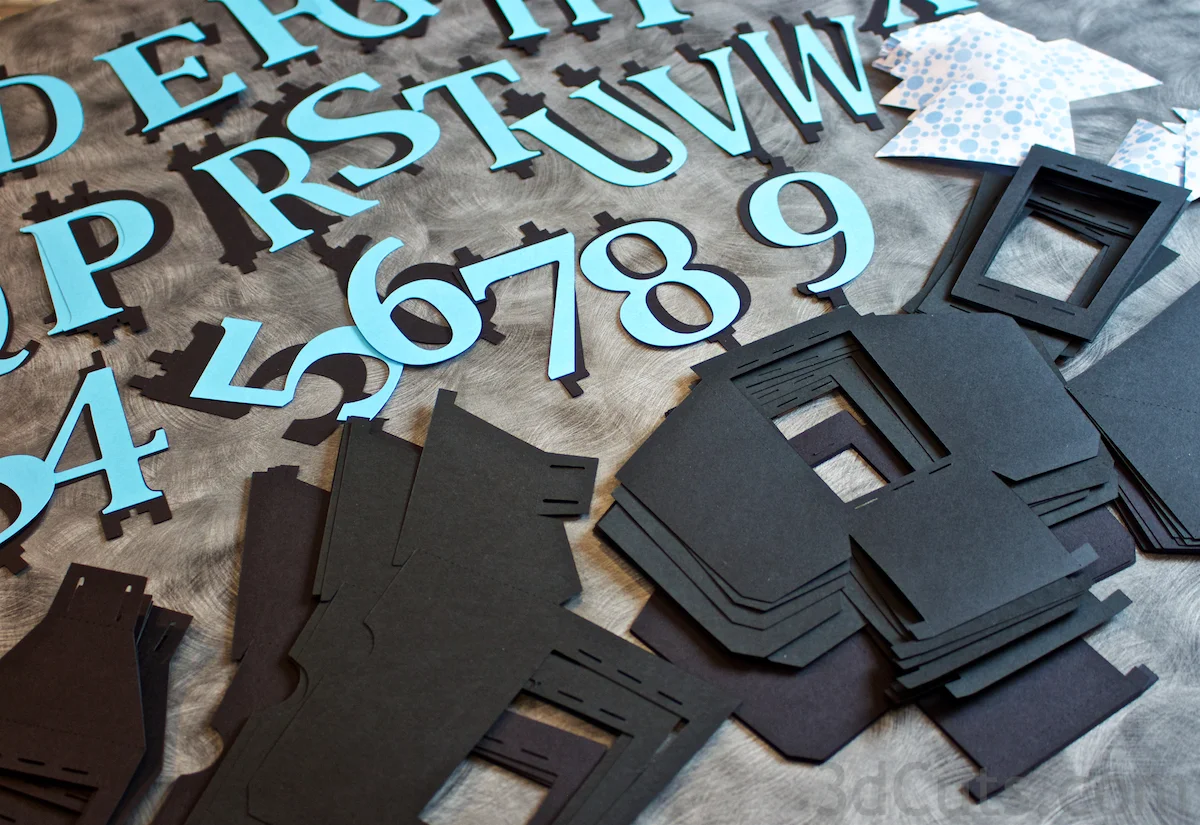
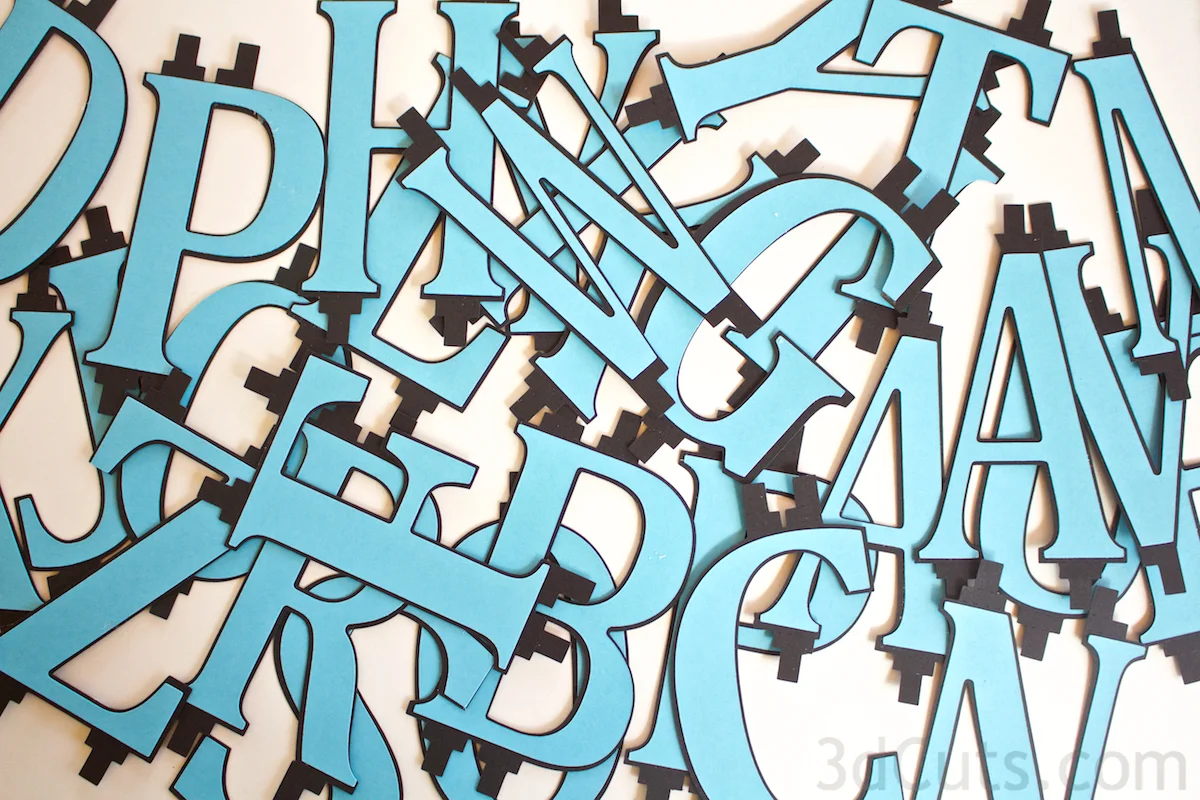
card stock for the letters - two colors - about 9 letters fit per letter sized card stock.
wax paper (or parchment) for the lantern openings
Permanent Paper adhesive - I used a variety:
Spray Glue (Aileen's Tacky Spray)
Tape Adhesive (Score Tape)
Removable scotch tape
Glue Dots
LED Tea Lights
Satin ribbon for hanging
Part Sizes:
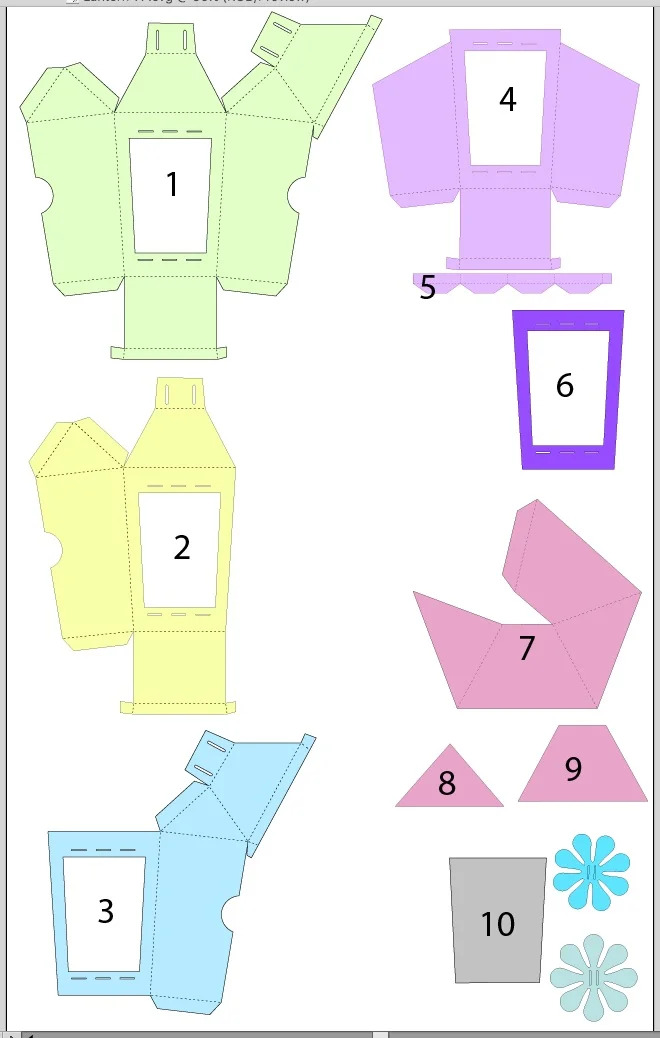
Part 1 - 10.073" w x 9.657" h - lantern front for 12 x 12 card stock
Part 2 - 5.747" w x 9.343" h - combines with part 3 for lantern front for 8.5 x 11 card stock. Is the same as part 1.
Part 3 - 7.452"w x 7.90" h - combines with part 2
Part 4 - 7.411" w x 6.687" h - lantern back insert
Part 5 - 6.4" w x .535" h - tea light holder
Part 6 - 3.106" w x 4.424" h - wax paper edge cover (optional)
Part 7 - 6.348" w x 5.818" h - lantern top
Part 8 - 3.017" w x 1.737" h - colored panel for lantern top (optional)
Part 9 - 3.604" w x 2.111" h -colored panel for lantern top (optional)
Part 10 - 2.690" w x 3.471" h - template for cutting wax paper
Flowers- optional and any size
Letters Panel - All combined - 34.5017”w x 34.0710’H - re-size all and then select the letters you need.
Steps for assembly of the Lanterns-
1. Download the cutting files for your cutting machine.
2. Load the files into your cutting software following the steps for your cutting machine.
3. Prepare the files:.
Click here for detailed steps on how to use .SVG files on your Silhouette (with Design Studio).
Click here for steps on how to use these .SVG files in Design Space with your Cricut Explore.
4. Cut the shapes.
I used black card stock for the lantern but you can certainly experiment with other card stocks. The tabbed letters should be cut from the same colored card stock as the lantern.
I used a print colored paper for the roof and a coordinating color card stock for the top layer of the letters.This is certainly an area you can experiment with color.
There is a lot of cutting if you want to create a long banner. You need to cut 1 lantern set for each letter.
For each lantern cut the following:
Part 1 - Lantern front cut 1 from 12x12
Part 2 & 3 - Lantern front alternate for 8.5 x11. Cut only Part 1 OR parts 2 & 3. Don't cut both.
Part 4 - Lantern back insert - cut 1
Part 5 - Tea Light holder - cut 1
Part 6 - Wax paper edge cover - Optional - cut 2 for each lantern.
Part 7 - Lantern top - cut 1
Part 8 - Cut 2 from patterned paper
Part 9 - Cut 2 from patterned paper
Part 10 - Cut from anything scrap. It is a template for cutting wax paper panels.
5. Adding Wax paper lantern window filler.
I used regular kitchen wax paper for the filler in the windows. You can certainly experiment with other materials that are semi-transparent.
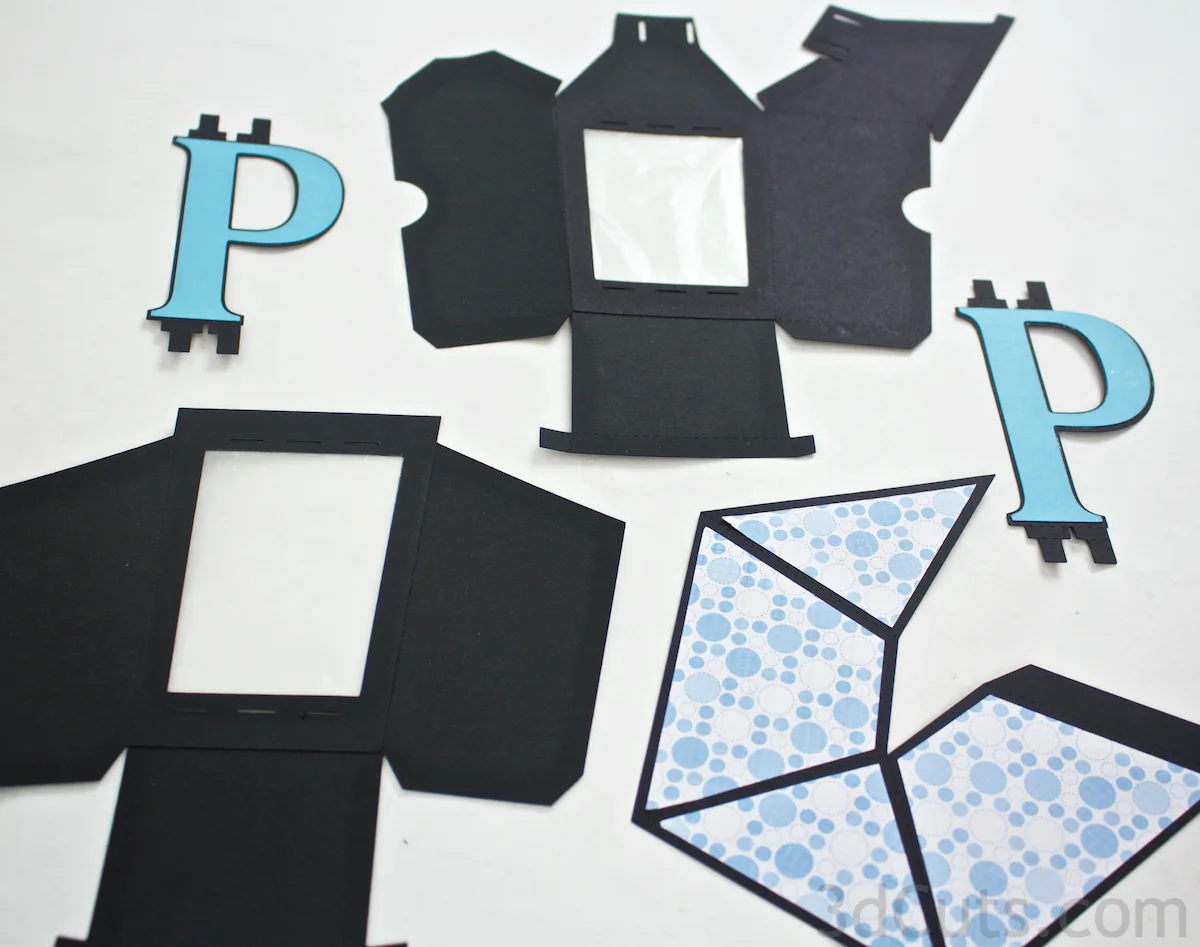
Take the wax paper template (piece #10) and cut two inserts for each lantern that exact shape. I don't try to cut wax paper on my cutting machine but instead traced the template and cut the wax paper using scissors.
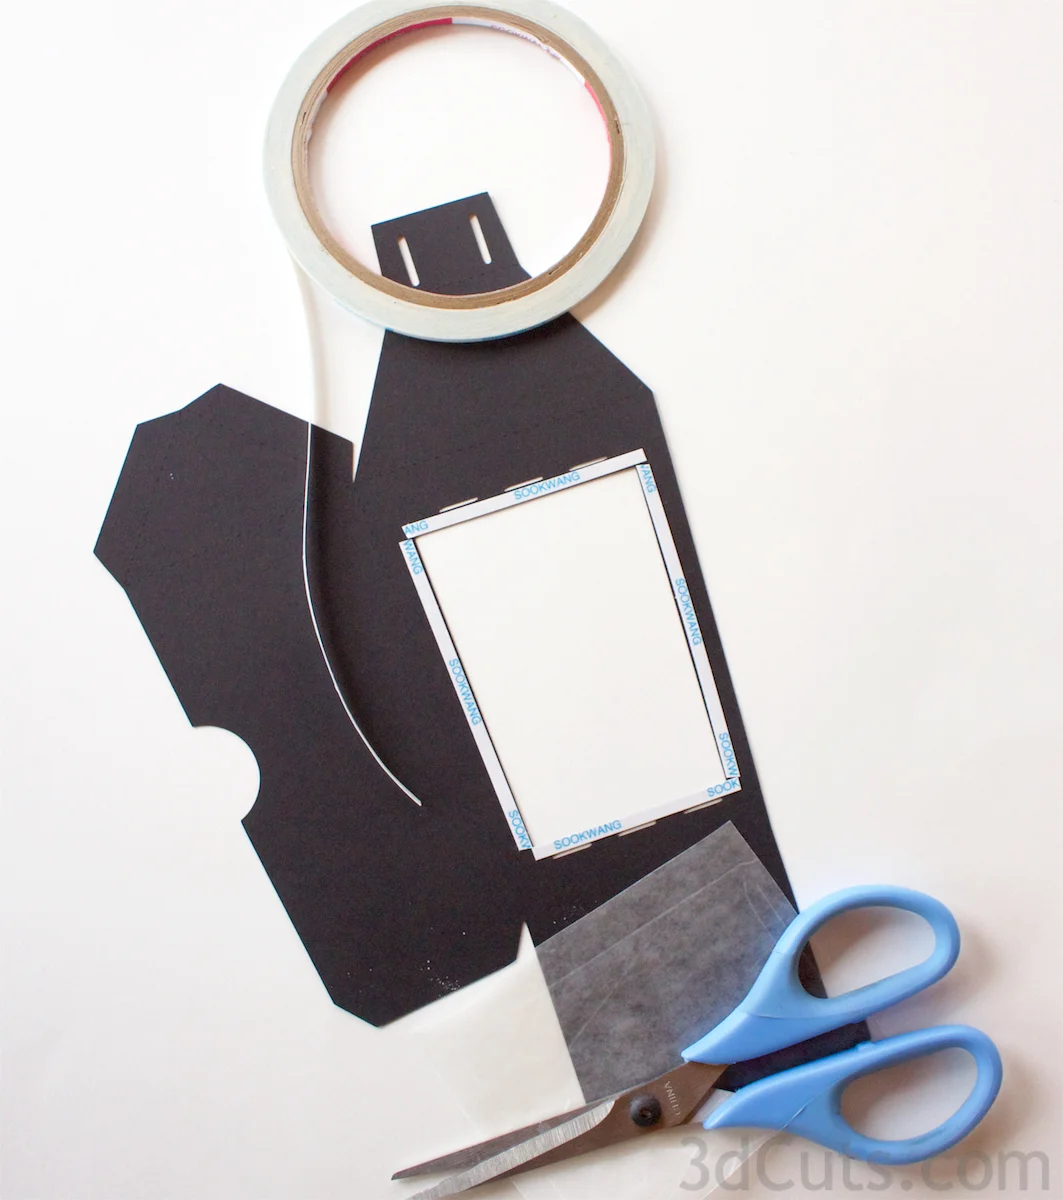
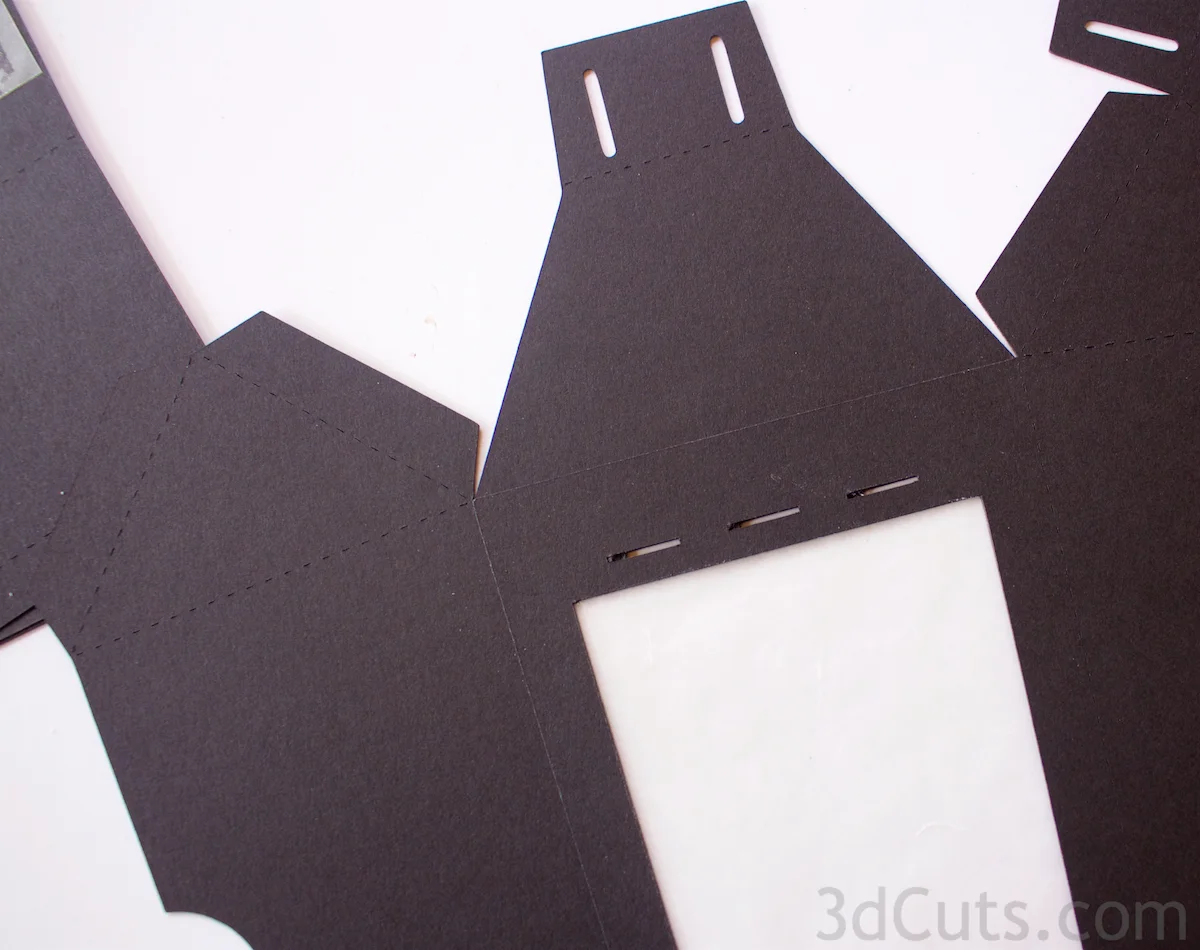
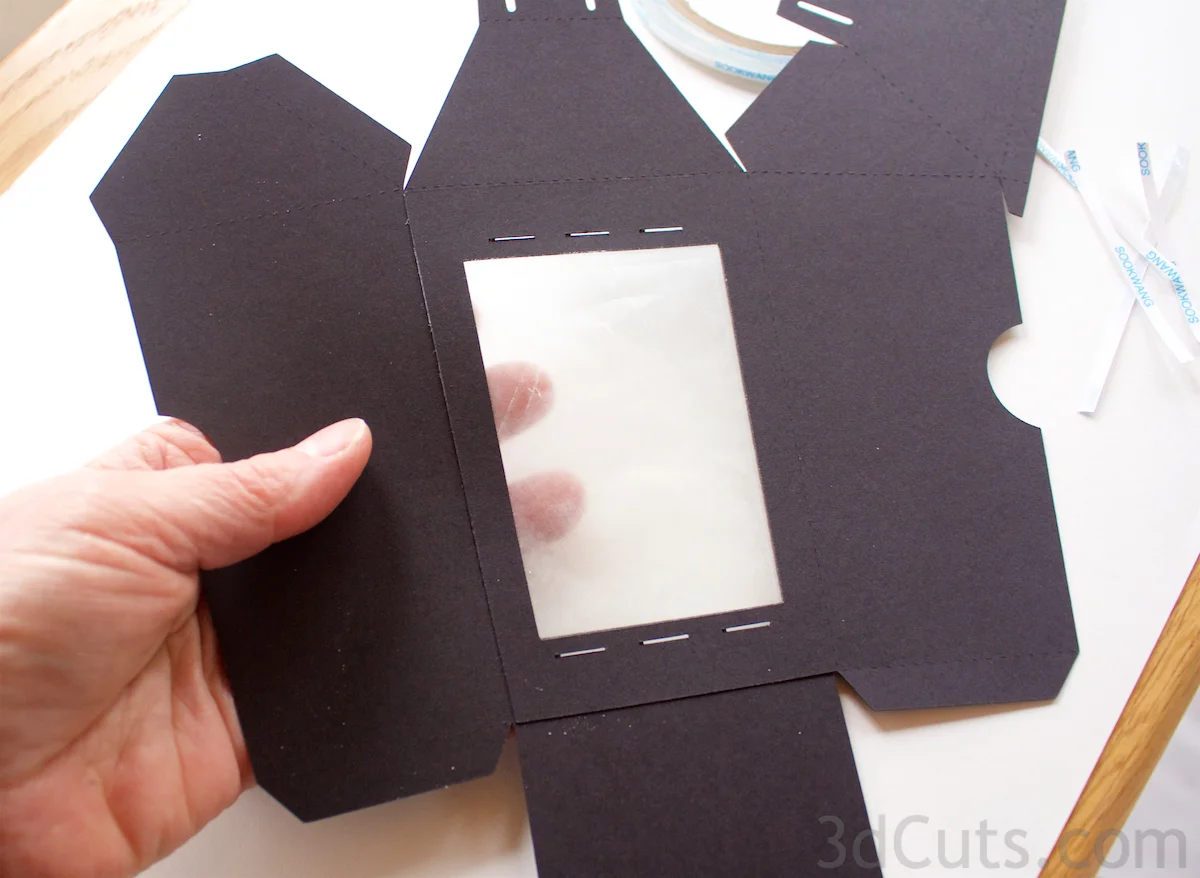
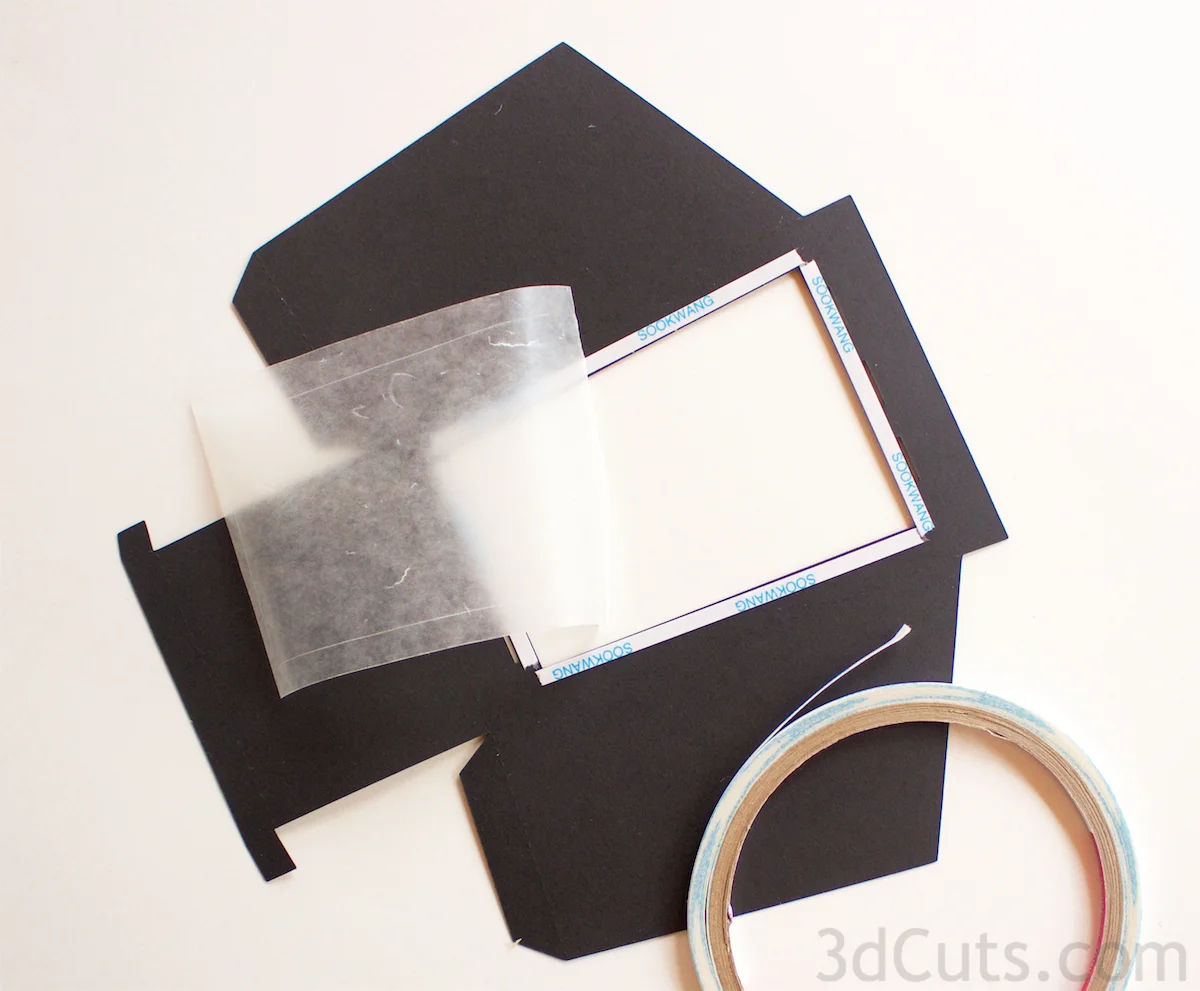
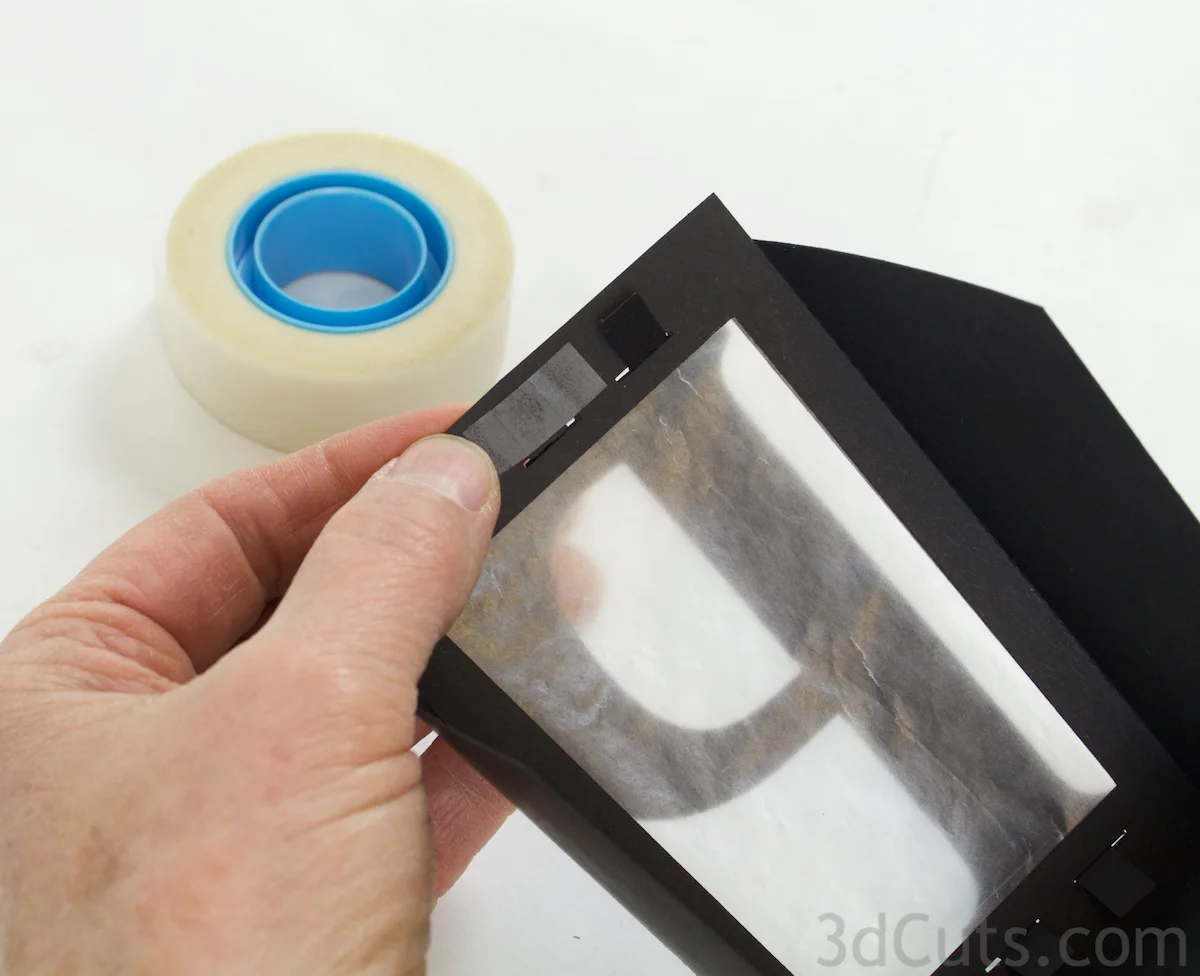
Use adhesive ( I like 1/8" Score-Tape) and apply to all edges of the lantern window being careful to not cover any of the 6 slots above and below the window.
For the photograph I used parts 2&3 from 8.5" paper. If you used the single part 1 then apply this to the inside of the lantern. This is determined by how you fold along the fold lines later.
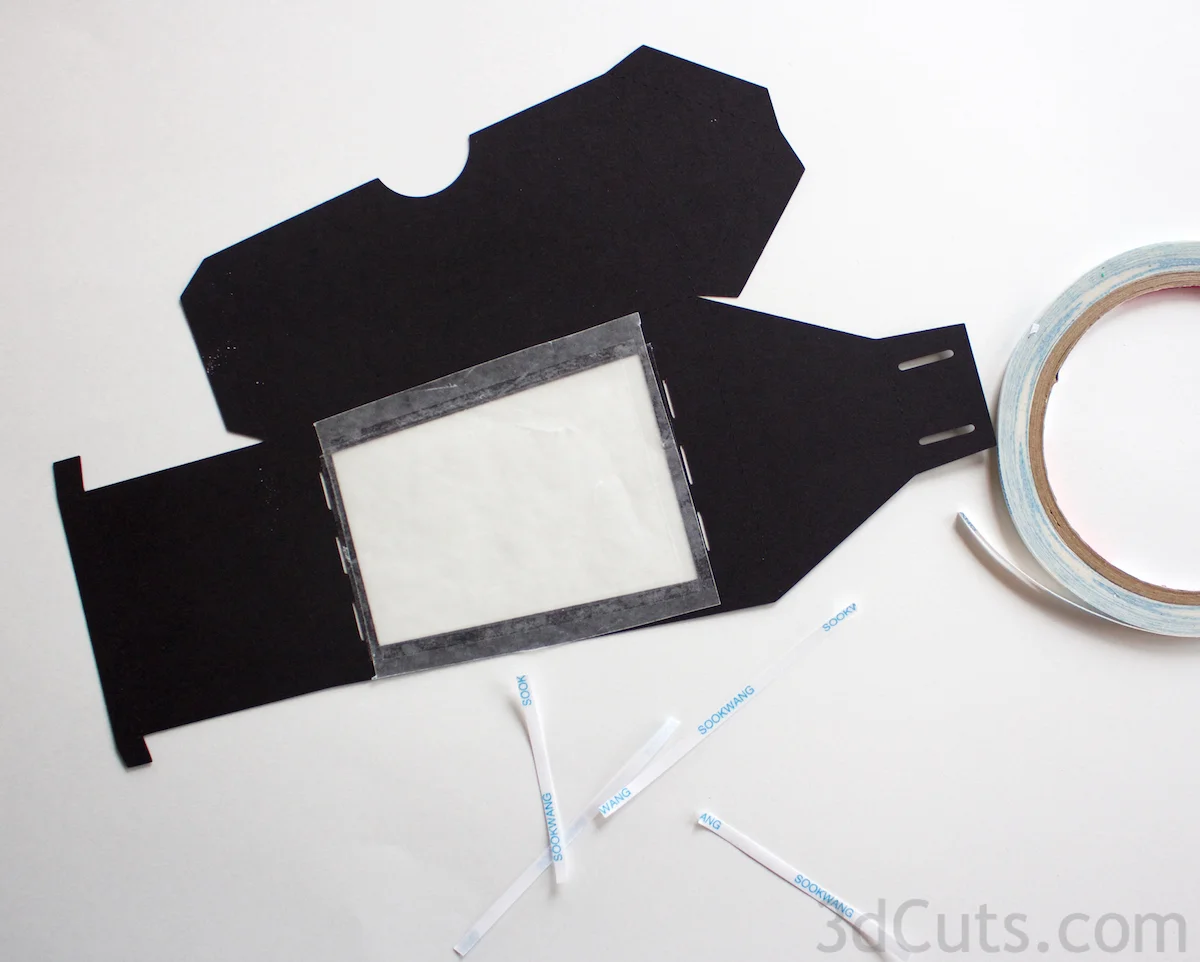
Peel the backing and adhere the wax paper. Be sure the wax paper doesn't cover any of the 6 slots.
(Note: I reduced the sides of the window piece template to fit better after taking the assembly photos!)
If making the lantern front from the two pieces - 2 & 3- Glue them together now.
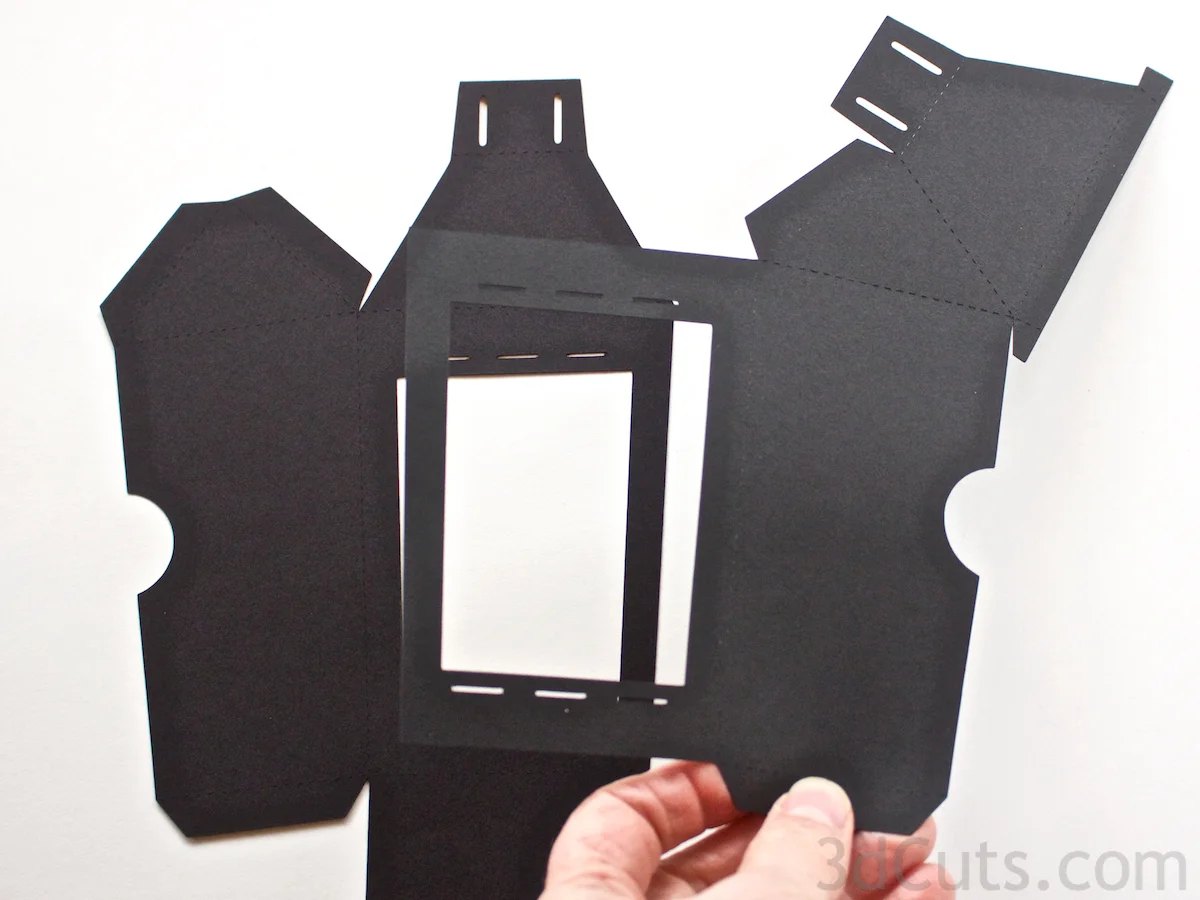
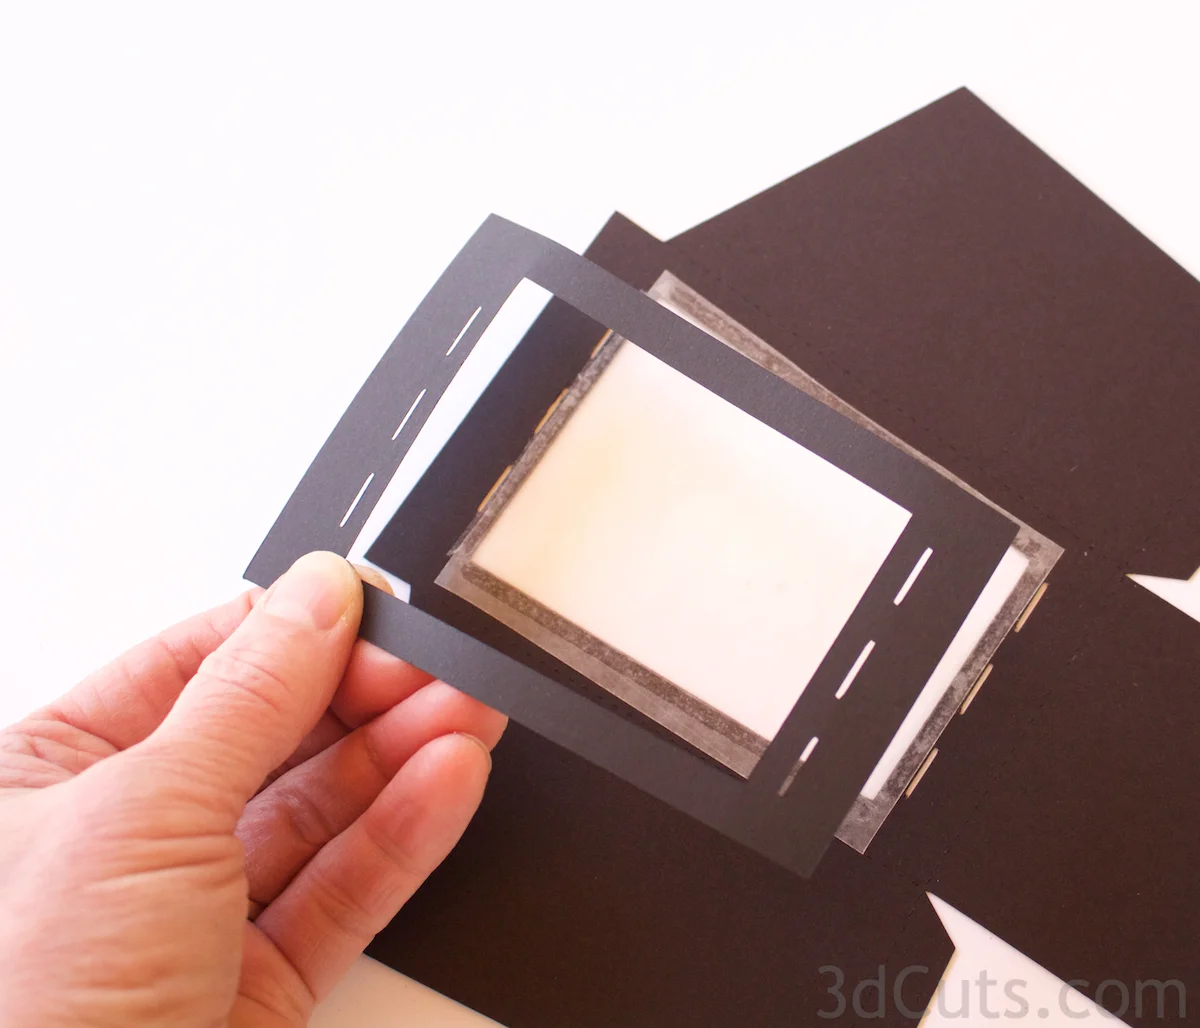
Piece 3 gets adhered over piece 2 being extremely careful to line up the 6 slots. Notice the orientation of the two pieces in the photo.
Flip piece 3 over and apply adhesive to JUST the backside window frame portion of piece 3.
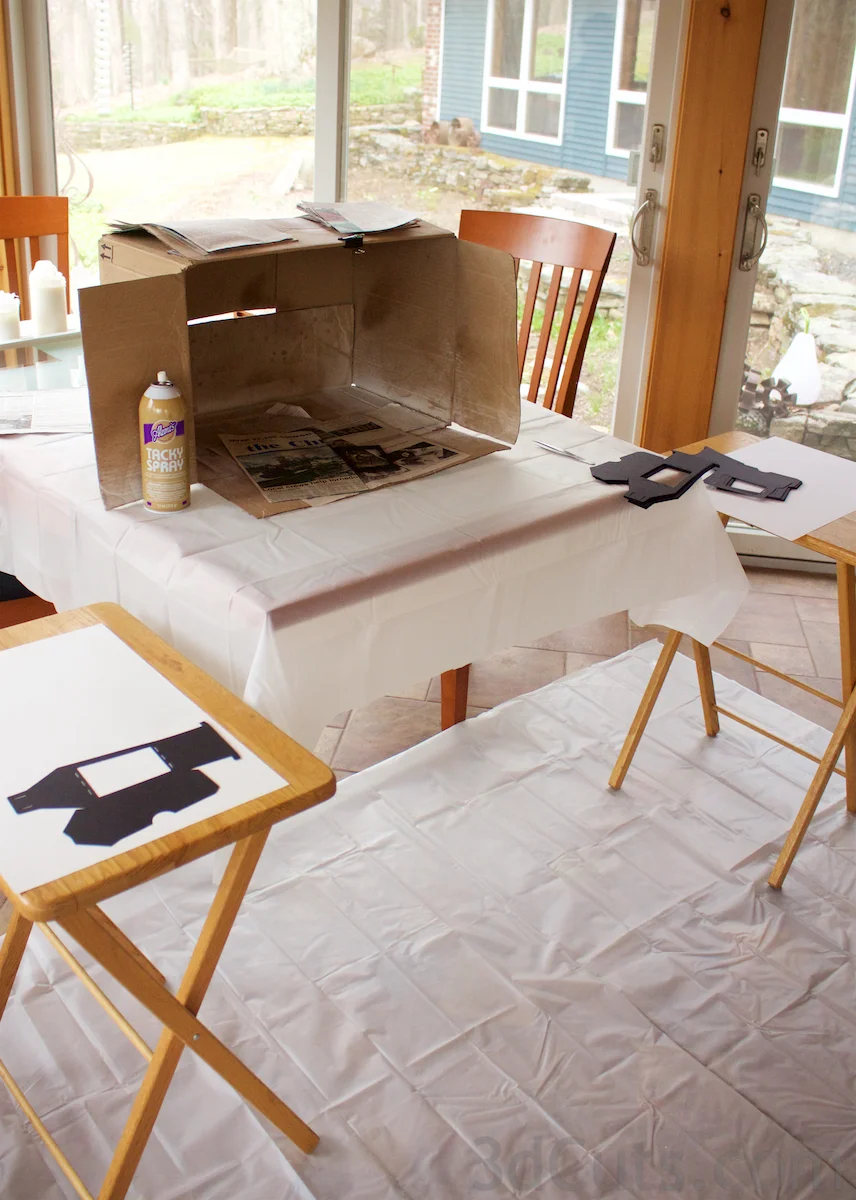
I used spray glue for this step. I like Aileen's tacky glue because it gives me some time to adjust the positioning.
I set up a makeshift spray booth in an old box out in my sunroom so that I have good ventilation. I made 18 lanterns at once so I was doing a lot of spraying.
I covered the portion of piece 3 that wasn't the window frame area and just sprayed the window frame edges.
Position piece 3 over piece 2 and adhere in place being sure that the six slots remain open.
If using the single large part 1, after adhering the wax paper, you can choose to adhere part 6 - wax paper edge cover - over the wax paper on the inside of the section. This is optional. It just makes the inside of the lantern neater.
Do the same for the window in Part 4- lantern back. Apply the wax paper to the inside of the back. Inside gets determined by how you fold it.
Determine the back side of the wax paper edge cover (Part 6). Do this by lining up the slots. Apply adhesive on the back-side of the wax paper edge cover. I used spray glue here. Adhere the cover in place being sure to keep the slots open.
This step is optional. It just covers the cut edges and makes the inside of the lantern neater.
6. Apply optional color panels to lantern roof.
While you have the spray area set-up you might want to skip onto several other spraying tasks before you start assembly.
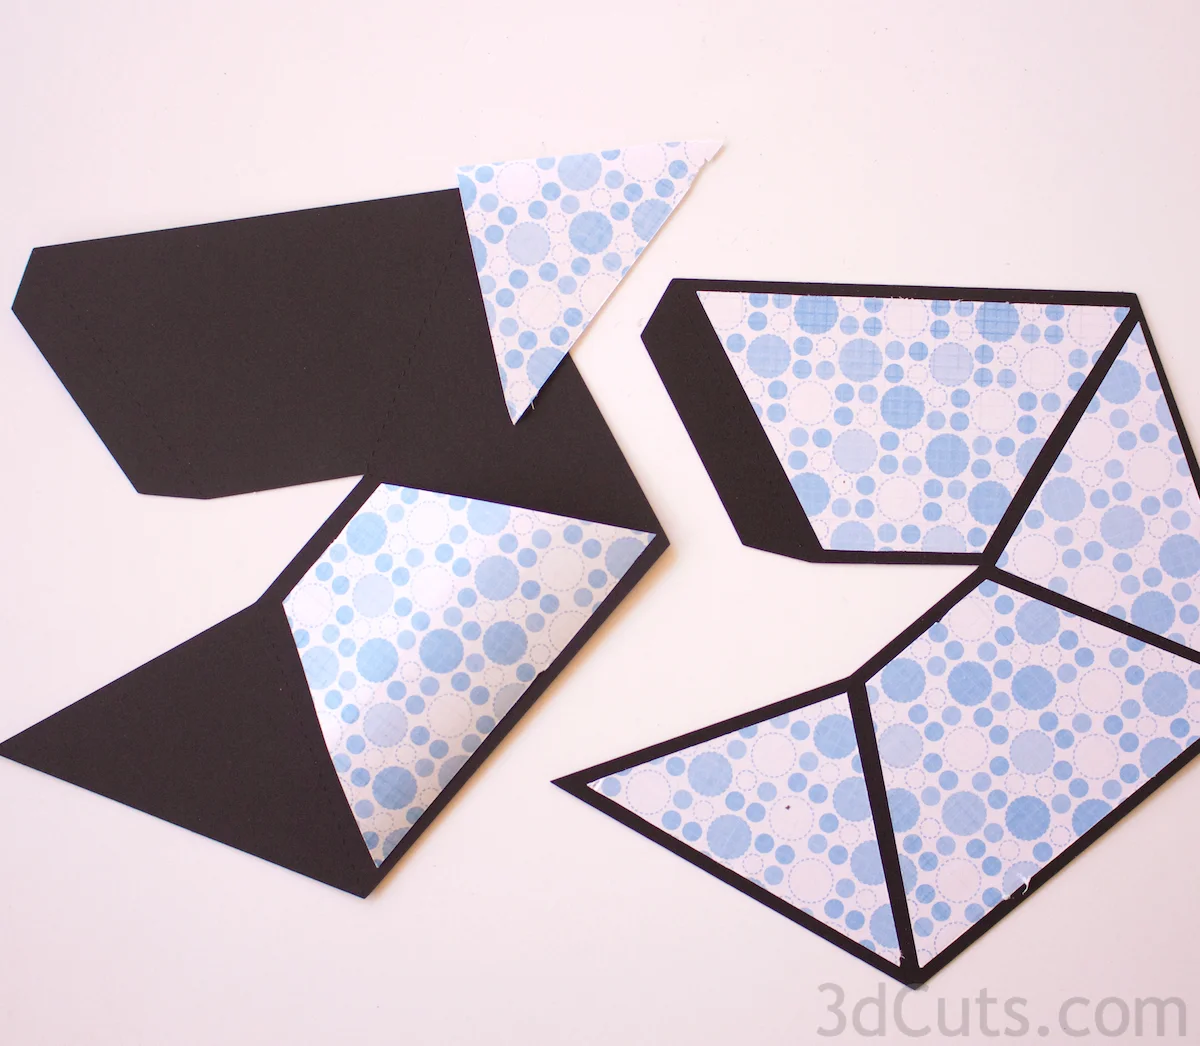
The four roof panels need to be applied to the 4 sections of the lantern roof. I chose spray glue for this task but other adhesives would works as well (think Xyron). I put nuts on these to hold them down as I applied spray glue. Paper tends to blow away with the spray glue.
Carefully position each panel in its appropriate spot. They get positioned between the dotted fold lines leaving a strip of black showing. These color panels are optional.
7. Adhere the two layers of each letter together.
This was another spray glue job (although again, other adhesives would work).
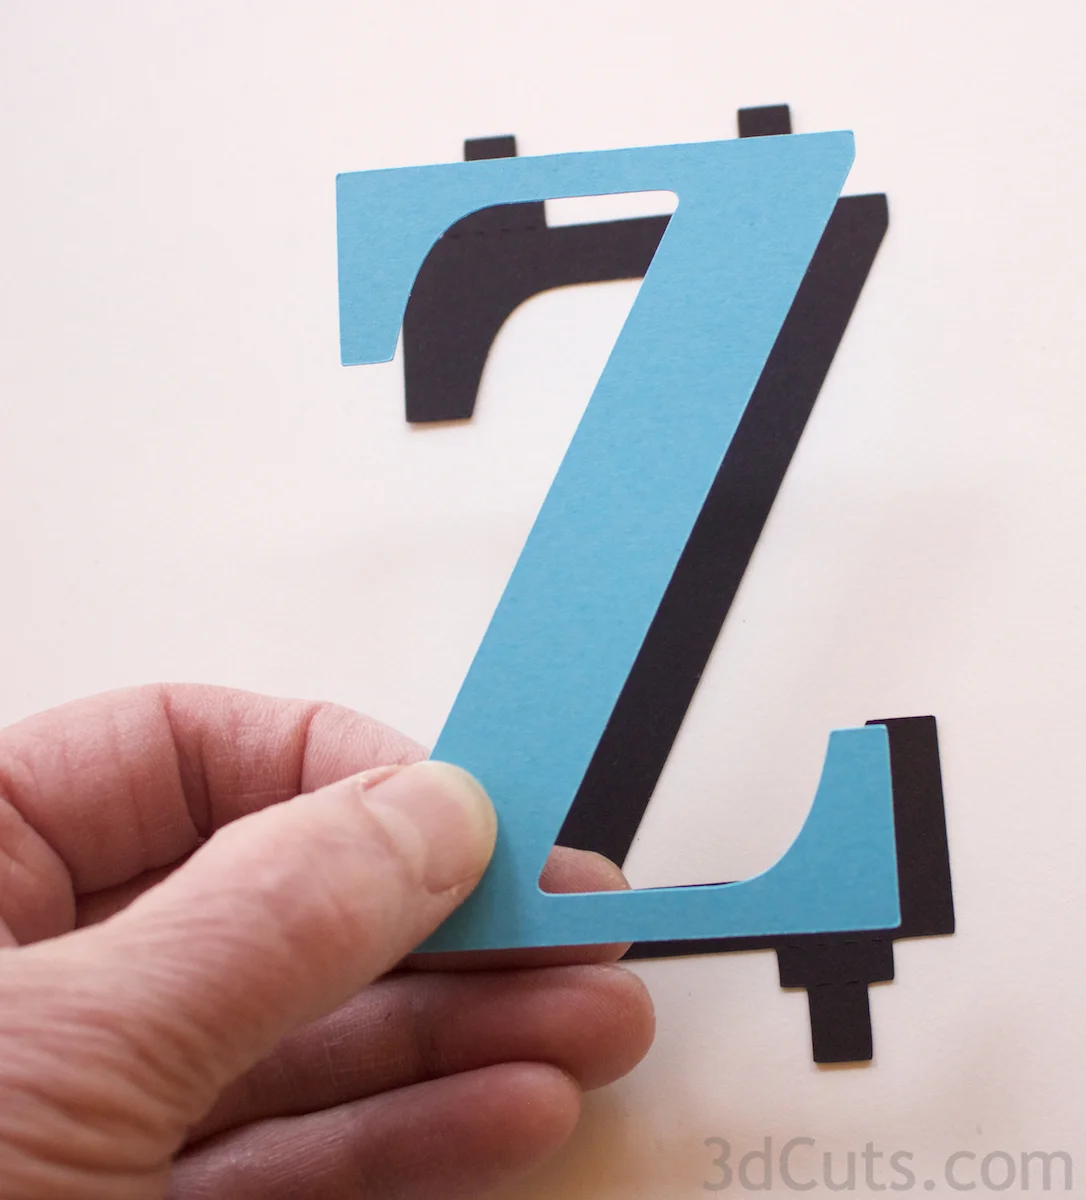
Match the letters up carefully watching for ones that look symmetrical but aren't. (Top of the B is smaller, H center line isn't, etc.) I applied glue on the wrong side of several letters by not paying attention to the differences. I had to re-cut those letters.
I sprayed the back side and adhered the top letter in place leaving a small black margin around the letter.
8. Lantern assembly.
All of the individual parts are now assembled and construction of the lantern can begin. You should have the lantern front with wax paper window, the lantern back with wax paper window, the top and 2 letters set to go.
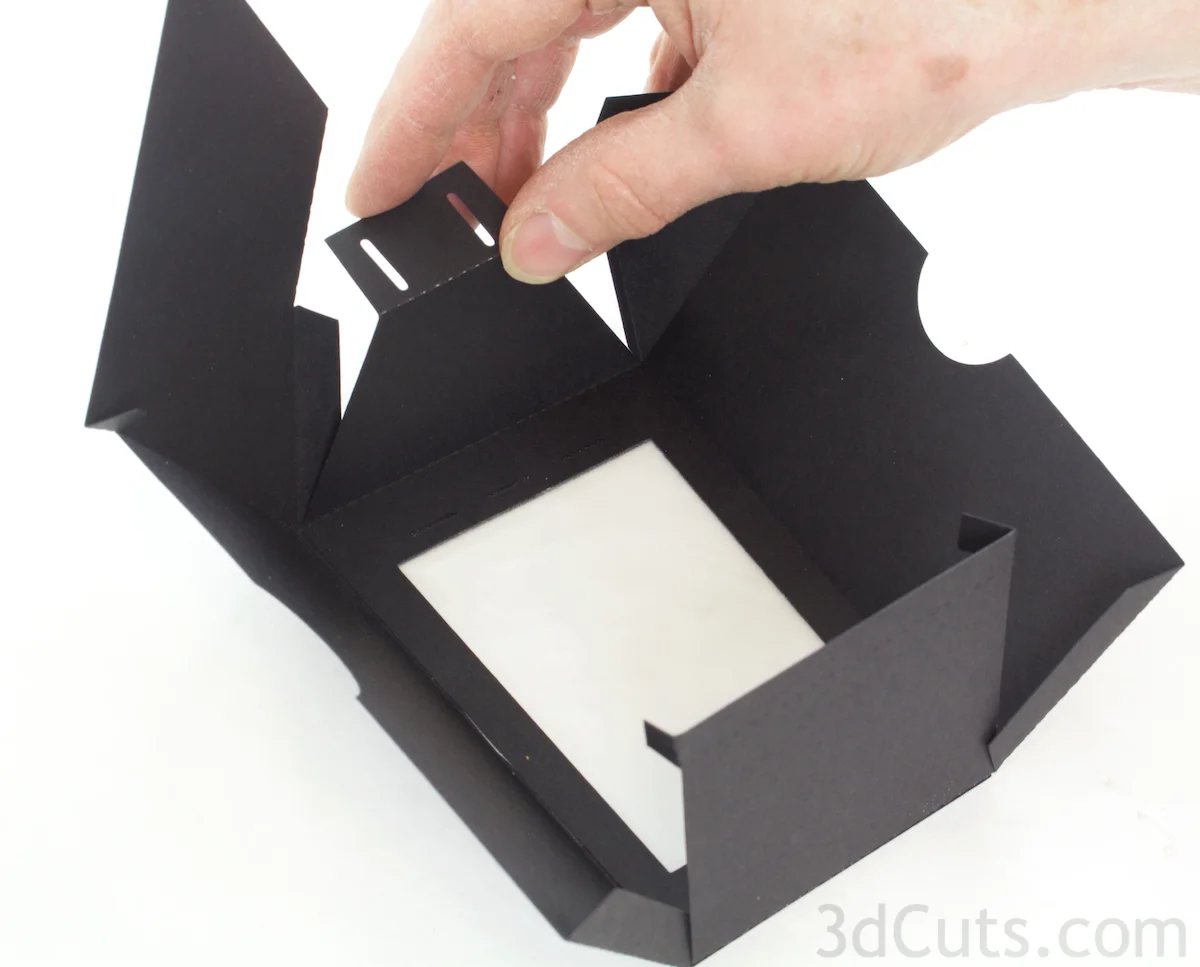
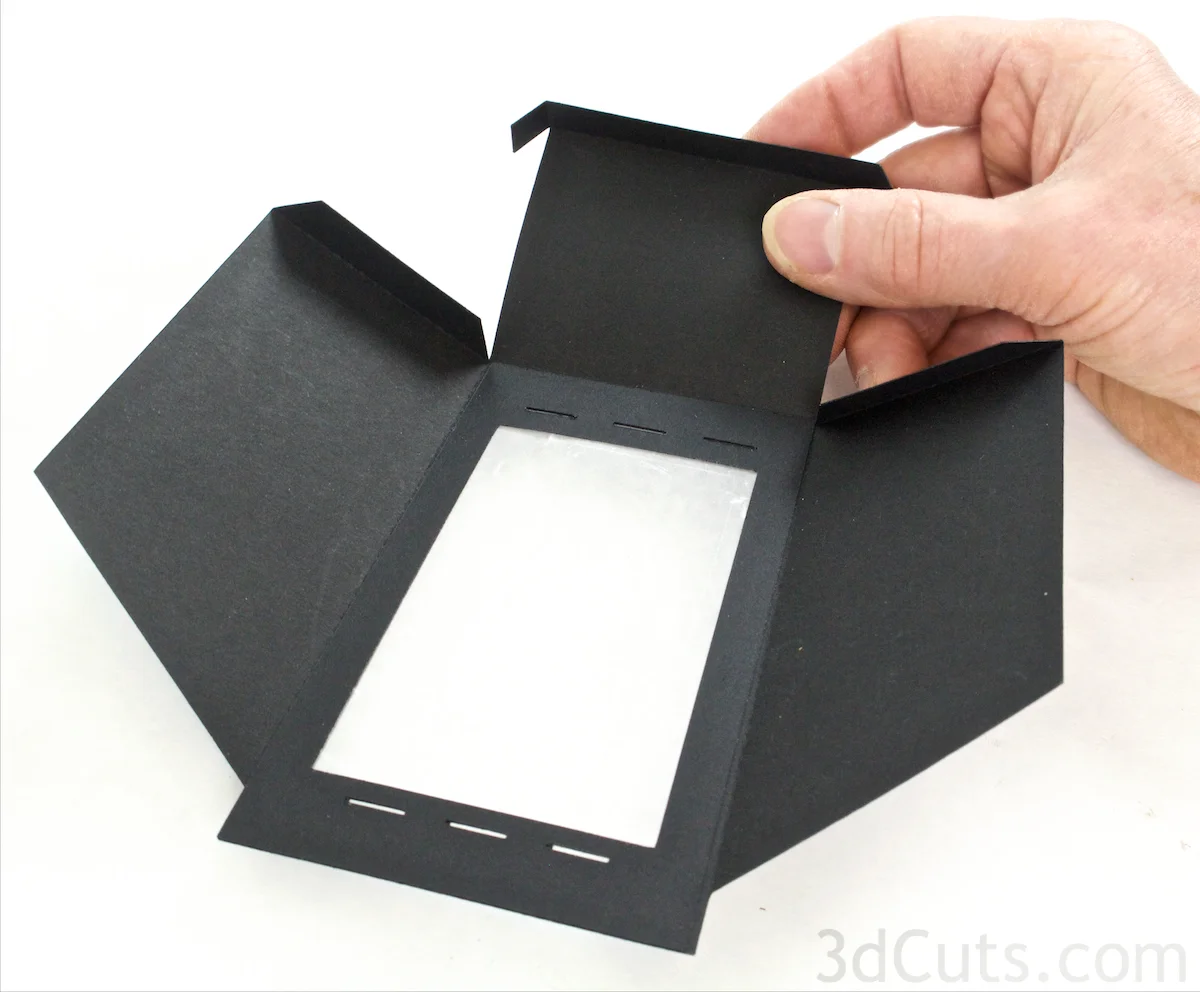
Fold all the dotted fold lines on the lantern front. All folds fold in the same direction except the hanging tab at the top. That folds in the opposite direction.
If using the single piece front (part 1) fold so the wax paper edges are inside.
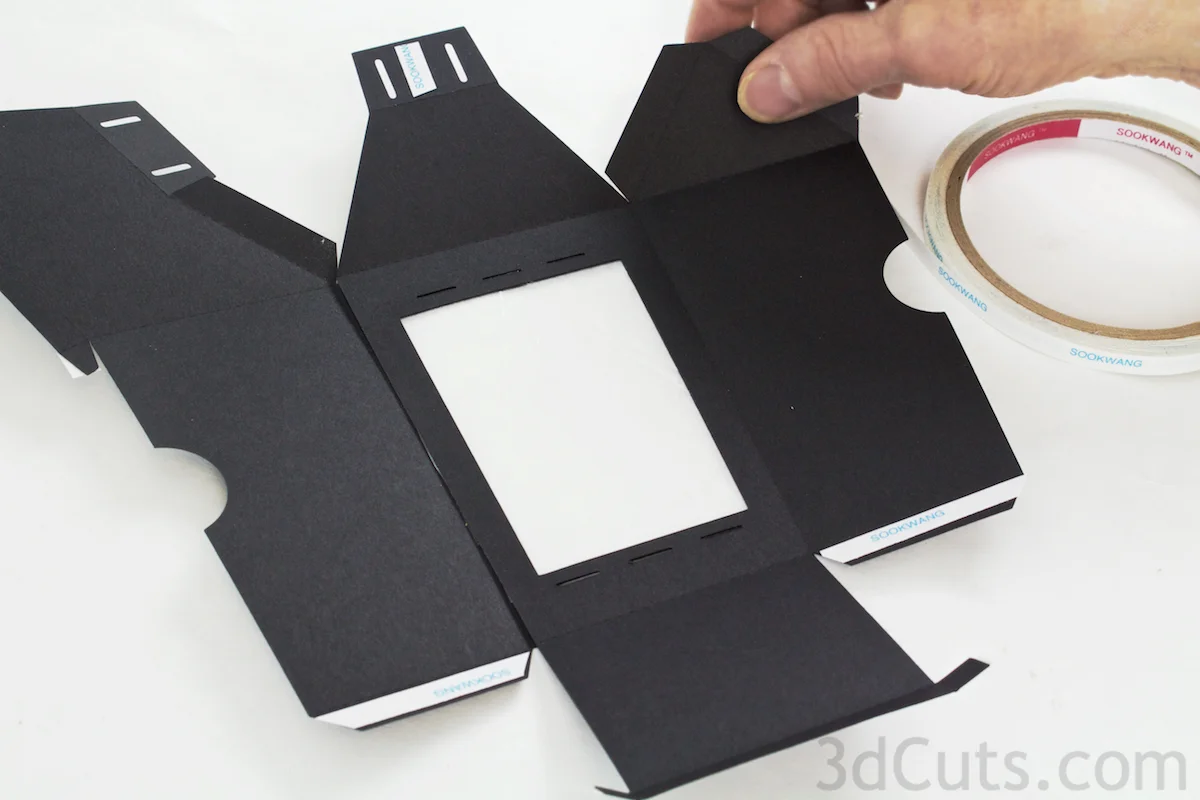
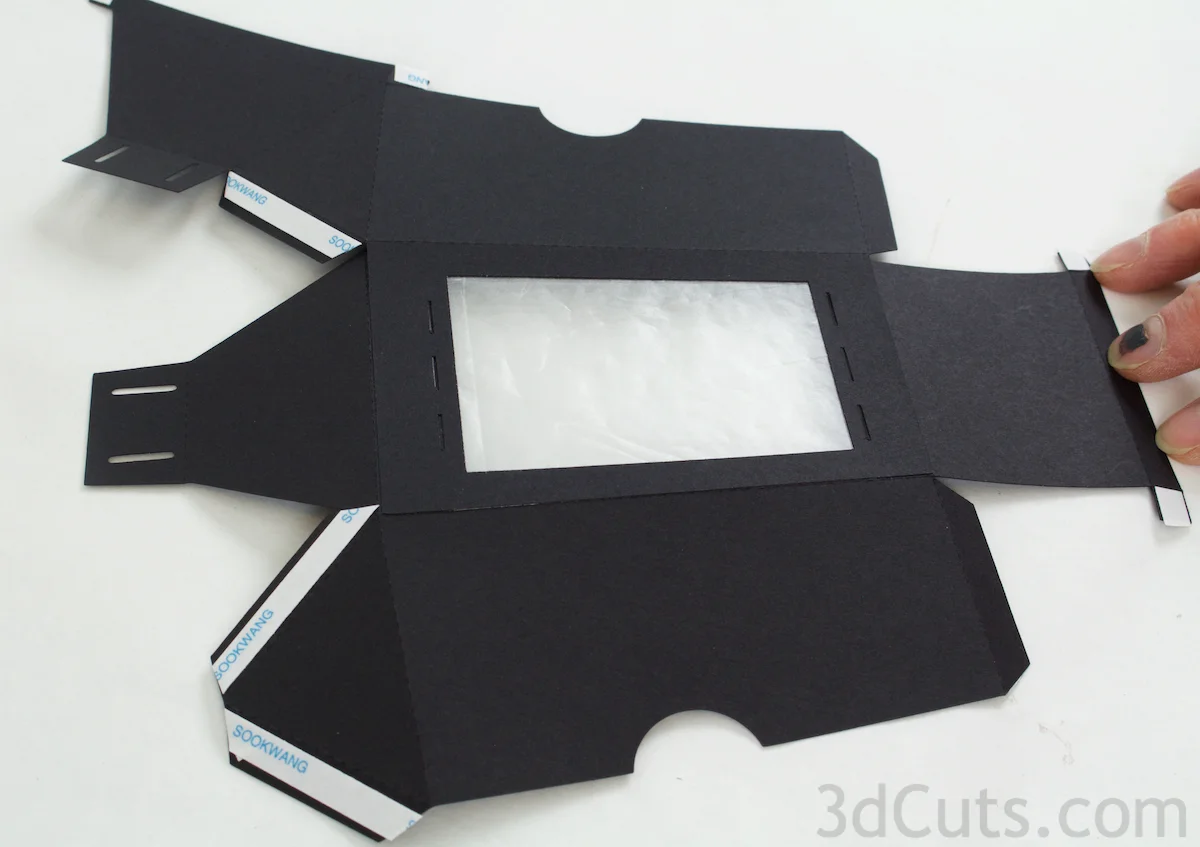
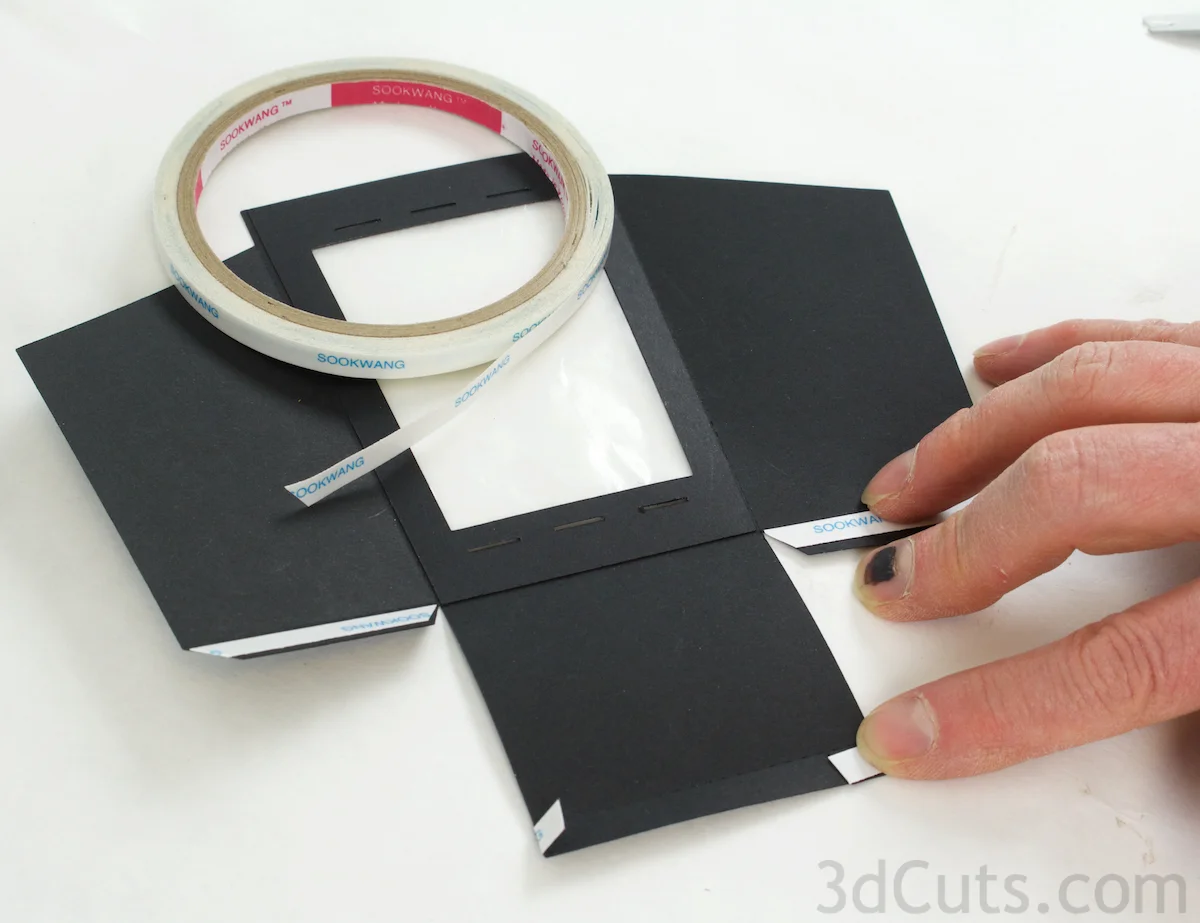
Apply Score-Tape to the tabs paying attention to correct sides.
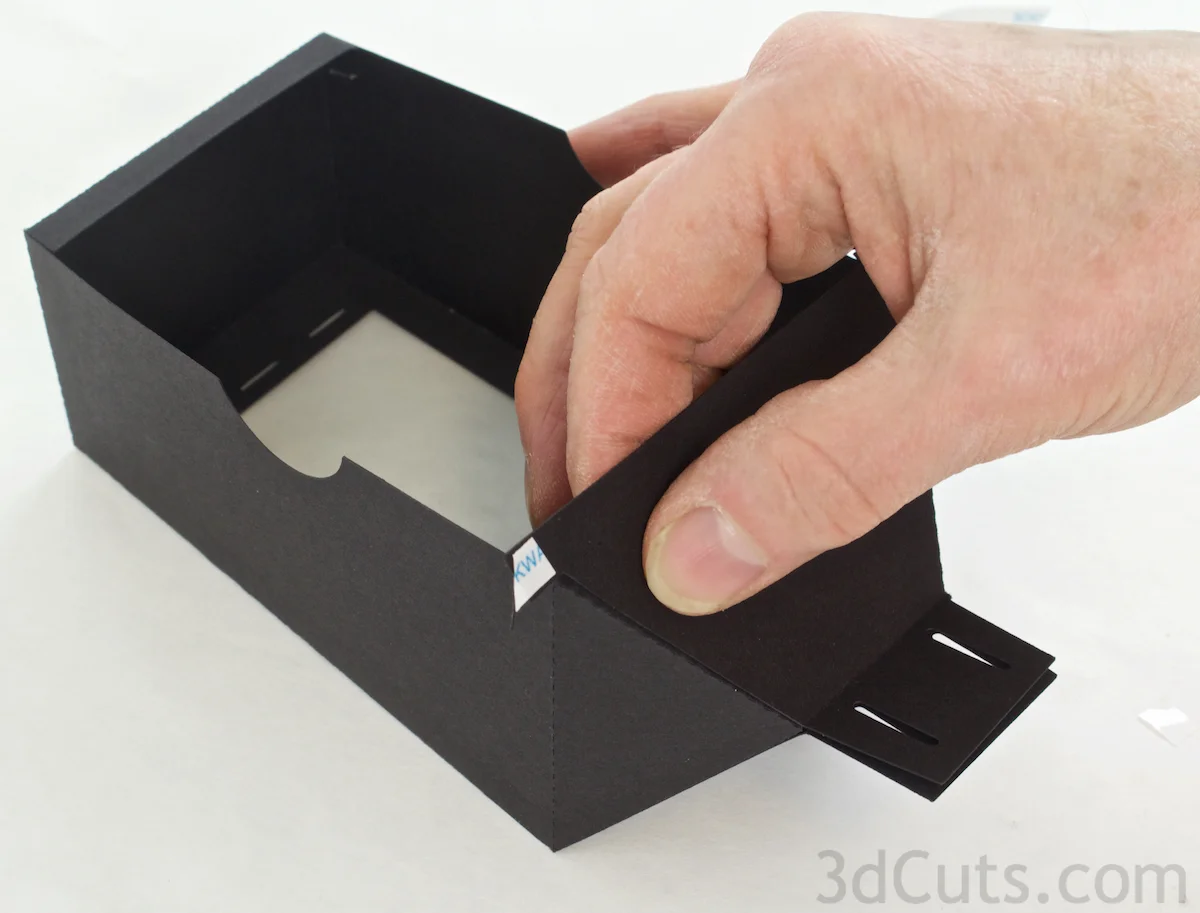
Start by applying strips to the inside of the tabs on the bottom of the sides as shown. Leave the backing tape in place.
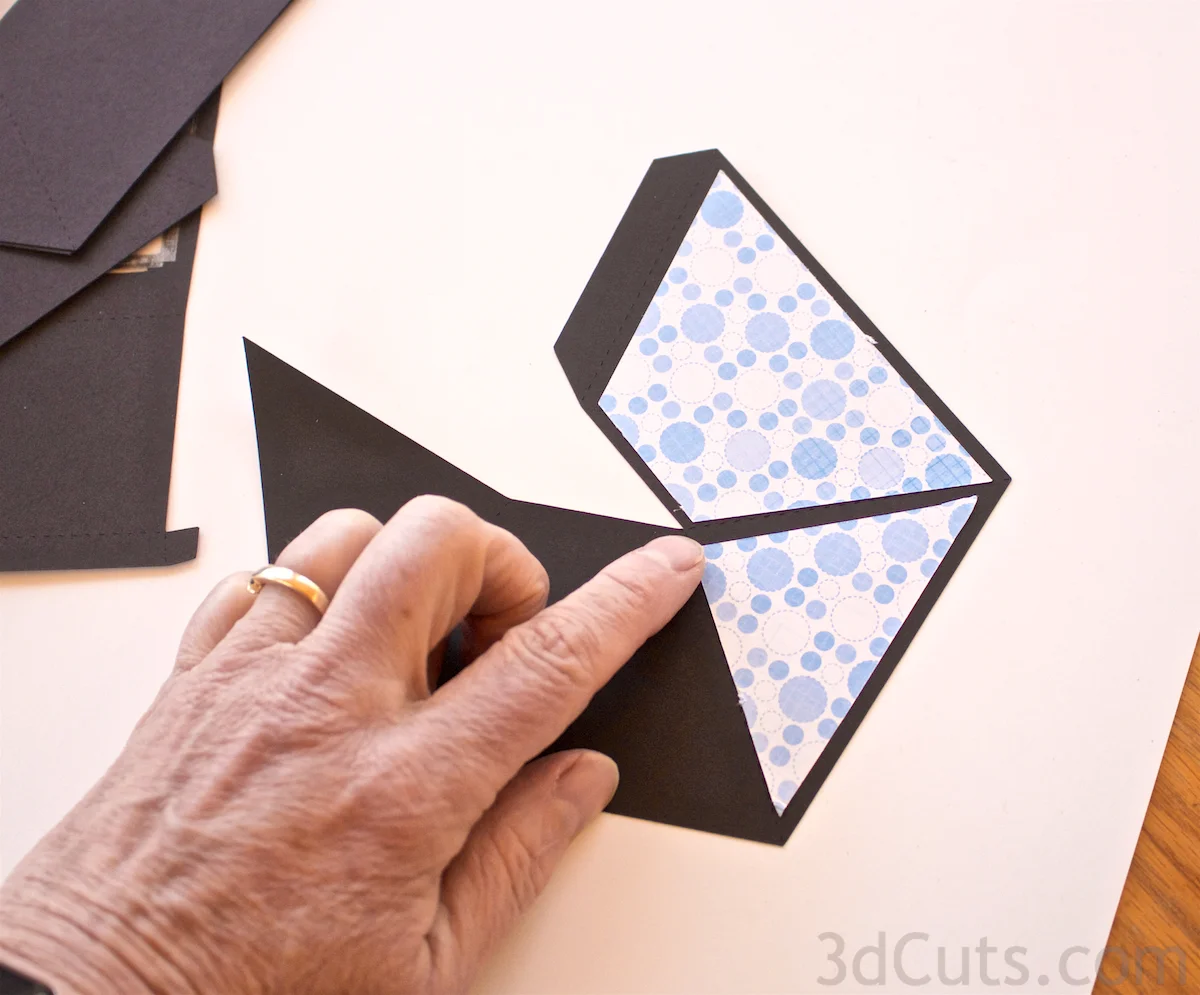
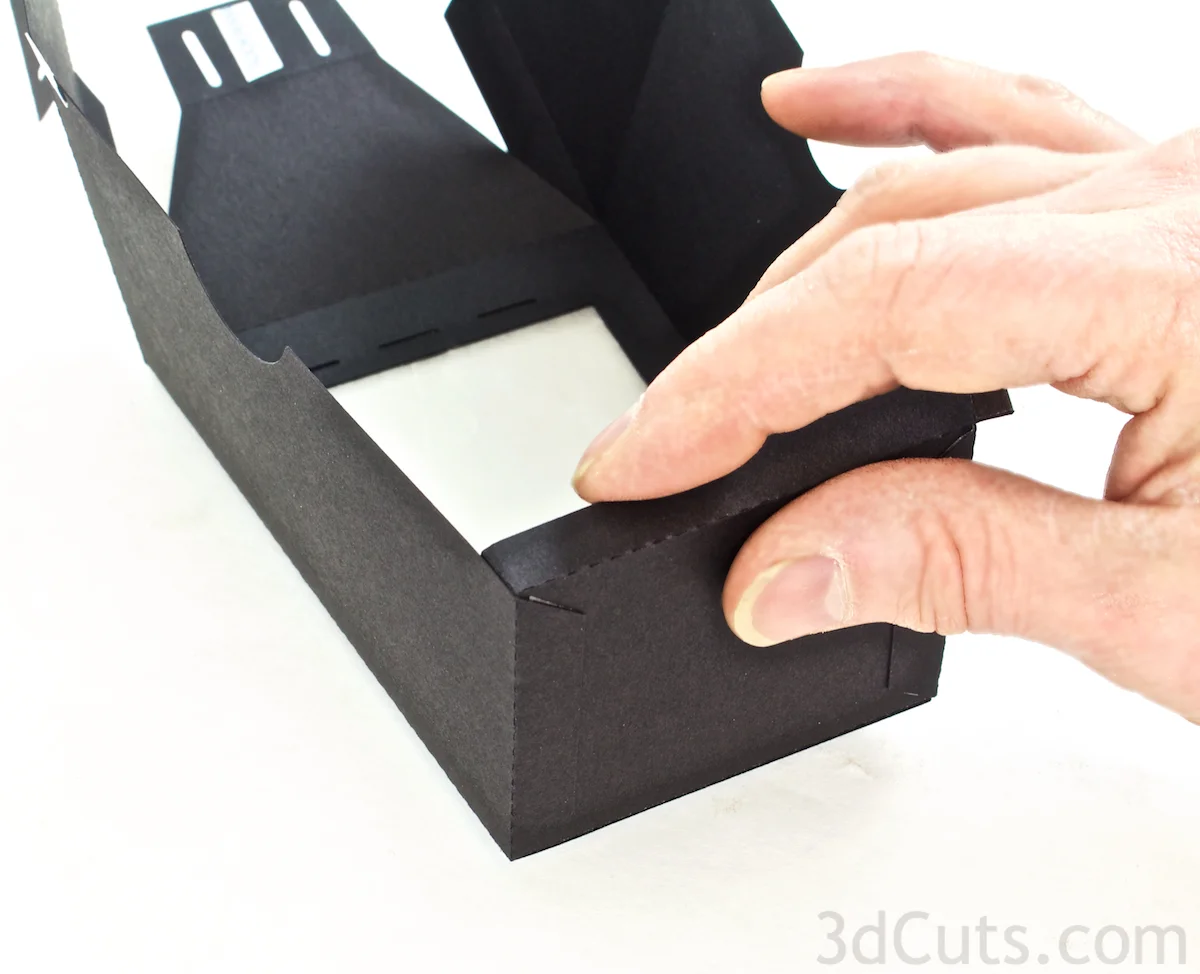
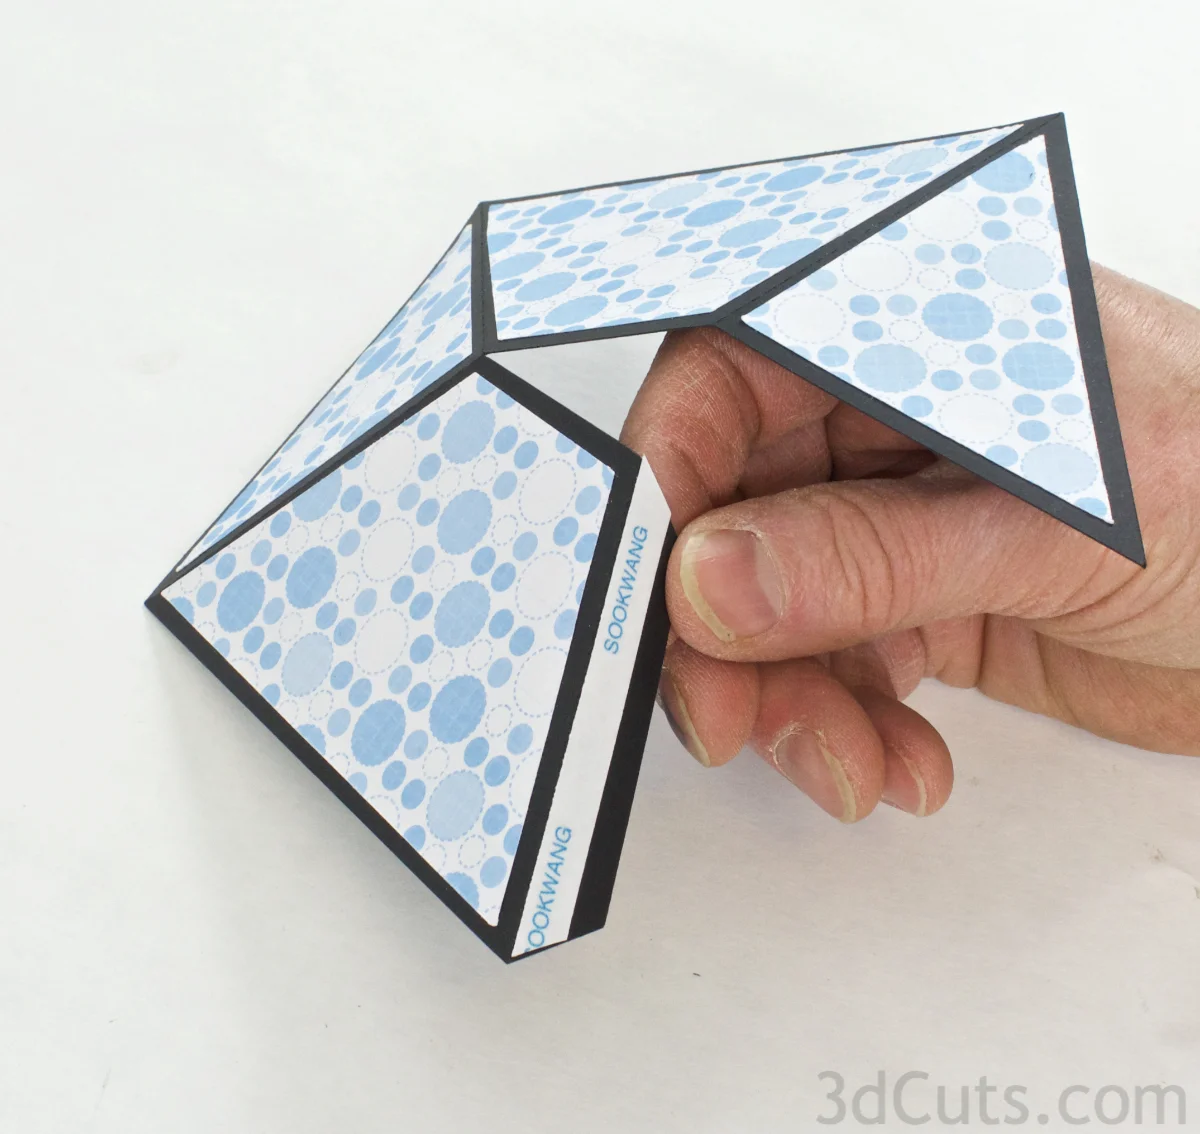
Flip the piece over and on the outside apply Score-Tape to the 3 angle tabs near the roof line and the four tiny tabs on the edge strips.
You can see two of these near my fingers. The other two are up in the top left and hard to see in the photo.
Make sure these are all on the opposite side of the two you applied in the previous step.
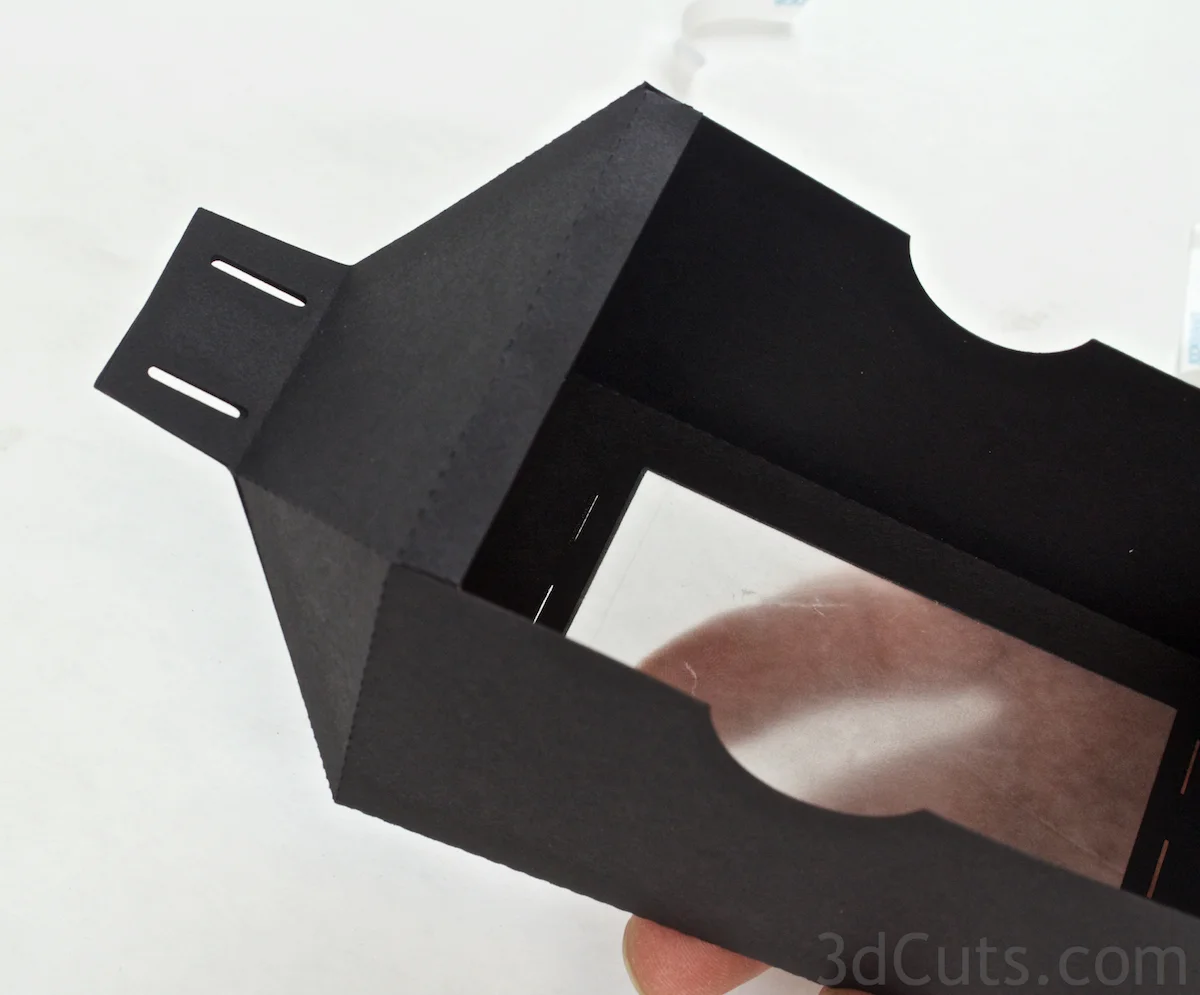
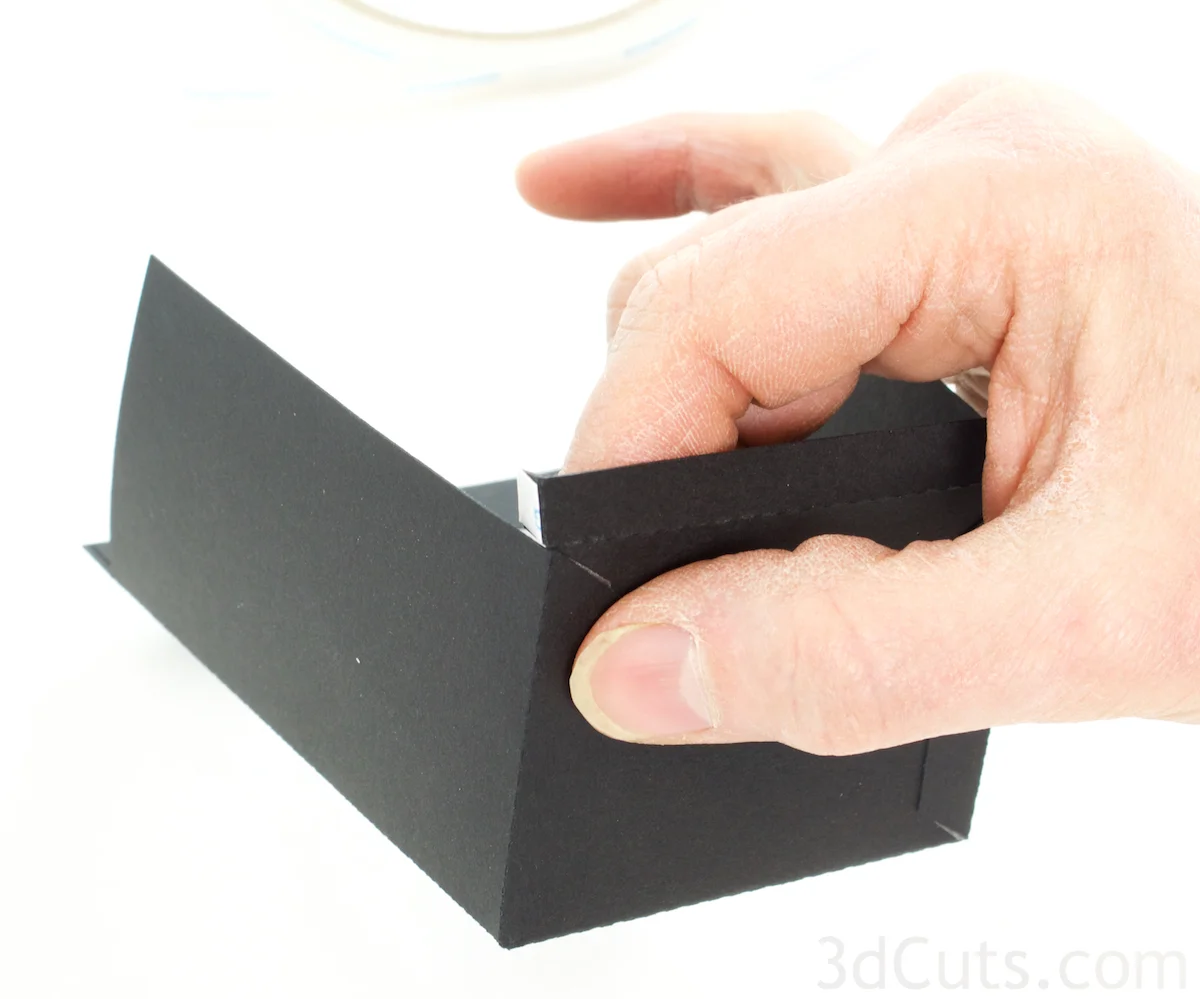
Fold the bottom up into place and wrap the two long side tabs around the bottom.
Peel the backing tape from the side tabs and press into place on the outside of the bottom.
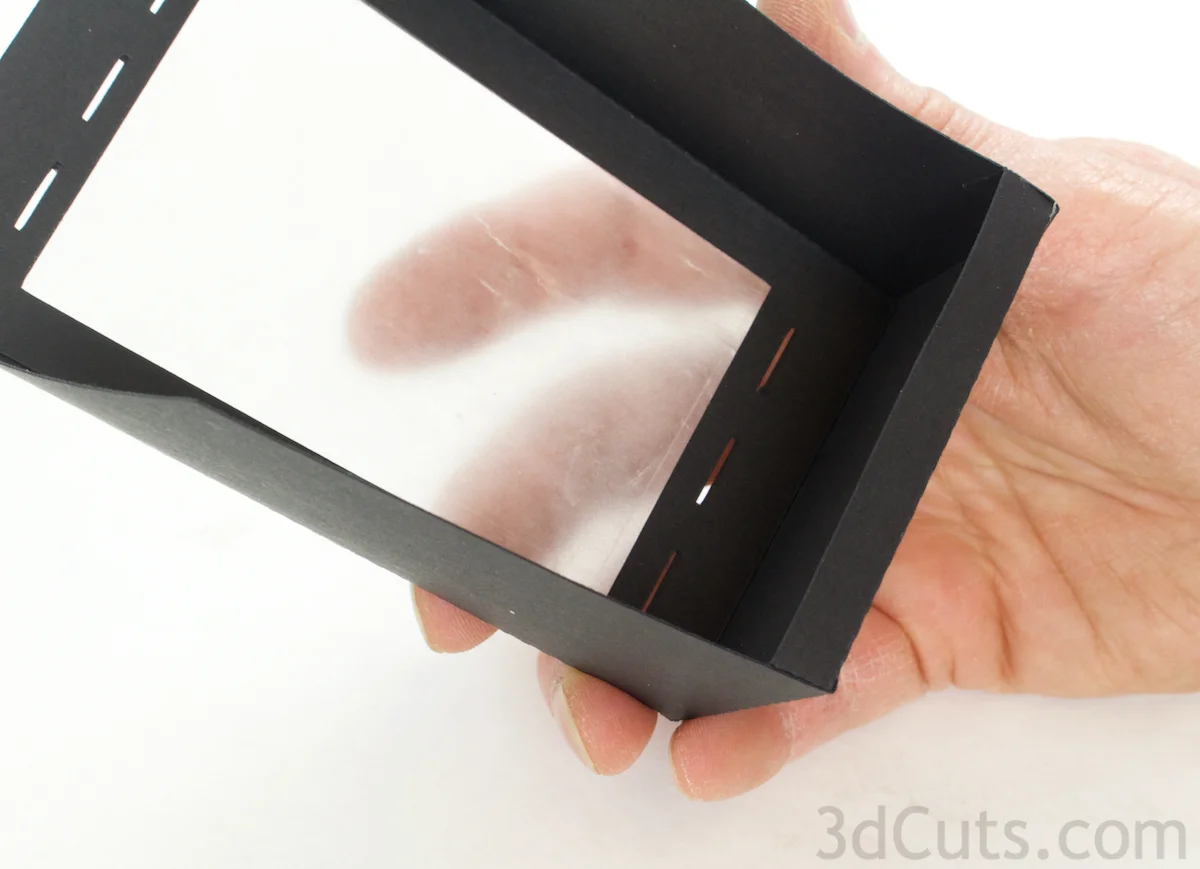
Peel the backing from the Score-Tape on the two little tabs and fold those inside the lantern and adhere them into place creating a lower lip to the rear opening.
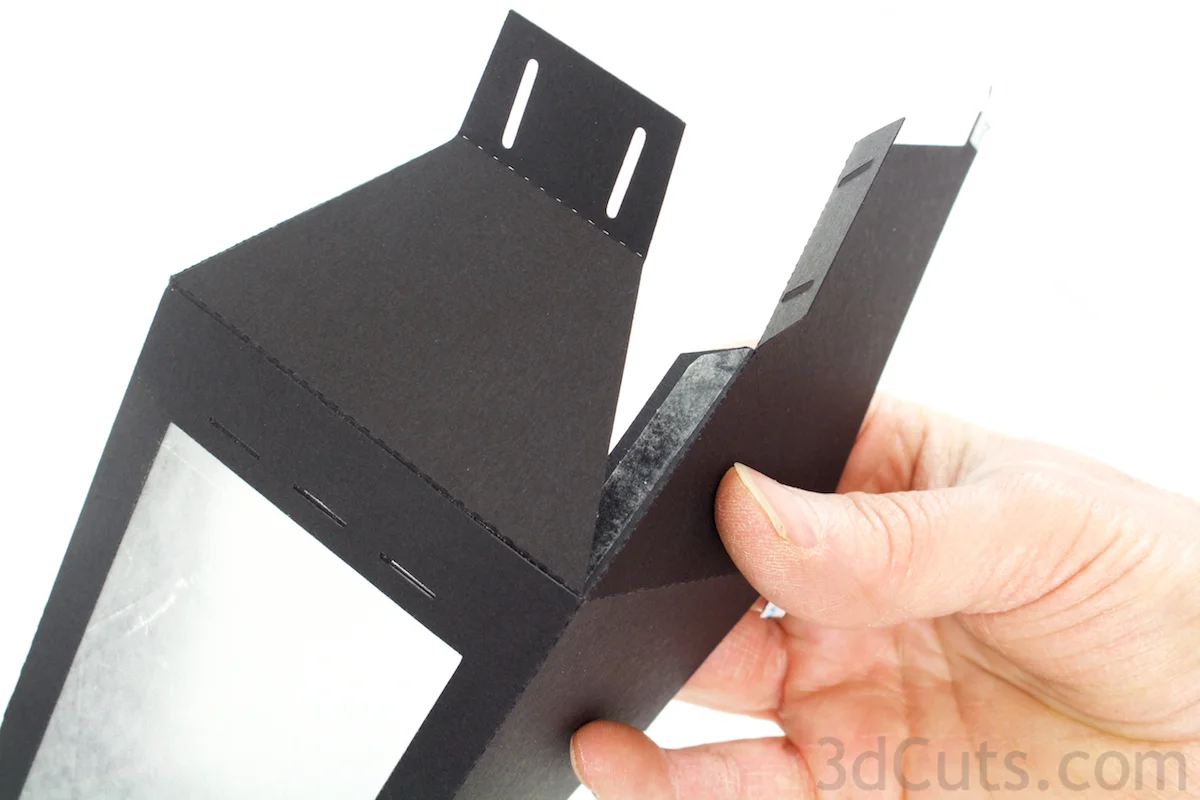
Peel the backing from the Score-Tape for the roof angles and adhere those in place. There are 3 edges to adhere.
There is a support lip along the top of the back opening just like on the bottom. Peel the backing tape from the remaining two tiny tabs, fold them inside and adhere in place to form the top lip.
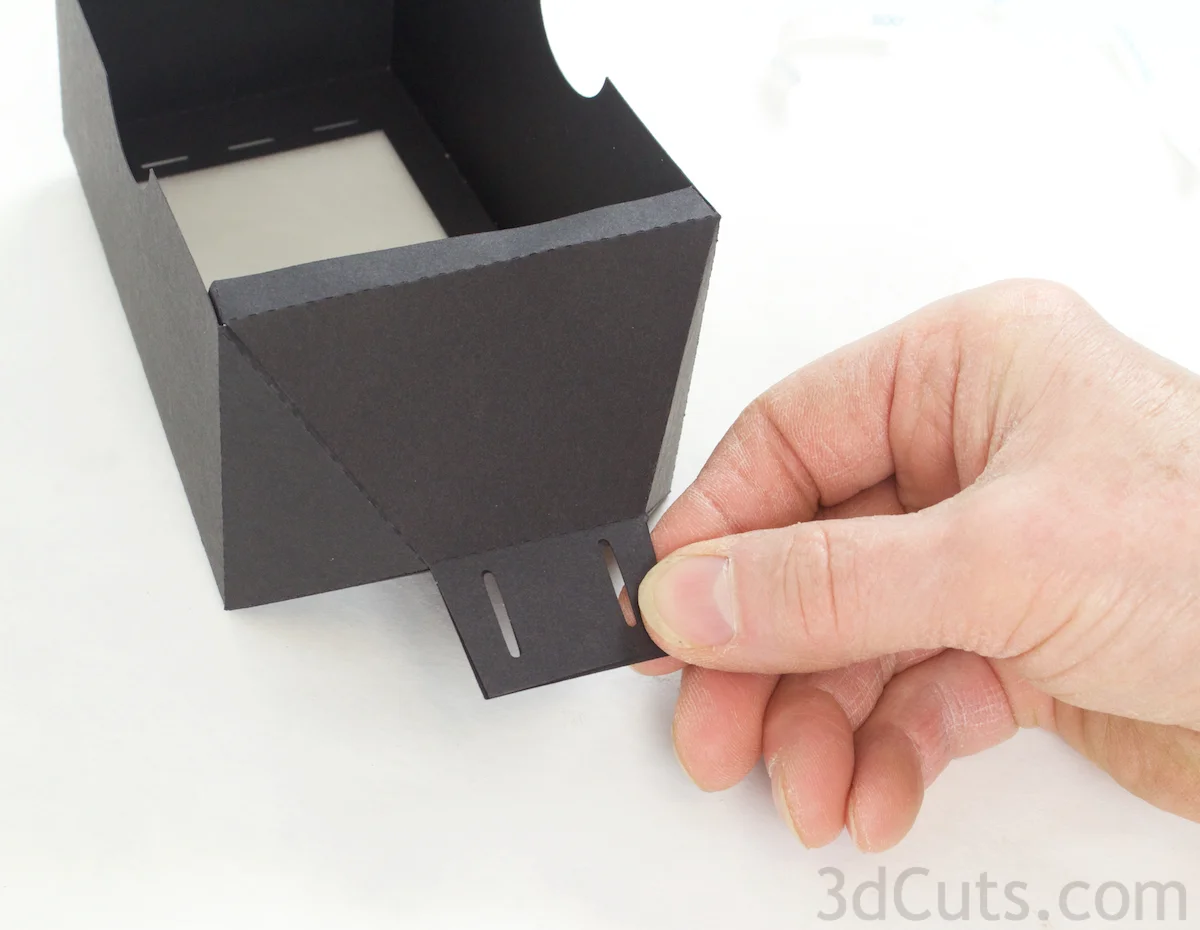
Apply a bit of adhesive between the two hanging tabs and glue those together being careful to keep the slots open.
9. Lantern back assembly.
Fold all the dotted folds lines on the lantern back (piece 4).
These all get folded in the same direction so that the wax paper and wax paper edge covers are inside the finished box.
Apply Score-tape to the insides of the two long tabs along the bottom of the side panels and to the OUTSIDE of the two tiny tabs near the support strip.
Fold the two longer side tabs around the bottom and press into place.
Peel the backing from the tiny side tabs, fold those inside the box, and press those into place forming the bottom lip.
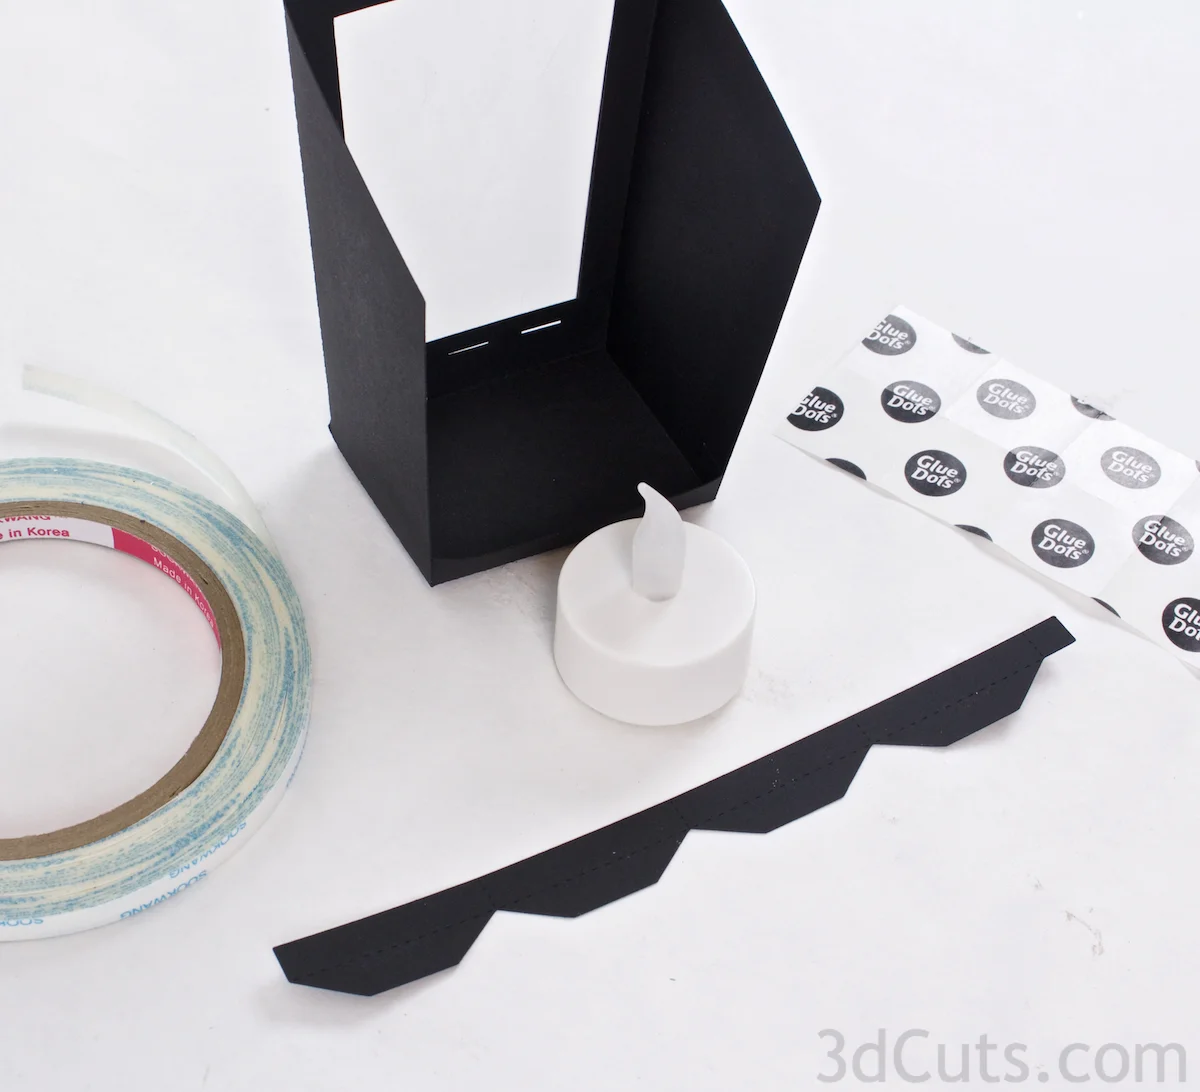
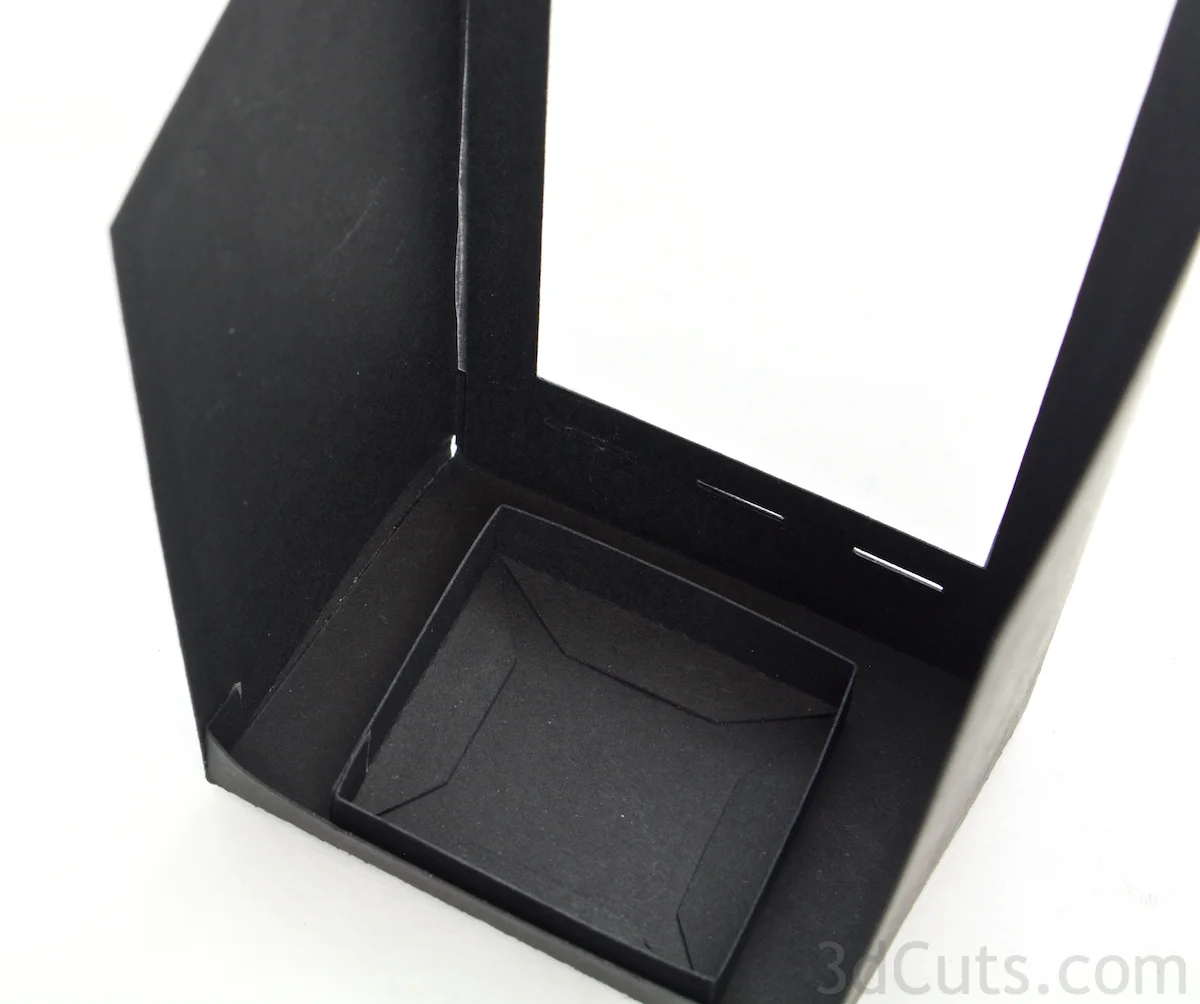
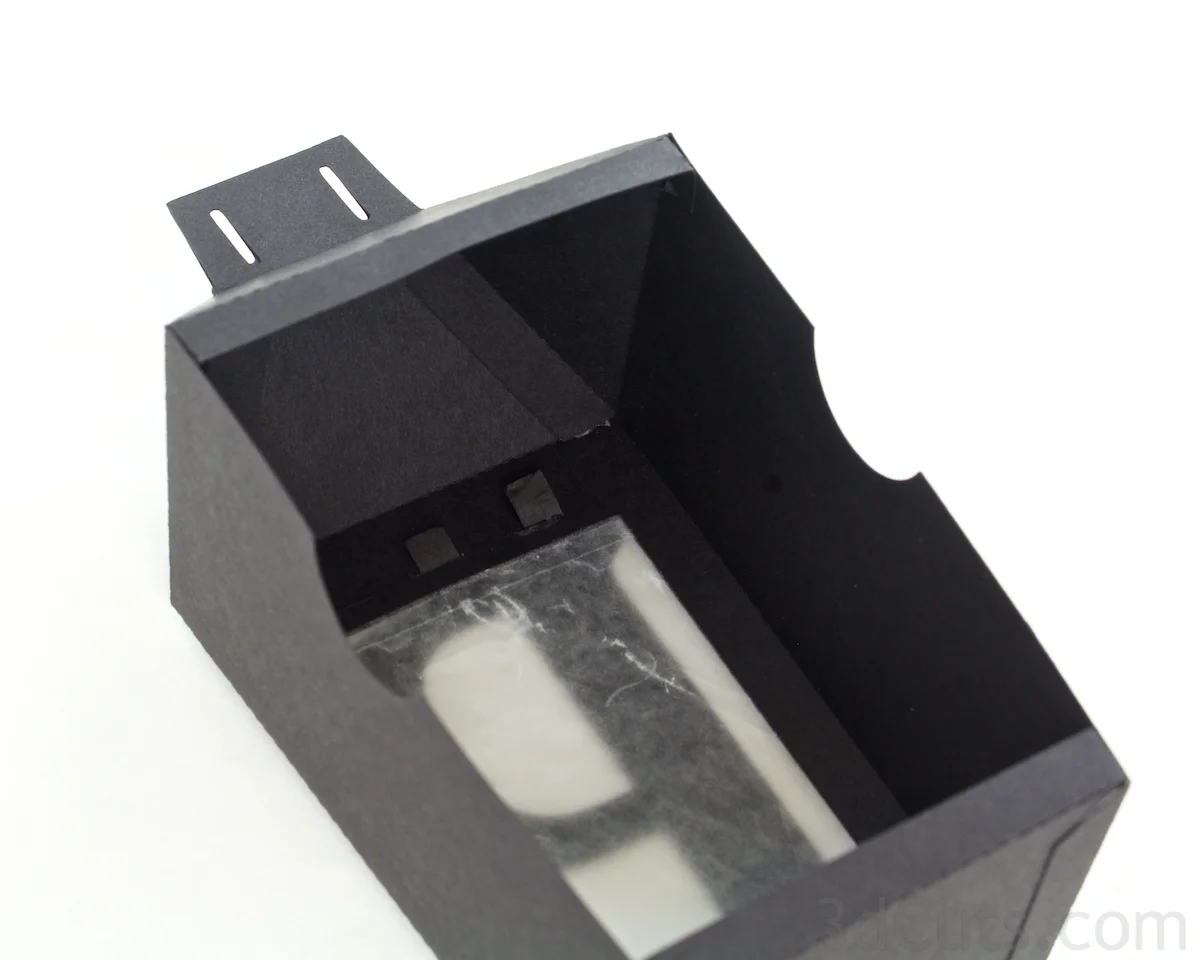
Add the tea light holder inside the lantern back piece.
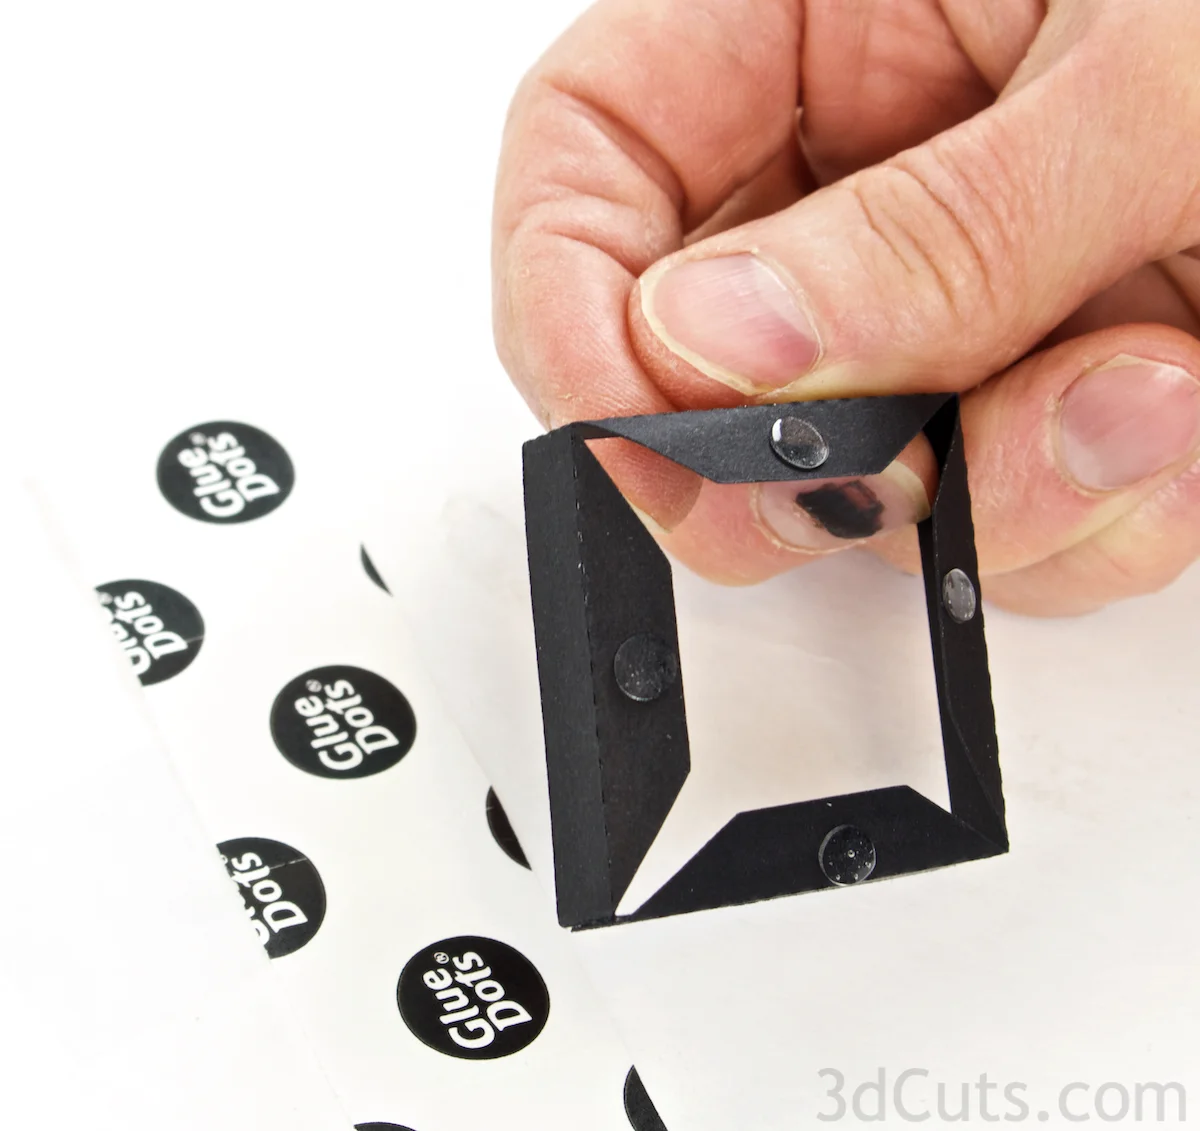
For this step take part # 5, Fold all the dotted fold lines in the same direction, attach the tiny end tab to the beginning to form a square.
Apply glue dots to the bottom of each tab, and adhere this square holder to the base of the lantern back. It should be positioned closer to the open side than the wax paper side to allow for easier access when installing letters in the little slots.
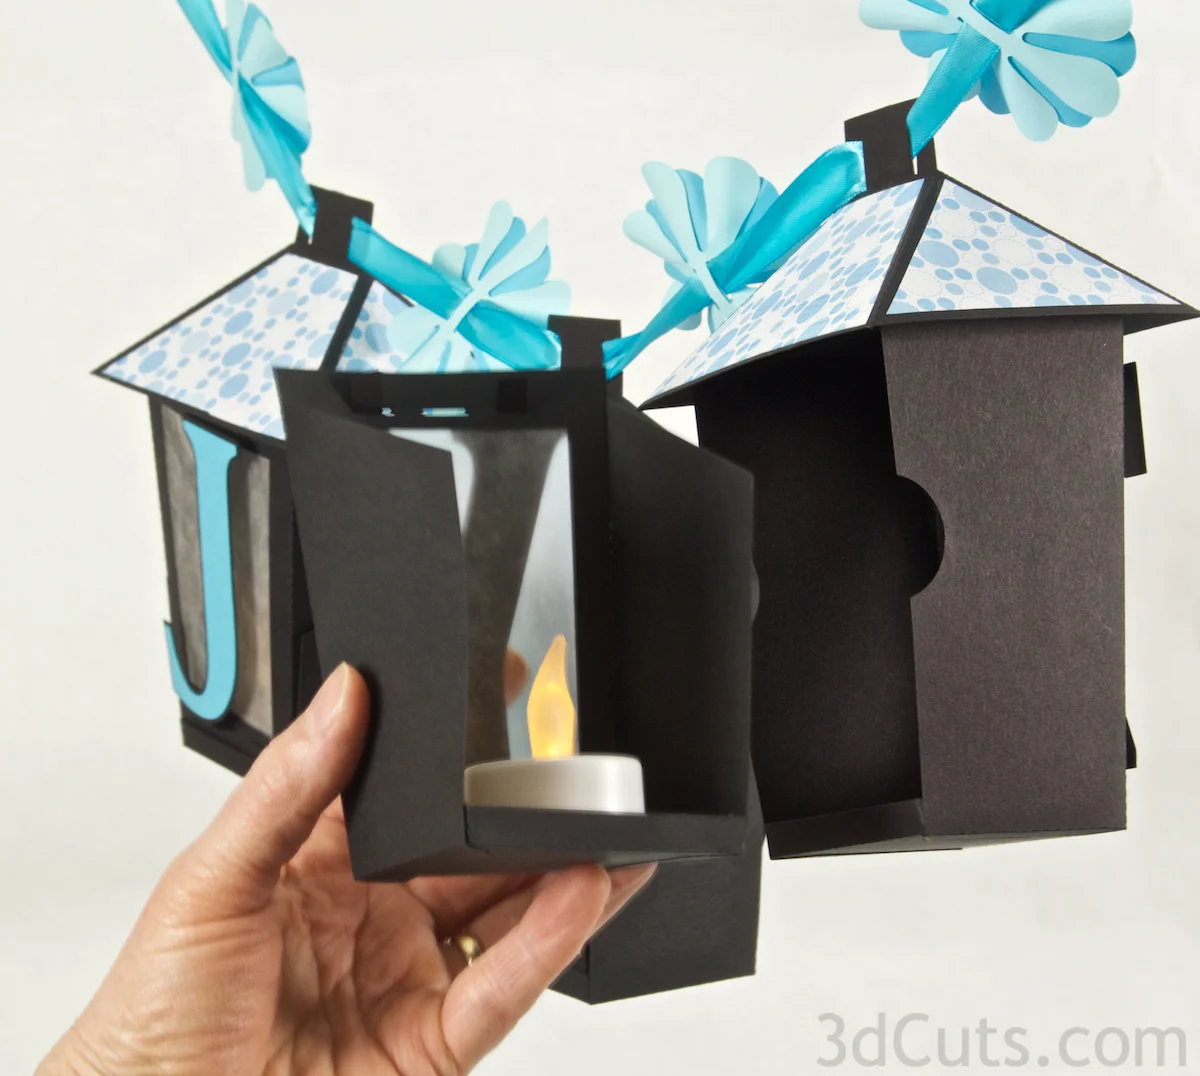
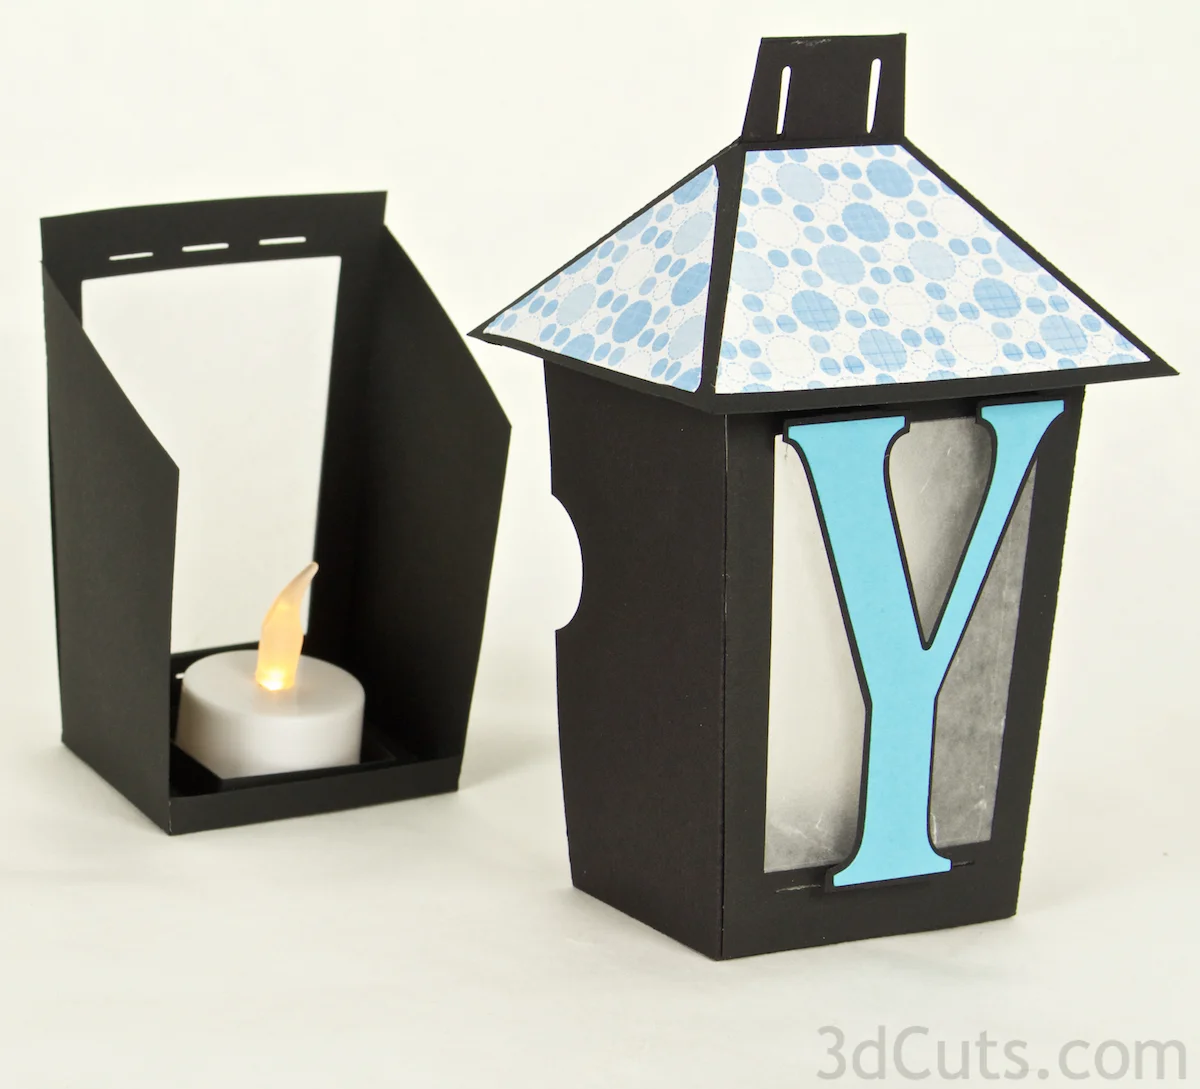
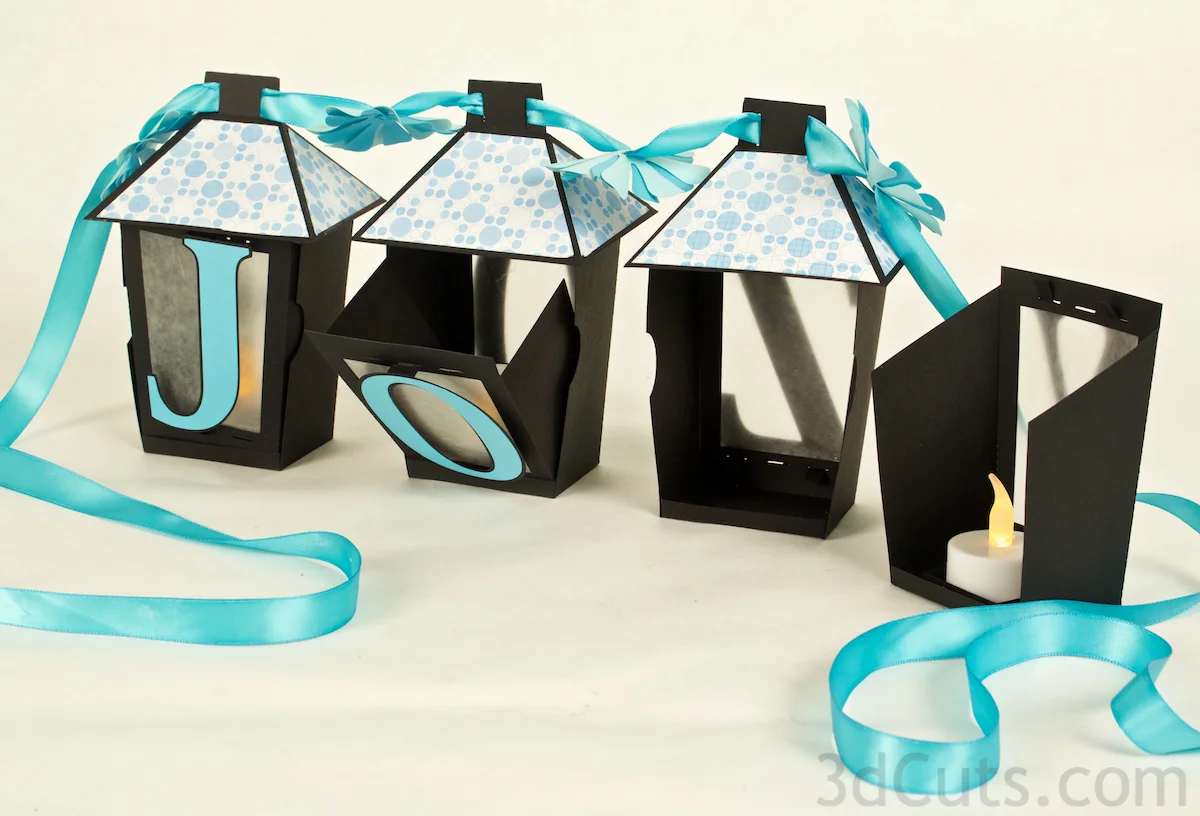
The finished lantern back gets inserted into the back opening in the lantern front.
Insert the bottom first placing it behind the bottom lip.
Rotate the back into the space.
The top edge of the back rests up against the top lip of the back of the front.
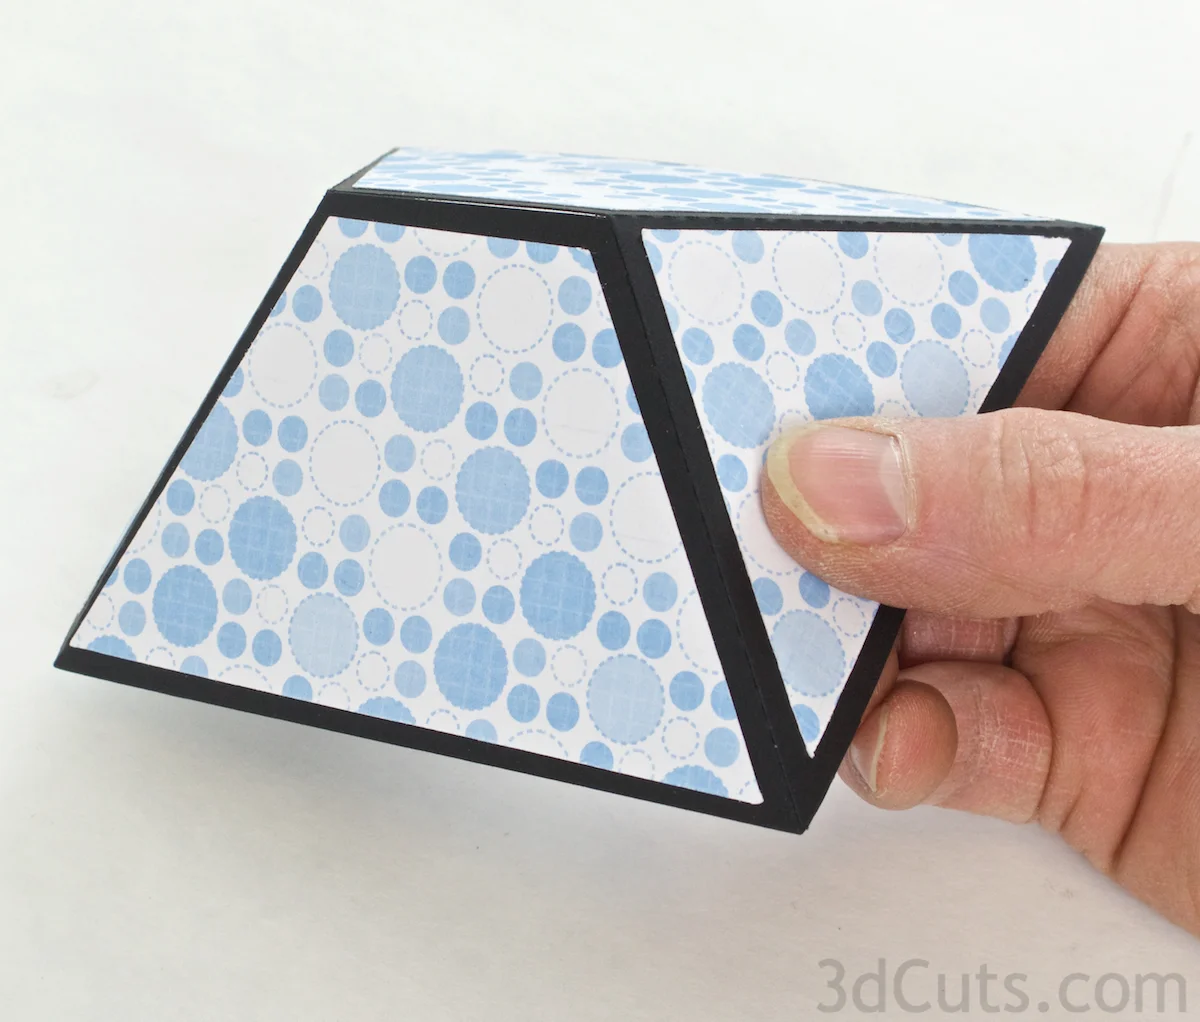
10. Complete lantern roof.
Fold along all dotted lines on the lantern top.
Add Score-Tape adhesive to the end tab.
Peel the backing and glue the tab inside the opposite trangle creating the lantern roof.
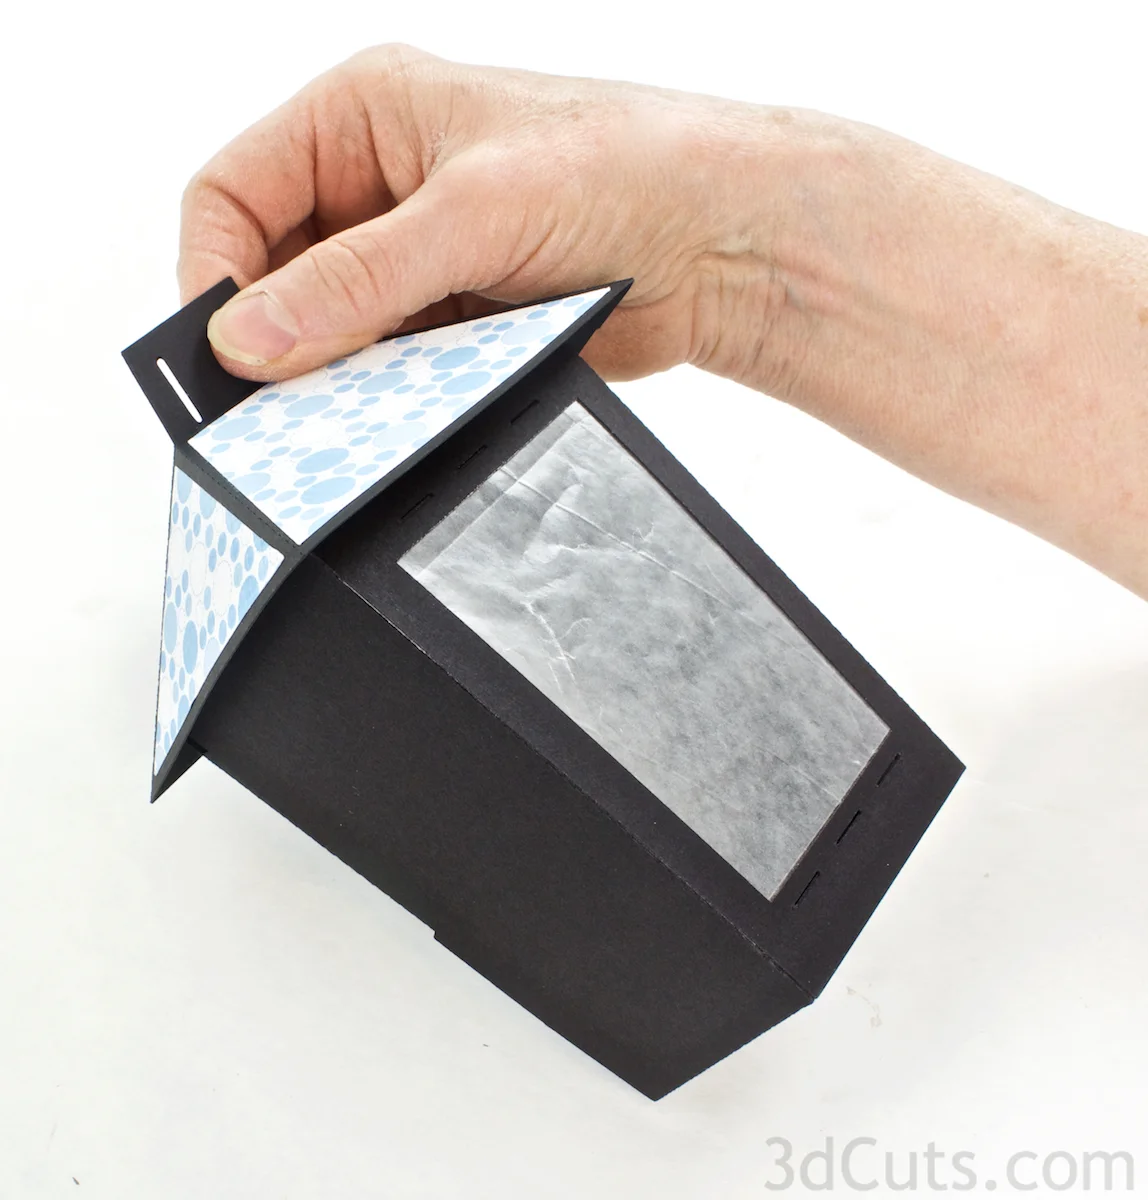
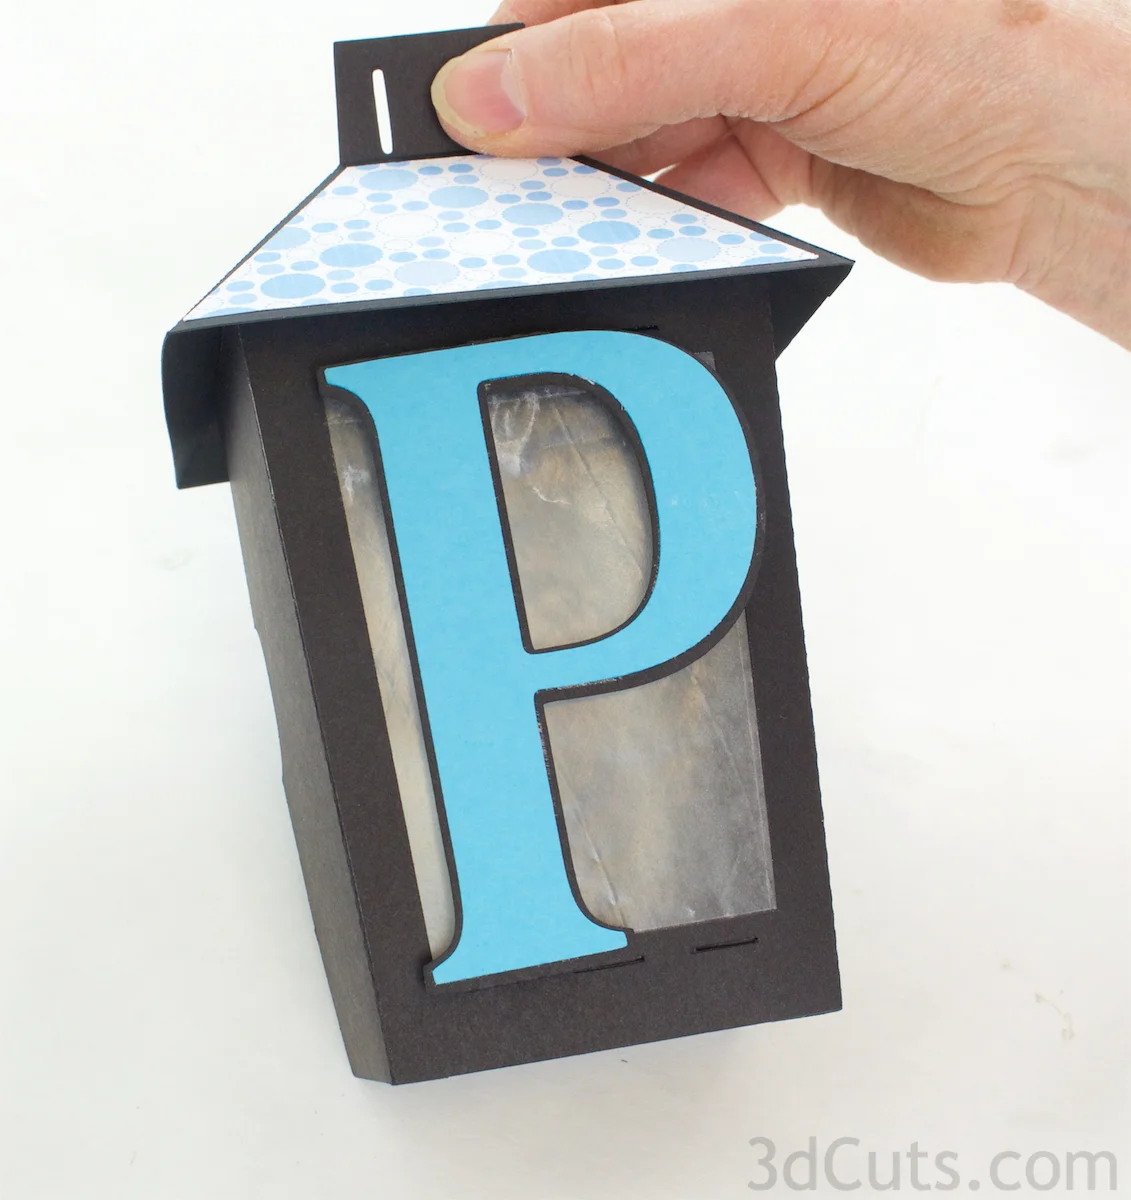
Slide the lantern roof over the hanging tab on the lantern.
DO NOT glue the roof on top. It should be able to slide up and down. When it is in the down position, it will help hold the lantern back in place. By sliding it up a little, it makes it easier for the lantern back to flip out to allow for access to the LED tea light.
Also, you will be able to swap tops if you want to change color schemes with your lantern letters.
11. Add letters.
What name or phase are you spelling with your banner? You will need one lantern for every letter.
Is your banner going to be hanging where both sides can be seen? If so you will want letters for both sides.
The letters can be installed permanently or they can be installed in a temporary fashion so that you may change them and create different banners. The letters are quick and easy to make, so add to the alphabet for different celebrations.
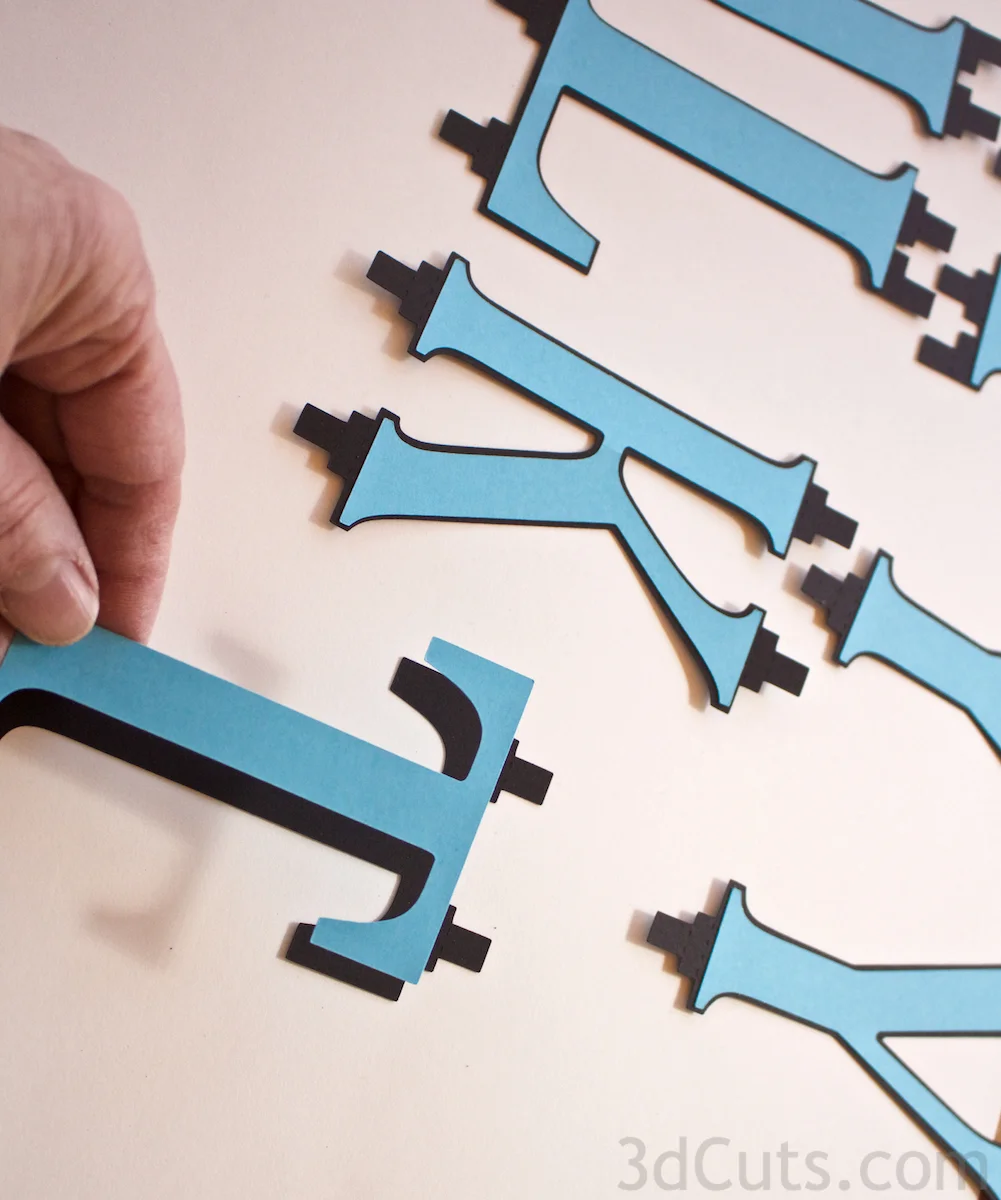
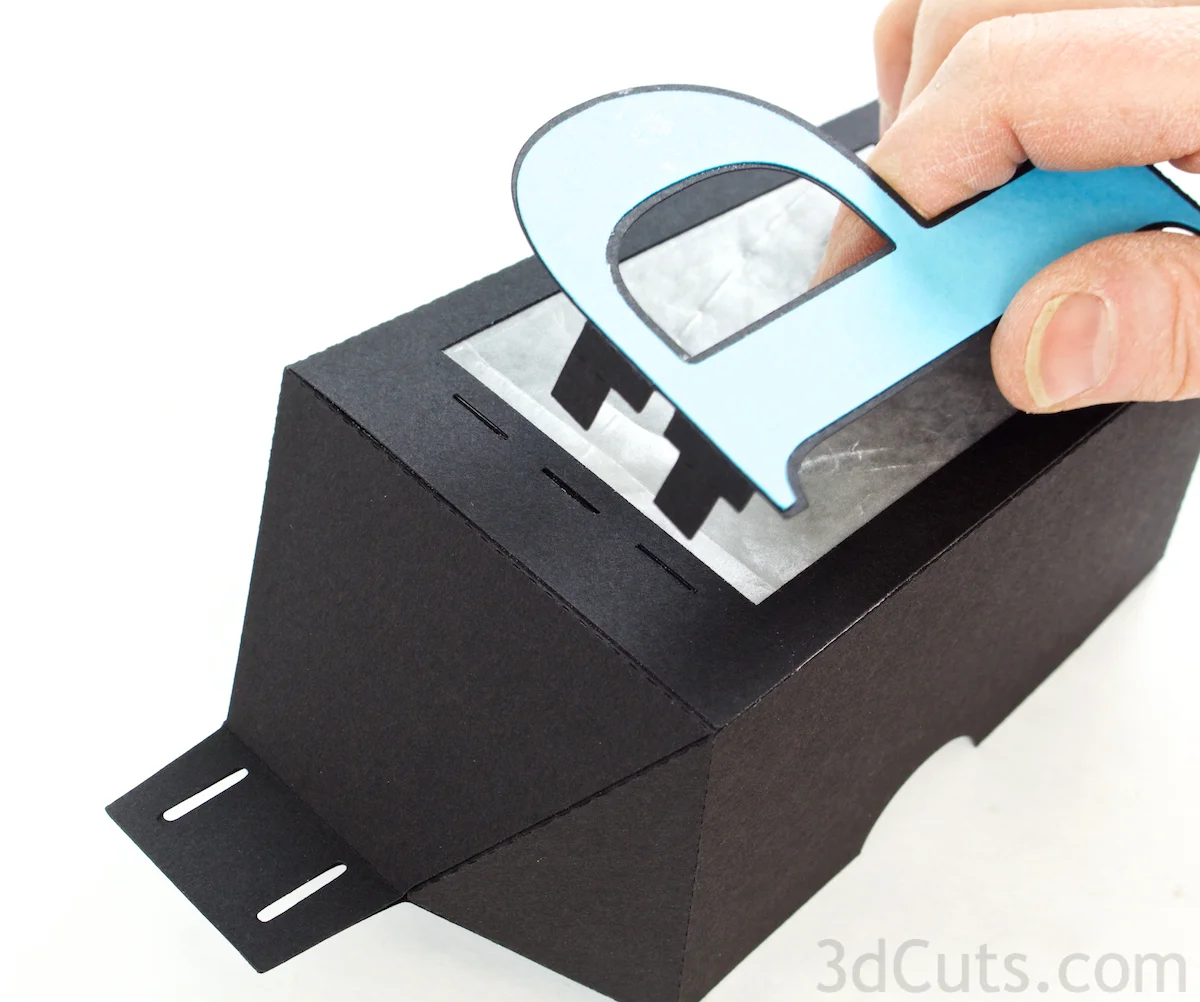
Each letter has a unique set of tabs. Some have 2, others 3 and others 4. Fold the tabs back along the dotted fold lines.
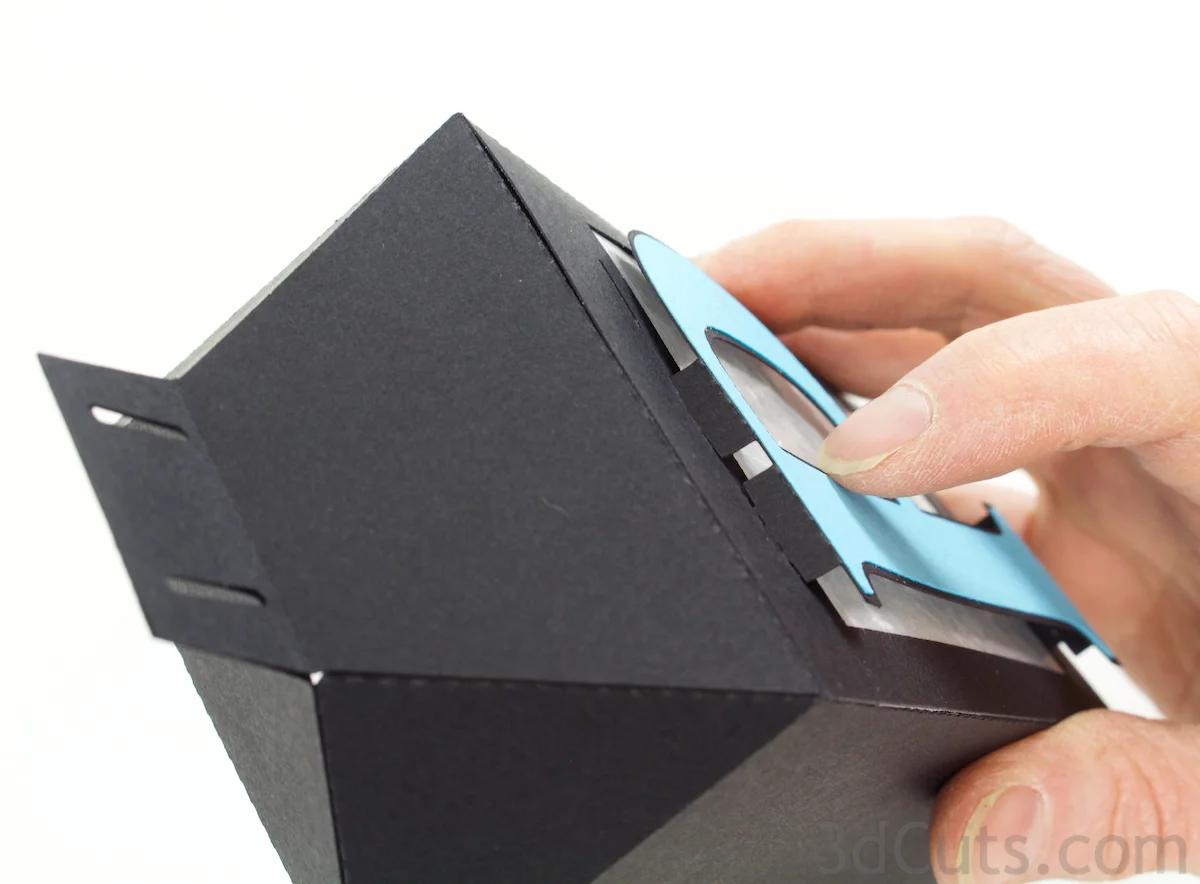
The tabs get slid into corresponding slots on the lantern. the slots you use will depend on the letter and tab pattern. The goal is to center the letter.
Only the skinny portion of the tab gets inserted. The wide portion of the tab provides a spacer from the lantern. When complete the letter is raised off the wax paper by about 1/8".
This is to allow the light to shine out and around the letter.
The tabs have an additional fold line so you can easily fold the tabs up (for the top tabs) and down (for the bottom tabs) on the inside of the lantern.
If you are going to be changing the letters and reusing the lanterns then use removable scotch tape to tape the tabs in place.
If you are going to leave the banner together then use permanent scotch tape or glue dots to hold the tabs in place.
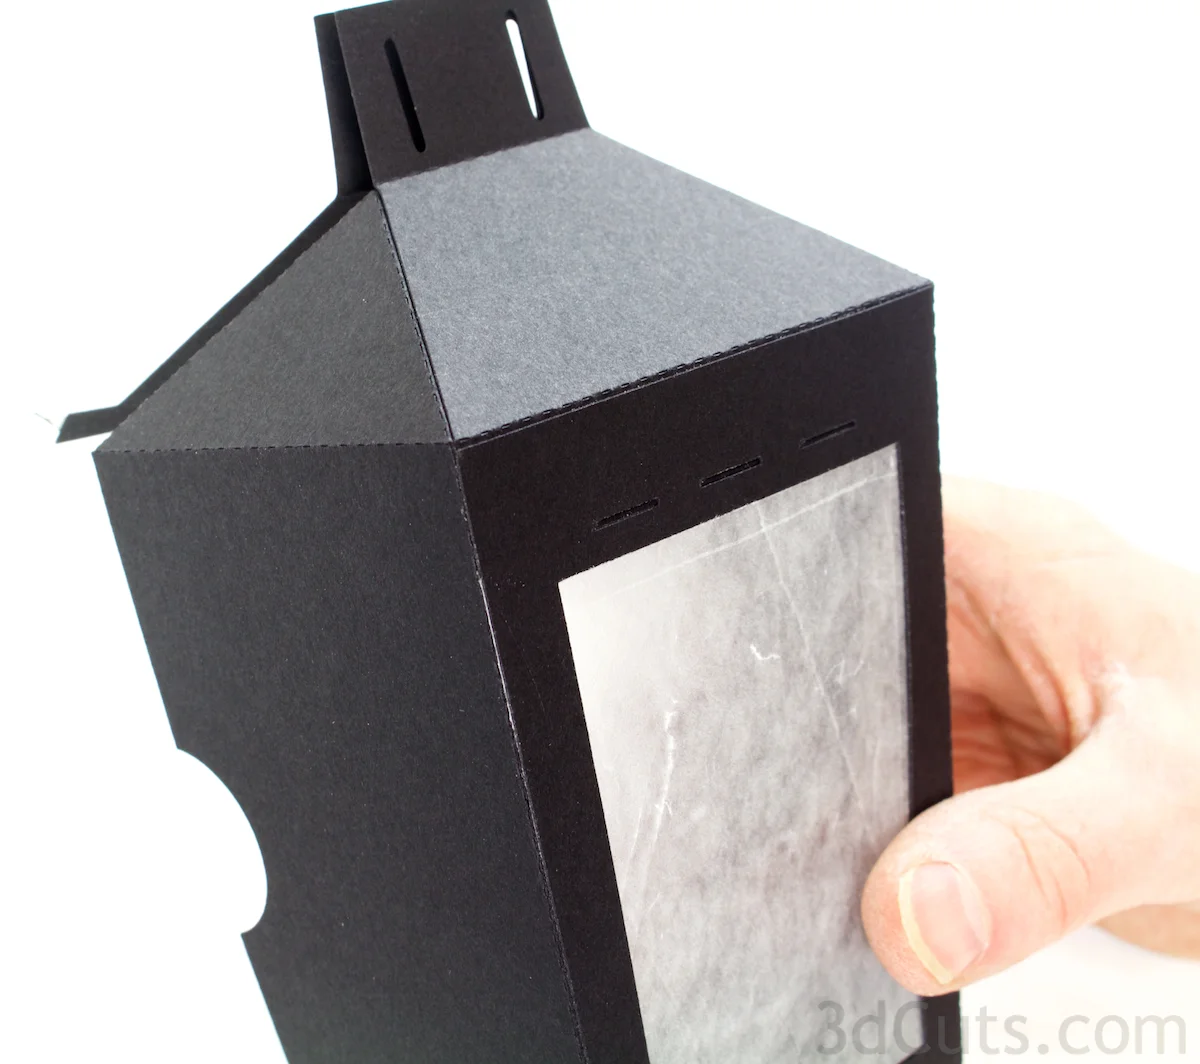
Here is the completed lantern. How many will you need?
The back flips out and a lit LED tea light can be positioned inside to make the lantern glow. DO NOT use real tea lights!
12. Add embellishments and hang.
The file comes with a flower embellishment. Simply cut it in two colors, roll the petals to give dimension, glue them together matching the center slots and use them as part of the banner.
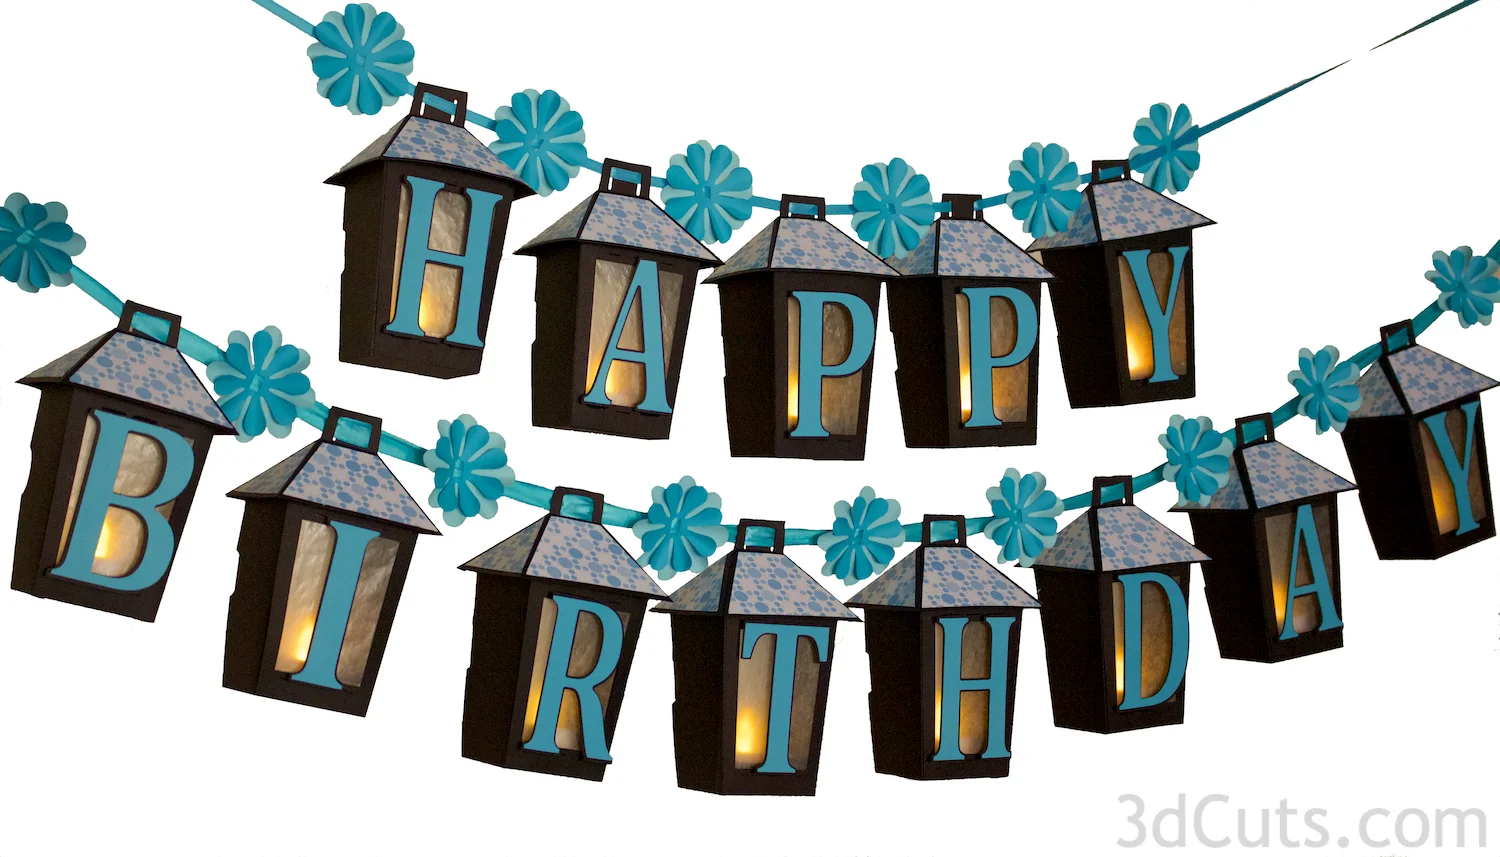
I used satin ribbon to thread the banner and I alternated flower, lantern, flower. Switch the embellishment to reflect the celebration. Use other files like umbrellas or baby carriages to include in your banner depending on the occassion.
For longer phrases like Happy Birthday, I used two ribbons and split the words.
I hope you had fun crafting this paper banner and that you have a wonderful time at your celebration.
Share images of your completed banner on Pinterest and in Facebook.
Send me images of your completed banner. I love to share photos of creative ways people have assembled or modified my files.

