
Zig-Zag Village (Quick Version) Tutorial

Project Description
Scroll down for link to video tutorial.
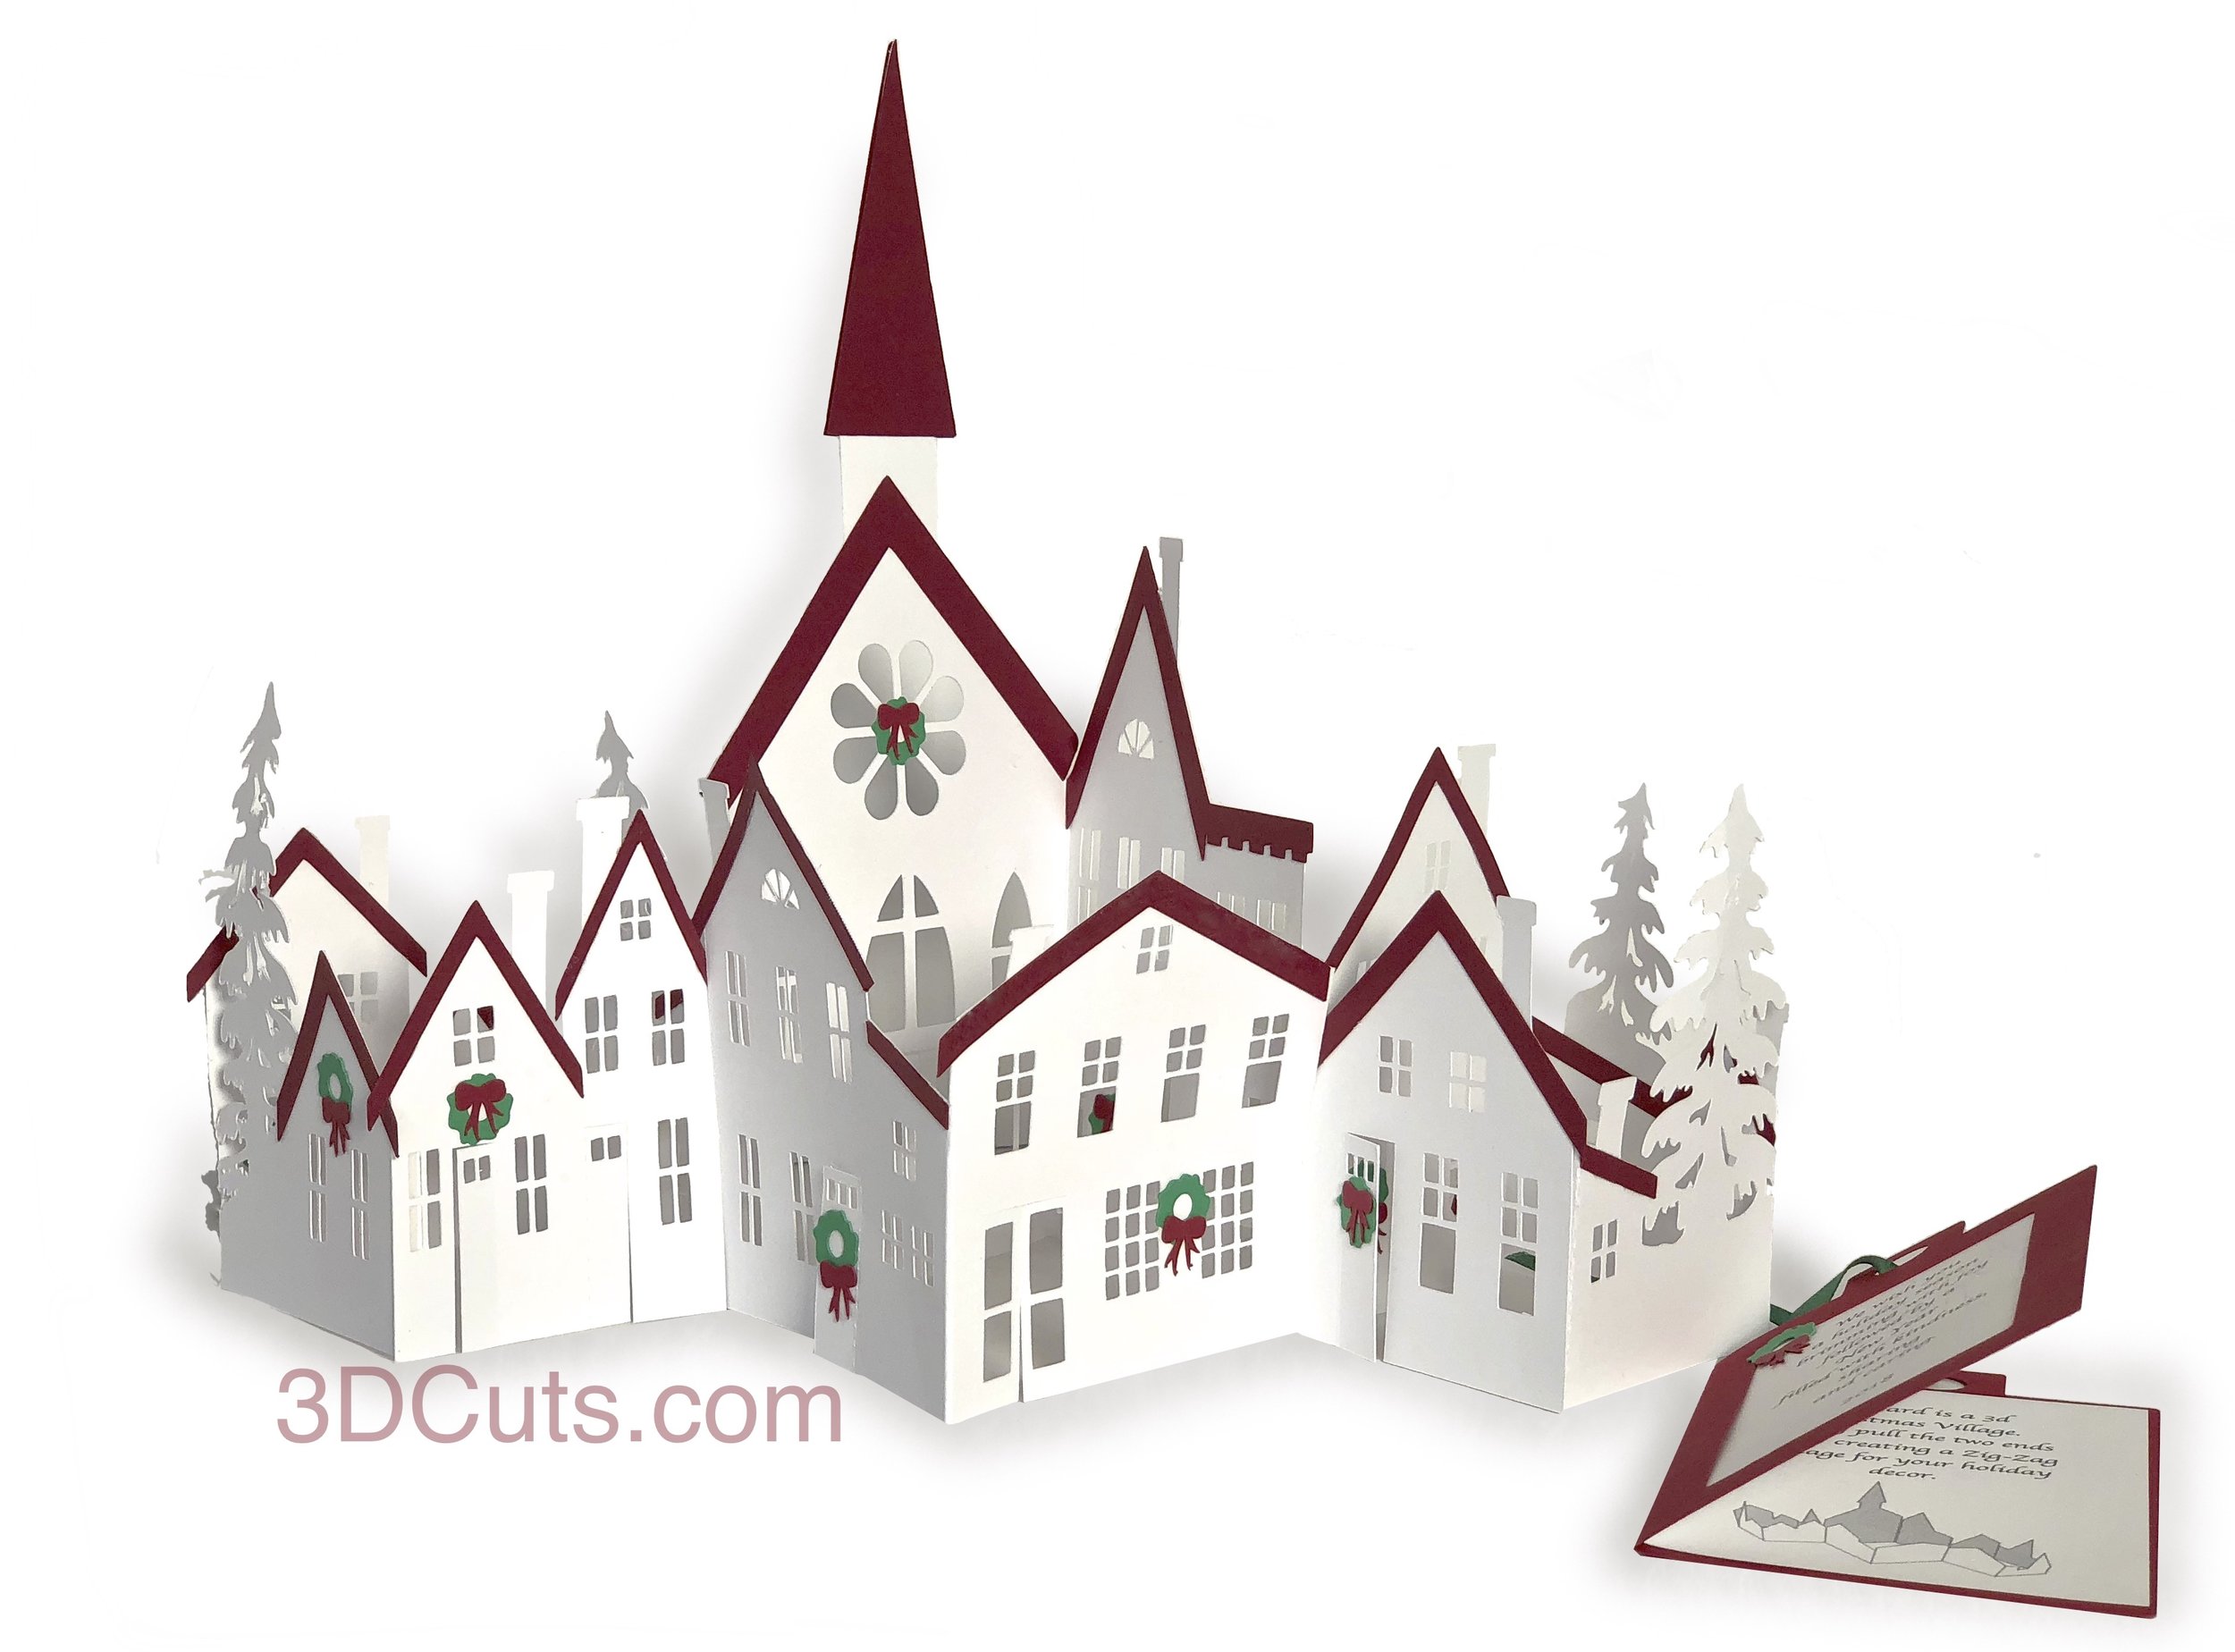
This tutorial is for the assembly of Zig Zag Village(quick version) by 3Dcuts.com. Zig Zag village is a charming collection of buildings that can be lit with either tea lights, fairy lights or window light. But the surprising element of this village is that it easily folds flat for either storage or mailing. There are multiple versions and this is the tutorial for the Quick version. This versions comes without all the details. It still creates a wonderful project but in less time. I recommend this version if you are planning to make many. It is about 11" wide x 8" tall but can be quickly folded zig zag style to fit in a standard 6" x 9" booklet envelope. It comes complete with files for tiny wreaths to convert to a Christmas Village. Also included are bases for building in fairy lights as an option.
The assembly is easy basic 3d construction, although organization of all the tiny parts can be a challenge. Hints are provided below.

Supplies Needed:
Cutting File available at http://3dcuts.com/zig-zag-village from 3dcuts.com
8.5 x 11" card stock for buildings - I use Neenah Exact Index Card Stock 110 lbs from Amazon
8.5 " x 11" card stock in red and green for wreaths and the color of your choice for roofs - I used the 65lb Cardstock from Recollections available at Michael's.
Adhesive - 1/4" Scor-Tape
Art Glitter Glue
Optional lighting - tea lights or fairy lights
Major Parts Sizes:
Church row - 10.0736" w x 7.7097" h
Store row - 10.0656" w x 3.625" h
Left end - 4.9264" w x 3.8083" h
Right end - 4.9958" w x 3.4417" h
Roof Details grouped - 5.7625" w x 10.5319" h
Links to supplies on Amazon:
Many but not all of the supplies I use come from Amazon. Here are affiliate links to those supplies.
Order from Amazon: Neenah Exact Index Card Stock 110lbs. 250 sheets (Affiliate Link)
Order from Amazon: Art Glitter Glue with metal tip (Affiliate Link)
Order from Amazon: Xyron Sticker Maker XRN150x 1.5 inch(Affiliate Link)
Order from Amazon: 12 LED flickering Tea Lights(Affiliate Link)
Order from Amazon: 6 Pack of 20 Micro LED Fairy Lights in Warm White (Affiliate Link)
Order from Amazon: Premium Silhouette Blade (Affiliate Link)
Steps for completing the Zig Zag Village (Quick Version):
Special Note: I update the instructions online. Check at http://3dcuts.com/zig-zag-village-quick-version-tutorial for adjustments and additional information. Don't just rely on the pdf file that comes with the download. Learned hints and corrections are added to the the online tutorial. I'll also add photos submitted by other crafters for additional ideas.
1. Download the cutting files for your cutting machine at http://3dcuts.com/zig-zag-village from the 3dcuts.com store.
2. Load the files into your cutting software following the steps for your cutting machine.
3. Prepare the files:.
For the Silhouette: The SVG files from this site will need to be turned into cutting files. Click here for detailed steps on how to use SVG files on your Silhouette. http://www.3dcuts.com/tutorial-upload-svg-silhouette
DXF files can be opened in the basic edition of Silhouette Design Studio but often require modifications. I recommend using the Designer Edition and using svg files.
For Cricut Explore: Here is a guide for importing into Cricut Design Space. http://www.3dcuts.com/tutorial-adding-3dcuts-files-to-cricut. Be sure to attach parts before cutting.
For Brother ScanNCut: The svg files will need to be transferred to files for your particular machine. You can change SVG files to FCM files at http://www.canvasworkspace.com/ or Google "How to import SVG files into a ScanNCut" for links to tutorials.
4. Cut the files.
All pieces are cut from card stock.
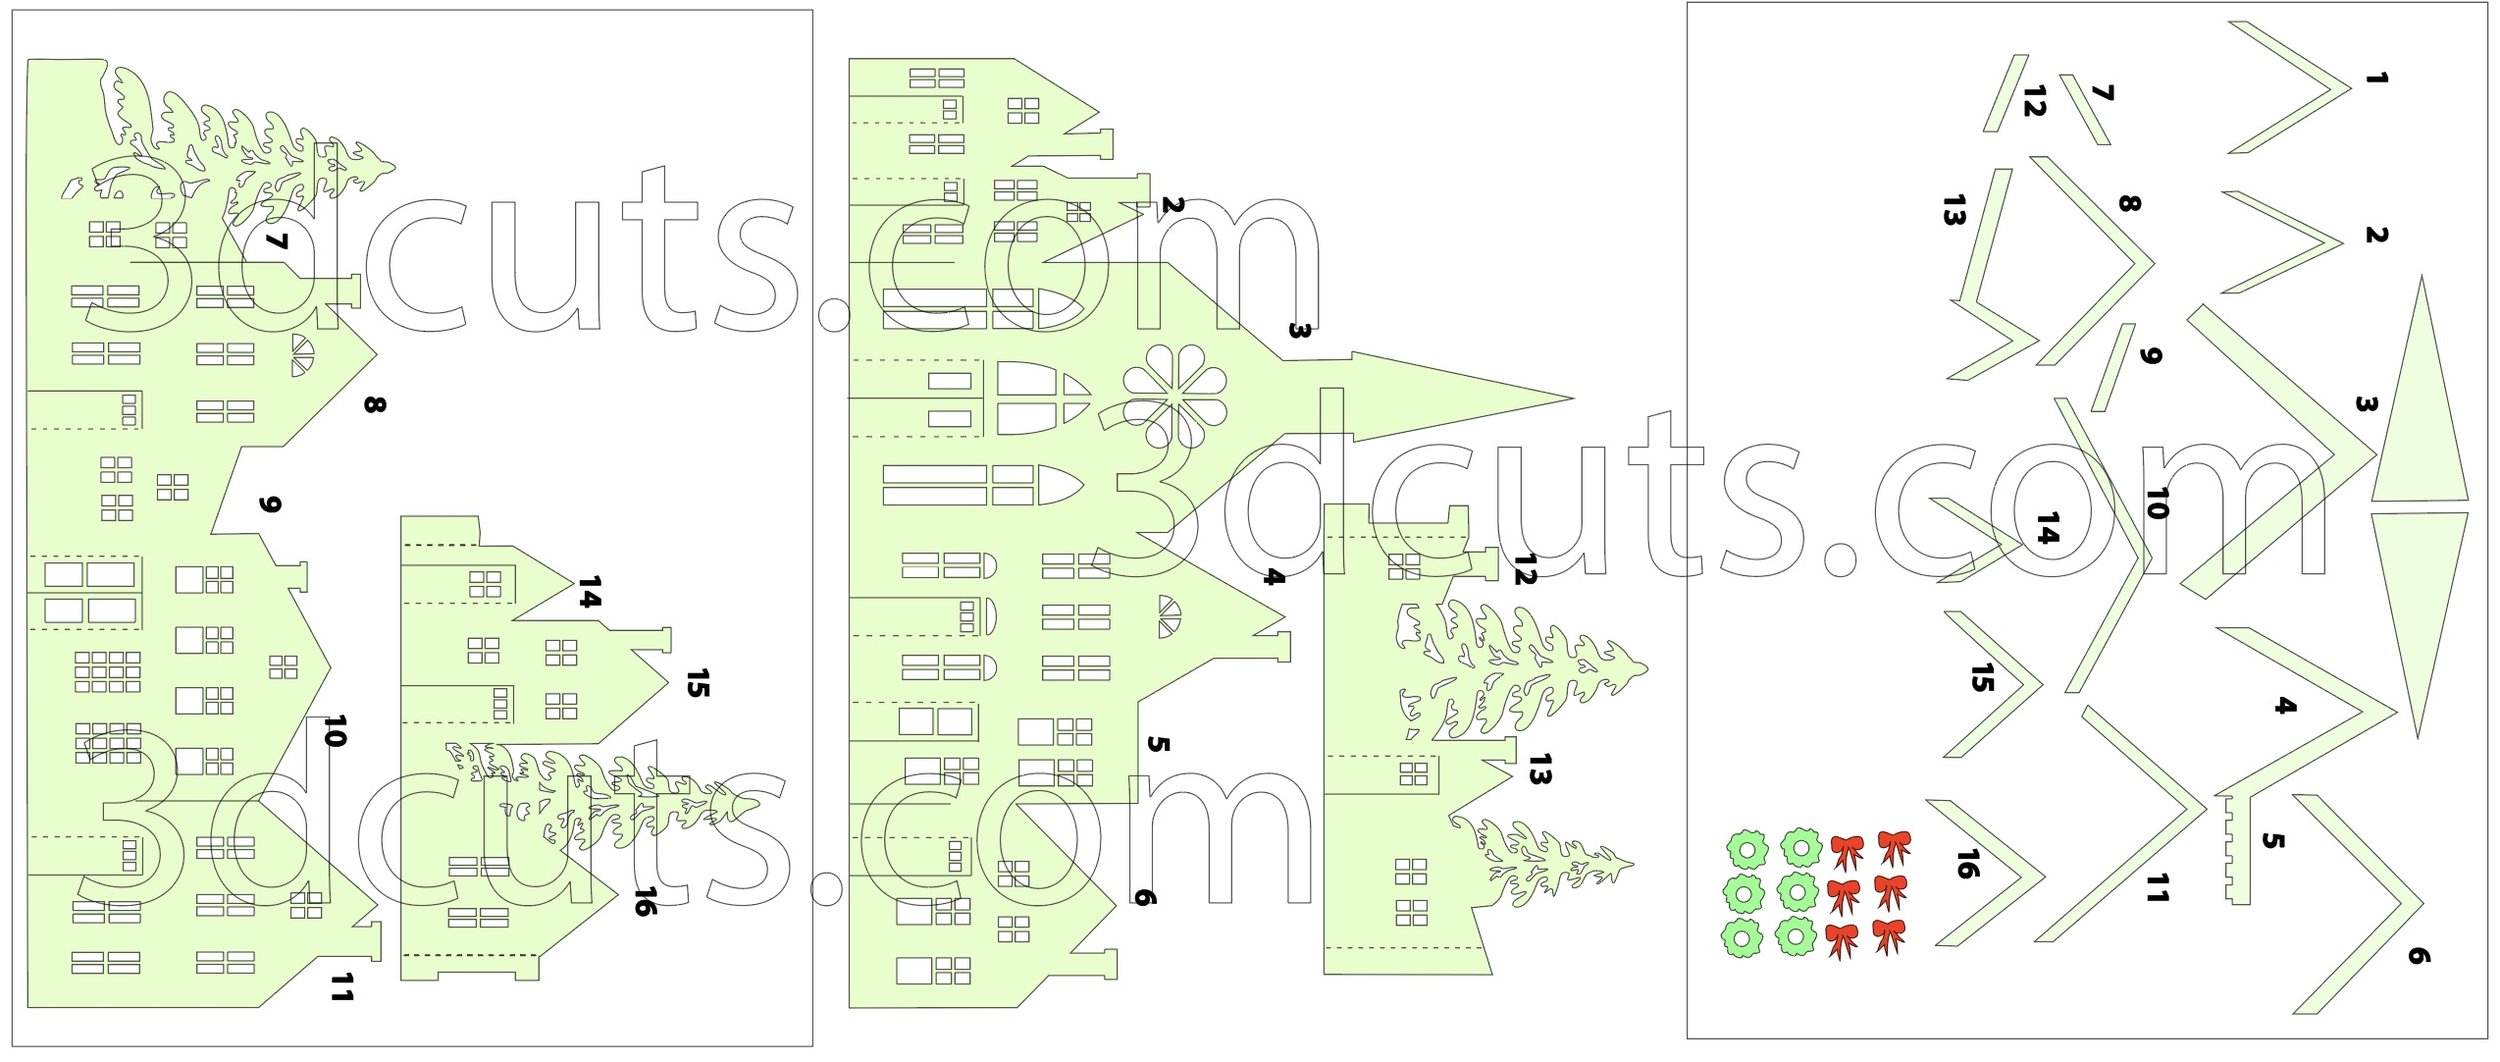
Below is a layout of the various pieces you will be cutting out.
The files will download organized into groupings that will fit on 8.5 x 11" card stock.
I recommend you leave all of the roof pieces on the mat until you adhere them to each location piece by piece.
The roof pieces have all been arranged on one sheet so you can cut all those from a contrasting color together if that is your design choice. Remove the wreath and bow pieces to be cut from green and red. Those are optional.
I cut all buildings from white card stock. That isn't a requirement.
Hints on cutting details:
Use a good blade. I have found the Silhouette Premium blade to be well worth the money for those of you using Silhouette.
A mat in good condition is also important. I use the Nicapa mats from Amazon - Nicapa Cutting Mat (Affiliate Link).
If your mat and blade are good then all the little windows will cut well and come out easily.
5. Assembly
The assembly steps are detailed in the video below. Here is the url. https://youtu.be/MVVaKjS8ONc
Note: If you purchased the file from the Silhouette online store, the project is complete.
If you purchased it from directly at 3dcuts.com there are a few added surprises in the download file. Read on below the video the discover more about these.
Your village is now complete. How many willl you make and who will you send them too?
Update 11/30/2018
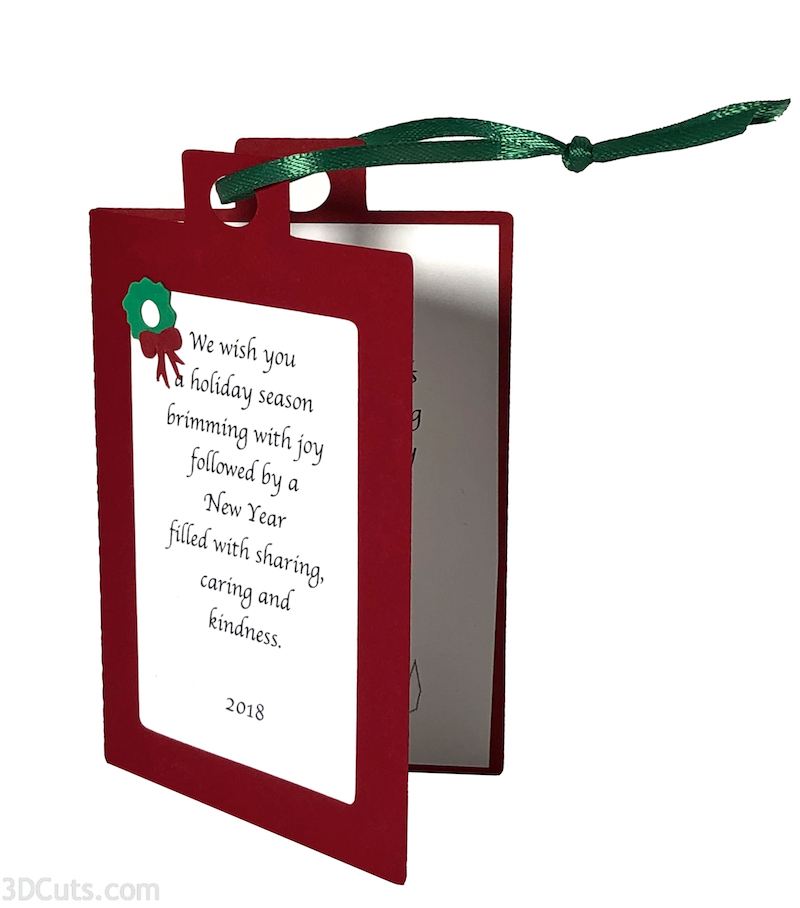
I just finished my 30 cards. As went to sign them I realized I didn’t want to sign on the village itself so I designed a little message card to attach. It is 4” high and ties on with a ribbon. Here is a link to that new file.
Surprises for direct purchases.

1. Building backings: The first version of Zig Zag Village included backings for each building into witch you could add wax paper to cover the openings. I eliminated those for the quick version to save time, but if you want to add them in the quick version you can. I have included the cutting files for them if you purchased directly from 3dcuts.com.
Just cover each opening with wax paper and glue onto the back side of each building. It will add strength as well as riches - but take time.


2. Trees: You will find the file to add two tress to the trees on fronts panels. Just fold on the dotted line add adhesive and apply

New Hint!
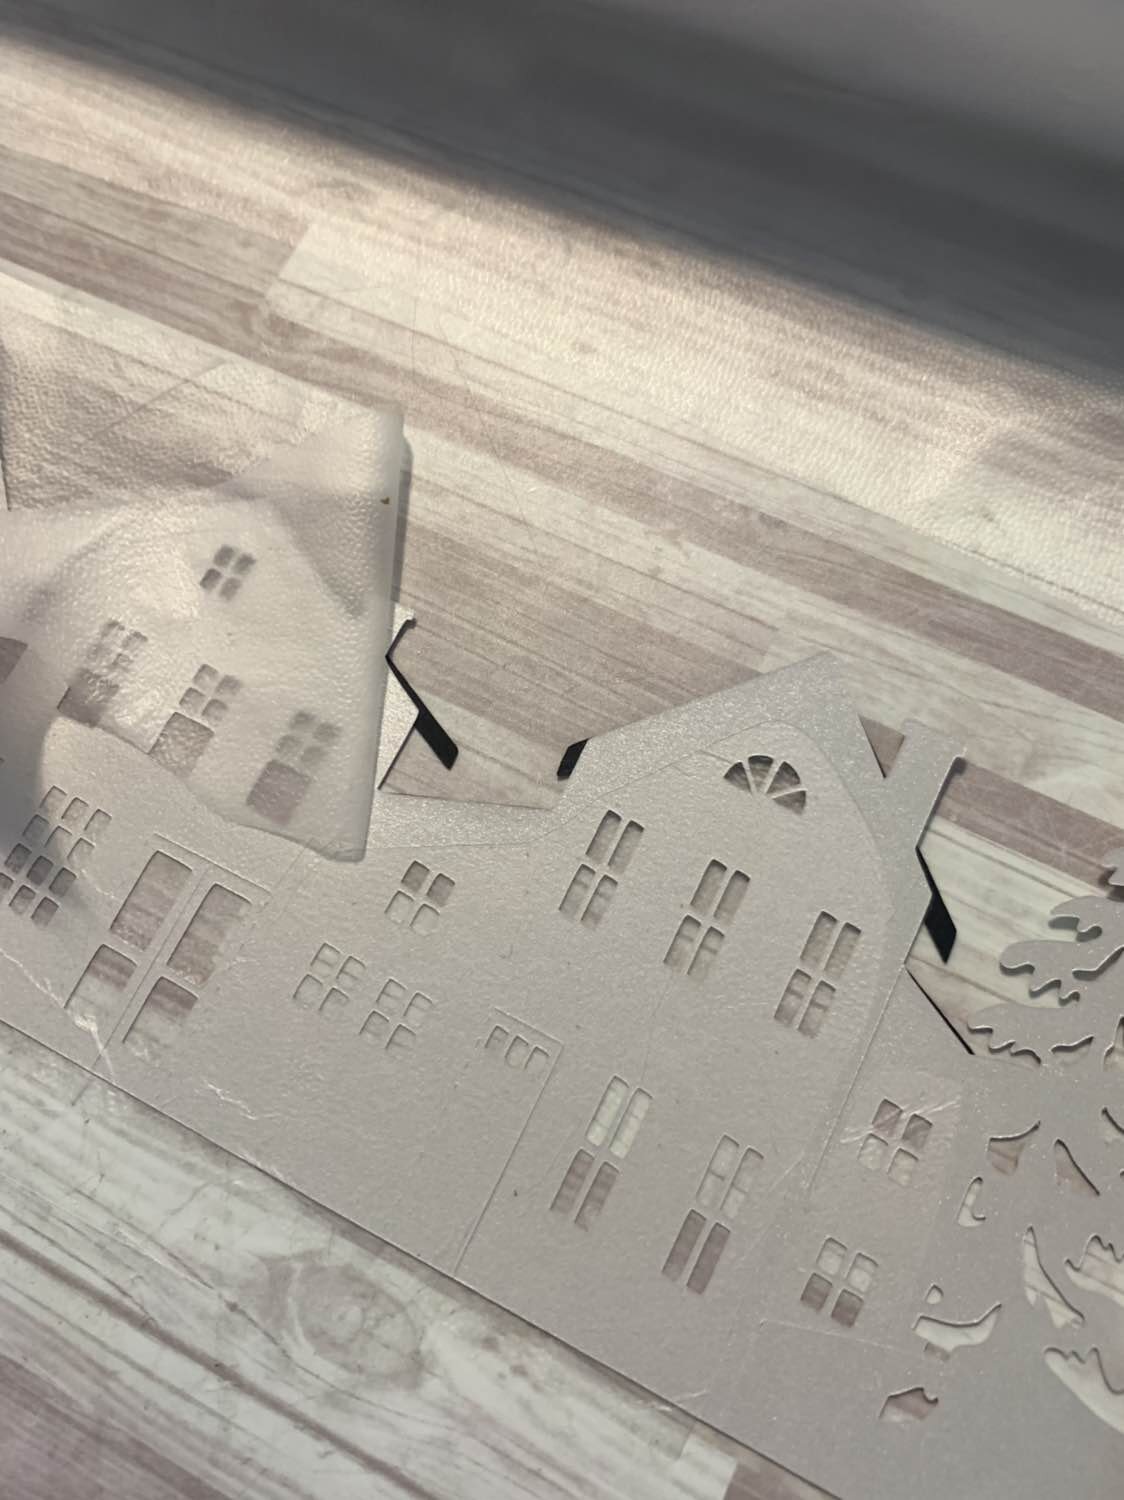
Nancy, a crafter sent in this excellent idea. Instead of wax paper for the windows she uses Glad Press ‘N Seal to cover the windows and defuse the lights. It saves bundles of time in construction. She sent me a few photos of her process.
She presses it on the back as one piece and the uses an facto to lightly slice away the extra. Thanks for sharing Nancy!

There is also a Zig Zag Village with many more details also available from 3dcuts.com. It includes window and door trim, 3d trees and lighting bases for use with fairy lights.

Share!
Take photos of your finished project and share them to Pinterest, Facebook groups, and email them to me at marji@3dcuts.com. I like to share the creative things people do with my files here on the website.
© 2018 Marji Roy • 3dcuts.com
Barbara Petters took Zig Zag village a step further and made it into an illuminated shadow box. Che shared the following comments about her approached with me. “I reduced the file by 25%, and it cut easily. I added vellum to the windows, and used a tree from one of the tea light village files to add dimension to the end trees.
I resized a 5 x 7 shadow box frame from Lori Whitlock and used a digital background paper, which I altered a bit and added stars and moon. I also added trees from the tea light village . Unfortunately, I do not know who the designer of the paper is. I used three tabs attached to the back of the village to hold it in place. I found a strand of ten fairy lights, which I taped to the inside bottom of the frame (finding short strands of fairy lights was the hardest part!).”

Laurie Y of Roguestamper.blogspot.com posted her version of this file. Beautifully rustic. Visit her website where she shares techniques/
