
3D Paper Valentine Tree • Tutorial for Tree with Heart Apples
Project Description:

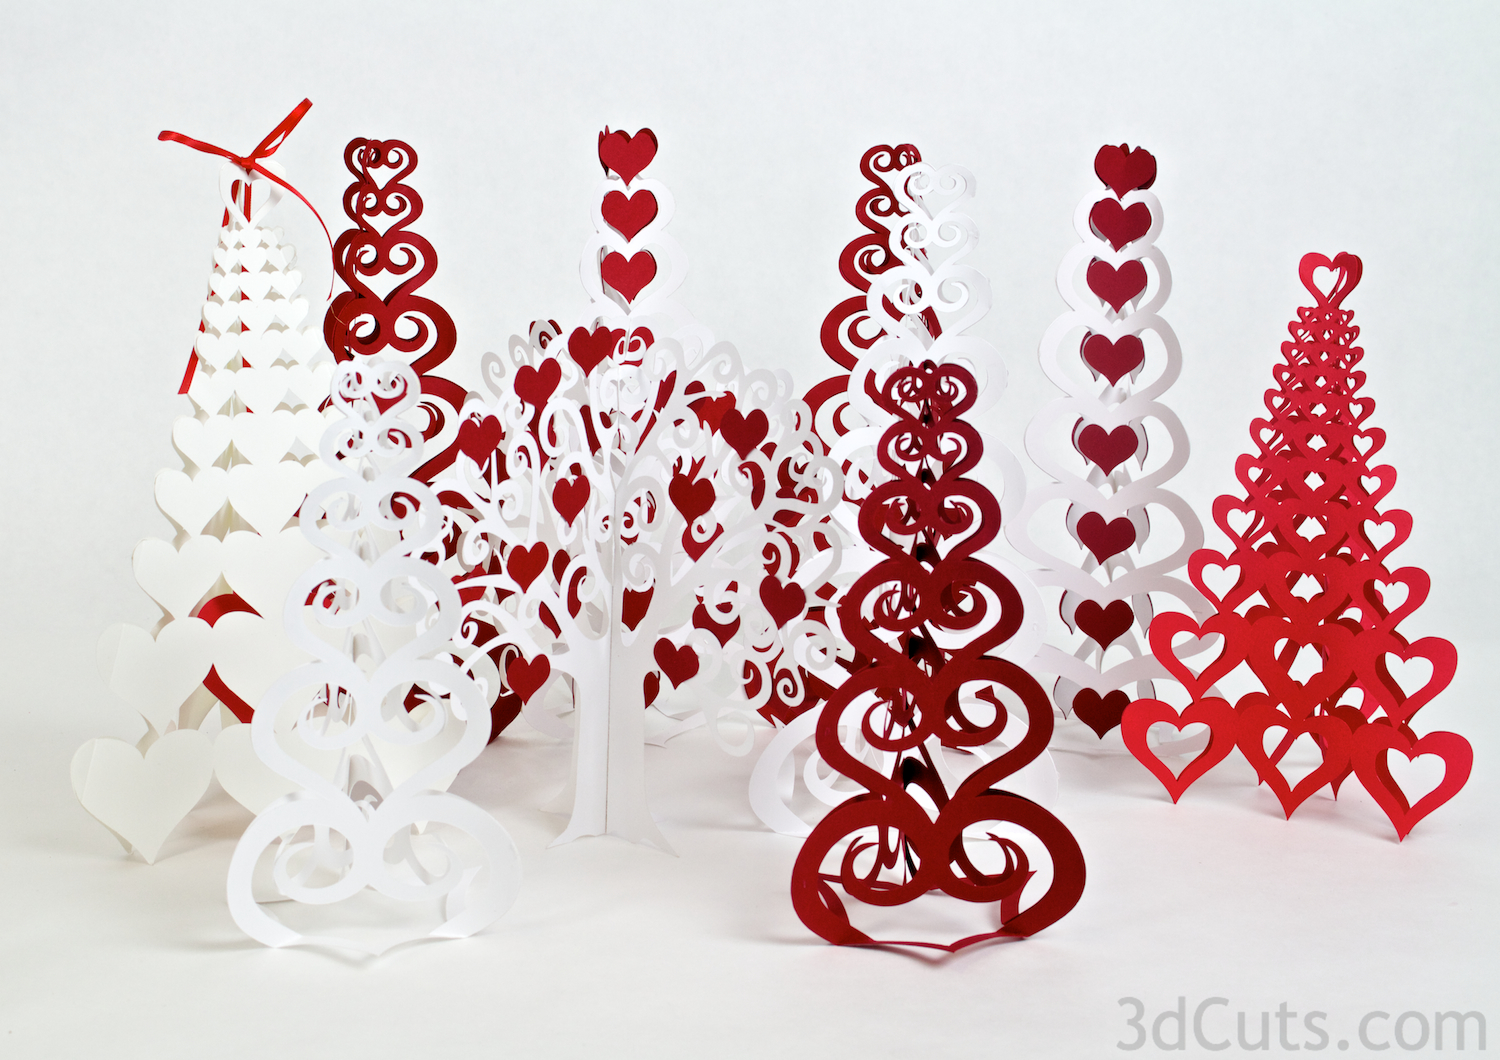
3D Trees are wonderful decorations at so many events. They make stunning centerpieces, mantle displays or accents for other arrangements. They can be made in many different styles. This tutorial is for the tree that looks like an apple tree with hearts for apples..
The tutorial for the other trees can be found
http://www.3dcuts.com/tutorial-valentine-tree-3piece
Purchasing Options:
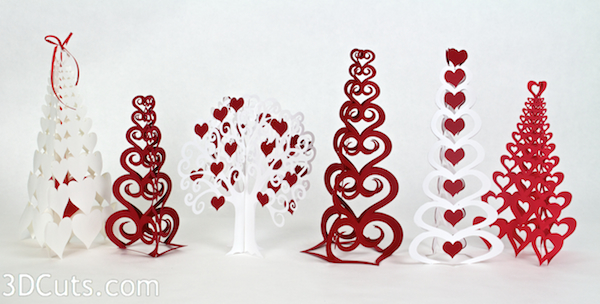
All six tree cutting files are available from the 3DCuts Store as a group purchase here.
http://www.3dcuts.com/store/
Heart Apple Valentine Tree Tutorial

Supplies Needed:
Cutting File available at 3Dcuts.com
8.5 x 11" card stock - I used the 65lb Cardstock from Recollections.
Paper Adhesive of choice. I use Scot-Tape and Glue Dots
Tree slice and nail for base (optional)
Parts sizes: (For those importing into Design Space) - in inches
Tree Shape (Cut 2) 9.0227" W x 8.1265" H
Optional - cut 4 and double up for a sturdier tree
Hearts (Cut 30-40) .7961"W X .721"H
Steps for completing the tree:
1. Download the cutting files for your cutting machine here.
2. Load the files into your cutting software following the steps for your cutting machine.
3. Prepare the files:.
Helpful Hints:

For the Silhouette: The SVG files from 3dCuts.com site will need to be turned into cutting files. Click here for detailed steps on how to use SVG files on your Silhouette. http://www.3dcuts.com/tutorial-upload-svg-silhouette
For Cricut Explore: Melody Lane has put together a helpful video on how to import 3dCuts files into Design Space. I recommend you view it here. http://youtu.be/EtY_VaNn1y8 I have also grouped the dotted lines into one group to make it easy to label them as score lines.
4. Cut the shapes.
Cut the each tree 2 times from the same color.
Cut 30-40 little hearts from red card stock.
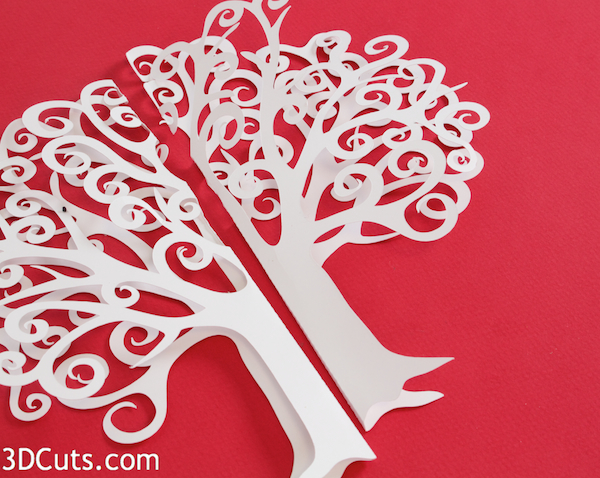
5. Fold the tree halves.
Each tree half has double dotted fold lines that run up from the base and into the branches.
Carefully fold along both lines in the same direction.
Do this on both tree halves.
Optional - If you choose to make four trees, fold all in half and glue half sides back to back to make a stronger tree.

6. Add the hearts
Flatten each tree half and start gluing hearts onto the branches.
The number and placement is up to you but I found 4-5 per each quarter and on each side to be a good amount.
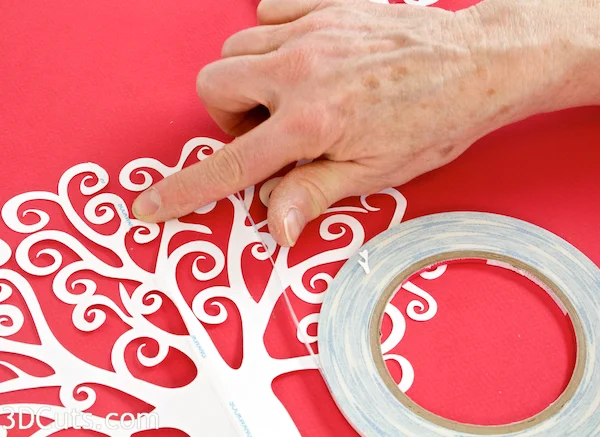
I placed a glue dot on the branch and then placed the heart.
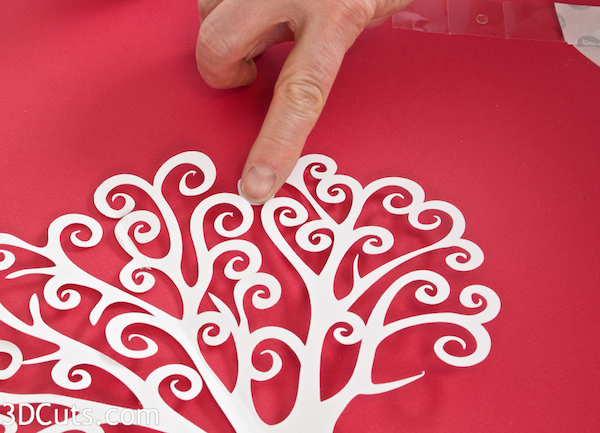
Placement can be random but look at the branches and identify and long branches that are not solidly connected to another. Use a heart to connect them. Put a glue dot on each close branch and span the space with a heart. This will solidify the tree branches. My finger is pointing to just such a gap in the photo to the right. I would place a heart there glued to each branch.
Hearts go on both haves and on both sides of each. They don't need to line up with the hearts on the other side.
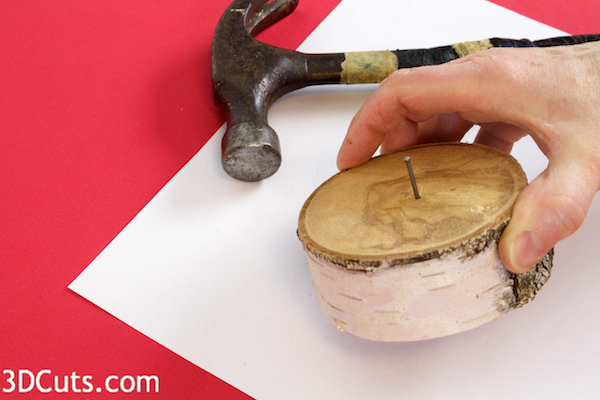
7. Make a base (optional).
When I create paper trees I often make wood slice bases. Paper trees tend to blow around unless weighted down. This is one way to do it.
I cut a log slice or get a block of wood and hammer a small finish nail into the center. I cut the fat head off the nail using cutting pliers.
When I assemble the tree trench, I place it around the nail. The block of wood gives the tree more weight and they stand better.
8. Assemble the tree halves
Place 1/8" Scor-Tape (or other permanent tape glue) between the 2 dotted fold lines of the tree trunk.
Also place it on any upper branches that also got folded.

Peel the backing off the Scor-Tape.
Place 1 tree trench up against the nail. The nail will be placed right between the 2 fold lines.
Bring the second tree trunk up to it on the opposite side.
Press the center strip of glue tape together all the way up the tree.
10 Adding centers to the Open Heart Tree

Picture three together in the center of the dining room table. Stunning! I need to go and make 2 more!
Have fun making a collection of trees........
Copyright 2015 • 3DCuts.com • Marji Roy