
3D 3 Layer Shadow Box • Tutorial

Project Description:
The shadow box continues to be a form I use often in my 3D paper designs. This tutorial is for any of the 3 layer shadow boxes. I photographed the Halloween Spider Web shadow box as I made the tutorial but you can also use this for other designs as well. More will be coming!

3D Shadow Box with Three Layers - Tutorial
Supplies Needed:
- Cutting File from 3dCuts.com
- 8.5 x 11" card stock - I used the 65lb Cardstock from Recollections.
- 1 6"x6" square of decorative background paper. I used orange yardstick but this would be effective with other papers as well.
- Paper Adhesive - I like Glu Dots and Scoretape for this type of project but other adhesives work as well.
- Thread for spider - heavy duty black coat thread works well.

You find the Line Over Cut Settings by clicking in the cut icon in the upper right, selecting card stock as a material and then the advanced settings. Turn on the Over Cut Setting and increase both to .1.
Steps for completing the Shadow Box:
1. Download the cutting files for your cutting machine from 3dCuts.com.
2. Load the files into your cutting software following the steps for your cutting machine.
3. Prepare the files:.
Helpful Hints:
- For the Silhouette: The SVG files from this site will need to be turned into cutting files. Click here for detailed steps on how to use SVG files on your Silhouette. http://www.3dcuts.com/tutorial-upload-svg-silhouette
- For Cricut Explore: Here is a guide for importing into Cricut Design Space. http://www.3dcuts.com/tutorial-adding-3dcuts-files-to-cricut
4. Cut the shapes.
- It depends on the specific file you are cutting but most will have 3 box layers, 1 back ground piece and an optional hanger. Some designs might have accessories that get added as embellishments. This example has the spider as an attachment.
- The spider web layer has some very fine lines. I have cut it successfully many times but it does take a sharp blade and newer mat. I make sure my paper is well adhered to the mat by rubbing it with a spatula before cutting. I also use the the Line Segment Overcut setting in the advanced tools of Card Stock on the Silhouette Cameo. I use this whenever I want crisp corners in a delicate design.
Note for Spider Shadow box:
Do Not take the Spider parts off the mat. Leave them there for safe keeping until you construct the spider.
Sizes needed for Cricut users:
- Layer 1 - 7.834" W x 7.834"H
- Layer 2 - 6.95" W x 6.95" H
- Layer 3 - 7.7198" W x 7.7198"H
- Hanger - 6.0561" W x 1.333"H
- Spider (all Parts) - 4.9" W x 4.44"H
- Words inner - 4.0986" W x 1.9626"H
- Words outer - 4.2986" W x 2.1626"H

5. Construct all 3 box frames.
- Notice there is a cut-out number in one corner of each frame. Use this a guide. It will help in identifying the layers, identifying front or back, and knowing which corner should be in the upper left.
- I universally design these so that the number is always in the upper left. On some frames it doesn't matter but on others it does. If you always have the number in the upper left as you work you will know you are assembling things correctly.
- The frames are numbered as they will be when complete. Number 1 is the front frame, 2 next, and 3 in the back.

- Start with frame 1.
- Place the 1 in the upper left corner and fold on all dotted fold lines. You will fold the 4 edges back and away from you on frames 1and 2.
- Make nice, crisp folds.
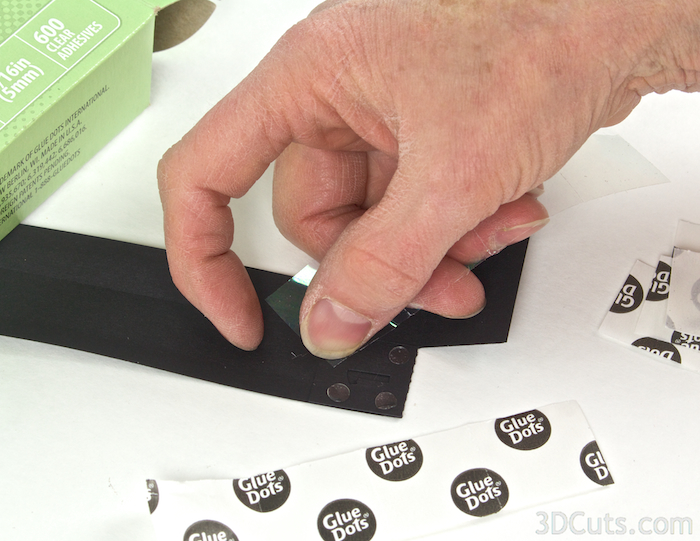
- Use your adhesive of choice to glue the tabs inside of each corner. I like to use Glue Dots because it keeps my fingers clean. Other adhesives works as well.
- On the first frame I put 4 mini glue dots in each corner.
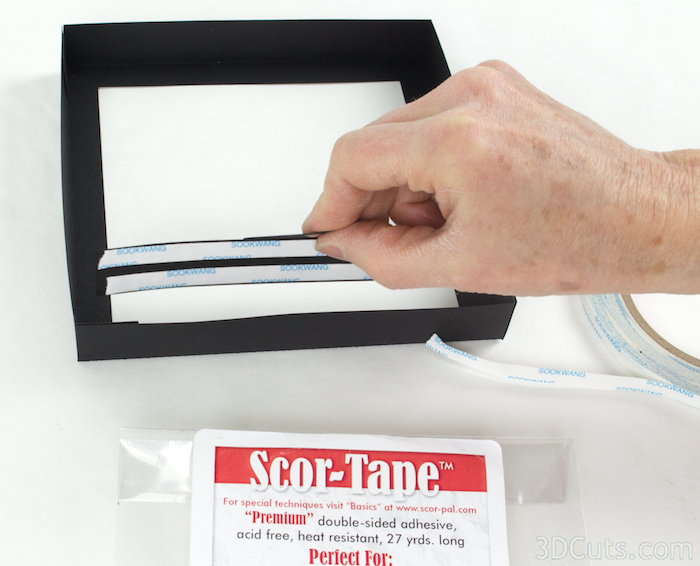
- OR I put 2 strips of Scor-Tape instead.
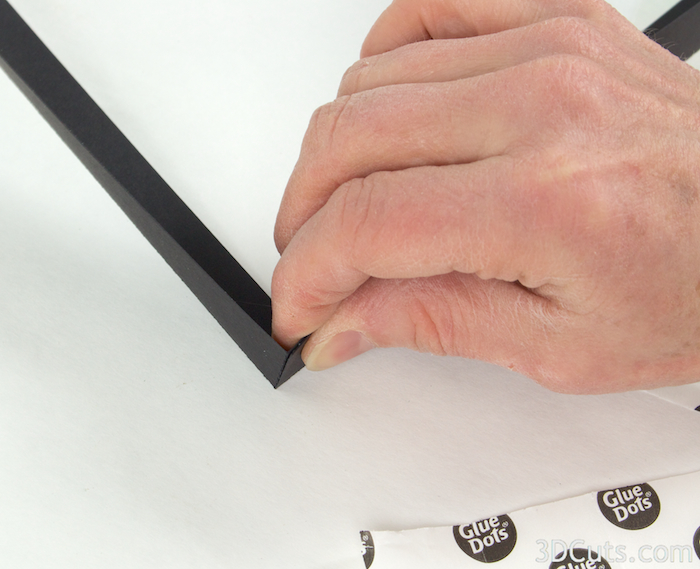
- Make sure the edges line up.It is important to make good, even square corners.
- Glue all 4 corners of layer 1.


- Glue together layer 2 the same way as you completed layer 1.
- These are inside and 1 glue dot per corner is enough.

- On layer 3, reverse the fold. All the edges of layer 3 will be folded up toward you.
- Glue a square of background paper into frame 3. It should be about 5 7/8" square.
- You should now have all 3 shadow box frames folded and glued together.

6. Add a hanger (optional)
- The cutting file includes an optional hanger. If you want to use it, glue that into the top of layer 1 so the hole folds up to the outside.
- I used Scor-Tape here although any tape runner with permanent adhesive would work.
- Be sure to center the hook along the top edge of layer 1.
7. Adhere frame 2 into frame 3.

Frame 2 gets adhered inside frame 3. I use Scor-Tape along each edge which I apply but leave the backing on.

I place layer 2 inside frame 3 and use tweezers to reach in and pul the backing of the Scor-Tape in place. I then press the sides together. (Note I made 1 sample with frame 3 being orange. I switched to all layers being black for others. I like the black back best.
8. An aside on spacers.
- With some shadow boxes it is wise to add a few well placed spacers. If the design has areas that don't seem to be well supported and might sag over time, inserting a spacer behind it and attaching that to the back layer will make your shadow box stronger.
- Different things can be used for spacers depending on the location. Certainly white foam dots work well on a white design. I have also used self-adhesive weather-stripping foam.
- The sider web is well supported and didn't need any spacers but other 3 layer designs might.

9. Construct and add any embellishments.
- This 3 layer shadow box includes a little 3d Spider. I hope you left all the spider parts adhered to the mat for easy part identification and assembly.
- First pull off the large spider body. This is the core. The smaller pieces get glued on in layers on both the top and bottom of this shape.
- I used Zig Glue to glue these parts together.
- Apply a little glue to the mid section of the spider and glue the first of the hour glass shapes on top. Use all the top row of shapes for side one of the spider.
- Add more glue to that, and add the second.
- Continue with the first row of shapes.

3d Spider Web Shadow Box for Halloween tutorial by 3dCuts.com, Marji Roy, 3D cutting files in .svg, .dxf, and .pdf formats for use with Silhouette and Cricut cutting machines, paper crafting files
- Once you finish the 4 hour glass shapes, add the top row of dots to the head end of the spider and the bottom row of dots to the abdomen.
- You are building up a spider in layers similar to a topographic map.

3d Spider Web Shadow Box for Halloween tutorial by 3dCuts.com, Marji Roy, 3D cutting files in .svg, .dxf, and .pdf formats for use with Silhouette and Cricut cutting machines, paper crafting files
Attach the string.
- On the second side of the spider, before adding the first hour glass shape, put 3 glu dots and press the string for the web into the glu dots.
- Add the hour glass shape on top and glue all the additional pieces on top just like on the first side.
- You won't need much string. Two feet is fine.

3d Spider Web Shadow Box for Halloween tutorial by 3dCuts.com, Marji Roy, 3D cutting files in .svg, .dxf, and .pdf formats for use with Silhouette and Cricut cutting machines, paper crafting files
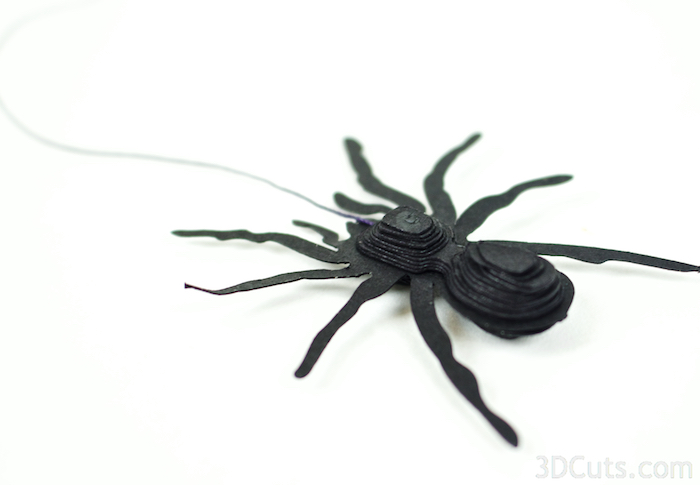
Here is the spider with the string attached and all the layers glued in place.
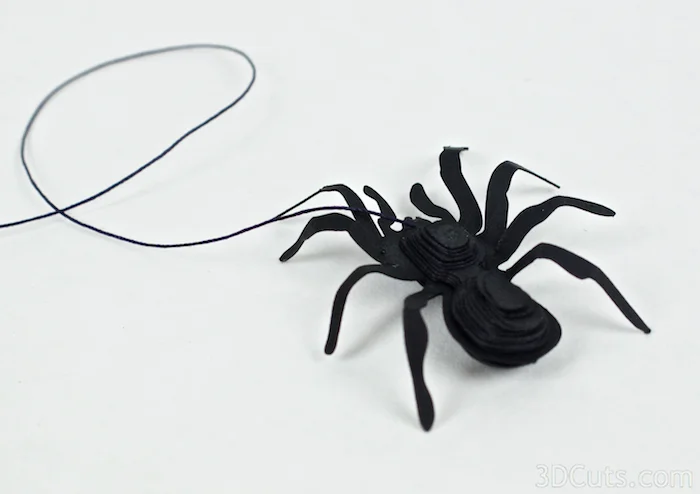
Bend the spiders legs up and then down to make it more spider like.
- Attach the spider string to the outside of frame 3.
- I used 3 glue dots on the top of frame 3 and adhered the string to that.
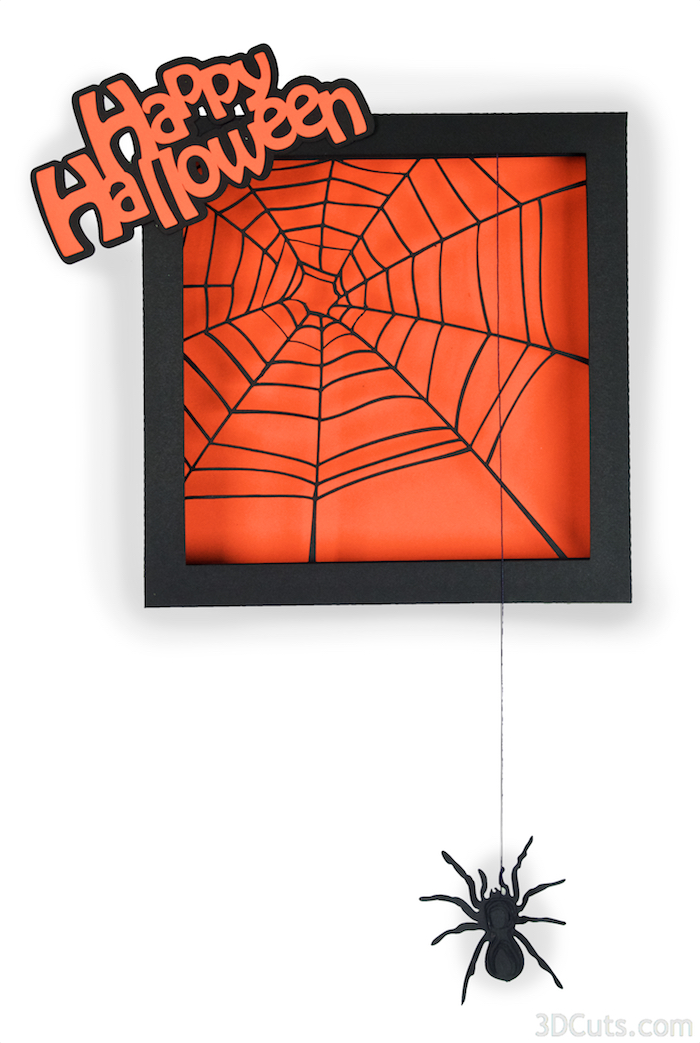
- I have had the spider dangle in front of the web or dangle below the frame. You might even add multiple spiders - your choice.

3d Spider Web Shadow Box for Halloween tutorial by 3dCuts.com, Marji Roy, 3D cutting files in .svg, .dxf, and .pdf formats for use with Silhouette and Cricut cutting machines, paper crafting files
10. Adhere frame 1 around frame 3.
- Frame one should fit snuggly around frame 3.

I added Scor-Tape to all 4 sides of frame 3, not removing the backing, and then slide frame 1 over them.

Using tweezers, I pulled the backing off and pressed the frames in place.

- I included some lettering for optional embellishment.
- Glue one layer on top of the other.
- Glue onto the upper corner of the shadow box.
And your 3d 3-layered shadow box is complete!
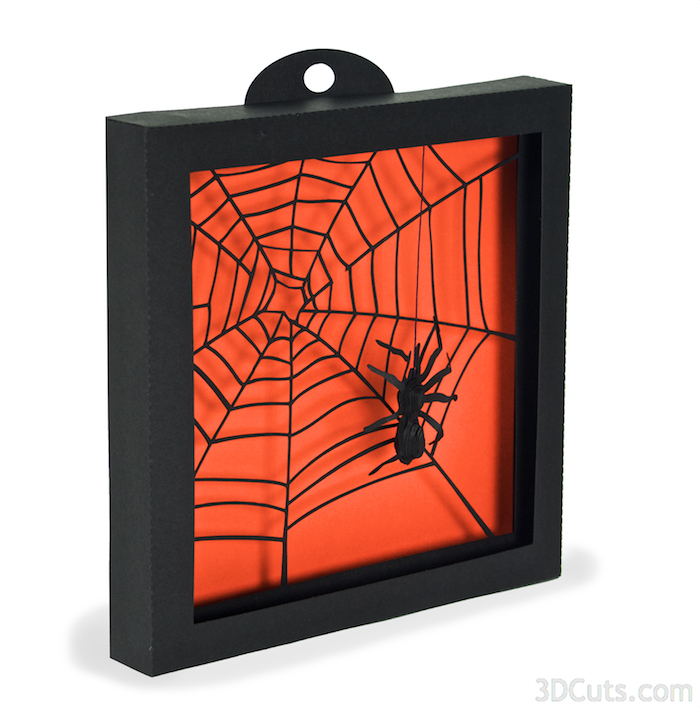
3d Spider Web Shadow Box for Halloween tutorial by 3dCuts.com, Marji Roy, 3D cutting files in .svg, .dxf, and .pdf formats for use with Silhouette and Cricut cutting machines, paper crafting files
3d Spider Web Shadow Box for Halloween tutorial by 3dCuts.com, Marji Roy, 3D cutting files in .svg, .dxf, and .pdf formats for use with Silhouette and Cricut cutting machines, paper crafting files
Happy Crafting
© 2015 Marji Roy, 3Dcuts