
Tutorial - Sunflowers Shadow Box
Project Description:
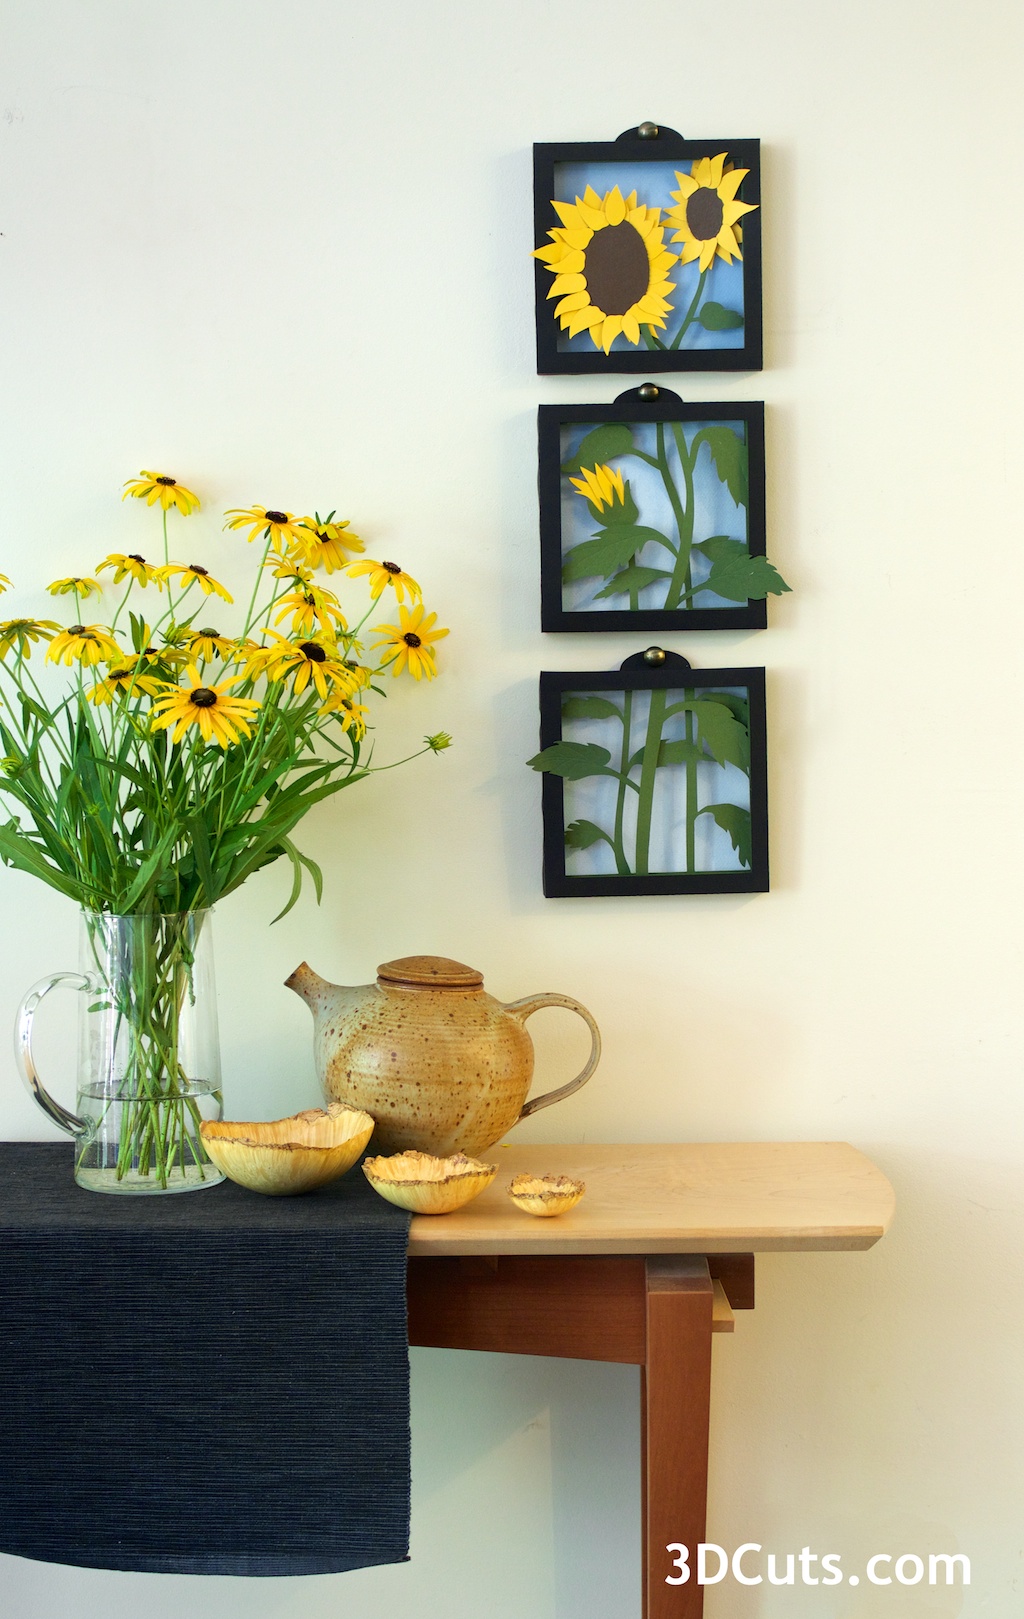
This triple shadow box is composed of 12 cut files assembled in layers to create a graphically stunning 3D wall art of Sunflowers in full bloom. The download includes the cutting files for all the shadow boxes and the flowers. Although complex looking, the cut files are fairly simple as is the construction.
Supplies Needed:
- Cutting File downloaded on 3DCuts.com here
- Assorted Adhesives
- Glue dots 3/16"
- Hot Glue
- Scor-Tape
- Scotch Tape
- 6 sheets of Black Card Stock 8.5 x11"
- 6 sheets leaf green card stock 8.5 x11"
- 1 sheet yellow card stock 8.5 x11"
- 1 sheet brown card stock- scraps OK
- 3 sheets of background paper (optional)
Parts Sizes:
(For people importing into Design Space)
Sized to Maximize 8 1/2 x 11 Paper
- Layer 1 Frame (Without the hanger) 8.23 square
- Hanger 6.62" w
- All Layer 2 - 7.55" square
- All Layer 3 - 7" square
- Layer 4 - 8.1" square
- Petals (all grouped) 8.17" w x 10.71" h
- Background (Optional) 6.25" square
Sized as grouped
- I have grouped some of the files together for importing into Design Space for Cricut. This can cut down on the number of import steps.
- Import them and resize them together, and then ungroup and define scoring lines.
- Layers 1 + 4 + hanger - 16.727w (Cut 3 of each)
- Top Layers 2 + 3 - 14.707 w
- Middle Layers 2 + 3 - 14.698 w
- Bottom Layers 2 + 3 - 14.817 w
- Petal Layer 8.17 w

Steps for completing the 3-D Sunflower Shadow Box project:
1. Download the cutting files for your cutting machine here.
2. Load the files into your cutting software following the steps for your cutting machine.
3. Prepare the files:.
- Click here for detailed steps on how to use .SVG files on your Silhouette (with Design Studio).
- Click here for steps on how to use these .SVG files in Design Space with your Cricut Explore.
4. Cut the files:
- Paper colors are your preference. The project does require card stock for all layers with the exception of the background. The background is optional. Heavy paper is appropriate for this layer. I used a large sheet of white which I spray painted lightly to give a sky gradation.
- Cut 3 of Layers 1 and 4 from black, (including the hanger), and 1 of all other layers. Layers 1 and 4 are universal for all 3 frames.

- Notice all of the frames have a number (1-4) cut out of the upper left corner. This is to help in identifying the correct piece while following these instructions. It also helps you in identifying the front and back of a piece after it has been cut. The number always goes in the upper left when viewed from the front.
- These numbers do not imply order of construction.
5. Start by assembling all Layers 1 and 4.
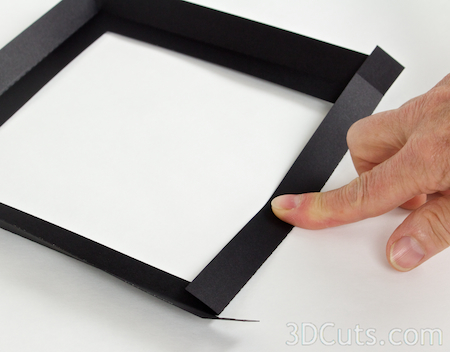
On all Layer #1, fold BACK on all dotted fold lines. Back is away from you with the cut #1 in the upper left.
On all Layer #4 fold TOWARD you on all dotted fold lines.
Use the adhesive of your choice. I have used both glue dots and hot glue to seal the corners. I like glue dots because it keeps my fingers clean. I like the speed of hot glue.

It is important to keep all corners square.
Build all #1 and #4 boxes.
6. Add box hangers.

There is a hanger piece as part of the Layer 1 cut out. This is optional depending on how you are planning to display your shadow boxes. If you want to hang them on the wall with a decorative tack then you will want to add the hanger.
To add the hanger, fold the tab up and glue the hanger inside the upper edge of layer 1. Remember to keep the cut number in the upper left of all layers.

6. Complete Sunflowers
- Find all the yellow shapes needed for Top Layer 2.
- The petals are varied and many. They don't have assigned spots but rather assigned areas.
- The smaller ones go on the inside curves of both flowers. Those appear to recede into the frame.
- The pieces that have bottoms that are flatter- sorted of shape like teeth are for the outside rims. Those are glued to the front. More details are below.
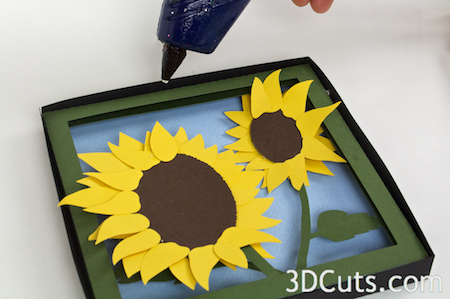
7. Complete the large Sunflower.
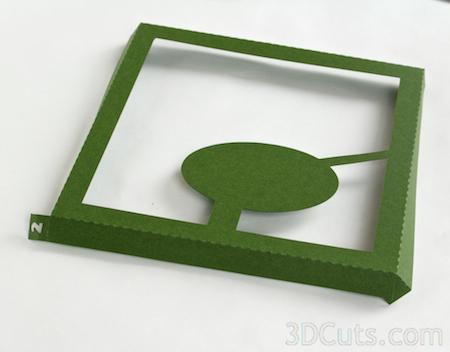
- Glue the corners of Top Layer 2 forming the frame.
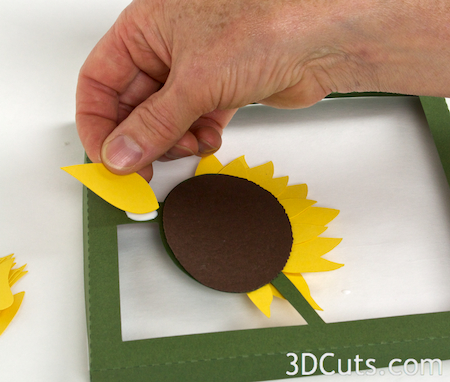
- On the backside, apply glue. I used Aileens Quick Dry Tacky glue but others types are appropriate. Apply the glue to the rim of the center edge. I went too far in the photo.
- Attach some of the smaller petals with rounded bases. Space them out and then add a second layer in the spaces, overlapping the first.
- View 4 shows this step from the front.
View 1

View 3

View 2
View 4

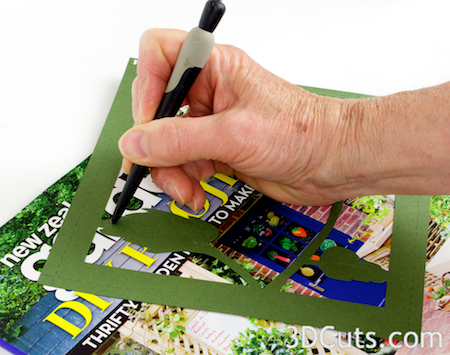
- Apply texture to both sunflower centers. If you have an embosser, go ahead and apply an all-over texture. I don't have one so I used the round end of my spatula working on top of a soft magazine, and made speckle dents all over both brown pieces. This gives a little added detail.
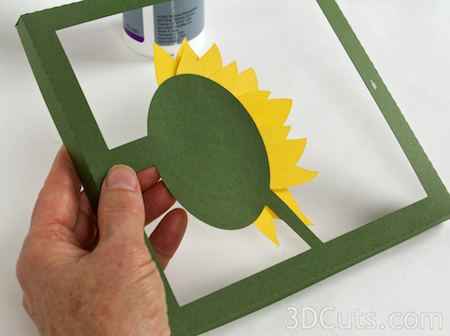
- Glue the large brown oval on the front of the green oval. It is important to cover the right side edge.

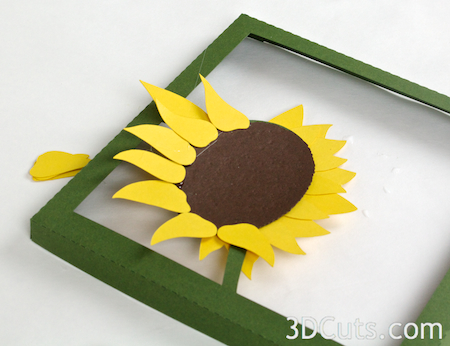
- Add larger petals to the front left side of the larger sunflower. Be sure to glue a petal to cover the green side support. The bottom support is a stem and doesn't need to be completely covered.
- Add petals to the front left side of the flower. Use the petals with the flat, tooth like bottom and place them on top of the brown edge.
- Continue building up the sunflower adding petals to both the front and back until it looks like a full bloom. Stagger the petals and place some so they will extend beyond the frame.
8. Complete the small sunflower.
- Take Top Layer 3 and before gluing the box sides together. apply some embossed leaf veins into the leaves. I used the back end of my peeling spatula and pressed on a soft magazine leaving impressions of veins.
- This can be done to the leaves on all middles layers and bottom layers as well.

- This is a closeup view of the veins pressed into the leaf.
- Apply glue to the back of the small green oval and add small petals radiating out (View 1). And a second layer between them.
- Flip and glue the small brown oval on the front covering it and the edge of petals (View 2).

View 1

View 2
- Add smaller tooth-shaped petals to the outer edge of the sunflower covering the brown edge. (View 3, 4).
- Flip and fill in spaces on the back side (View 5).

View 3

View 5

View 4

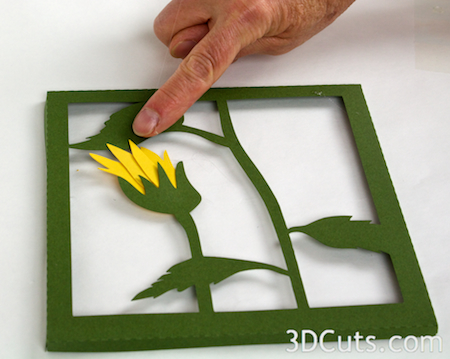
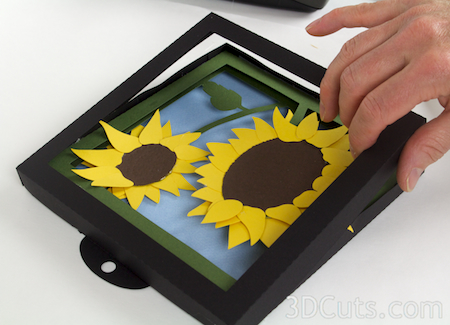
- The sunflowers in the top frame are complete. Layer 2 slides over layer 3.
- Pull a few of the left petals from layer 3 in front of layer 2.
7. Complete the middle layer 2.
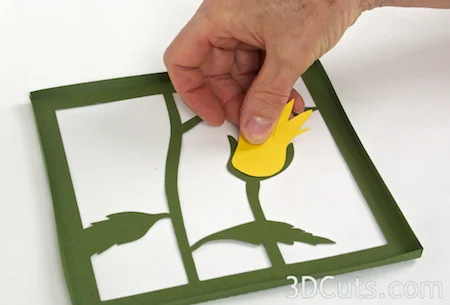
- Middle layer 3 has a sunflower bud.
- First, emboss leaf veins into all leaves on this layer.
- Locate the 3 odd leaves, 1 octopus shape and 2 long skinny ones. Glue the long skinny ones onto the front of the other. (View 2)
- Flip over and glue onto the backside of the sunflower bud location. (View 3)
- Place yellow bud so one of the long petals can be glued to the upper leaf to provide added support. (view 4)

View 1
View 3

View 2
View 4

8. Complete all remaining frames:
- Complete all of the other frames including Middle Layer 3 and Bottom Layers 2 and 3. This are all simple boxes with leaves and no added parts. Remember to score leaf veins before gluing corners together.

9. Assemble 3 groups of layers 2 & 3.
- Layer 3 of the top group gets inserted into Layer 2 and they are taped together so back edges of the frames stay aligned.
- Working from the back, aligned back edges and place a piece of Scotch tape along the inside edge.
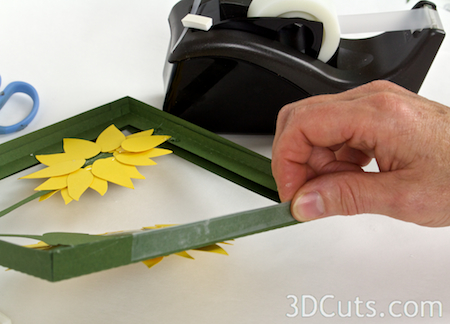
- Fold it over and press it along the outside edge. This tape is all hidden by the black frame.
- The goal is to hold the layers separate, each in their own plane.The shadow box effect is better if the layers don't slide together.
- Repeat the taping process on all four sides of the top frame.
- Repeat on all fours sides of layers 2 and 3 of the middle and bottom frames.

10. Complete the assembly of the top frame.

- A complete frame is composed of layers 1, 2, 3 and 4 plus an optional background layer.
- For the background, I used a large piece of white paper (18x24") that I sprayed a graduated blue for the sky.
- I cut it into 3 6.5" squares, one for the backing of each frame.
- The frame can be left open to allow for a wall color to show through.
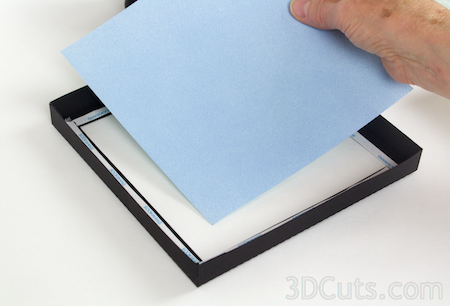
- Apply Scor-Tape to all inside back edges of the top frame # 4.
- Peel the cover off and position your background paper in place.
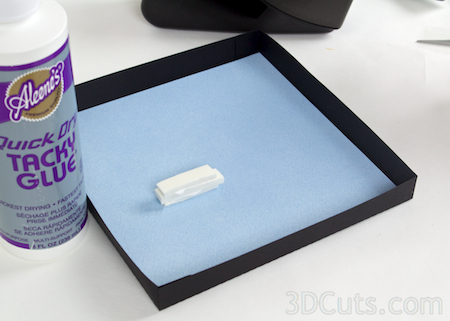
- The sunflower layer is heavy. To prevent sagging, add a support foam pad to stick the large sunflower to the background.
- I used weatherstripping foam and Aileens' Glue but pre-made foam dots would work as well.
- I positioned it behind the center of the large sunflower and built it up about 1/2" from the back.
- I added glue to the top so the sunflower would stick to it.
- Slide the combined top 2 & 3 layers into the back layer #4.
- Press on the sunflower to stick it to the foam behind it.
- Add a little hot glue into the space between layers on all sides to hold in place.
- Slide layer 1 over layer 4.
- Carefully pull out the petals that extend beyond the frame


- Flip over and add hot glue into the seam on all four sides to hold layer 1 to layer 4.

11. Repeat with the middle and bottom frames.
- Combine the middle and bottom frames using the same process.
- The middle frame has an extra leaf to be added to extend beyond the frame.
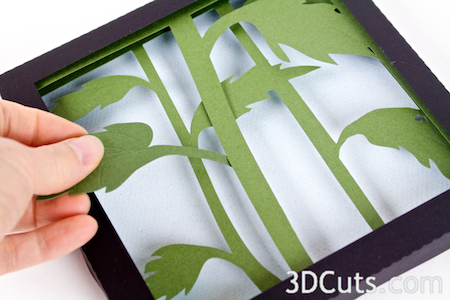
- An extra leaf can be added to the bottom frame as well.
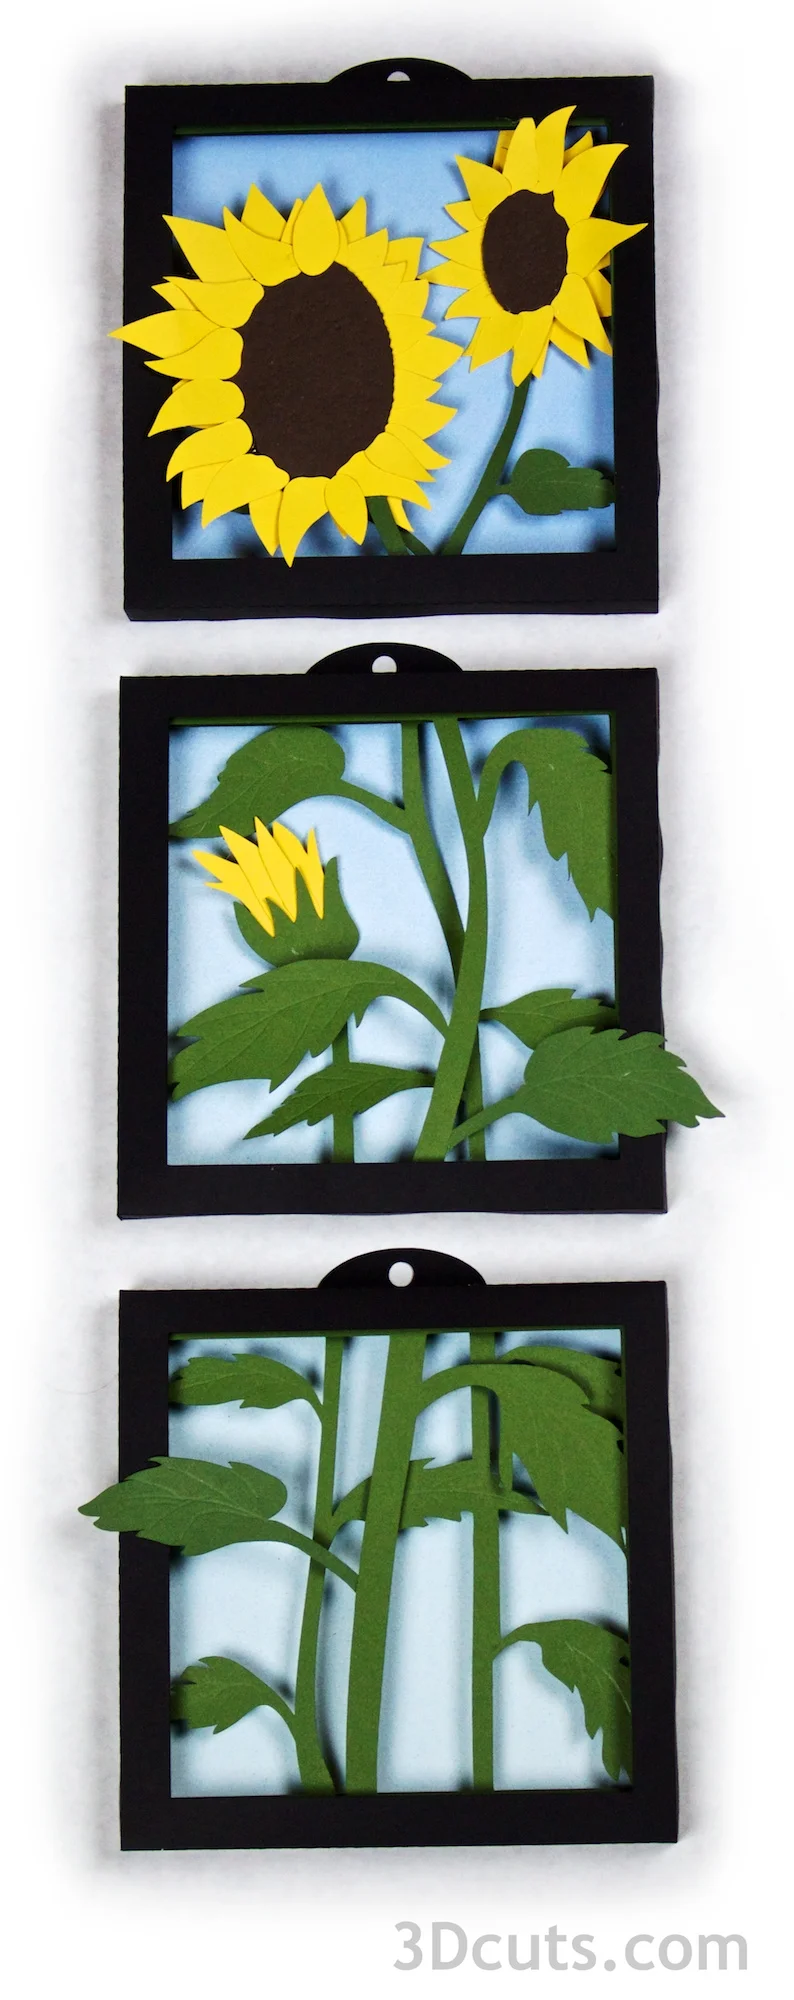
Hang the 3 completed frames on a display wall.
This tutorial is available at:
http://www.3dcuts.com/tutorial-sunflowers-shadow-box
I have designed additional shadow boxes including:
- Butterfly Shadow Box
- Poppies Shadow Box
- More to come.
©2014 3DCuts.com, Marji Roy