
3D Nesting Stars -Tutorial

Project Description:
This is one of a series of similar 3D Stars cut from card stock and assembled in double layer fashion to provide standing strength. Use in groupings as centerpieces or in mobiles. An arrangement of 3 would be stunning mantel decor for the patriotic holidays.
This tutorial is for both the simple version and the design with cut-out stars in the border.
Like stars? Need a bigger variety? I have designed many. Checkout some of the other 3d star designs here.
3D Nesting Star Tutorial

Supplies Needed:
- Cutting File available from 3dcuts.com available here.
- 5 sheets of card stock for each star. The largest in my group is 12x12" The smaller ones were cut from 8.5 x 11" card stock - I used the 65lb Cardstock from Recollections.
- Adhesive - Spray glue and glue dots
- Invisible thread or mono-filiamant
- Glue eraser
Parts sizes: (For those importing into Design Space) - in inches
- Large Star - 11.412" w X 11.412"h
- Medium Star - 8.247" w X 8.247"h
- Small Star - 7.252" w X 7.252"h
Although a display looks best with a variety of sizes!

Steps for completing the 3D Nested Star:
1. Download the cutting files for your cutting machine.
2. Load the files into your cutting software following the steps for your cutting machine.
3. Prepare the files:.
- Click here for detailed steps on how to use .SVG files on your Silhouette (with Design Studio).
- Click here for steps on how to use these .SVG files in Design Space with your Cricut Explore.
4. Cut the files from the card stock of your choice.
You will use the outer star, and only 1 of the 3 smaller ones. The smallest center is extra as is the second to the largest. Those can be used in other creative ways. You will cut each star 5 times for a complete 3d-star.
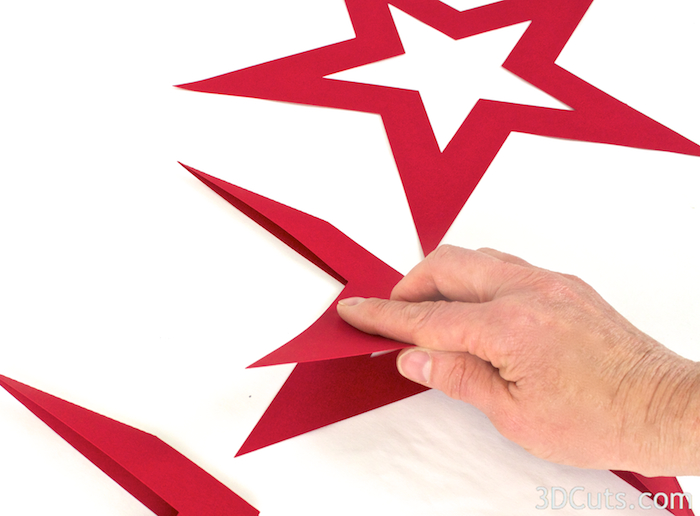
5. Fold all star shapes.
- All 5 large and 5 smaller stars get folded in half along the dotted fold line.
- Be sure to get a nice clean point at the top.
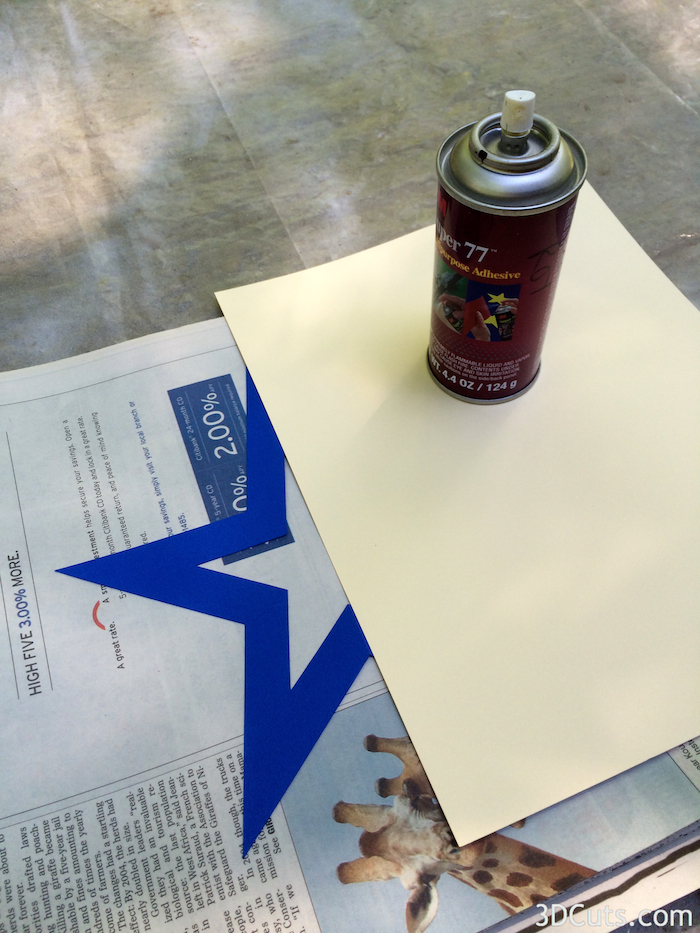
6. Glue the first 4 shapes of each star together.
- The five stars will get glued together using your adhesive of choice.
- I moved outside and used spray glue. I worked in the open air for great ventilation.
- A large Xyron would be easier. I like solutions that keep my hands clean but spray glue is affordable.
- Apply the adhesive to only one half of the star shape. I found it was best to cover one half with card stock and spray the exposed half.
- Place the glued half down on a matching star half being careful to line up all points. Start in the center and work out to the points.
- You will now have 2 folded stars stacked on top of each other with their common side glued together.
- Repeat with star 3 adding it to the top of star 1 and 2.
- Repeat with star 4 adding it to the top of the pile. Do not glue star 5 in place yet!
- Stop after star 4 and repeat with 4 of the small center stars.

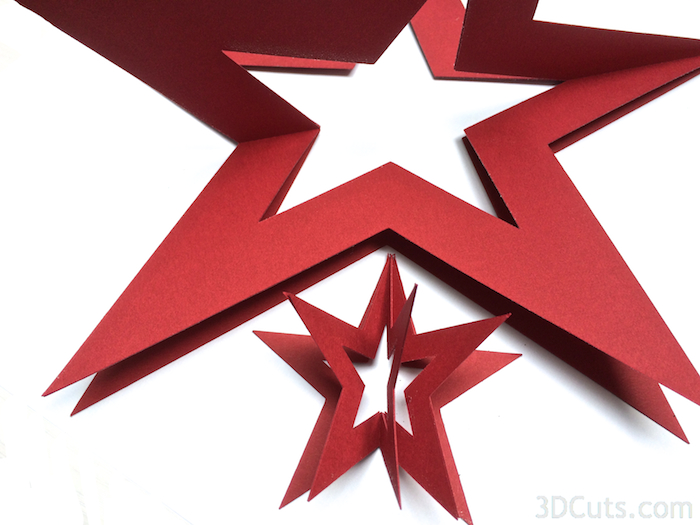
- You should now have the large and small stars each with 4 layers glued in a stack. It should open like a fan.
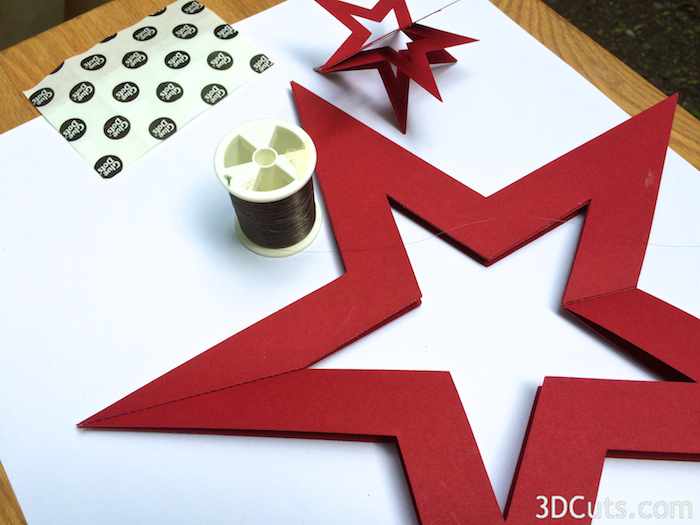
7. Add the suspension string.
- You thread the inner nested star into the center before adding the 5th star to the 3D star.
- You will open the large star so it is flat. Don't pick any place in the star stack. Pick the area with the folded seams.You want the side with all the folded edges to be up and visible.
Attach glue dots to the center seam.
- Place the small star inside the large one and open in the same way.
- Add a line of glue dots along the center seam.
- These glue dots will hold the string that suspends the inner star in place.
- Be sure to place a glue dot as close to the top and the bottom of each star edge. That will keep the inner star centered.


- Stretch a section of string from above the star down through each of the glue dots along the center seam.
- The position of the string is shown here in bright blue. I used a clear mono-filament thread but a color themed embroidery cotton would also work well.
- Leave enough string at the top for hanging if you are making a mobile.
- Likewise at the bottom.
- Press the string into the glue dots being sure to center the smaller star in its place.

8. Add the 5th star side
- On the 5th smallest star you will need to spray glue on the entire back side.
- Carefully position over the center star and glue in place covering the glue dots and the string.
- Repeat with the 5th large star,

- Spread out the 5 spokes of the 3d nested star. It is easiest to open the smaller star first and then the larger one.
Now make a collection!

© 2015 Marji Roy, 3DCuts.com