3D Classy Cat Luminaire
Project Description:
Designed to hold an LED Tea Light, this 3D Classy Cat along with her partner, 3D Cozy Kitty make a terrific Halloween decor pairing for your mantle, window sill or table top. Turn on the light and the eyes glow. Change out the ribbon or the paper color and use these kitties year round.
This tutorial is for the Classy Tall Cat. When complete she stands 9 3/4" tall x 7" w x 1 7/8" d. There is another tutorial for the 3D Cozy Kitty as well.
3D Classy Cat Tutorial
Supplies Needed:
- Cutting File available here.
- 8.5 x 11" card stock - I used the 65lb Cardstock from Recollections. Each kitty takes 4 sheets of card stock
- Adhesive - I prefer Scor-Tape for this type of project
- Zig 2-way glue
- Hot Glue & Gun
- Weights - some heavy items (washers, nickels, etc.)
- Green tissue paper
- Ribbon (Optional)
Parts sizes: (For those importing into Design Space) - in inches
- Classy Cat Front - 7.793" w X 9.698"h
- Classy Cat Back - 7.7336 w X 9.3193"h
- Classy Cat Sides 1-2-3 Grouped -6.4824" w X 10.4845"h
- Classy Cat Sides 4-5-6 Grouped - 6.4823" w X 10.474"h
Steps for completing the 3D Classy Cat:
1. Download the cutting files for your cutting machine. The files are available here.
2. Load the files into your cutting software following the steps for your cutting machine.
3. Prepare the files:.
- Click here for detailed steps on how to use .SVG files on your Silhouette (with Design Studio).
- Click here for steps on how to use these .SVG files in Design Space with your Cricut Explore.
4. Cut the files from the card stock of your choice. I especially liked these cats in black for Halloween however I have photographed the tutorial with gray paper because it is much easier to photograph.
5. Construct the cat back.
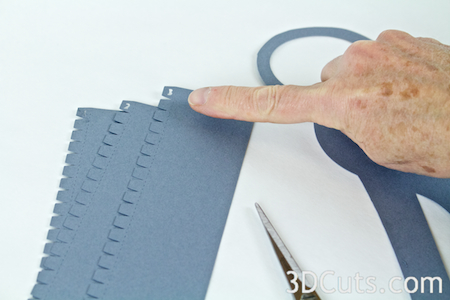
- Notice each of the sides strips has a number cut out of one corner. This is to help you in selecting the correct piece.
- Start with #1 side strip.
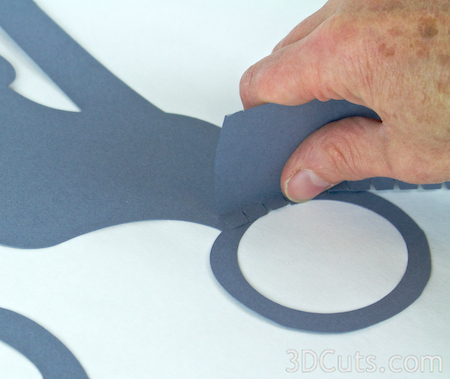
- Fold all the tabs in one direction along the dotted fold line.
- Run a line of Scor-Tape along the outside edge of the entire row of tabs. I use Scor-Tape because I can quickly lay it out and peel the backing. Other adhesives in your collection are appropriate as well.
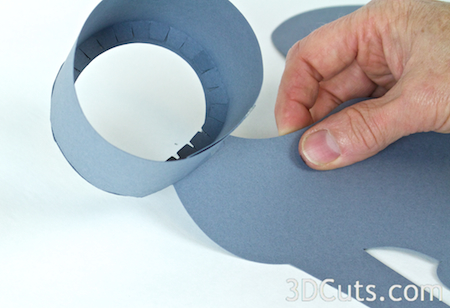
- Edge #1 circles the head shape. You position it so the tabs are to the inside and the edge aligns with the outside rim.
- Start at the bottom of the head so there will be no split on the top.
- Bend and adhere the edge strip all the way around.
- It will create a complete circle with the bottom edge over-lapping itself. This gives a strong platform to hold the LED yes-light when complete.
- Add adhesive to the ends of this edge to adhere them in place.
- Next is edge strip #2. It will become the chest of the kitty.
- Prepare it the same as edge 1 by folding over all the tabs and adding Scor-Tape to the tabs.
- The direction of the folds depends on whether your kitty will be facing right or left. Either is OK. Hold the piece in place to determine the correct direction for folding tabs. They all get fold in toward the center.
- It has an end tab which gets folded back and adhered under the chin on the head circle.
- Carefully position the chest edge in place running down the front of the kitty.
- You pass right by the arm and continue down the chest.
- You pass by the back leg hump and go straight down to the little notch in the base.
- At the notch, you turn the corner and have the reminder of strip #2 be the base.
- This base will get glued to strip 3 later. You can add a piece of Scor-Tape here for future use.
- Prepare strip #3 the same way you did strip #2 again paying attention to fold direction. Fold on all dotted lines and add Scor-Tape.
- Strip #3 gets positioned to start at the intersection of the head and back.
- It follows the edge of the back....
- And down to the base.
- Look for the dotted line that is the fold line for the tail. This edge must be placed just inside this fold line and follow the fold line down.
- Fold the end over to form the rest of the base.
- Glue in place.
6. Construct the front half of the kitty.
- Start by cutting colored tissue paper to cover the inside of the eyes and nose.
- Glue that in place using a glue like Zig 2 way glue pen.
- Be sure to add glue to the center of the eye to hold them to the tissue paper.
- Prepare edge # 4 the same way you did previous edges. Fold over the two end tabs and all the edge tabs along the dotted fold lines.
- This ring gets glues around the kitty head with all tabs pointing inward and aligned with the edge.
- One end tab is positioned following the back, and the other is following the chest.
- Do not allow the edges to creep in. The front is a little bigger than the back but if you let the edges creep in, you will have problems with the fit later.
- Prepare Edge # 5 the same way you did previous edges. Fold over the end tabs and all the edge tabs along the dotted fold lines.
- The direction depends on what direction your kitty faces. Position the edge to determine the correct fold direction.
- It gets adhered to the chin, down the chest to the notch in the base, just like you did on the back piece.
- Prepare Edge # 6 the same way you did previous edges. Fold over the end tabs and all the edge tabs along the dotted fold lines.
- The direction depends on what direction your kitty faces. Position the edge to determine the correct fold direction.
- It gets adhered to the back of the head, down the back along the dotted edge the is the tail fold line, just like you did on the back piece.
- You now have back and front kitty parts.
7. Add Weights
- Once you add an LED light to the top of this kitty, she will become top heavy. In order to prevent that, hot-glue some weights into the base of the back piece. (Don"t put them in the front piece!) This can be some washers or nuts, a few nickels or even a small bag of sand. Use something that is easily available to you.
8. Slide together and complete.
- The fronts slides over the back. There is some flexibility and space.
- I squirted a little hot glue in to a variety of spaces around the back edge down in the slot.
- Squirt in a little, and hold to stick.
- Repeat in other cracks as well.
- I did not glue the entire edge but spot glued it in 5-6 different locations to hold things together and in place.
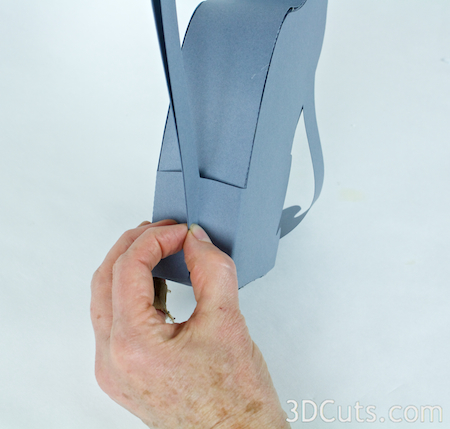
- The two tail pieces get folded into the center and glued at the base,
- And then glued all the way up matching edges.
9. Add embellishments.
- Be creative here. A ribbon or other bling will change the personality of your kitty cat.
10. Slide an LED tea light into the back.
3d Cats by 3dCuts.com, Marji Roy, 3D cutting files in .svg, .dxf, and .pdf formats for use with Silhouette and Cricut cutting machines, paper crafting files, Halloween, Cozy Kitty, Classy Cat
- The glow in a darkened room is mesmerizing! Or place sitting on a window ledge. No LED light is needed. The sunlight will shine through and make the eyes glow as well.
Make the Cozy Kitty to keep your Classic Cat Company!
© 2014 Marji Roy, 3DCuts.com


