
Ledge Village - Town Hall
Project Description
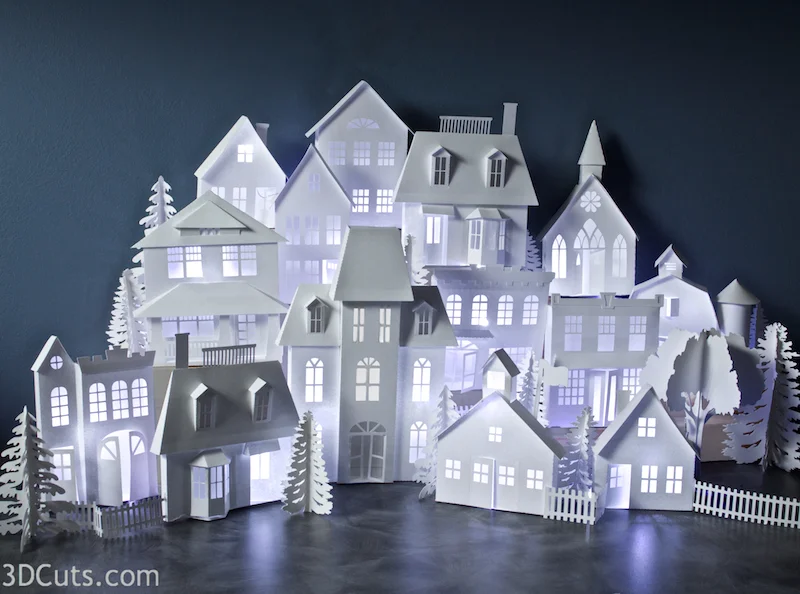
The Ledge Village is series of 3D buildings and accessories that can be combined in a mix and match fashion to build tiny villages on small ledges around your home. The buildings are thin, with all detail on the front so they fit on small trim ledges. A growing number of files for Ledge Village can be found here at 3dcut.com
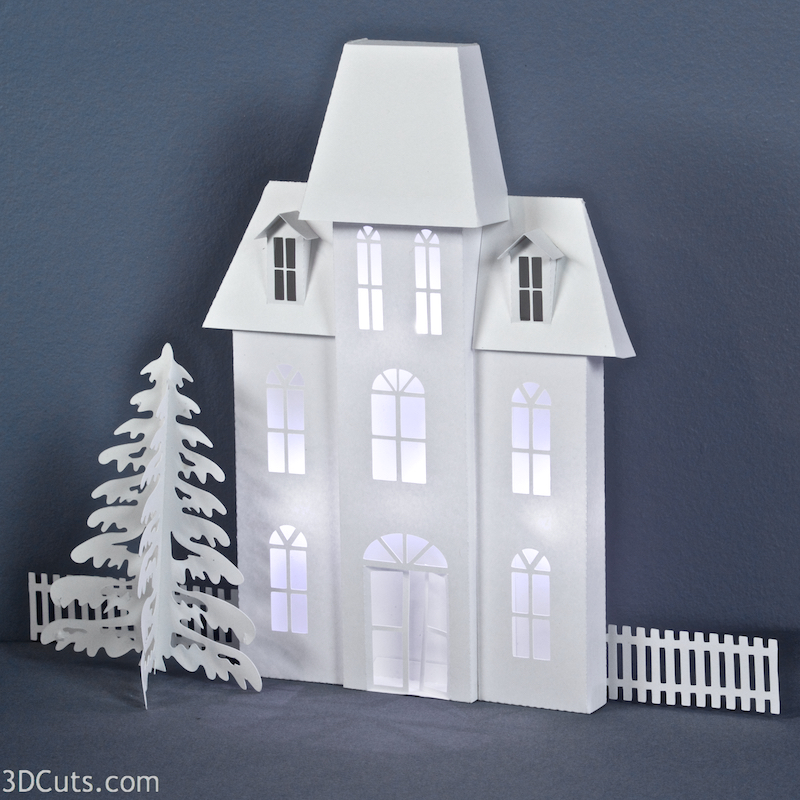
This tutorial is for the Town Hall. I am adding this to Ledge Village in 2017. Like any town hall it will be a center point of your Ledge Village. This is the most ambitious Ledge Village building to date and not the first one to attempt. The tutorial below is complete and will make assembly easy but you should try some of the simpler buildings in this series first.
Note: Ledge Village cutting files are available here on this website and individually at the Silhouette online store. The Silhouette Store does not provide an option for group purchases but you can purchase the entire village as a grouped file here for a better price.
Supplies Needed:
- Cutting File downloaded on 3DCuts.com here
- Scor-Tape Adhesive in 1/8", 1/4", and 1/2" widths
- Card Stock. I especially like the Neenah Premium Card Stock 65 lb available at Amazon.
- Needle nose tweezers
- Fairy lights (optional)
Parts Sizes:
- These measurements apply to files download from 3dCuts.com in SVG, PDF, PNG, or DXF formats. The Silhouette files are assembled in a single file and these measurements don't apply.
- Notes on part sizes: Some with different cutting machines and software combos might have size consistency issues on import. I have grouped this building as four files. If you keep the parts grouped together and resize the groups to match the dimensions below the parts should all fit together.
- File 1- 7.3213" w x 9.9491 h
- File 2- 7.8077" w x 9.7117 h
- File 3- 5.9878" w x 9.1957 h
- File 4- 7.788" w x 10.4909 h
Steps for completing the 3-D Ledge Village Town Hall project:
1. Download the cutting files for your cutting machine from 3Dcuts.com here.
2. Load the files into your cutting software following the steps for your cutting machine.
3. Prepare the files:.
- For the Silhouette: The SVG files from this site will need to be turned into cutting files. Click here for detailed steps on how to use SVG files on your Silhouette. http://www.3dcuts.com/tutorial-upload-svg-silhouette
- For the Silhouette files from the Silhouette online design store: This download comes in one long file with cut lines already enabled. You will need to ungroup the file and then copy and paste the parts into separate page sized files to cut. All the text instructions are non cutting items.
- For Cricut Explore: Here is a guide for importing into Cricut Design Space. http://www.3dcuts.com/tutorial-adding-3dcuts-files-to-cricut
- Each piece will fit on 8.5 x 11" card stock. You will need to cut and paste the pieces to different pages to cut.
4. Cut the files:
- Paper colors are your preference. I like the simplicity of the all white but others have used a variety of card stock with great results. The file is grouped together. You can ungroup it in order to cut various parts from different papers.
- The windows and smaller details (like the picket fence) require you to understand how your cutting machine and blade best cut details. I find working with a good blade and mat and my Silhouette cut settings set on Card stock with a blade of 3, a speed of 4 and a thickness of 24 works nicely. I especially like the Premium blade for detail work.
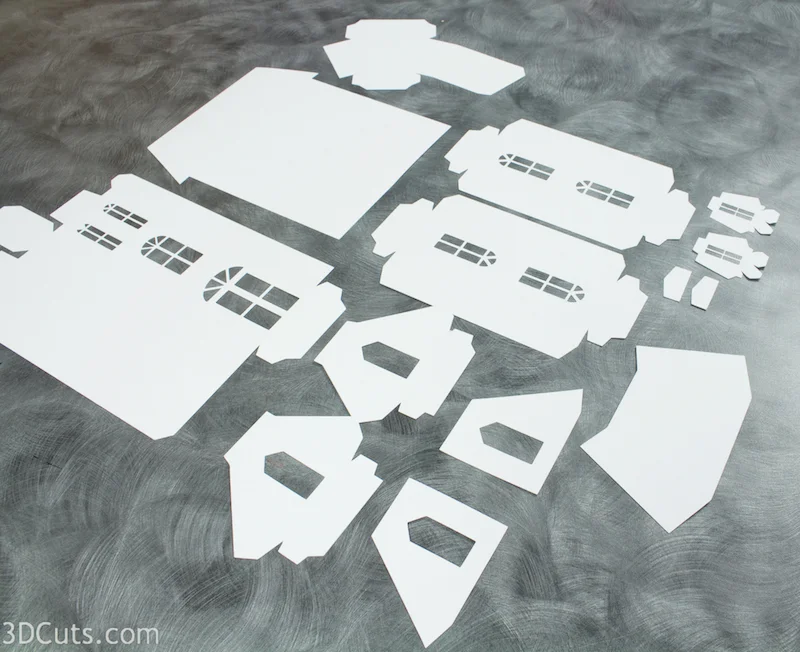
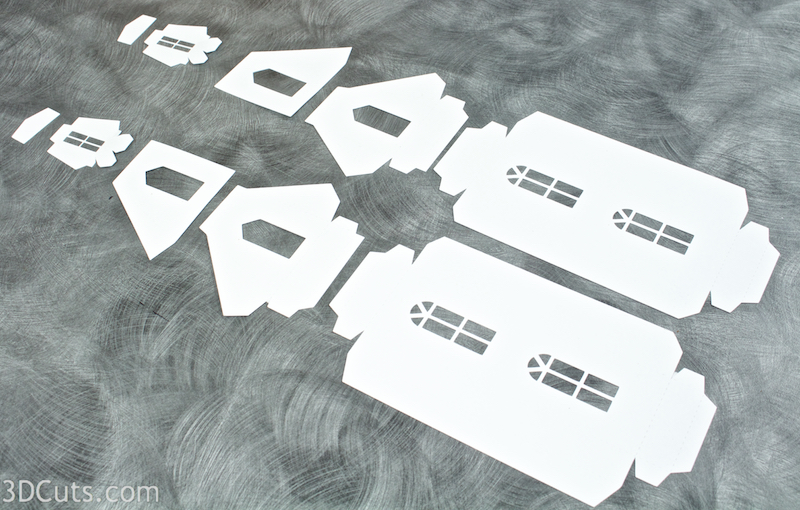
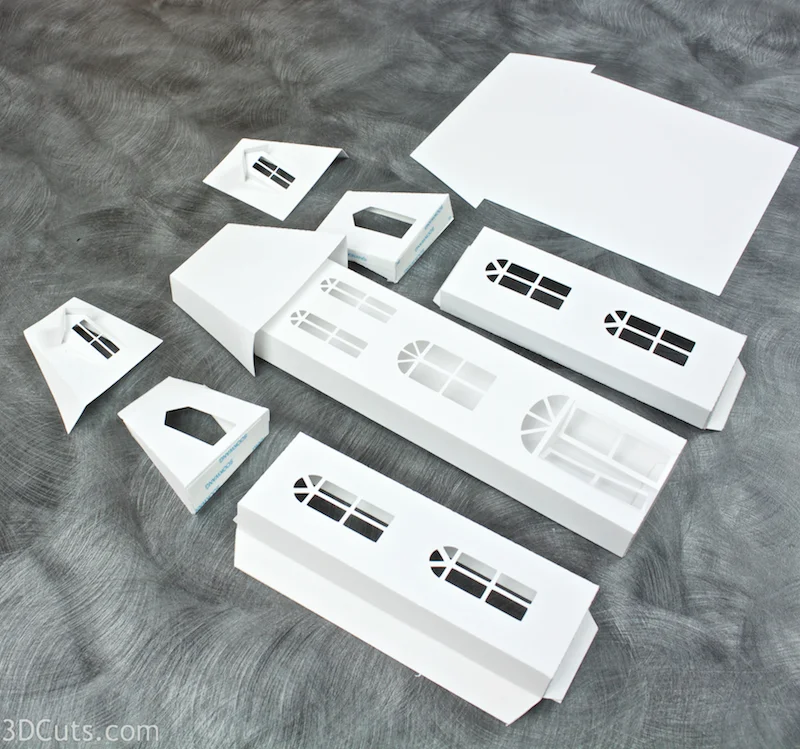
- Below is a diagram of all the pieces and the terms I will use in this tutorial for assembly.


5. Start with the center tower.
- Note each cut file has dotted lines. These are fold lines.
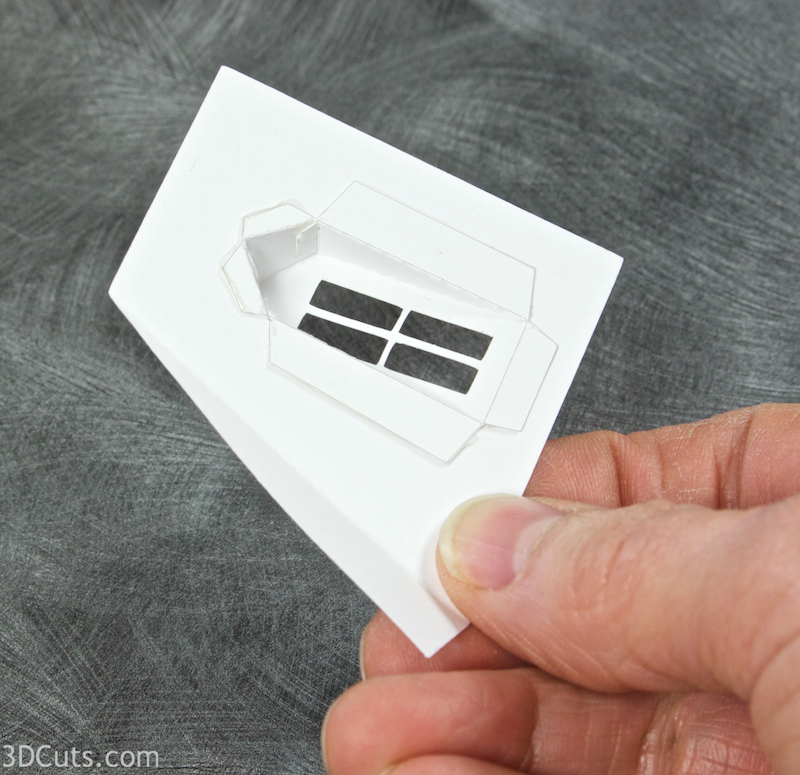
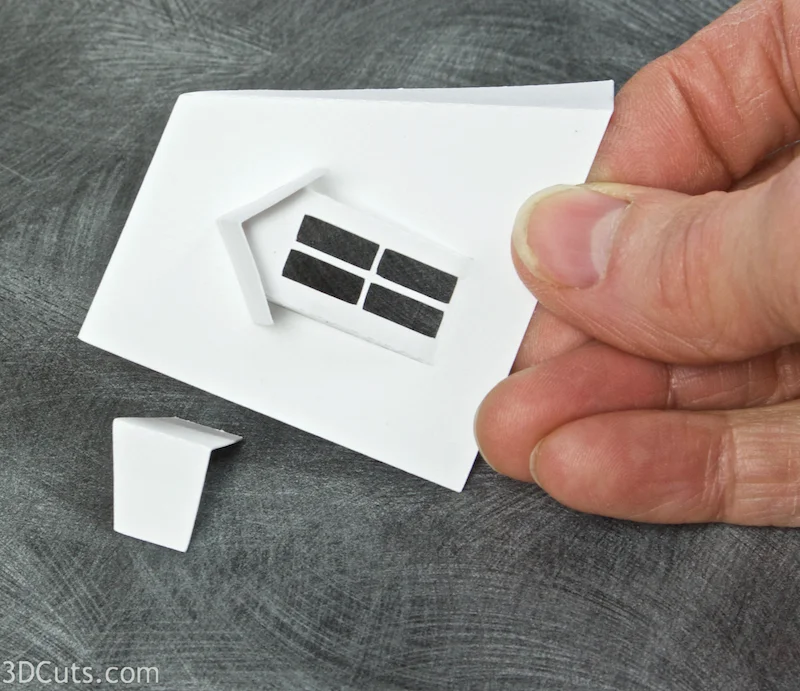
- Fold and crease all the dotted lines on the center piece toward the back.
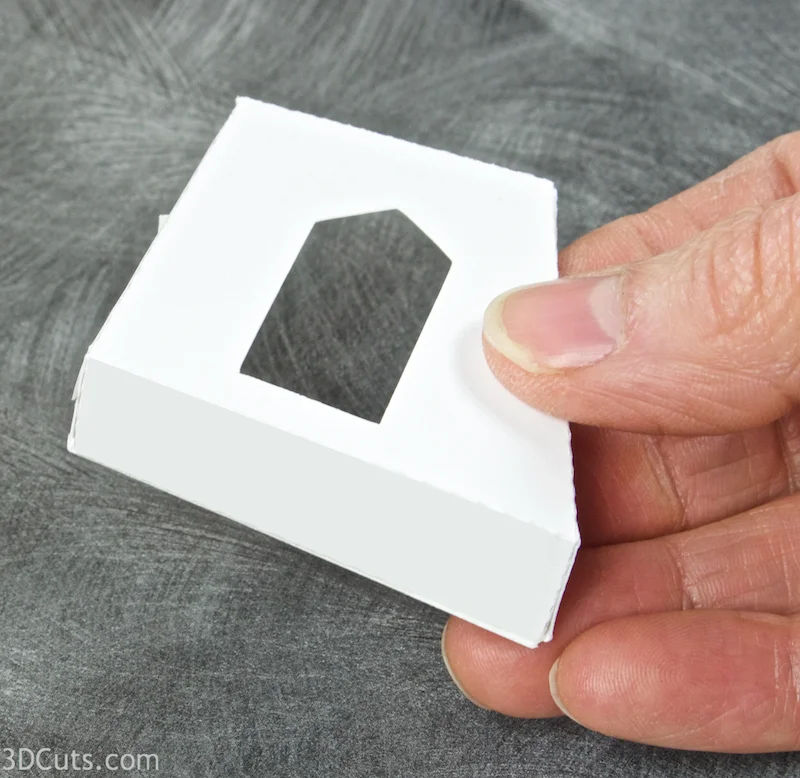
- Be sure to fold the door in as well. This hard to do later.

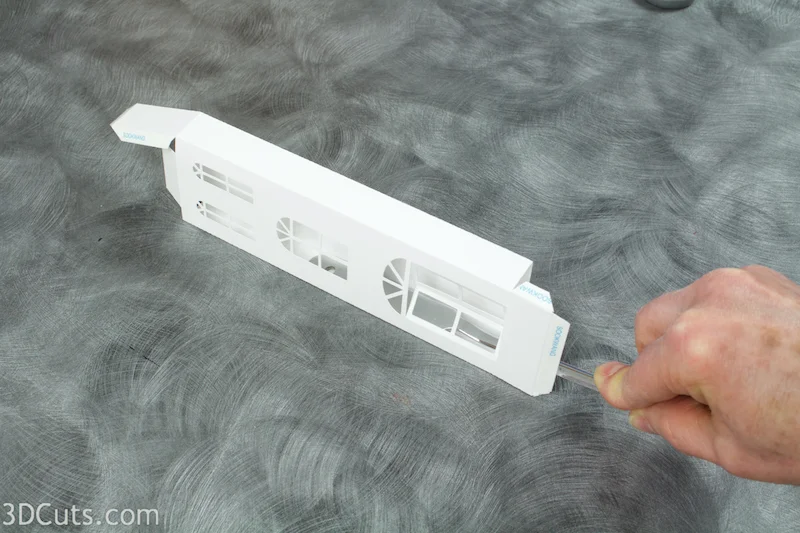
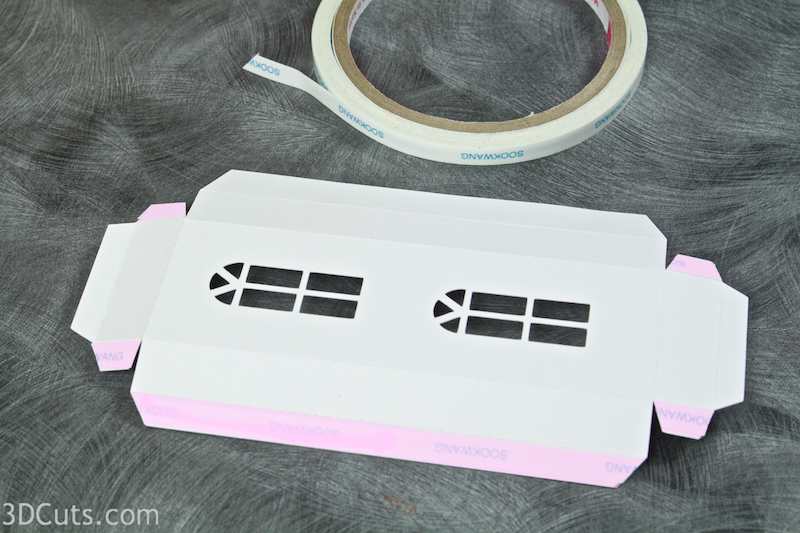
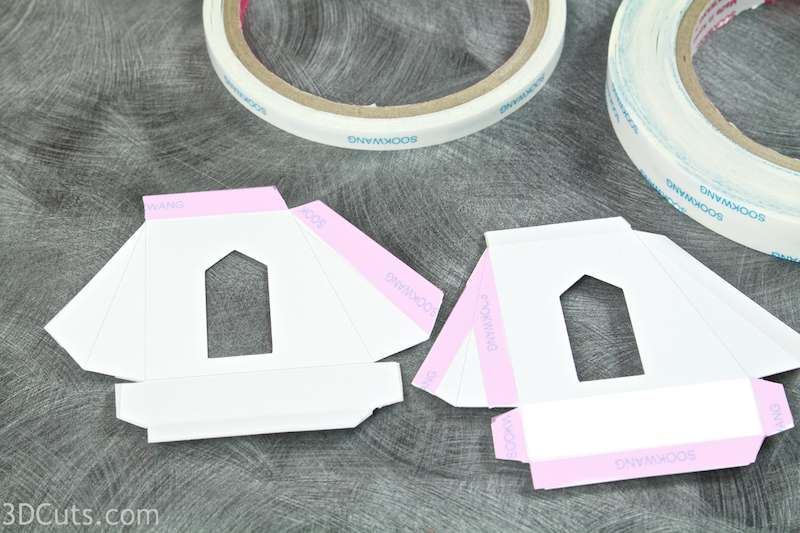
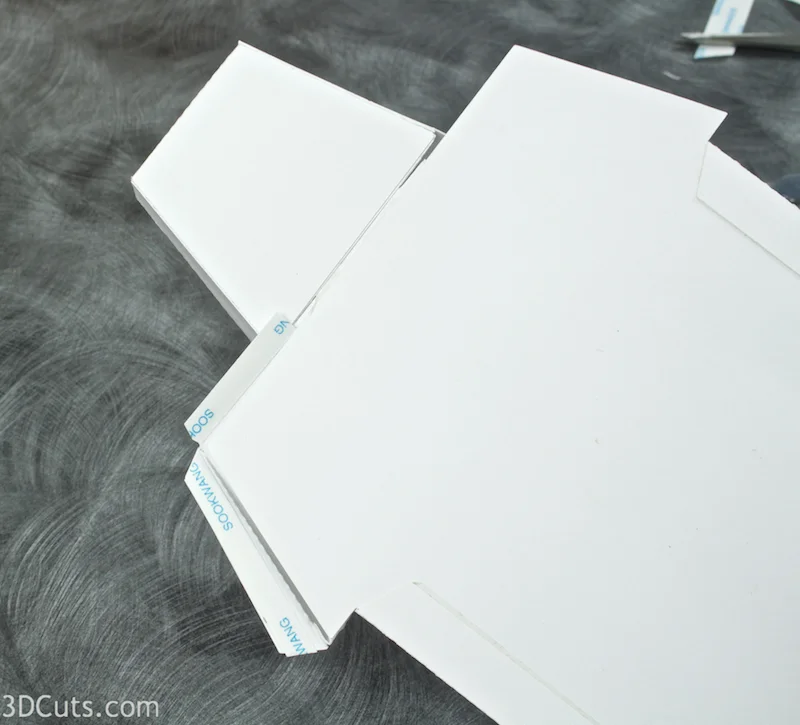
6. Add Scor-Tape adhesive to the main tabs on the tower as shown in the photo. Leave the backing in place.
- Over the years I have used many different adhesives for making the Ledge Village Houses. I have found that Scor-Tape holds best on 3D projects. I also like that I can remove the backing as needed which helps in assembly.
- This is the second tutorial where I have adjusted the color of the Scor-Tape in post photo processes to help you in identifying locations. Score-Tape isn't pink in real life. I like to apply all the Scor-Tape to a piece while it is still flat and then peel the backing from various pieces as I assemble the building.
- Score-Tape gets applied to the FRONT side of the center tower on all the tabs as shown in pink the photo. LEAVE THE BACKING ON the Scor-Tape.
- As you apply the Scor-Tape be sure to press it down well. Extra effort spent pressing in place will help to the longevity of the adhesive.
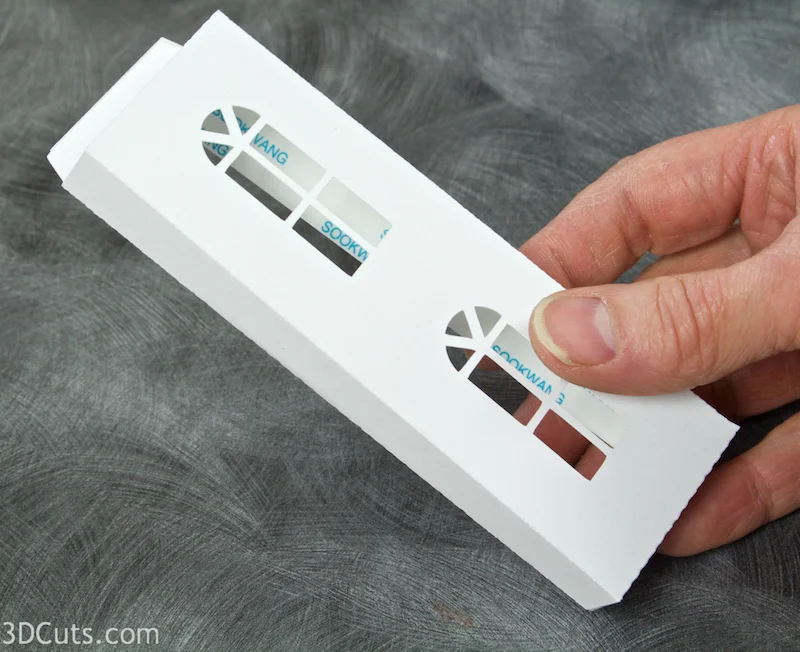
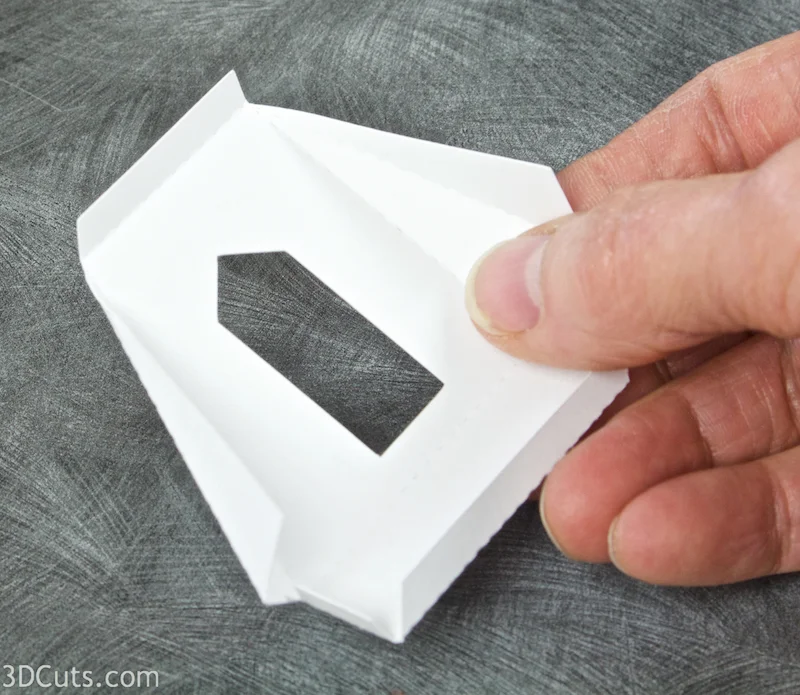
- Peel off the Scor-Tape along the long side edge of the center tower and press it in place along the opposite edge forming the box for the tower. Match top and bottom.
- Keeping things square is important through out this tutorial.
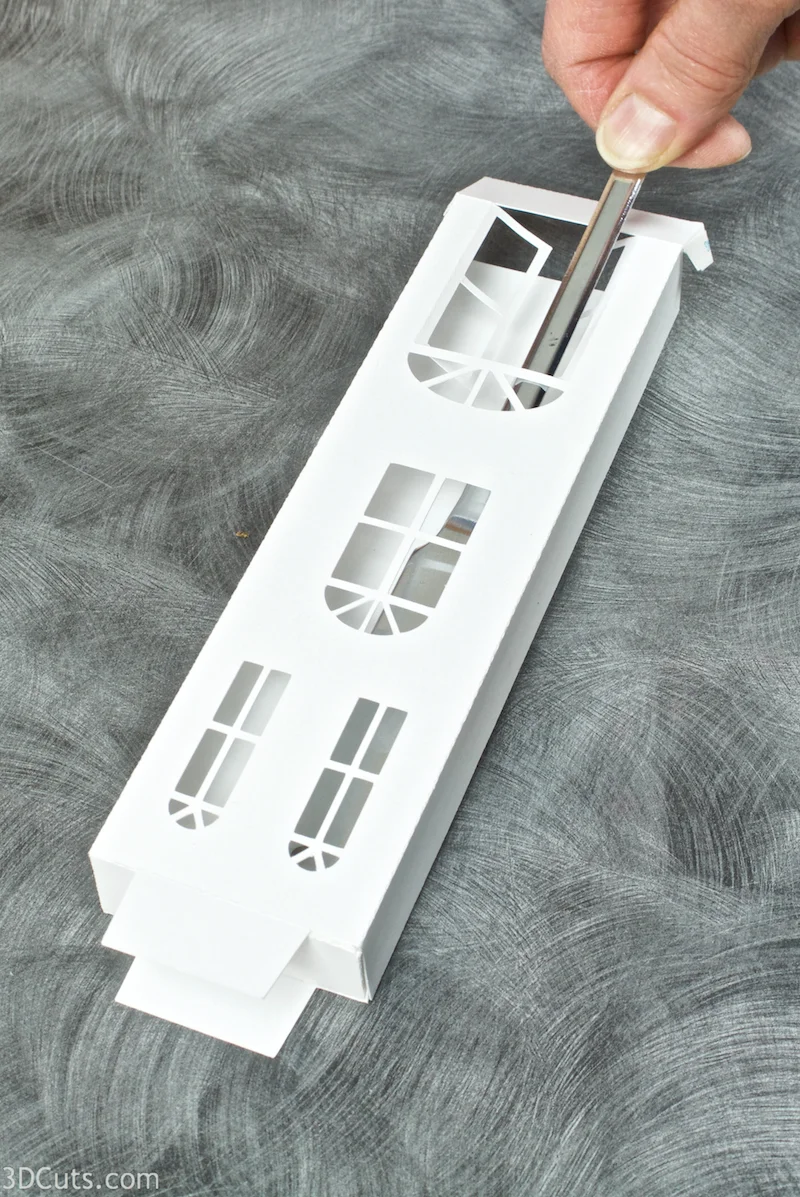
- It is important to press all seams well. I use a letter opener to get inside and press this seam into place.
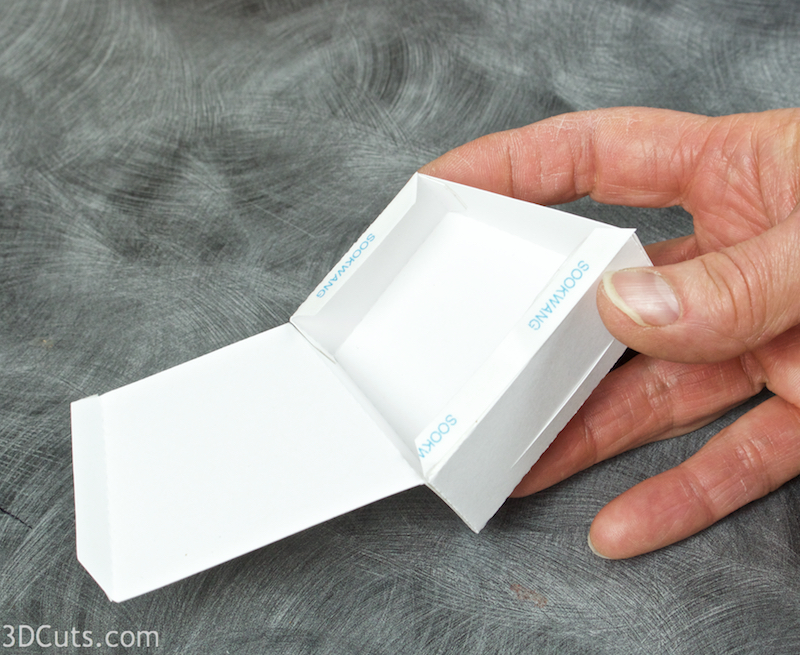
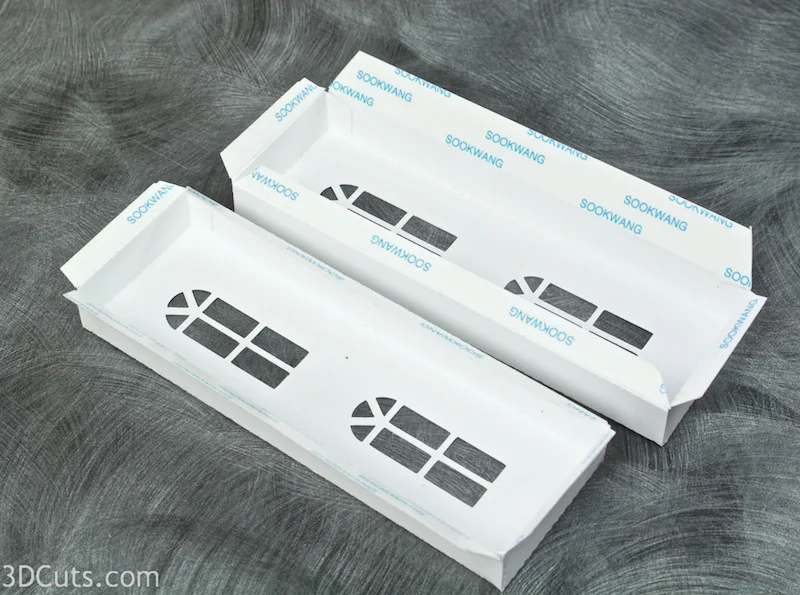
- Peel off the backing on the Scor-Tape of all 3 tabs on the top of the center tower box.
- Fold them in and carefully position the top in place to hold the tower shape square. It forms a flat "roof" to this section.
- Notice the two tall tabs continue to stay up and the flat section folds down between them.
- Again use the letter opener to press these seams in place.
- Repeat this on the bottom of the center tower.
- Remove the backing strips off all 3 tabs on the bottom. Fold it into place with the tabs inside.
- Press in place reaching in the door openings.
- Identify the Center Tower roof base piece.
- Fold and crease toward the backside on all dotted fold lines.

- Apply Scor-Tape to the front side of all the tabs high-lighted in pink in the photograph.
- Press in place well.
- Peel the backing off the two shorter tabs on the base of the the roof.
- Bend that in place and press the tabs in place on the inside of the sides.
- Work to keep things square.
- Do the same for the top of the center tower roof base.
- Leave the back open for access.
- Apply Scor-Tape to the outside bottom of the tower roof base. Use 1/2" Scor-Tape and apply a strip between the two slits in this panel.
- Apply a strip of 1/4" Scor-Tape to the inside of the large front tab extending up from the front of the tower.
- Apply a strip to the back of the tab extending up from the back of the tower.

- Peel the Scor-Tape backing only from the bottom of the roof piece.
- Insert the two large tabs on the tower through the corresponding slits on the bottom of the tower roof base. The roof base has the flat side toward the back and slanted side toward the front.
- The front slit is about 1/4" in from the front of the roof.
- The back slit is directly on the fold line along the back.
- Pull the tabs through working to keep the roof centered. When the tabs are completely through and the roof is centered press down to adhere the two parts together.
- Peel the backing off the two tabs inside the roof. fold the front one down in place to further secure the tower and roof together. Leave the back one standing.

- Press the tab along the base of the roof up against the inside tab and adhere.
- Peel the backing tape from the 3 remaining tabs on the roof base and carefully close the back of the roof while lining up all edges and press in place.
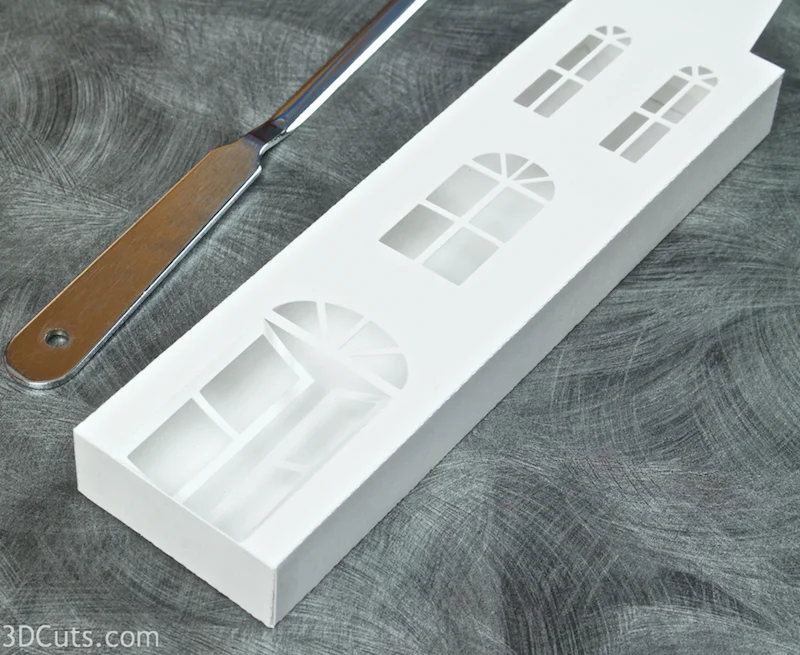
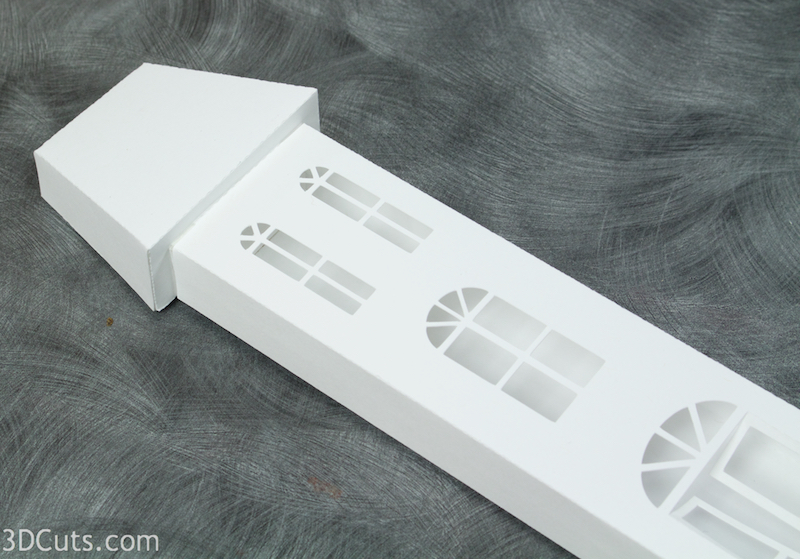
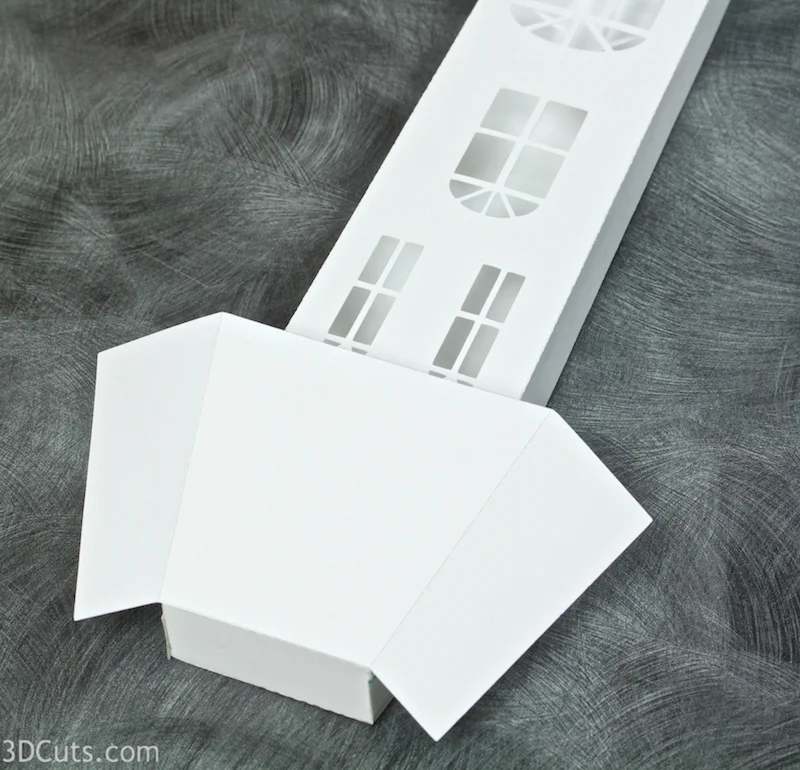
- The back of the tower will now be closed as shown.

- The front of the tower looks like this with an overhanging roof.
- Locate the Tower Roof Cover piece.
- Fold back on both dotted fold lines.
- Apply 1/2" Scor-Tape to 4 locations on the top of the tower. It gets applied on the front surface along both the bottom and top edges of the roof, and along the back edge of both side panels of the roof.
- The roof cover piece edge will align with the top of the tower base roof and be centered.
- Peel the back off the Scor-Tape and press the roof cover into place on the front and then wrap the two sides around and adhere them in place as well.

7. Make the two town hall sides.
- The finished town hall is made up of the center tower and a left and right side. The left and right sides are assembled the same way but as mirror images of each other.
- Separate out the pieces and layout them out so you are sure to construct them as mirror images.
- Locate the following:
- Building left side* Building right side*
- Roof base left side* Roof base right side*
- Roof cover left side* Roof cover right side*
- Dormer left side + Dormer right side+
- Dormer roof left side+ Dormer roof right side+
* These pieces mirror each other
+ These pieces are the same either way
- Construct the right side of the building.
- Start with the building right side piece. The curves go to the top of the windows and the wider side tab goes to the right.
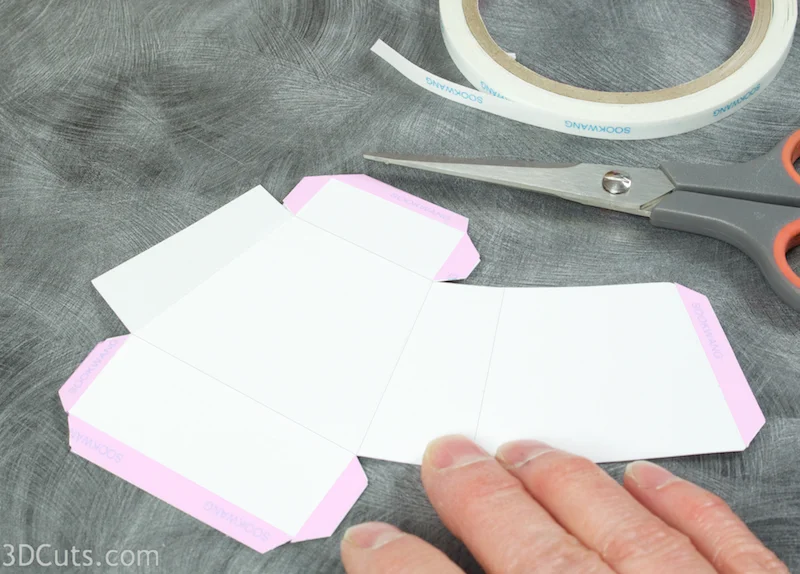
- Fold and crease all dotted lines to the back.
- On the front add Scor-Tape to all the tabs highlighted in pink in the photo to the right.
- Leave the backing strip in place.
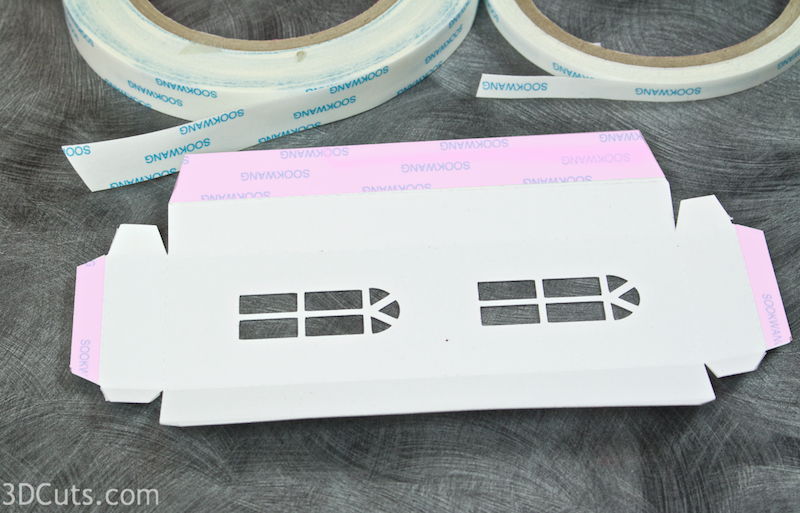
- Turn this piece over and on the back side add Scor-Tape to all the areas shown in pink in the photo to the right.
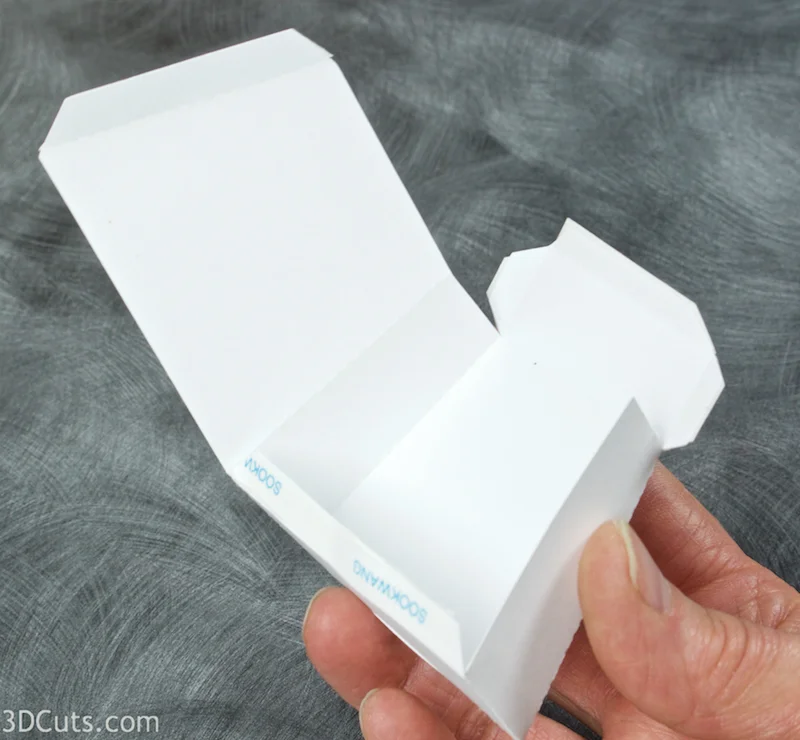
- Peel the score tape off the two small side tabs of the bottom.
- Fold it up and adhere inside making a square bottom.
- Do the same with the top.
- Repeat these steps with the left side of the building being sure to have it assembled the opposite way.
- Each piece should end up with the large tab sticking out the opposite side. That will be the outside edge. The smaller tab will be in the center.
- Construct the right dormer.
- Fold on all dotted fold lines on the dormer. There are many.
- The inner set that border the window frame all fold to the back. There are four of those.
- There are three tiny tabs to shape the peak of the roof. They get folded back.
- The next set - which are the support tabs- all get folded forward. There are five of those, one at the bottom of the window, two on the sides, and two on the roof.
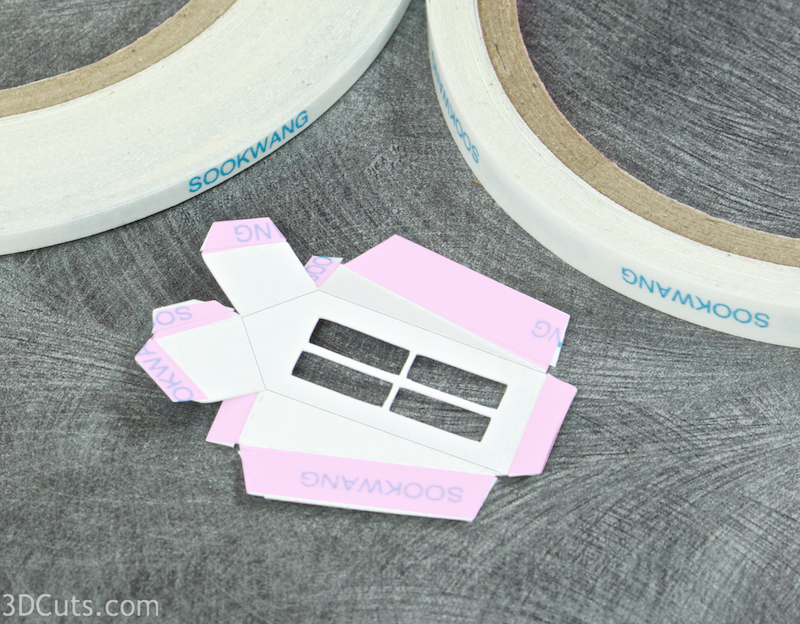
- Apply Scor-Tape to all the tabs.
- I used a mixture of 1/8" and 1/4".
- Use the photo as a reference. There are 8 tabs that need Scor-Tape.
- Leave the backing in place.
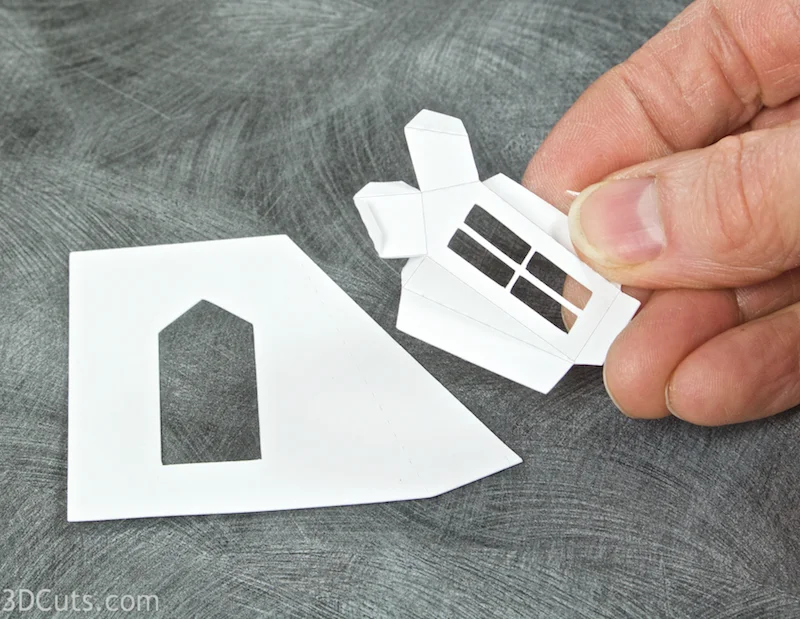
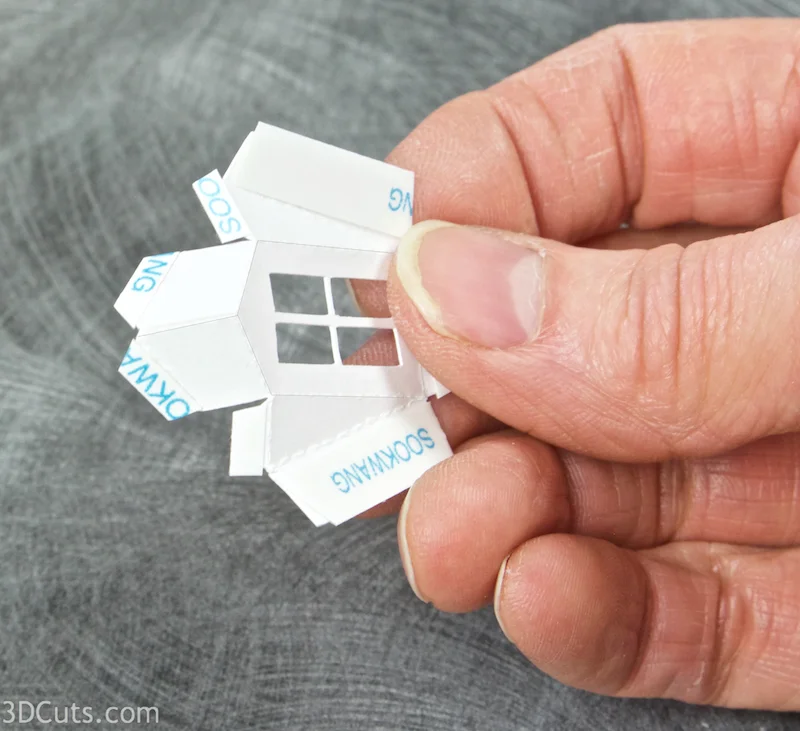
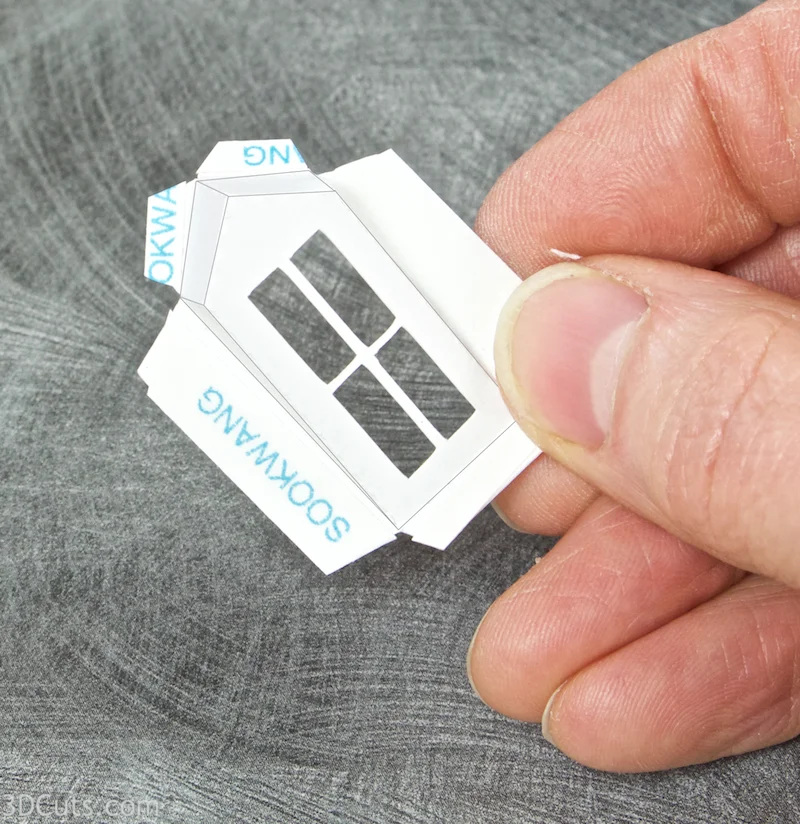
- First peel and adhere the tab in the top center and form the peak. (Left image)
- Then peel and adhere the tabs to each side of that and form the left and right sides of the dormer. (right image)
- The dormer fits tightly through the opening in the roof cover.
- Peel the backing off all 5 of the tabs, push the dormer through the opening from the back to the front keeping all the tabs on the back side. Make sure the peak of the dormer is snug up in the peak of the opening and adhere the tabs on the back side.
- It will look like this on the backside with all the tabs holding the dormer in place.
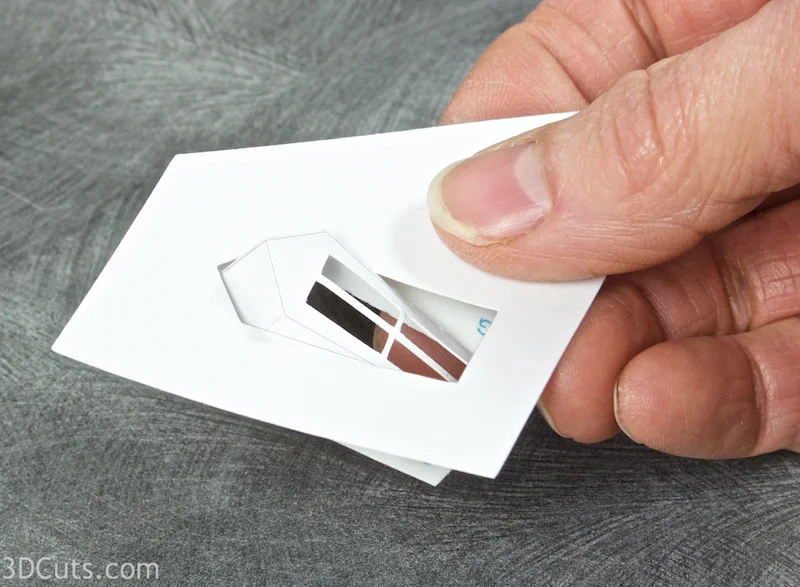
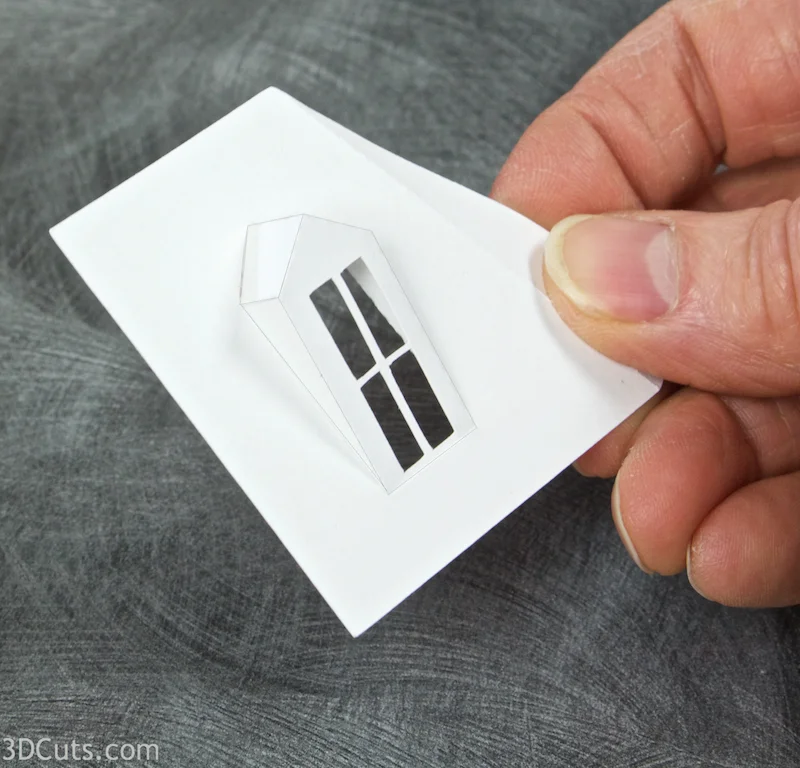
- Fold the dormer roof in half along the dotted fold line.
- Apply a strip of adhesive on the under side and glue it on top of the dormer.
- The angle edge goes against the roof.
- Take the right dormer roof base and fold and crease on all dotted lines toward the back.
- The image below shows both the front and back of this piece with the Scor-Tape applies.
- The back is on the left. Apply Scor-Tape to the tabs as shown.
- The front is on the right. Apply Scor-Tape to the tabs as shown.
- Peel off the backing on the 2 little tabs on the bottom, fold up the bottom, and adhere the tabs inside the sides forming a square base.
- Repeat the dormer construction with the left side being sure to create a mirror image.
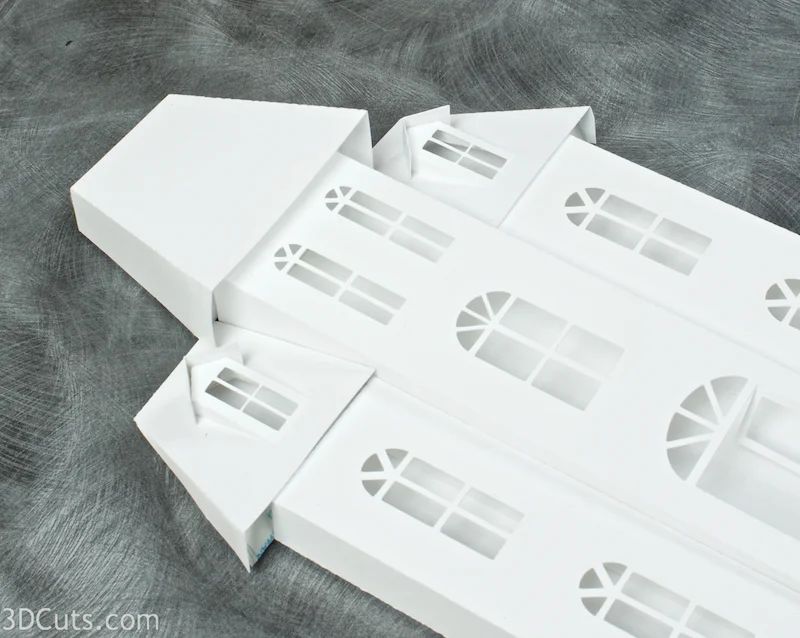
- Here is a layout of how these pieces will get assembled to create the town hall.
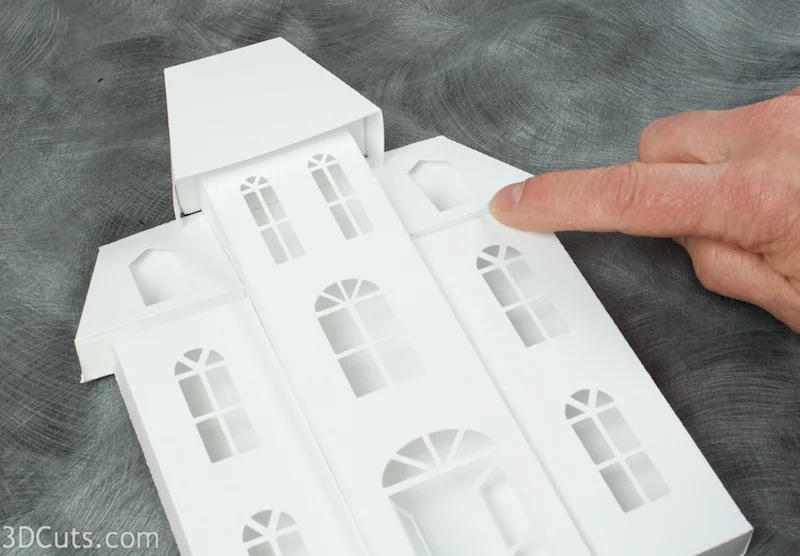
8. Assemble the parts together.
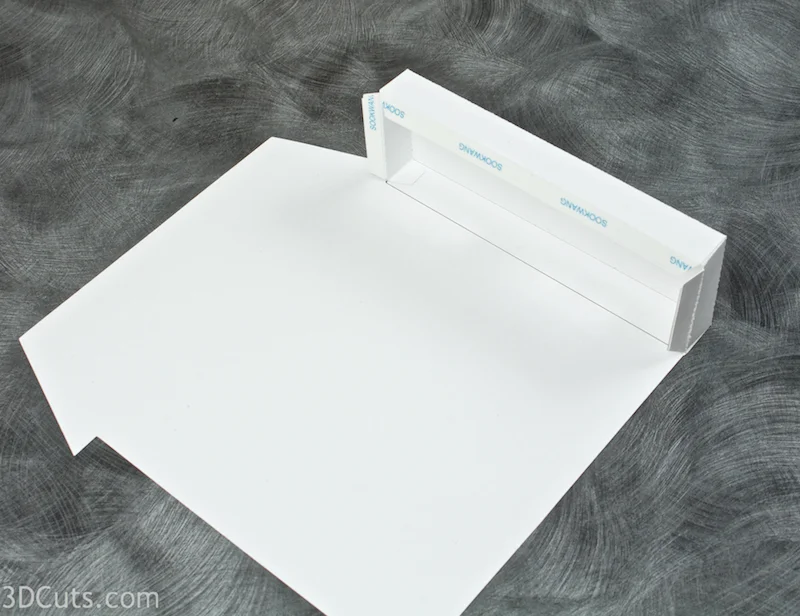
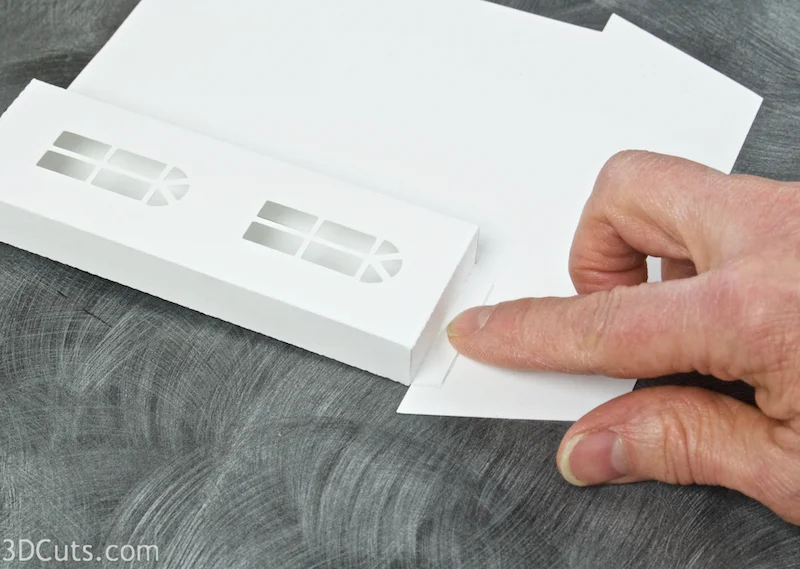
- Take the town hall back and the right section. The larger side tab of the right section will get adhered to the back of the back. The right section will then wrap around and be adhered to the front.
- Line-up the side seam. Peel back the Scor-Tape backing and adhere making sure the top bottoms are even and the edge of the back is aligned with the fold line of the tab.
- Peel off the Scor-Tape backing of the remaining 3 tabs.
- The top tab is to extend up and adhere to the front
- The bottom tab will extend down and wrap around to the back.
- The long side tab will fold under and adhere under the section once it is put in place.
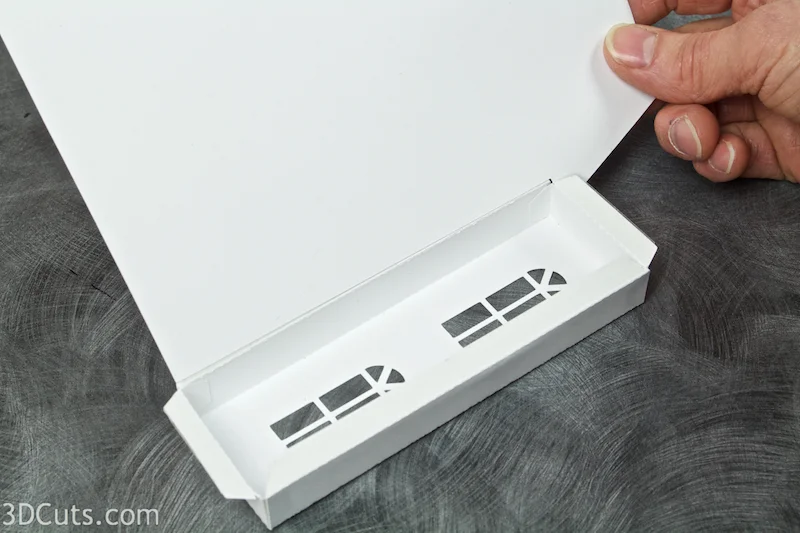
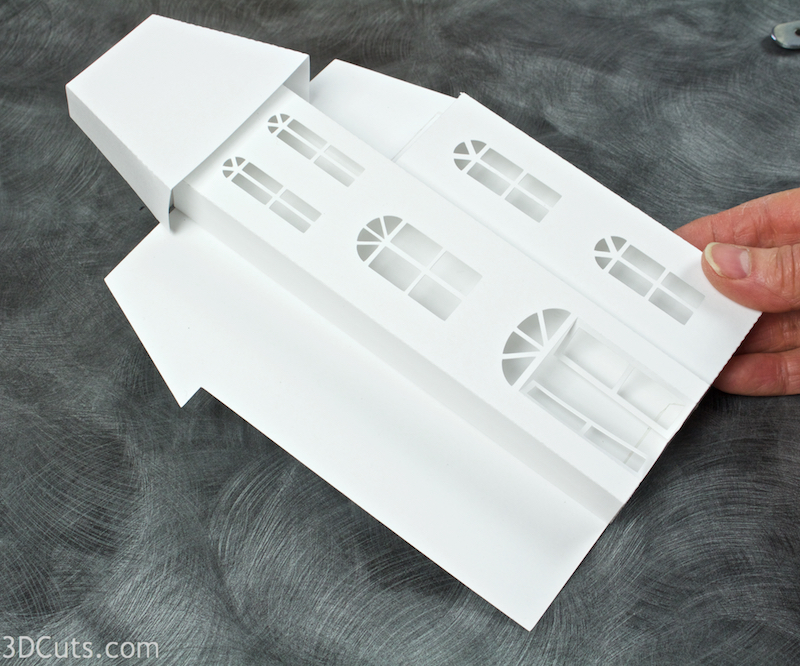
- Roll the right side building section into place on the front.
- The long side seam will adhere first and use your letter opener to reach in and press in place.
- Then press the top seam in place on the front of the back.
- Then fold the bottom seam around to the back and press in place.
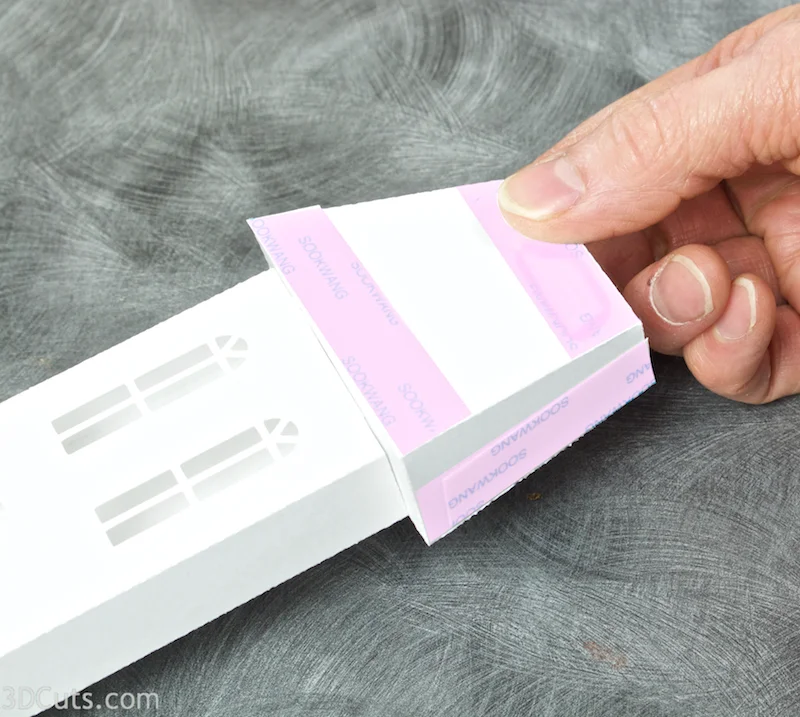
- Apply 1/2" Scor-Tape as shown in the photo.
- Put 1 strip up the side of the recently place right building piece.
- Put 2 strips up the center to line up with the back of the center tower.

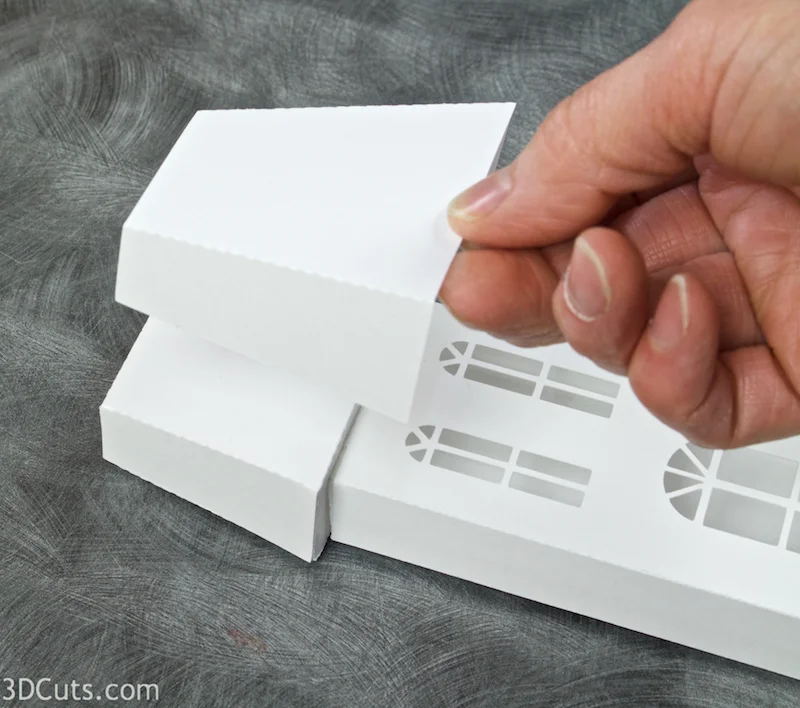
- Peel the backing off all three pieces and place the center tower snug up to the right side and aligned at the bottom.
- Adhere in place.
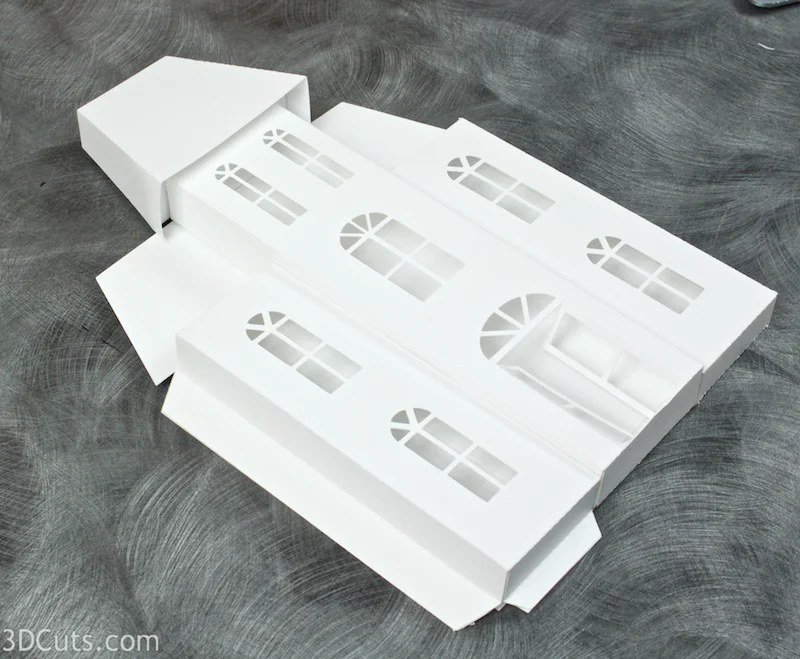
- The left side gets adhered in place.
- Add a piece of score-tape to the side edge of the left building portion. Adhere the left section right up next to the center tower.
- The wide tab on the left gets wrapped around and adhered to the back.
- The top tab gets adhered on the front.
- The bottom tab wraps around and gets adhered on the back.
- When using Scor-Tape it is best to try and find a way to press each seam well.
- Reach in through the windows and press at all points that are accessible.

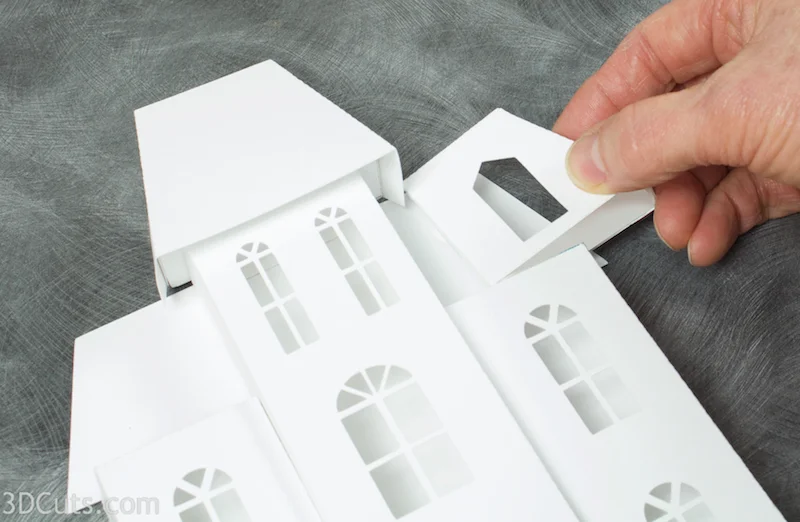
- Add the roof sections to the right and left portions of the building.
- The right roof base will slide in from the right behind the tower roof. The tab extends above the back and out to the right.
- Note: There may be a gap between the roof and the building below. This doesn't matter because it will get covered in a future step.

- Turn the building over and you will see the the tabs extending out.
- Peel the backing strip off and wrap the tabs around and adhere to the back. Press in place.

- Repeat for the left side.
- Add 3 strips of Scor-Tape (1/4")to the roof base. One should run next to the center tower, one on the front of the outside edge, and one along the back edge as shown in pink in the photo.
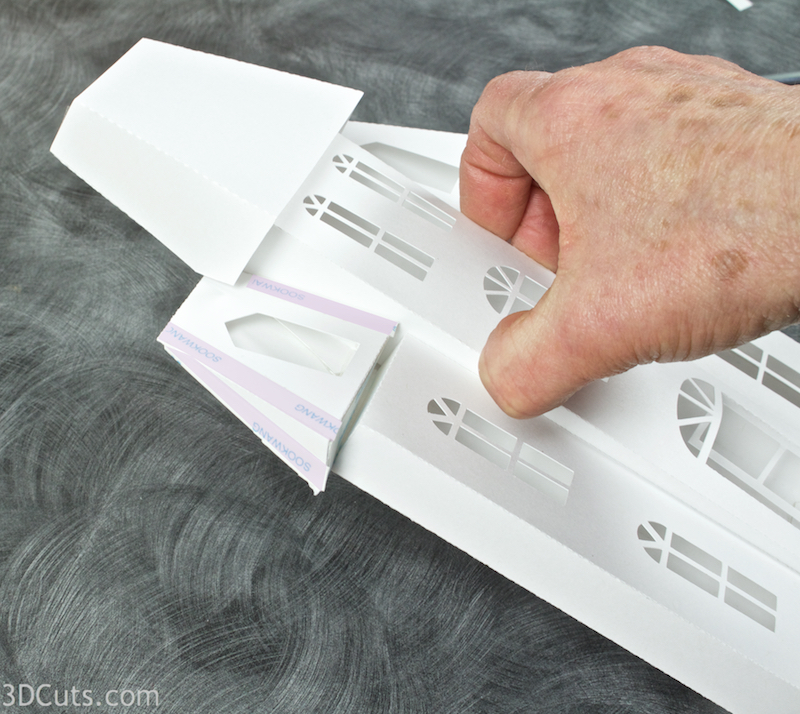
- Peel the backing tape off the Scor-Tape closest to the tower. Slide the appropriate roof cover with inserted dormer in under the tower roof and up against the tower. The top of the roof cover should align with the top and overhang on the bottom. Press in place.
- Reach behind and peel the other two strips and press the roof cover in place wrapping it around the side as you do so.
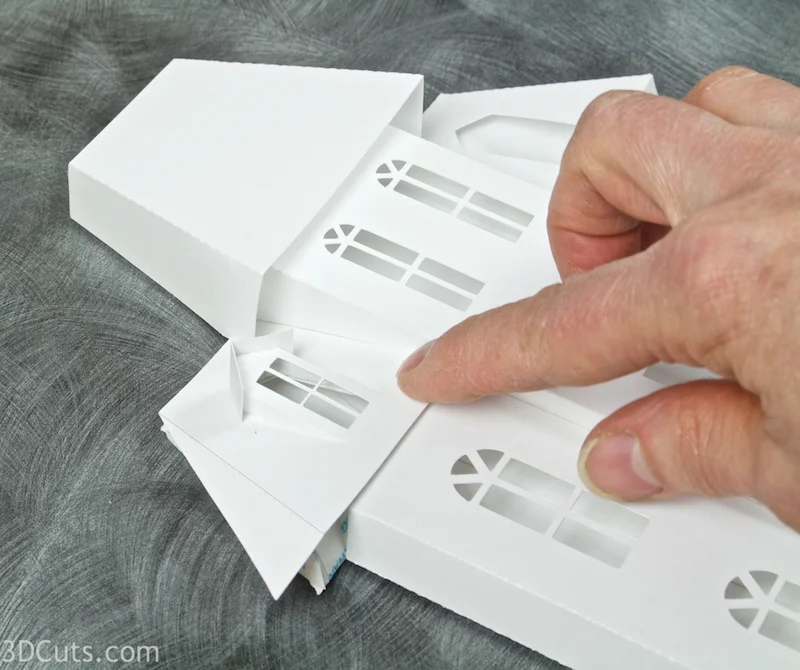
- Repeat on the other side.
The Town Hall for Ledge Village is complete. You can add it to a display with many of the other buildings available for Ledge Village.
In the photos for this display I added battery operated fairy lights (from Amazon) to the buildings. I simply poked a small hole in the back using an x-acto blade and inserted the tiny light.
The file does come with a tree. Go here for the tutorial on tree assembly.
Share your villages on Facebook or by emailing photos to me at marji@3dcuts.com. I share different arrangements on my idea page here.

Important Links to more Ledge Village Resources:
- Ledge Village cutting files are available here. http://3dcuts.com/ledge-village
- Links to all the other Ledge Village Tutorials are available here. http://3dcuts.com/ledge-village-tutorials-all
- Display Ideas here. http://3dcuts.com/ledge-village-ideas/
