
Deer in Forest Star Shadow Box Tutorial

Project Description
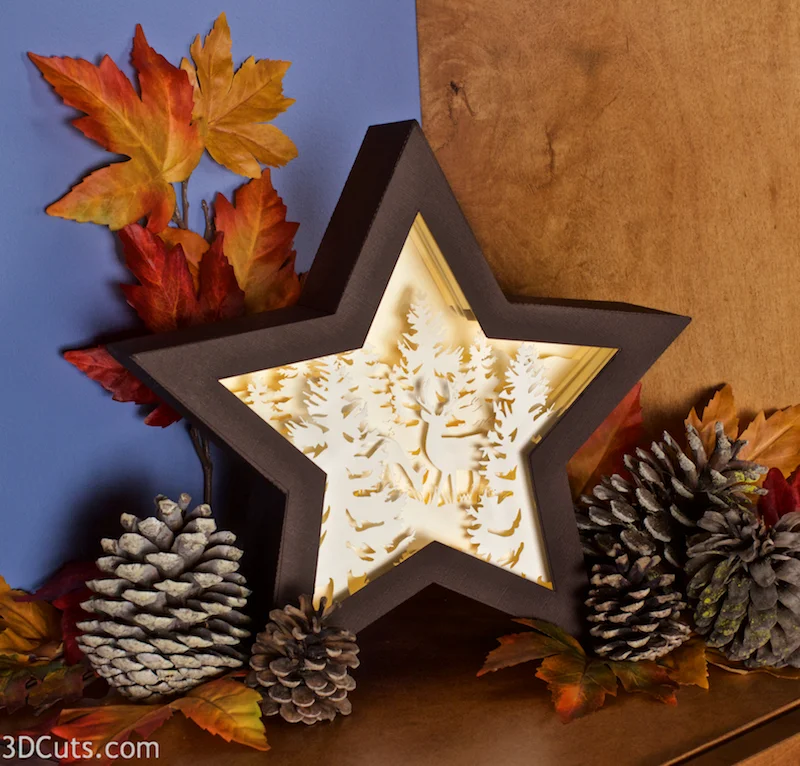
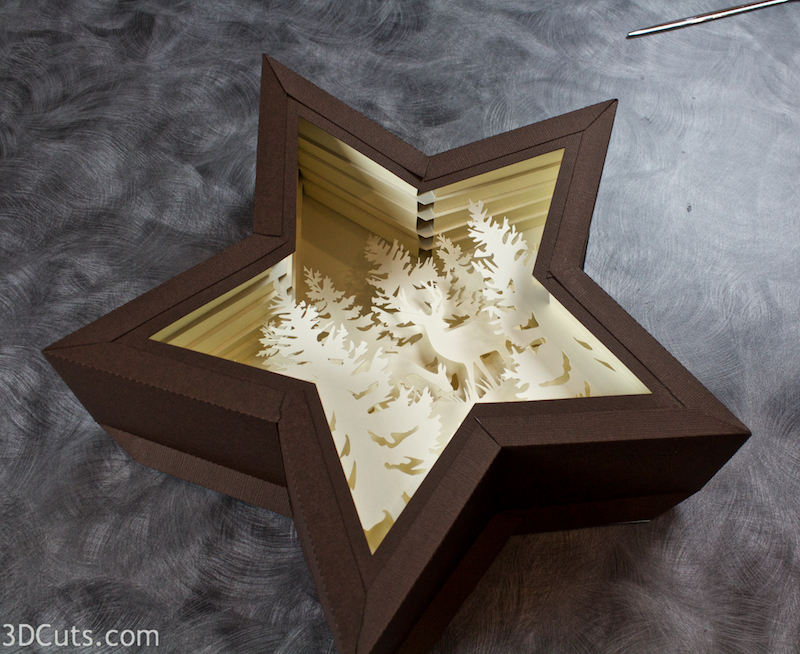
Make a stunning shadow box featuring a buck and doe grazing peacefully in a pine forest. This projects uses card stock and mid-level construction techniques to assemble the 11" tall x 3" deep shadow box. It includes 5 internal layers and mounts for optional LED fairy lights to provide a back glow in the sky. It is perfect for mantle, shelf or hall table.
Download cutting file here at 3DCuts.com:

Supplies Needed:
- Cutting File available here from 3dcuts.com.
- 12 x 12" card stock 9 pieces needed for star frame
- 12 x 12" card stock - 5 light colored card stock for interior layers from Recollections.
- 8.5 x 11 card stock - 5 matching color to interior for side supports
Adhesive - I used Scor-Tape (1/4 and 1/2") Links to Amazon
- String of 20-24 LED fairy lights- battery operated (optional)- Link below
- (I am an Amazon affiliate)
- Hot Glue Gun
- Scotch Tape
Parts Sizes: (need for dxf files)
- Star Frame Front - 11.187" W x 10.5731" H
- Star Frame Back - 11.187" W x 10.5731" H
- Layer 1 - 11.187" W x 10.5731" H
- Layer 2 - 11.187" W x 10.5731" H
- Layer 3 - 11.187" W x 10.5731" H
- Layer 4 - 11.187" W x 10.5731" H
- Layer 5 - 11.187" W x 10.5731" H
- Star Side - 4.023" W x 8.7457" H
- Side Braces (All) - 3.0716" W x 7.0397" W
- Insert - .49" W x 1.5" H
Steps for Completing the Deer in Forest Star Shadow Box
Special Note: I update the instructions online. Check here for adjustments and additional information. Don't just rely on the pdf file that comes with the download.
1. Download the cutting files for your cutting machine from the 3dcuts.com store. Link here.
2. Load the files into your cutting software following the steps for your cutting machine.
3. Prepare the files:.
- For the Silhouette: The SVG files from this site will need to be turned into cutting files. Click here for detailed steps on how to use SVG files on your Silhouette. http://www.3dcuts.com/tutorial-upload-svg-silhouette
- For the Silhouette files from the Silhouette online design store: This download comes in one long file with cut lines already enabled. You will need to ungroup the file and then copy and paste the parts into separate page sized files to cut. All the text instructions are non cutting items.
- For Cricut Explore: Here is a guide for importing into Cricut Design Space. http://www.3dcuts.com/tutorial-adding-3dcuts-files-to-cricut
- For Brother ScanNCut: The svg files will need to be transferred to files for your particular machine. You can change SVG files to FCM files at http://www.canvasworkspace.com/ or Google "How to import SVG files into a ScanNCut" for links to tutorials.
4. Cut the files.
- Note to Silhouette users - The Silhouette sometimes has issues with vertical dotted lines and cuts them in a slow fashion. If you position the pieces so the major dotted lines are horizontal, it might cut much faster.
- There are fine lines. It is best to have a good blade and mat and to slow down the speed. I use the Premium blade.
- Below is a diagram of all the parts, their names and how many to cut of each. You can also see matching colors. Refer to this chart when installing the layers to make sure you are consistent with left and right.

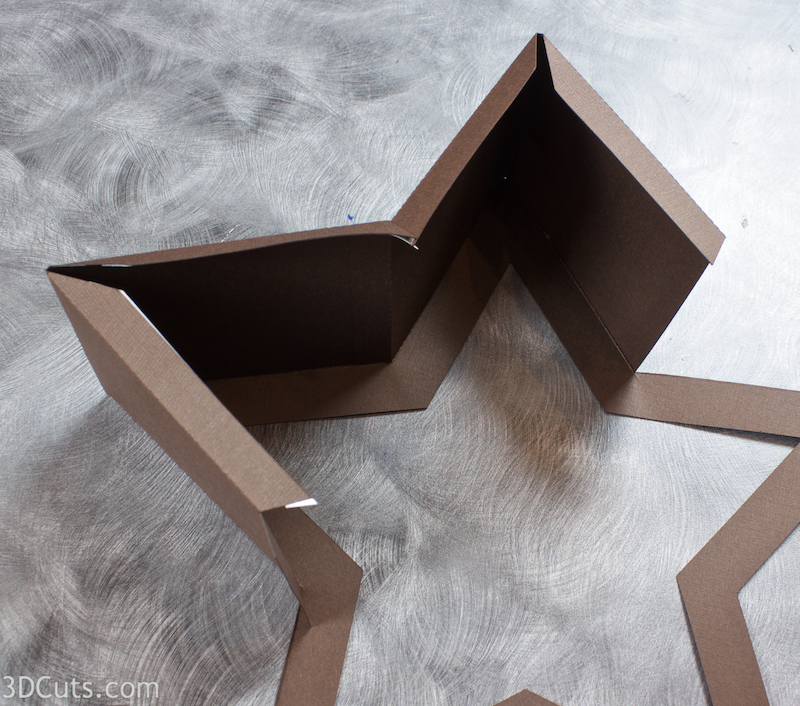
5. Build the star frame:
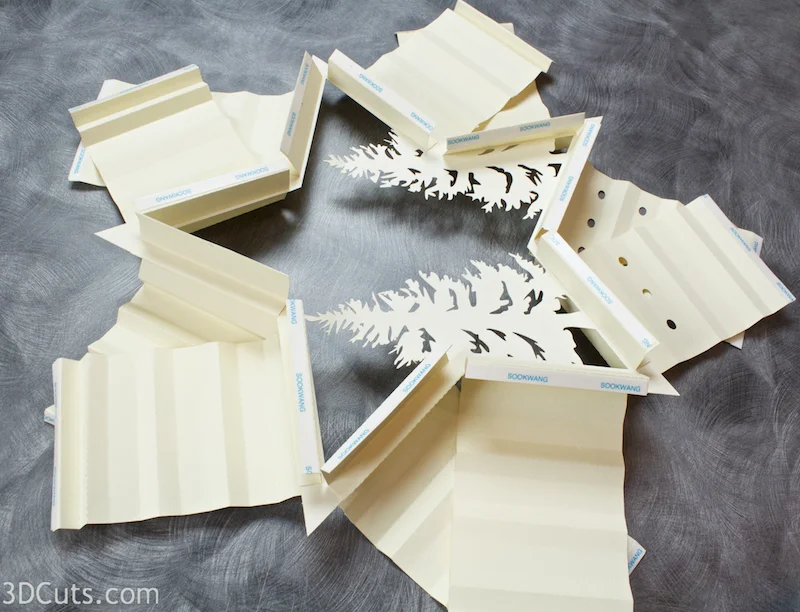
- Identify the 5 star side pieces.
- Fold on all the dotted fold lines. The fours side tabs all get folded inward and the one end tab gets folded outward.
- Part 1 of the Heart Tree Shadow Box Video tutorial match these steps. You can watch that for video guidance on how to assemble this shadow box.

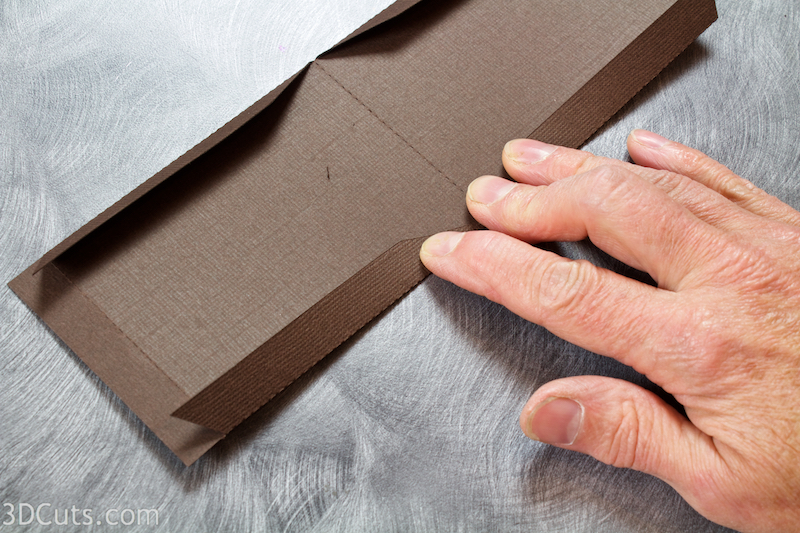
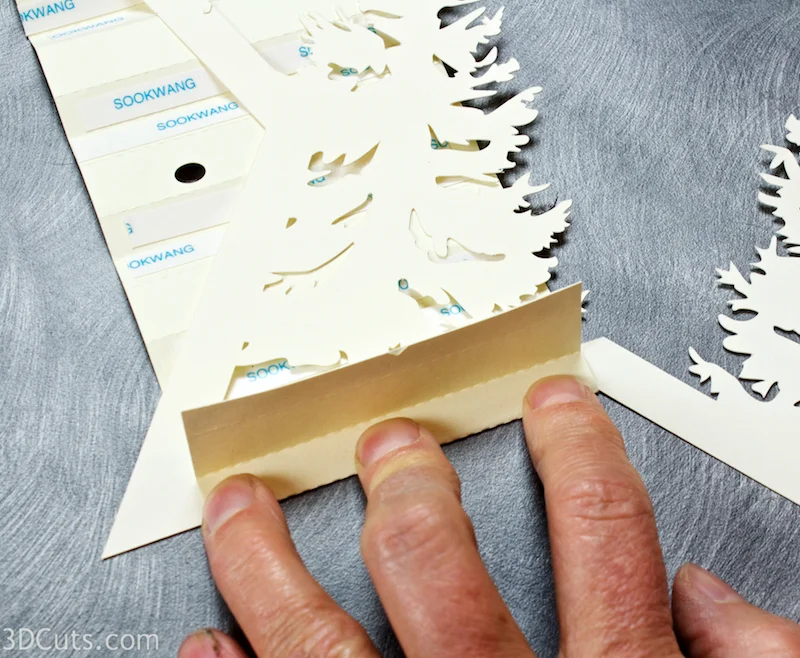
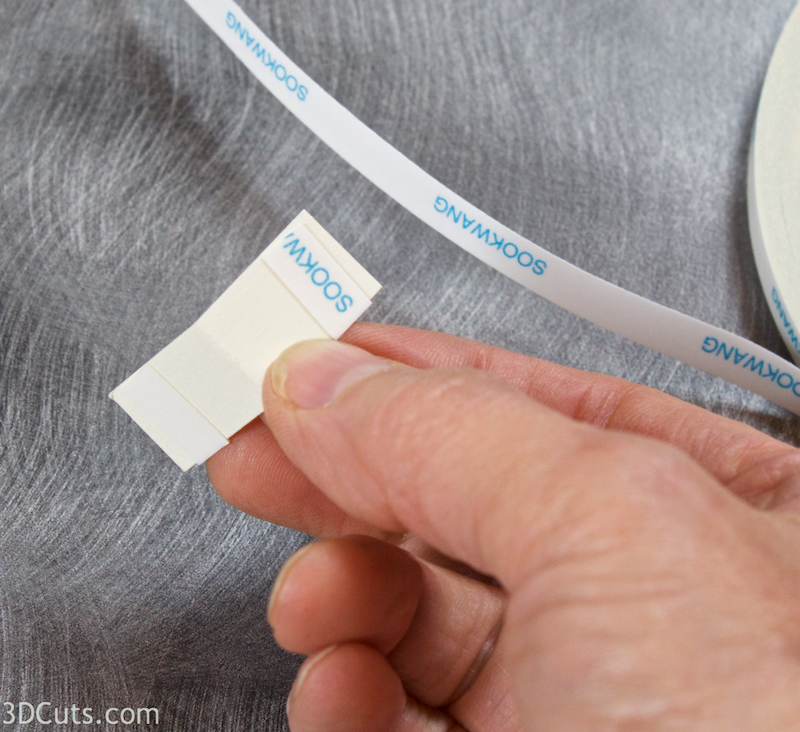
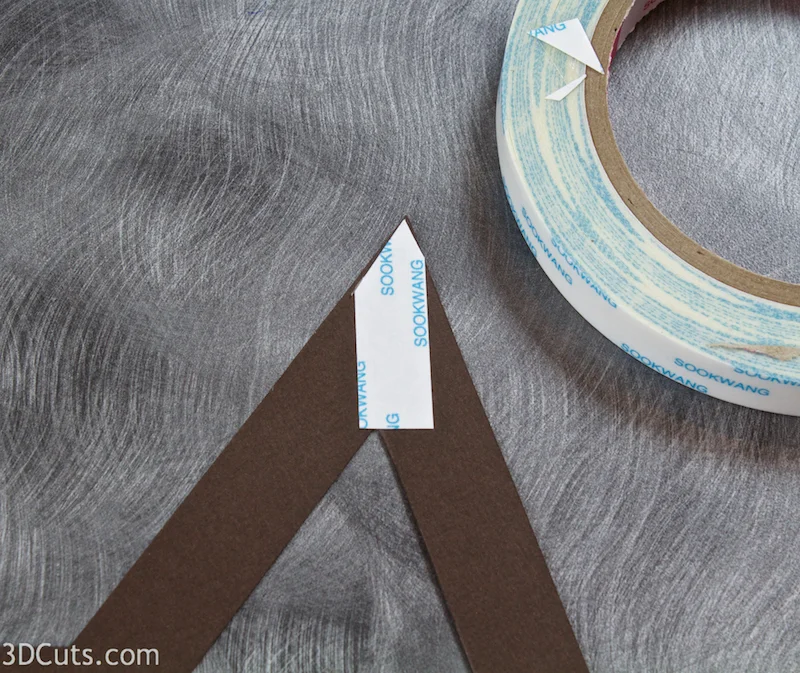
- Apply Scor-Tape to the inside of the four side tabs. Leave all the backing on the Scor-Tape,
- Turn the piece over and apply Scor-Tape to the other side of the one end tab.
- Repeat on all five side pieces.


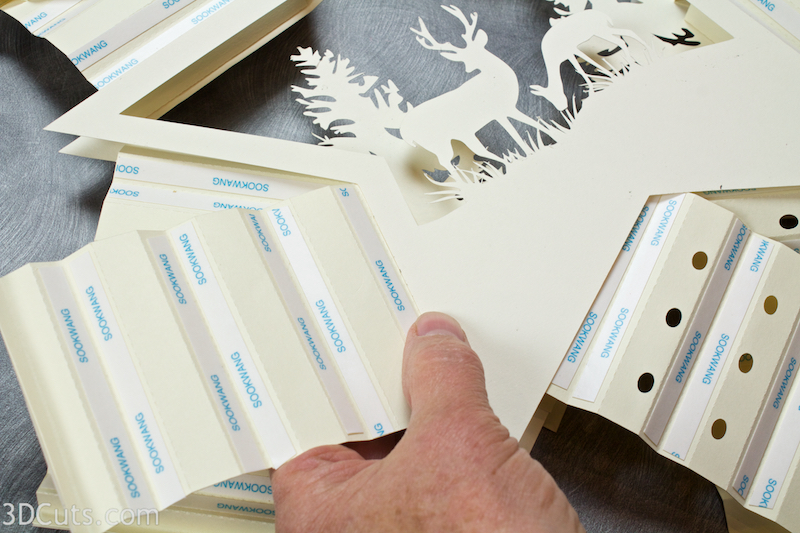
- Peel the backing off one tab on a side piece. Leave the backing on the other side.
- You will adhere the side piece to one of the hollow-center stars.
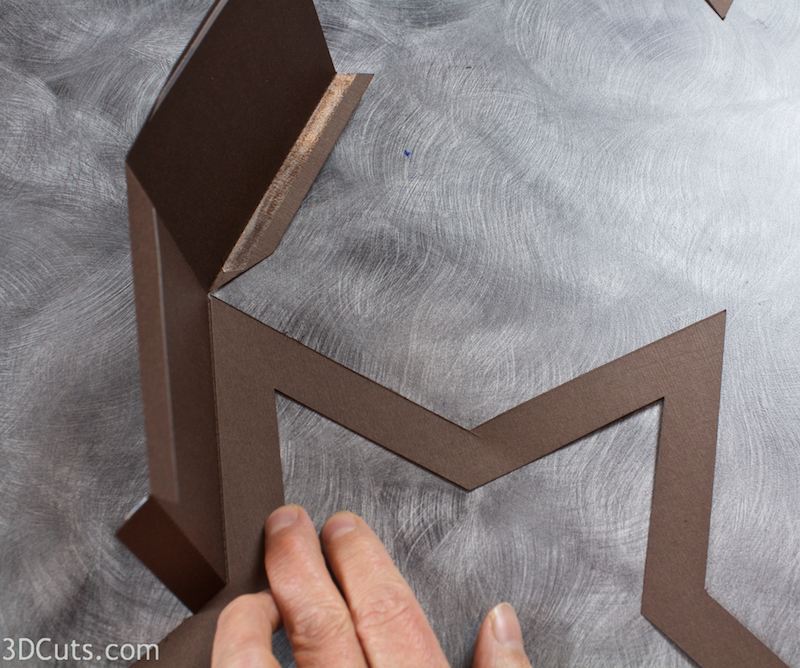
- Start at the star point and line that up with the dotted center fold of the side piece then line up the edge. The tab goes on the outside of the star frame. Work to keep the edge of the star perfectly aligned with the fold line of the side piece.
- Fold the side piece down the other side of the point, remove the backing tape and adhere in place.
- Peel the backing tape off the end tab and place the next side piece over the end tab and adhere in place. Be sure to line the end of the new side up to the dotted fold line of the end tab.
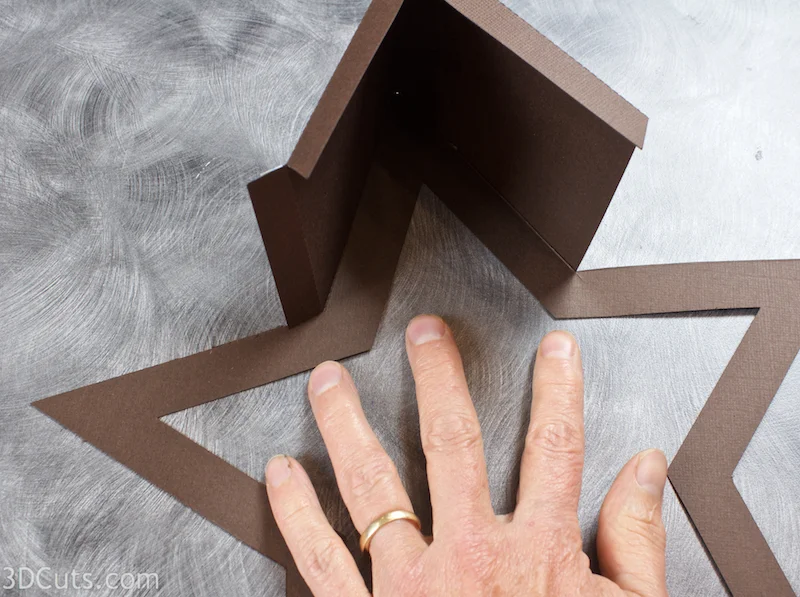
- Peel the back off the Scor-Tape of the side piece just attached and attach it to the side of the next star point working to have the center fold line up with the next point.
- Remove the Scor-Tape from the other edge and attach that side as well.
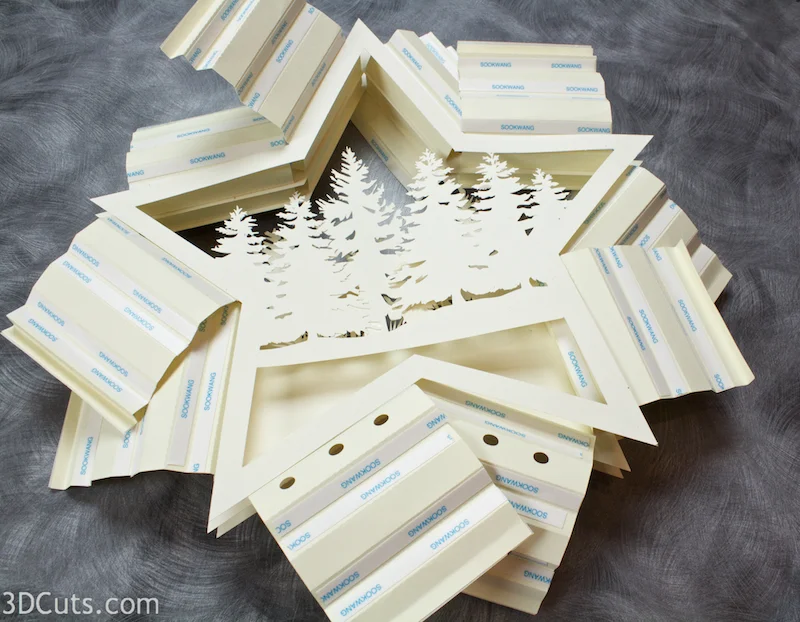
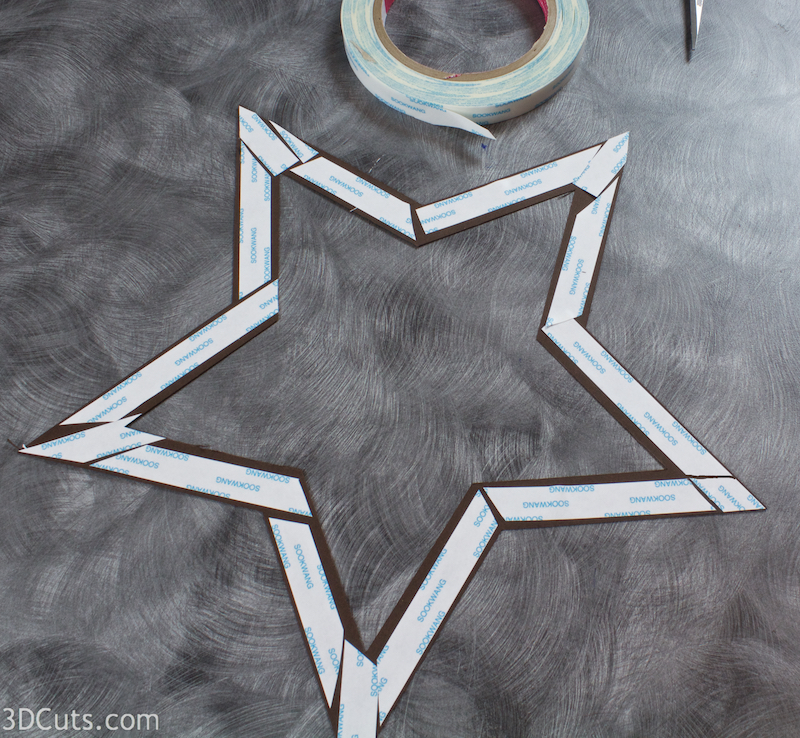
- Continue around the star adding each edge piece to the previous one and adhere to the edge.
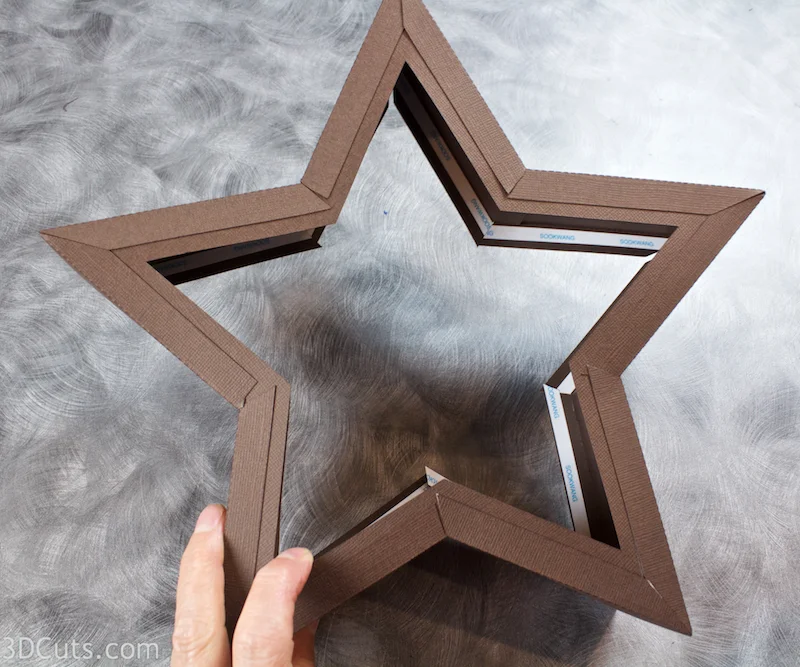
- When you get to the end adhere the last tab to the inside of the first edge making the star edge complete all around the star piece.
6. Build the internal layers.
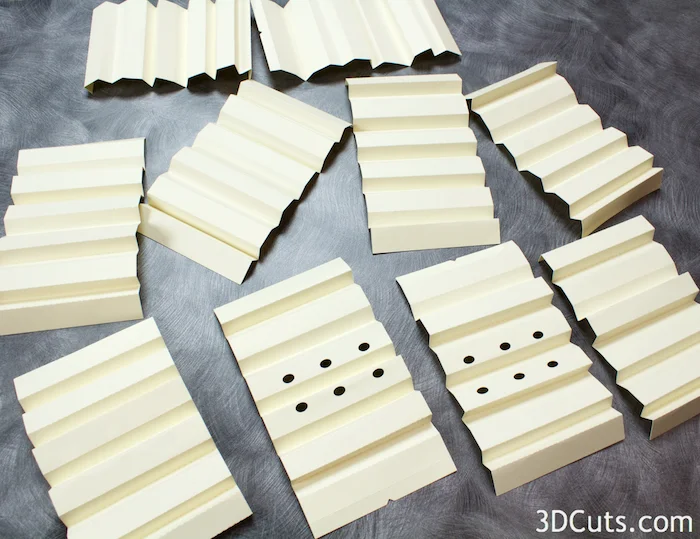
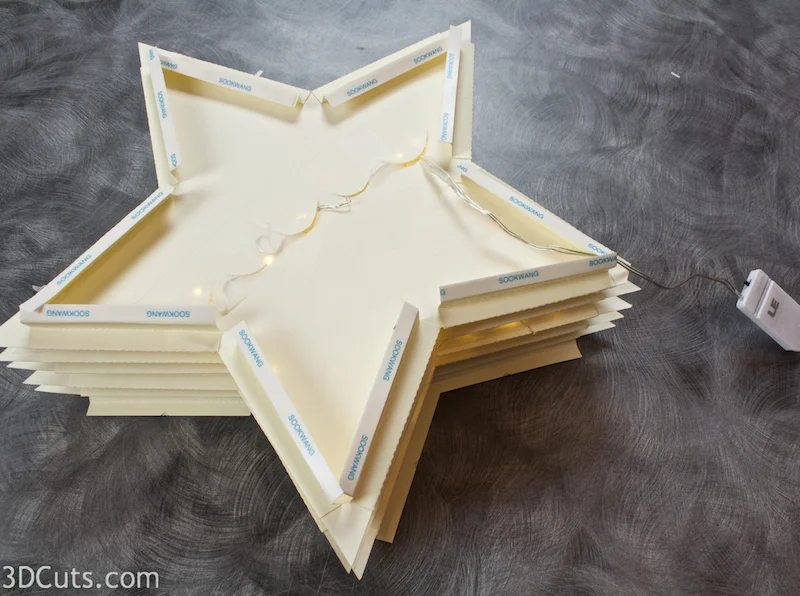
- The five internal layers of the shadow box are assembled together as a unit and slid into the star frame. The photo to the right shows the completed stack. This is what the next series of steps will guide you through completing. Going up each side of the star is a folded side bracket. There are ten holding the layers in place.

- Although there are some minor differences, Part 2 of the Heart Tree Video tutorial mirrors these steps. Watch that video for a better understanding of making the interior stack.
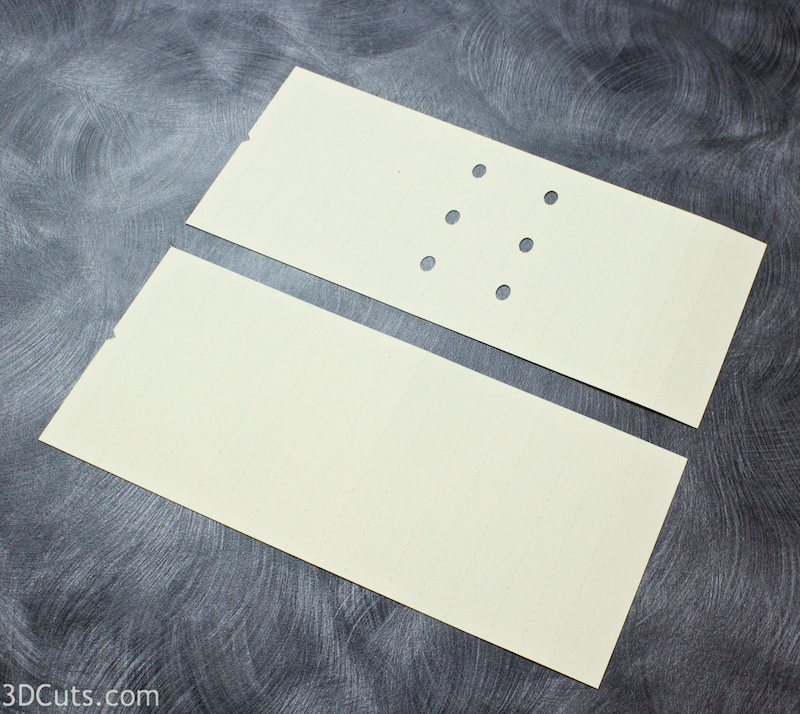
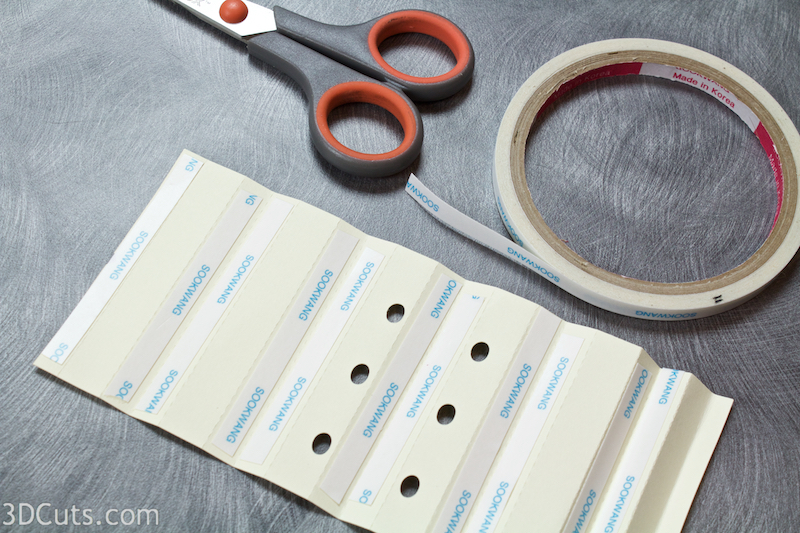
- There are 10 side braces. Eight have no holes but do have rows of dotted lines. Two have holes. I added an extra hole after taking these photos. The two with the holes go on the bottom two sides of the star. The holes will be used to hold lights. The other 8 are for the the other 8 sides of the star.
- Notice the notch on one end of the side braces. That is to help in identifying the edge that will be at the front. Keep track of the notch through out the tutorial. It should be toward the front.
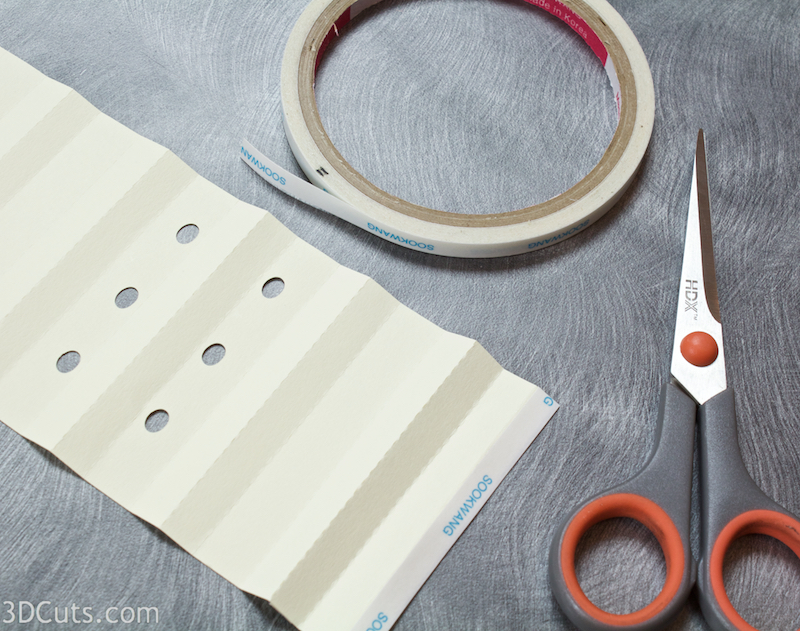
- The side brace is made up of sections that are 1/2" separated by 2 3/8" sections. The 1/2 " sections will face the center of the design.
- Start at the notch end and fold in the pattern shown by the blue line in the diagram:
- Back, back, forward, back, back forward, back, back forward, back, back forward, back, back forward, back, back forward, back, forward.
- If you look at it from the end, it will look like the blue line.
- You will recognize the pattern once you start folding. The 1/2" sides are all facing the same directions and the skinnier sections form the Vs.
- Repeat this for all 10 side braces.


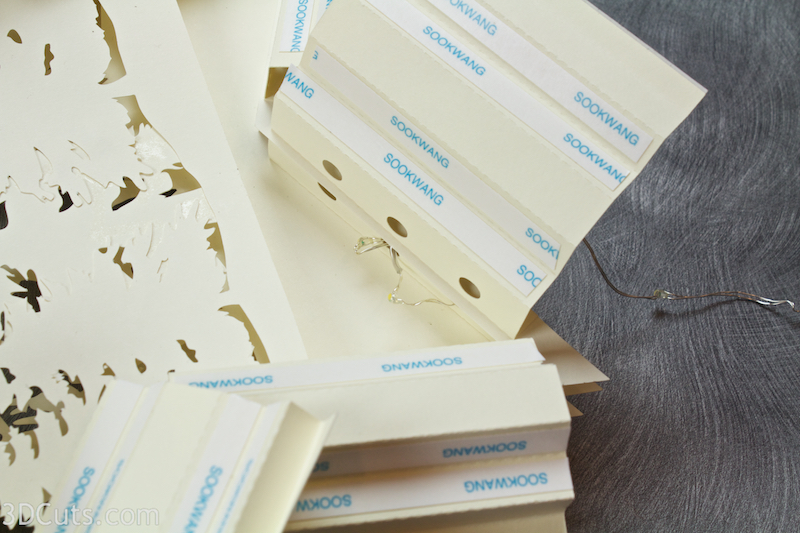
- Apply Scor-Tape to inside of all the Vs (the 3/8" sections) leaving the backing in place.
- A note on adhesives. I especially like Scor-TApe for 3d work. It is strong and it keeps my fingers clean. But it also can stay covered while you work. I use this feature a lot in this assemebly.
- Also apply Scor-Tape to the same side of the top section. The one with the notch.

- Turn the side brace over and apply Scor-Tape to the bottom section as well but on the opposite side from all the other Scor-Tape.
- Repeat this for all 10 side braces.
- Assembly will be much easier if you apply the Scor-Tape in advance.
- It is time to start adding the side braces to the layers. Locate Layer 1 which has 2 pine trees in the center area.
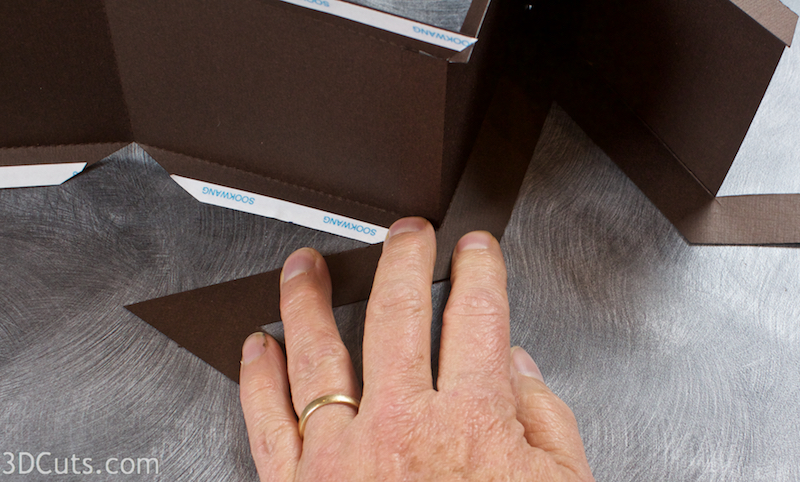
- The notch where my finger points is the V notch of the star. There are 5 on each star. It is here you will line up the side braces.
- Each side brace will meet in a notch.

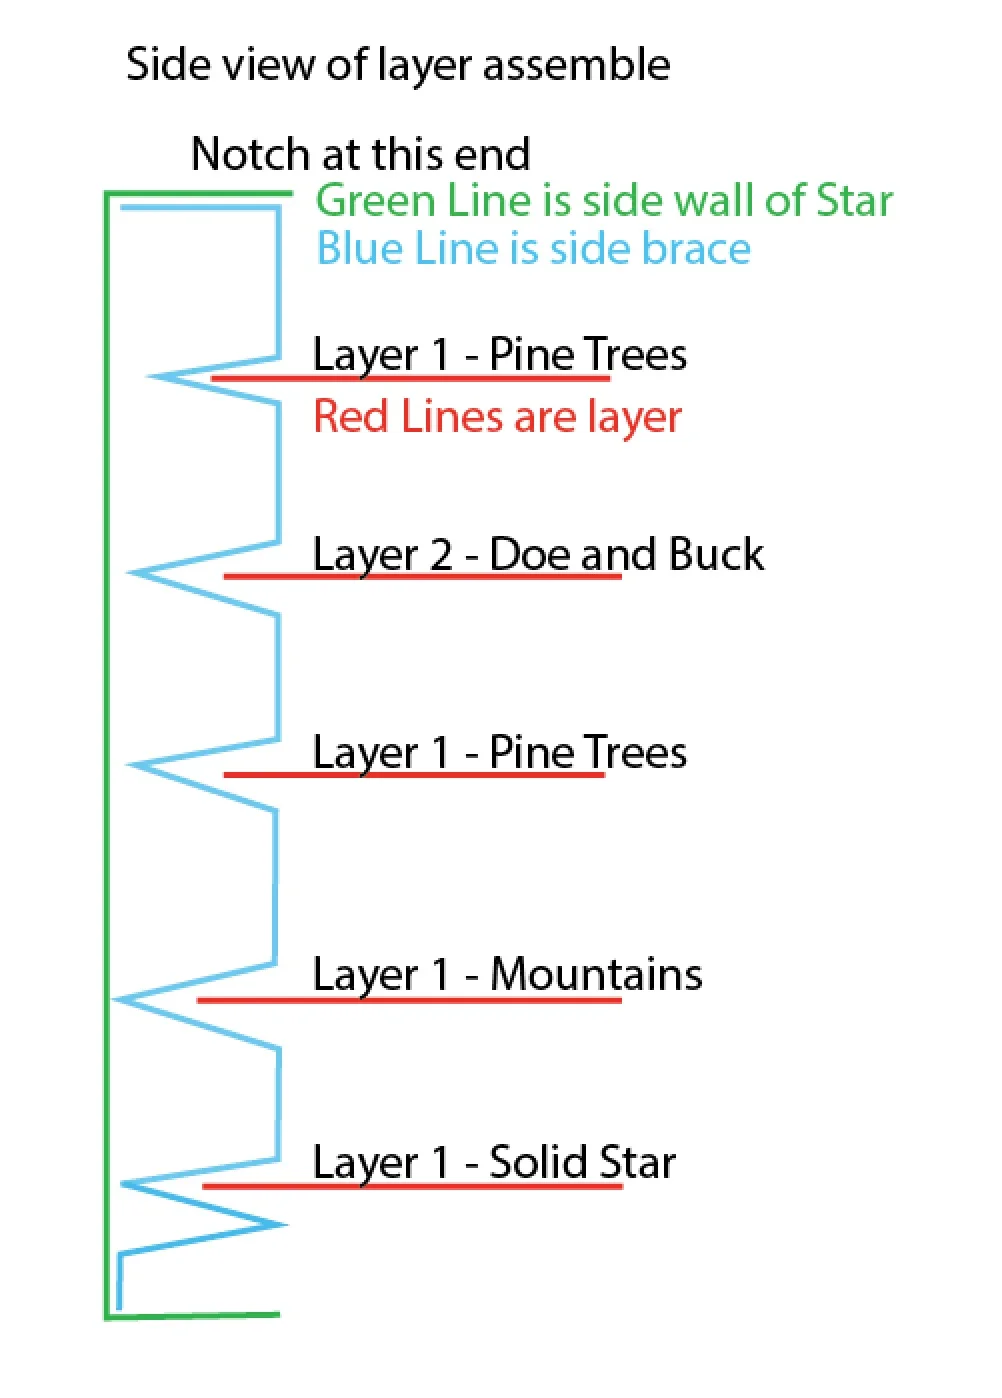
- Here is a diagram of the side view of what the stack of layers will look like. The green line shows the star base. The blue line is the folded side braces and each red line shows the various layers and how they will stack up. The side braces will keep them separated and in place.
- The directions have you start at the front with Layer 1. It will get adhered into the first folded V slot in the side brace. You will want it to go all the way in right up again the fold.
- Placement is very important so things will line up and fit inside the star.
- Pay close attention to every placement.
- You will start with layer 1.
- Make sure every side brace you attach to layer 1 has the notch end near layer 1.
7. Add Layer 1
- Start at the bottom notch, the one in the center between the bases of the two trees.
- Choose one of the side braces with holes. The two hole ones go on the bottom of the star.
- Working on the outside edge of the star, place the brace over the star edge. The right edge is to fit right into the center of the V notch. It does not reach to the point of the star.The notched end of the brace is up as shown. The edge of the star will be placed all the way in along the fold line as shown in the image.
- Make sure placement is correct and peel the backing from the Scor-Tape on one side of this V junction and adhere the side brace to the star.
- Repeat on the second side of the V slot. The first side brace is attached to the first layer.

- Repeat this on the other bottom star side to the right of the one just adhered.
- The second one (also with holes) butts up to the first one in the notch and gets adhered to the star in the same fashion.

- Continue around the outside edge of the star adhering a side brace to each of the 10 sides of the star. All the remaining ones should have no holes in them. They all get adhered in the same way although it gets trickier as you have more attached.
- Just make sure to always have the side braces meet in the center and to be sure the edge of the star is all they way into the slot before adhering.

- This is what the inner stack will look like once you have all 10 side braces adhered.
- Keep the faith. It gets easier with each layer you add!
8. Add layer 2 to the stack.
- Place layer 2 behind layer one. The buck should be on the right as you look from the front.
- Turn everything over and work from the back.

- You can start in any corner and work your way around the star.
- Take a side brace and position it so layer 2 is in the next slot along the brace. Layer 2 should be spaced 1/2" from the previous layer.
- Again, be sure the edge of the brace is lined up exactly with the center of the star notch.
- Peel the Scor-Tape strip and adhere the first side of layer 2 in place.
- Continue around the star adhering each side brace to Layer 2 always watching to be sure things are lining up. Keep those braces touching in the center of the V's!
- Make sure you peel and stick both sides of each slot.
9. Move on to layer 3 - the line of pine trees.
- Layer 3 is the row of pine trees.
- Place it behind layer two and repeating the same series of steps, adhering each of the 10 side braces to Layer 3.
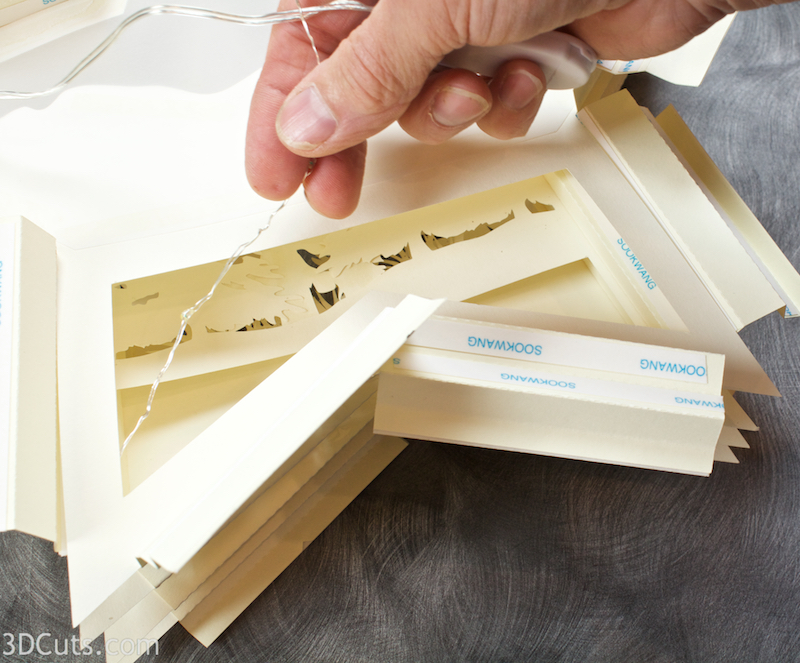
- Don't move on to Layer 4. Start inserting lights.
10. Start installing lights.
- It is easier to install the lights as you build up the layers. It can be done at the end but you don't have a lot of space for fingers.
- About the lighting: I used a 24 light string of tiny battery operated fairy lights that I purchased from Amazon. Here is a link. (I am an affiliate).
- You want to place the lights in each of the 3 last layers down below so the light shines up through the layers and visually separates the designs.
- You do not want any of the lights to be visible from the front so check periodically.
- Start by placing the first light up through one of the holes in the lower side braces between layers 2 and 3. You will want to use about 5-6 lights in each layer and some get lost in the seams. Push the lights up through the holes adding little hooks in the wire to help hold them in place. You will not put one in every hole but use the holes that work best for spacing. It will depend on how much space there is between lights on the LED set you purchased. I made a peak in the wire with the LED at the top and pushed it up through the hole and then repeated for several holes.

- There are some differences in the wiring of this shadow box and the Heart Tree shadow box but you can watch this video if you need additional assistance.

- Loop the string of lights over to the next level of holes (between layers 3 and 4) and repeat here. I just wrapped the wire around the outside of the stack but kept it snug.
- Turn the lights on and flip the design over. Make sure no lights are showing from the front. If they are, lower them or change their location.
- I added another hole in the final version to give you more options on placement.
- Add pieces of scotch tape to hold the lights in place. You don't want them to fall out or move over time. The lights are not replaceable - although the batteries are and you will have access to those.

11. Add Layer 4.
- Before you start attaching the side braces to layer 4 (Mountains) grab the wire and lights and thread it through the opening below the mountains. (Another change here, I made this hole smaller in the final version to make it easier to hide lights.)
- Place the mountain layer and adhere all 10 side braces in the same way you did all previous layers.
- Continue to be careful about placement.
- Layer 5 is the solid star with crescent cut outs.
- You hook the lights into the crescents before you glue it in place. You want to keep the option of moving lights until you are sure that they can't be seen from the front.
- I ran the wire of the lights up the inside of the layers and taped in place. It was positioned so the wire passed through from the previous space to the back of layer five on the left corner as viewed from the back - right near the row of crescent cut outs.
- I then placed the star and used binders clips to temporarily hold it in place.
- Again I made little peaks of the lights and inserted them through the crescents. They should be placed below the mountains but near the top for optimal effect.
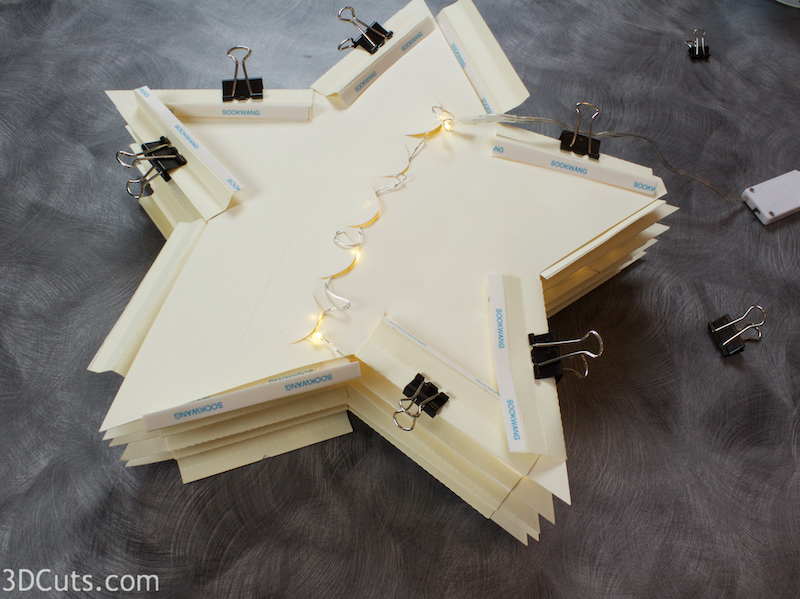
- The binder clips will allow you to turn the stack over and view the lighting. This is to make sure none are visible from the front yet they are well placed to provide visual separation of layers.

12 Add Layer 5.
- Once you are happy with light placement, place scotch tape on the wires on the back of layer 5 to hold the lights in place.
- Adhere all 10 side braces to layer five using the same procedure as the previous 4 layers.
- Position the end of the string of lights down through the lower corner and tape to hold.
13. Add space blockers.
- There are two rectangles - 1 1/2" by 1/2". Fold them in half.
- Add a strip of Scor-Tape to both ends
- These get adhered under the space visible in the front center bottoms of layers 1 and 2.
- Glue it under the space as shown.

- The layers stack is now complete. It should be solid.
- Here is a view of the bottom with the holes and lights, and a view of the front.


- Here is the video on finishing up. Much of it is the same.
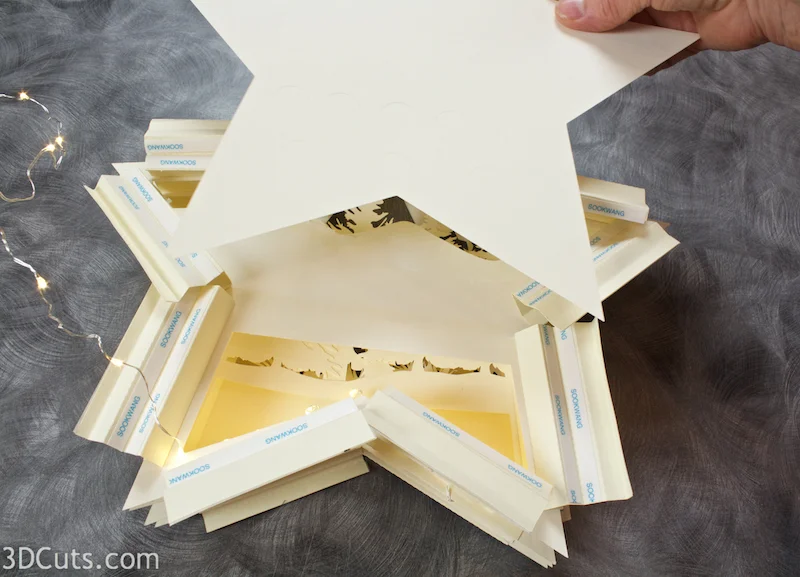
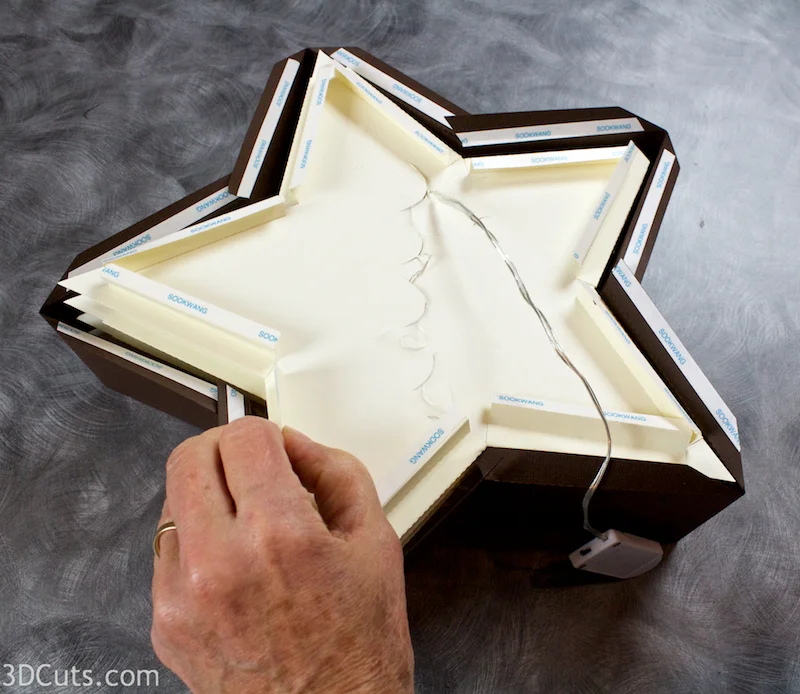
14. Insert the stack of layers into the star frame.
- Understand how this stack will fit into the star frame. I placed it in there to test before removing any Scor-Tape backing strips.
- Check the front and see how the front tabs will be adhered to the back of the front star and hold the stack in place and 1/2" back from the front star. You can refer to the color line drawing at the beginning of this tutorial to see how the front tab is to be positioned.
- Once you are satisfied that it will fit, remove it from the frame.
- Remove the Scor-Tape on all 10 tabs on the front of the star.
- Fold each tab in toward the center so it will stay away from the side walls as you place the stack in the star frame again. You don't want it to accidentally stick to the side on the way in.
- You might want to use binder clips toward the center to hold them in while you do this.
- Slide the stacked insert of layers into the star.
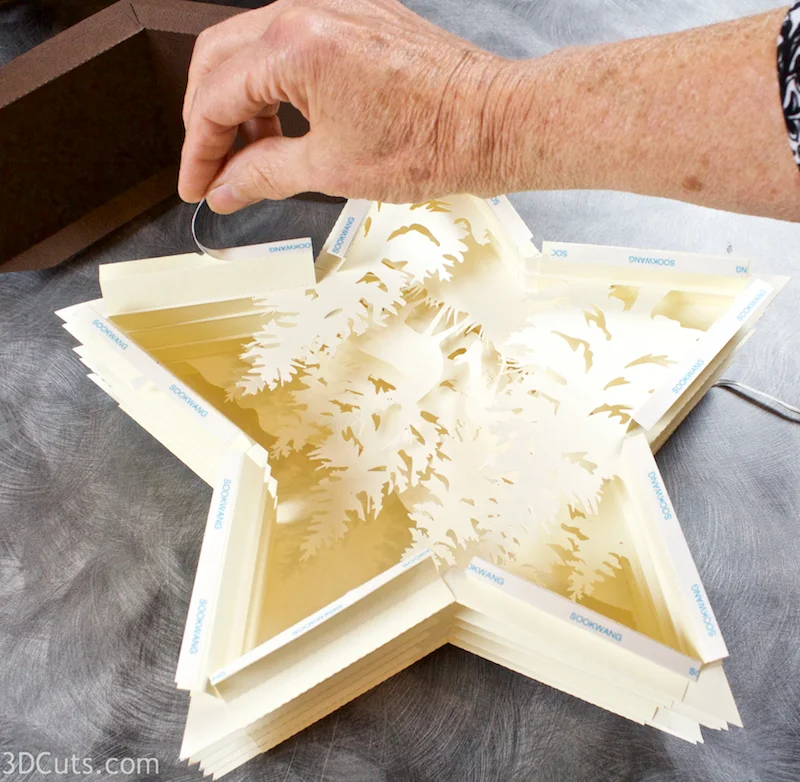
- One by one, carefully position each front tab so it sticks to the inside of the star and holds the stack 1/2" back from the front. I used a long skinny letter opener to insert into the gaps in the corners to help with positioning and then press in place.
- Repeat with all 10 sides.
- On the back side, peel off the Scor-Tape on each tab and press it against the side wall of the star.


15. Finish the back
- The star frame back gets installed next.
- Position it inside all the tabs of the star frame.
- One by one, remove the backing and fold over the tabs to adhere the star in place. I inserted a thin metal ruler to help me press each tab in place.


- Nip about 1/4" off the lower corner where the LED lights wire comes out. This will give it space without distorting the star.
- I couldn't get good pressure on the last tabs to get effective sticking for the Scor-Tape so I switched to hot glue and finished the back tabs with that.

- Apply Scor-Tape to one side of the open star and adhere to the back covering all the tabs.
- The back is finished. This is what it should look like.

16. Finish the front of the star.
- I had issues with puckers the first time I did this and I didn't want puckers on the front.
- On the second try I put a piece of 1/2 " Scor-Tape in each corner of the star.
- I then filled in the rest of the star with 1/2" Scor-Tape in pieces as shown.
- The goal is to be able to place the star in sections.
- Peel one corner and place the star.
- Peel each section of the backing and slowly place the star on the front, pressing in place as you go, making sure no puckers form.

- Congratulations! The shadow box is complete!

- Turn on the light and be surprised at how it wonderfully illuminates the layers making them visually pop!
- Find a space to display your new creation.

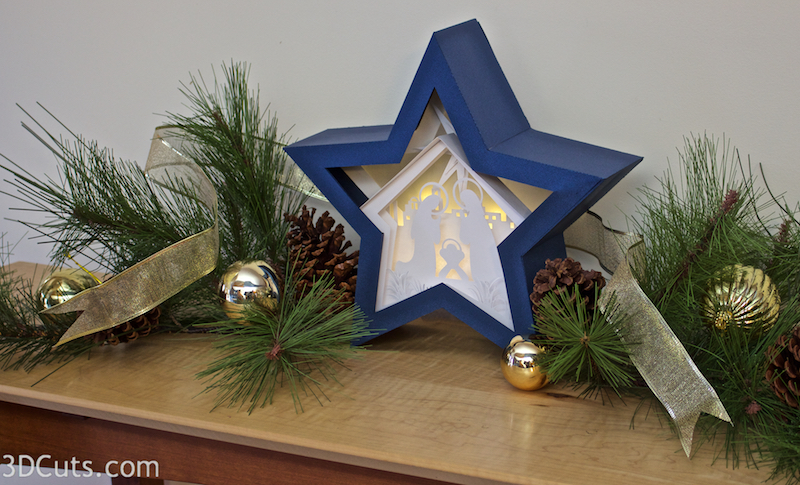
I also created a Nativity Star Shadow Box. The assembly of the interior is different but it is a similar project.

©2017 Marji Roy, 3dCuts.com