3d Star • 2019 - Tutorial
Project Description

Note: I have designed a number of 3d star projects over the years. Check the photos here and make sure this tutorial is for the star file you have!
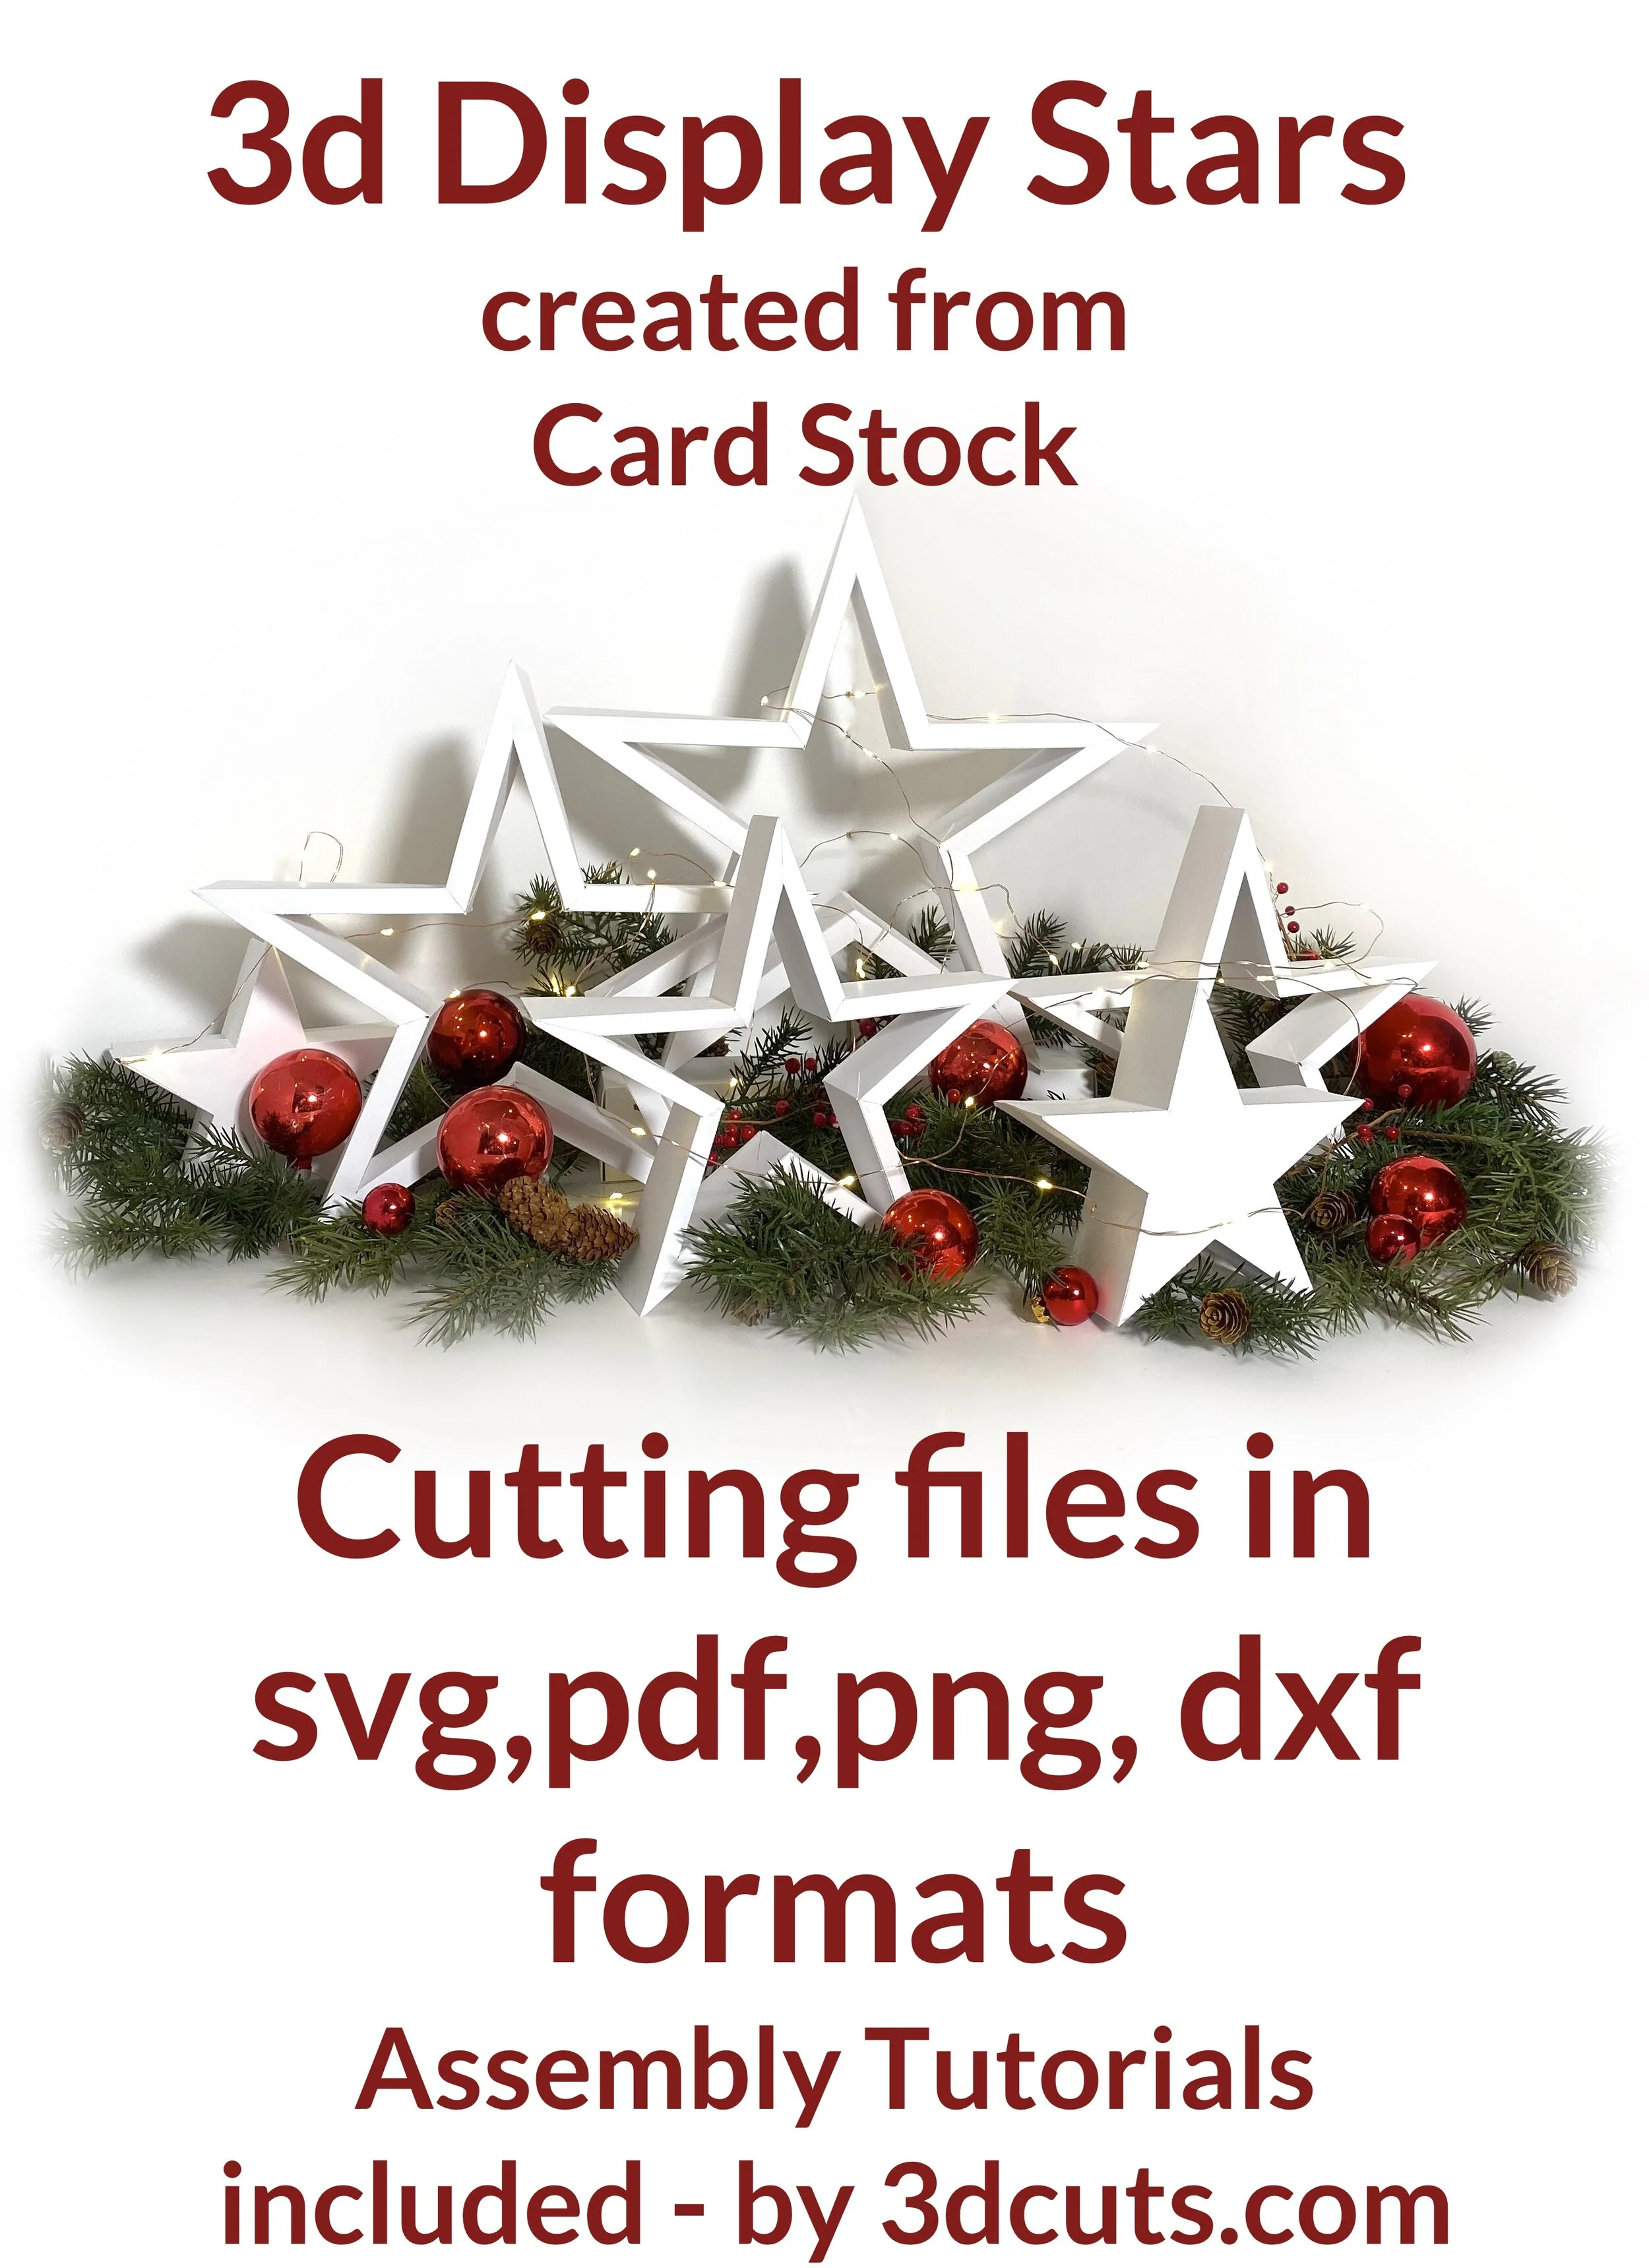
Here is a group of 3d stars constructed of card stock that can be used to create stunning centerpieces or holiday displays. The set includes 3 hollow stars in different sizes and a solid star. You can mix and match to create a display for your table, or mantel or credenza. It is totally flexible. You can add the optional fairy lights. The solid box is designed to hide the battery pack.
Cutting File available here from http://3dcuts.com/christmas-projects/3d-stars-2019
Supplies needed:
Order supplies from Amazon:
(Affiliate links work for USA customers only. Other countries will need to search in their local Amazon for the products.)
Cutting File available here from 3dcuts.com.
Card stock - I used the 65lb Cardstock Neenah from Amzon - affiliate link below
Adhesive - Art Glitter Glue and Scor-Tape 1/4”
Optional 50 light Fairy lights
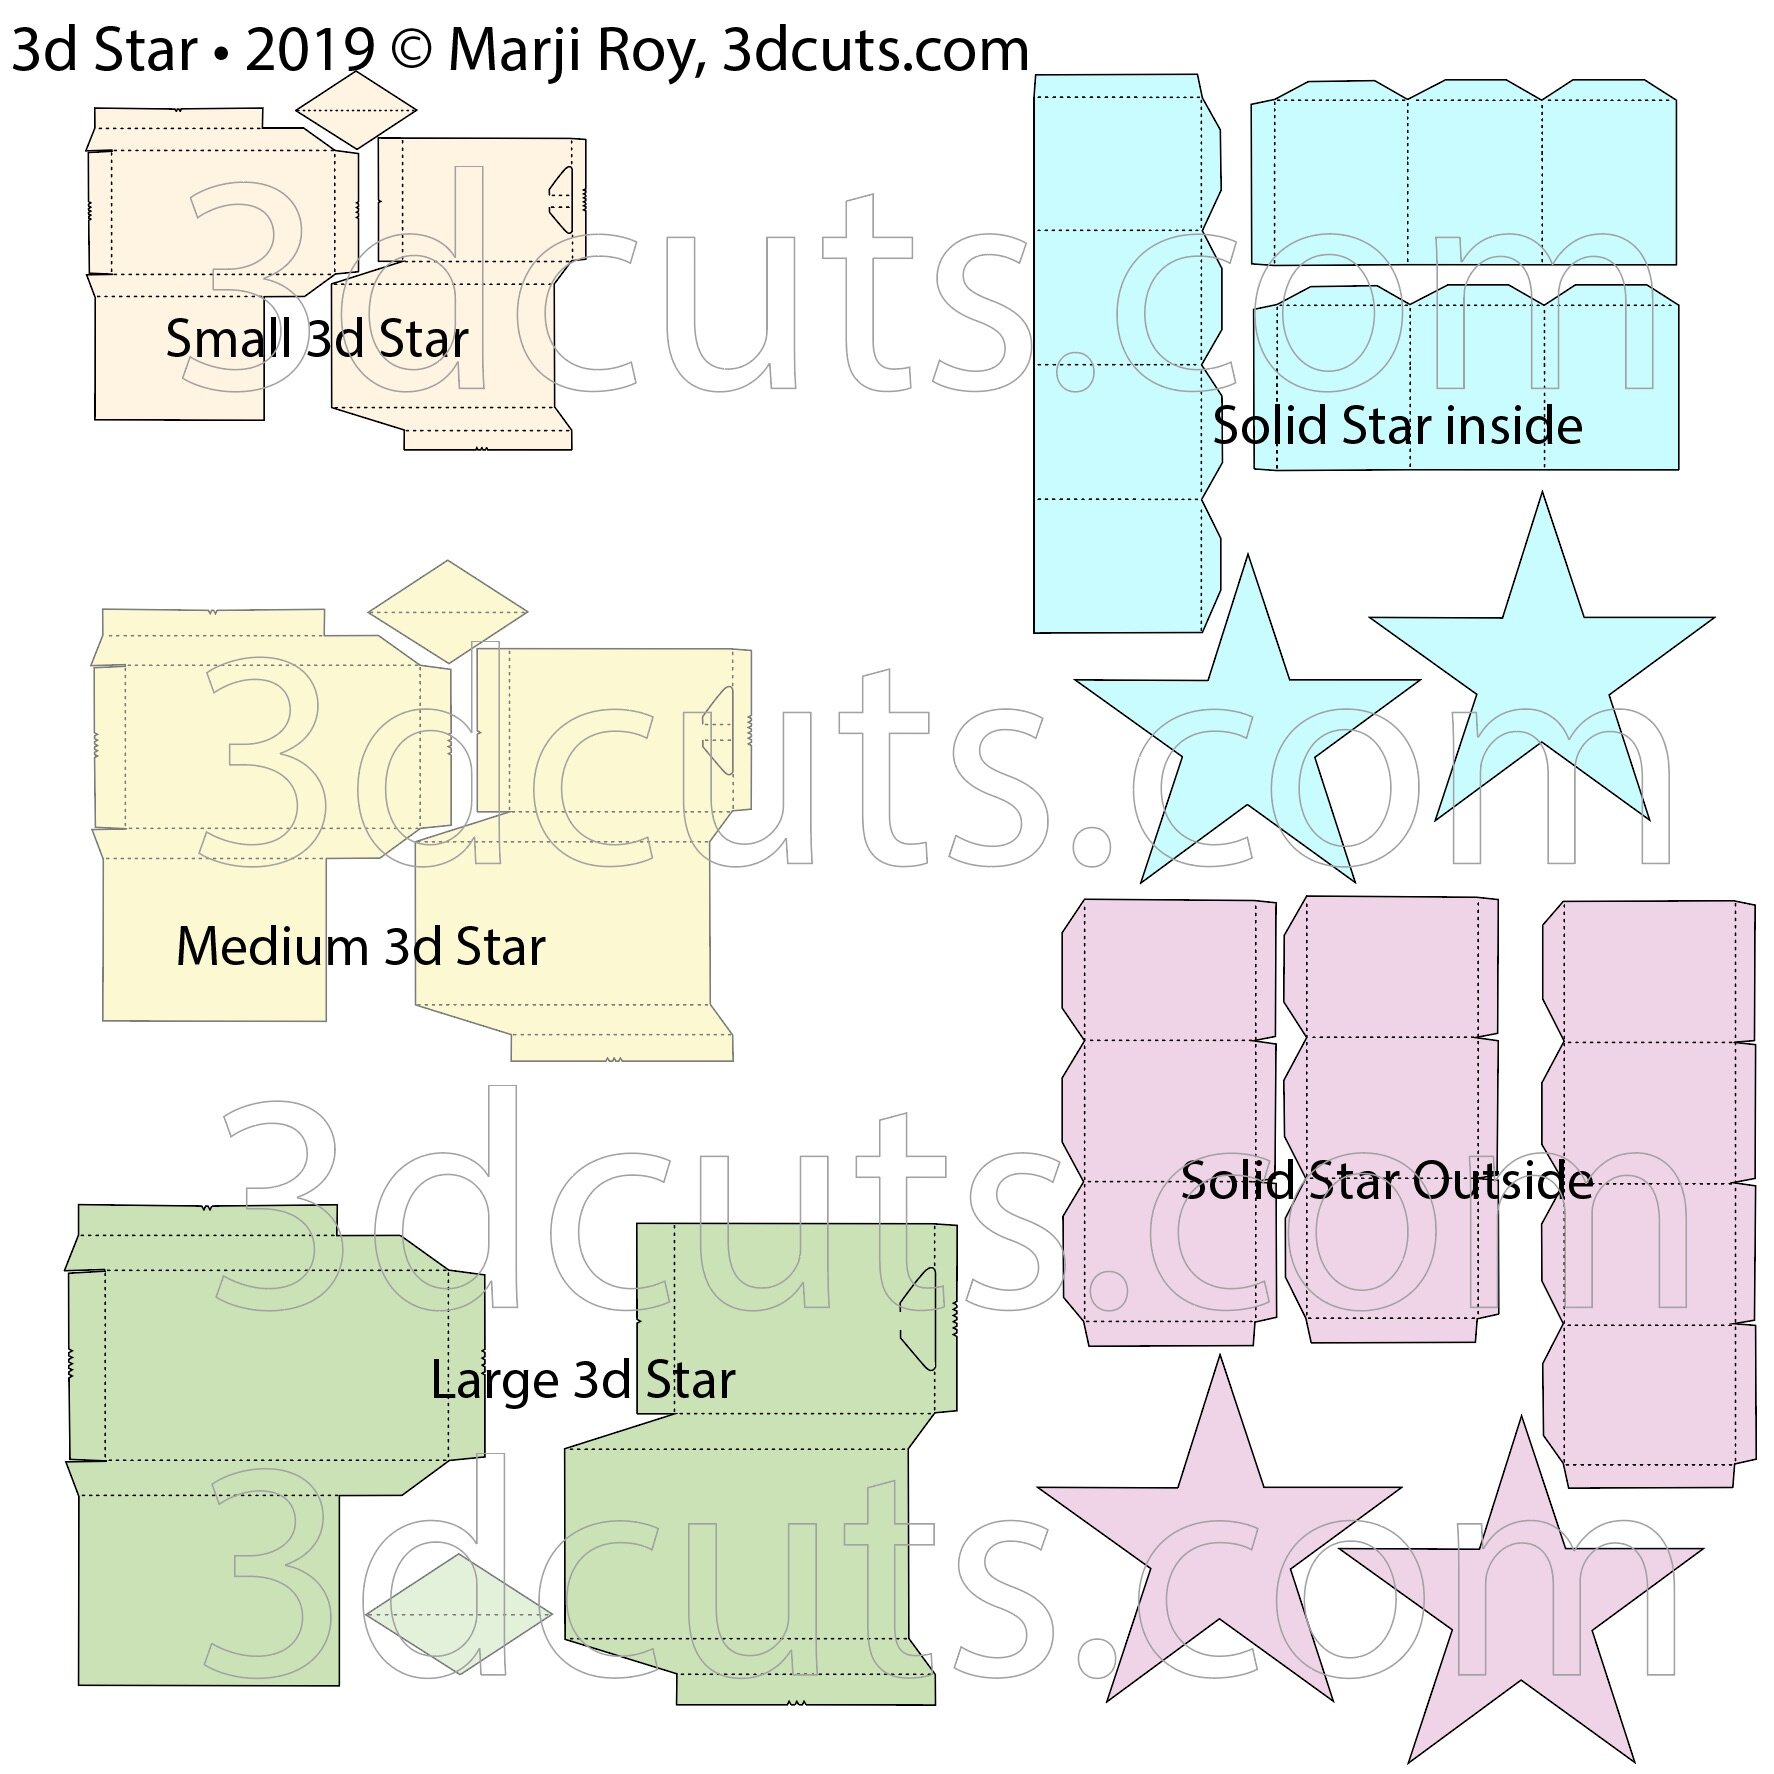
Major Parts Sizes - as download.
Keep grouped for sizing: Measurements match the grouping and orientation in the diagram below. Measurements maybe needed if using dxf files. After re-sizing you can re-arrange for optimal cutting.
Small 3d Star Group: 8" w x 6.0639" h
Medium 3d Star Group- 10.5611" w x 8.0083" h
Large 3d Star Group- 11.5" w x 11.6306" h
Solid Star - Outside group - 11.5153" w x 13.8958 "h
Star Box - Inside group 10.9958" w x 13.0667" h
Note: Keep them grouped together if you must re-size pieces.
ALL File: 27.4319" w x 27.8764" h ( just Nativity parts)
Note: Not all software and cutting machine combinations can use the ALL file. Some resizes files to fit in a smaller mat area. Import the individual files if your machine has size limitations. I create the ALL file in case you want to re-size everything.
Steps for completing the 3d Stars • 2019:
Special Note: I update the instructions online. Check here for adjustments and additional information.
1. Download the cutting files for your cutting machine here from the 3dcuts.com store. http://3dcuts.com/christmas-projects/3d-stars-2019. For those of you that are reading this as a pdf I recommend viewing it online at my tutorials page at this url. There all the links will be live.
2. Load the files into your cutting software following the steps for your cutting machine.
3. Prepare the files:.
For the Silhouette:
SIL Files from upload SVG purchased from 3dcuts.com:
The SVG files may need to be turned into cutting files. Click here for detailed steps on how to use SVG files on your Silhouette. http://www.3dcuts.com/tutorial-upload-svg-silhouette
DXF files can be opened in the basic edition of Silhouette Design Studio but often require modifications. I recommend using the Designer Edition and using svg files. DXF files do not always maintain file sizes and you may need to adjust according to sizes noted above.
For Cricut Explore: Here is a guide for importing into Cricut Design Space. http://www.3dcuts.com/tutorial-adding-3dcuts-files-to-cricut. Remember to ATTACH files before cutting in Cricut. There have been some issues with the Cricut release (August 2019) that will not allow you to use the ALL file. You must import in individual groups. Hopefully this gets resolved.
For Brother ScanNCut: The svg files will need to be transferred to files for your particular machine. You can change SVG files to FCM files at http://www.canvasworkspace.com/ or Google "How to import SVG files into a ScanNCut" for links to tutorials. Some models of Brother Scan N Cut can directly import the SVG files.Some files are on 12” mat so you may need to select 12 x 24” mat for correct sizing.
For Hand Cutting: You will need to rearrange parts in svg editing program like Inkscape, Illustrator, etc to separate and rearrange pieces to fit on 8.5 x 11 for printing.
4. Cut the files.
It is best to have good quality card stock and a good blade and clean, sticky mat. I use the Premium blade and the Nicapa mat.
I use the dotted score line as a fold line. I do not have a cutter that can score.
For each of the hollow stars (small medium and large) cut the two sides plus the diamond 5 times for each star you want to make. For the solid star, cut each piece once.
5. Assembly
The assembly steps are detailed in the video below. Here is the YouTube url https://youtu.be/zoRg0ygwAn8.
Creative Applications:
I will post photos of cards other crafters have made. Send a photo to 3dcuts.com if you have done something interesting with this file. Here are a few displays I have created.
Centerpiece for my Christmas Table including fairy lights and Christmas Balls.

Ledge or Mantle Decor- I don’t have a mantle but this type of arrangement would look wonder full on a mantle or similar ledge. Shown here with fairy lights, artificial greens and pine cones and Christmas balls,

Variations: Stars are universal. although I designed them with Christmas in mind they work for so many other times of year and types of projects. I love it when other crafters share their creations with me.
Lisa Fedele, a certified Zentagle instructor has been combining my start frames with her ideas for entangles. She also designed a holder on the inside to place a tea light.
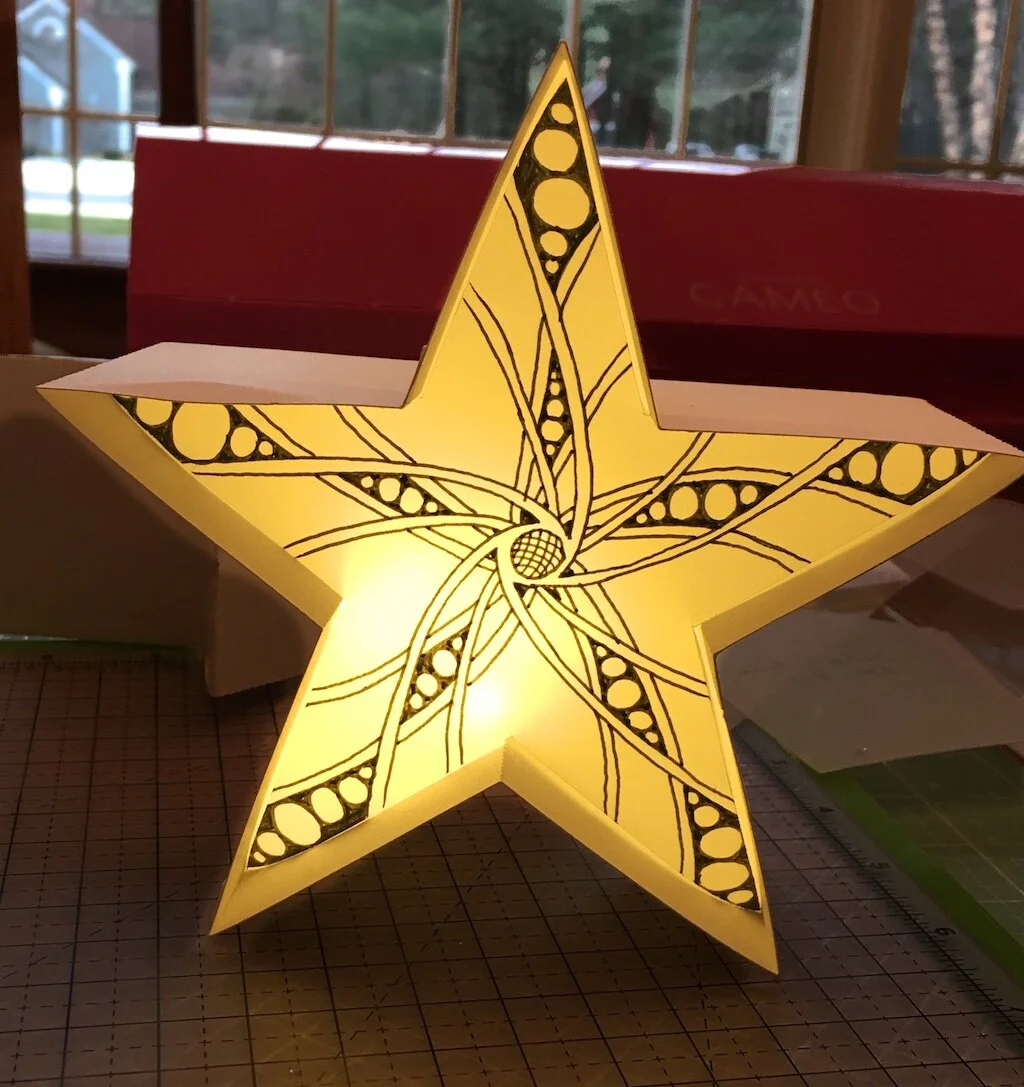

by Lisa Fedele, CZT
Theresa from Kuwait shared this photo of her stars in silver and gold.

I have designed many stars over the years. To see additional files check out both my Christmas Projects Page and my Stars page in my store.