
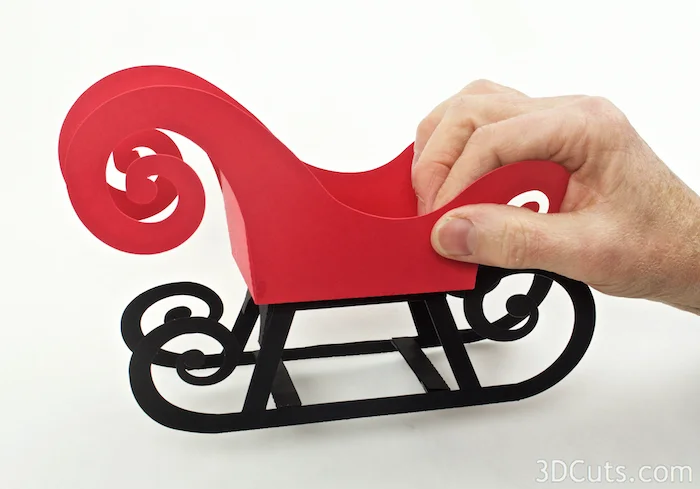
3D Santa's Sleigh - Tutorial

Project Description:
This tutorial is building Santa's Sleigh designed by 3dcuts.com. Assemble the sleigh to use as a center piece. Fill it with tiny presents (cutting files available from 3dcuts.com) or chocolate kisses. Either way it will be a great addition to holiday decor or a fun hostess gift.
This is the tutorial for the sleigh. The tutorial for the presents is here.
3D Santa's Sleigh
Supplies Needed:
Cutting File from 3dcuts. com.
2 pieces 8.5 x 11" card stock. The tutorial shows this project in red and black but I have also completed it in all white.
Adhesive - I use Score-Tape, glue dots and spray adhesive although other adhesives would work.

Steps for completing Santa's Sleigh:
1. Download the cutting files for your cutting machine from the 3dcuts.com store.
2. Load the files into your cutting software following the steps for your cutting machine.
Sizes for Design Space Users:
Sleigh Base - 7.0709" w x 10.2893 h
Sleigh Body - 7.1785" w x8.1424 h
3. Prepare the files:.
For the Silhouette: The SVG files from this site will need to be turned into cutting files. Click here for detailed steps on how to use SVG files on your Silhouette. http://www.3dcuts.com/tutorial-upload-svg-silhouette
For Cricut Explore: Here is a guide for importing into Cricut Design Space. http://www.3dcuts.com/tutorial-adding-3dcuts-files-to-cricut
4. Cut the shapes.
Cut the base from black card stock and the sleigh body from red- or choose your own colors to match with your holiday colors.

5. Construct the base - the sleigh runners.
Start by folding along the fold lines. The two outer most sets of runners got folded in toward the century along the dotted fold line.
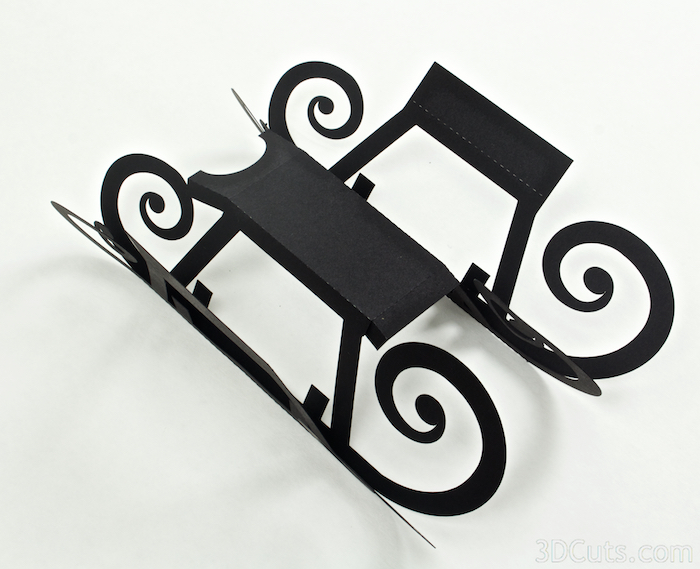
The sides of the center platform get folded down toward the bottom of the runners.
And the rectangular platform tabs (large) get folded up away from the runners.
You don't need to worry about all the small tabs (8) on the runners.

Add a piece of post-it note cut to fit. It is to cover the front and back edges of the runner platform. You will be using spray glue and you do not want the glue on these surfaces so cover them with the notes.
They are sticky enough to stay in place as you spray but then can easily be removed.

Flatten the folded runner base out and spray one entire side with spray adhesive.
Work in a well ventilated location and protect surfaces from over-spray.
I used Aileen's Tacky Spray because it gives me about 60 seconds of work time to place my parts.
Working quickly, fold one runner up and over its matching self making it double thickness of paper (Image 1). Work carefully to get a good alignment of edges but DO NOT stick down the tab onto the runner platform. Keep that folded up and away from the platform (Image 2).
Repeat with the second runner, again aligning edges and keeping the tab away from the platform (Image 3).

Image 1
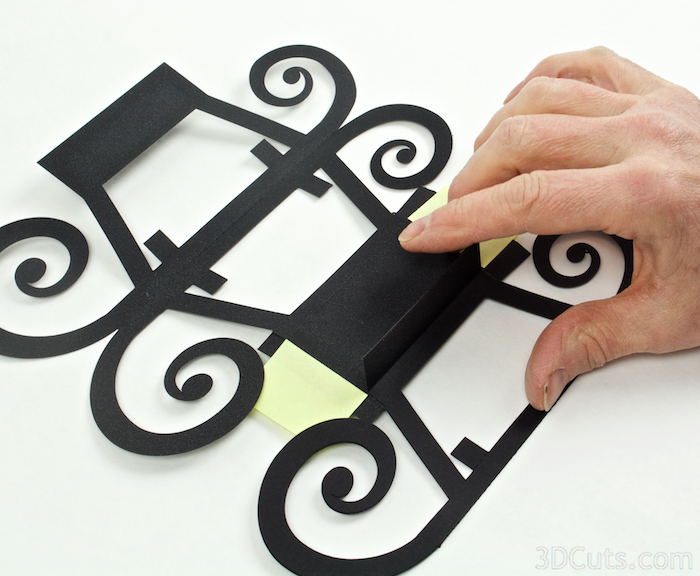
Image 2
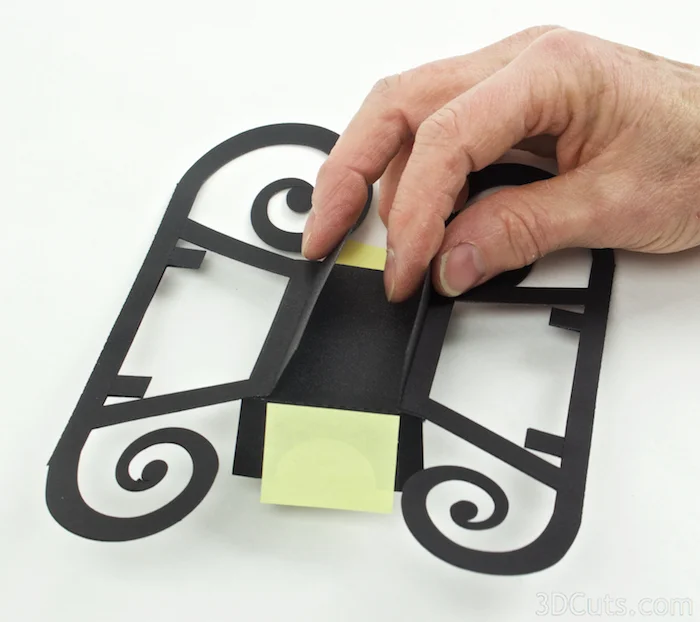
Image 3
Assemble the platform. I used glue dots and put 3 on each tab on the back edge with arch (Image 1).
I put 1 on each smaller tab on the front edge (Image 2)
Fold the back edge down, the tab goes in and adheres to the runner support (image 3).
Repeat on second tab (Image 4).
Repeat with front edge (no photos).

Image 1

Image 2

Image 3

Image 4
6. Assemble the sleigh body.

Fold on all dotted fold lines.
All folds go in the same direction - up and in.

Apply a strip of Score-Tape to each of the four corner tabs.
Note: Strong adhesive is needed. I used TomBow first and it popped open over night. Switched to Score Tape.
Fold up the back and glue the corner. It doesn't follow the curve. Just have it aligned with the edge at the base and adhere in place.
Repeat for all four corners.


Santa's Sleigh by 3dCuts.com, Marji Roy, 3D cutting files in .svg, .dxf, and .pdf formats for use with Silhouette and Cricut cutting machines

Santa's Sleigh by 3dCuts.com, Marji Roy, 3D cutting files in .svg, .dxf, and .pdf formats for use with Silhouette and Cricut cutting machines
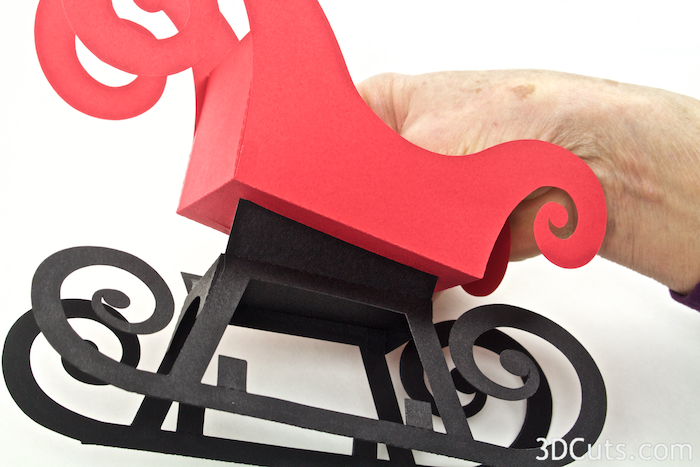
7. Attach runners to sleigh body.
First apply a couple of strips of Score-tape along the top of the black platform on the base piece.
The two top tabs on the base will thread up through the slits in the sleigh base.

Pull them through so the sleigh body sits firmly on the base and press to adhere.
Add a strip of Score-tape to the inside of each black tab.
Fold them in toward the center and press to adhere.
Fold the remaining rectangles in half along the dotted fold line (Image 1).
Fold the little tabs on the top edges of the runners in toward the center (Image 2).
Apply a strip of 1/4" Score-Tape along the inside of the rectangle but don't fold it. Make sure it goes all the way to the ends.
Place the rectangle so that it will connect the two runners under the sleigh (Image 3).
Now fold the rectangle over encasing the little tabs in its center and creating the connector. Press well to adhere (Image 4).
One gets applied as the back connector. The other as a front connector.

Image 1

Image 2

Image 3
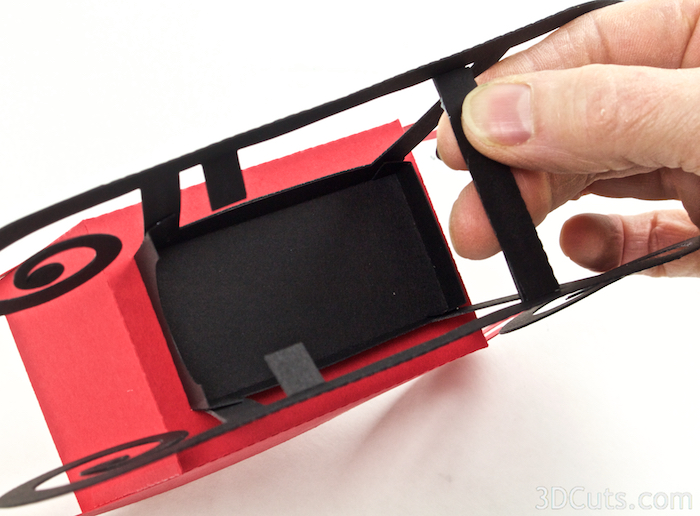
Image 4
Now the sleigh is ready to be filled. How about making some presents?

©2015 Marji Roy, 3dcuts.com
