
Tree Town Tutorial
Project Description:
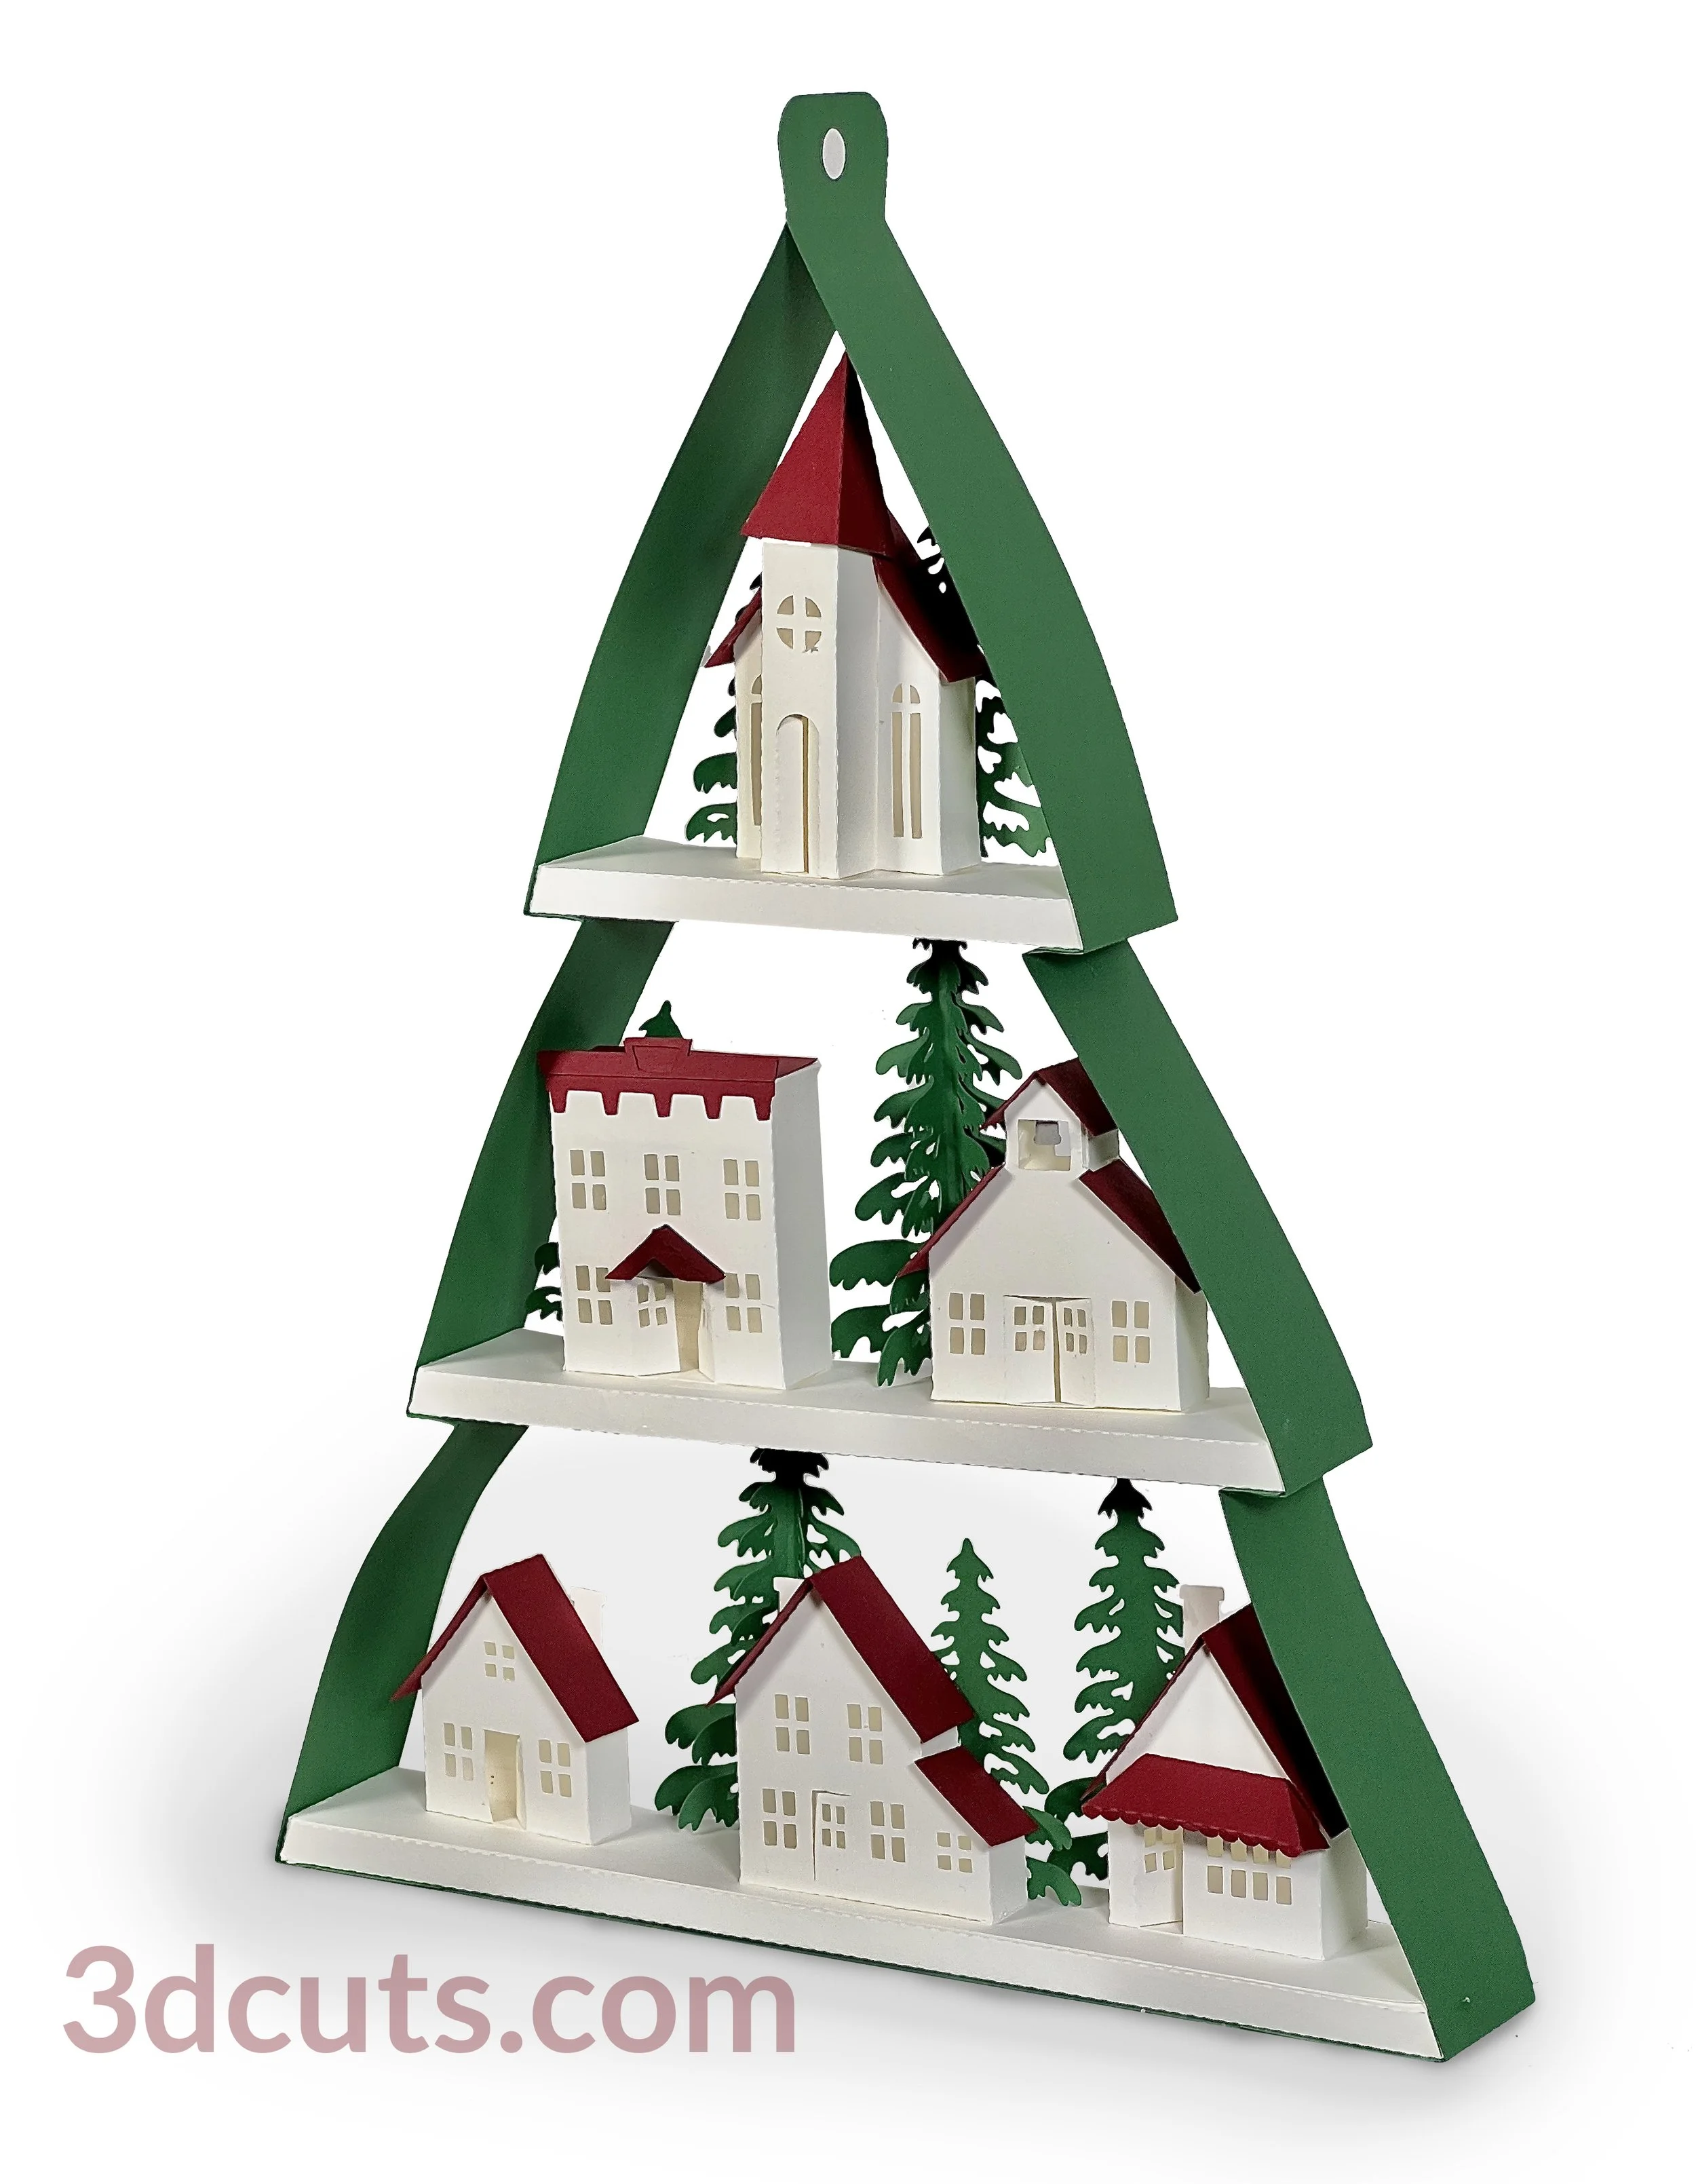
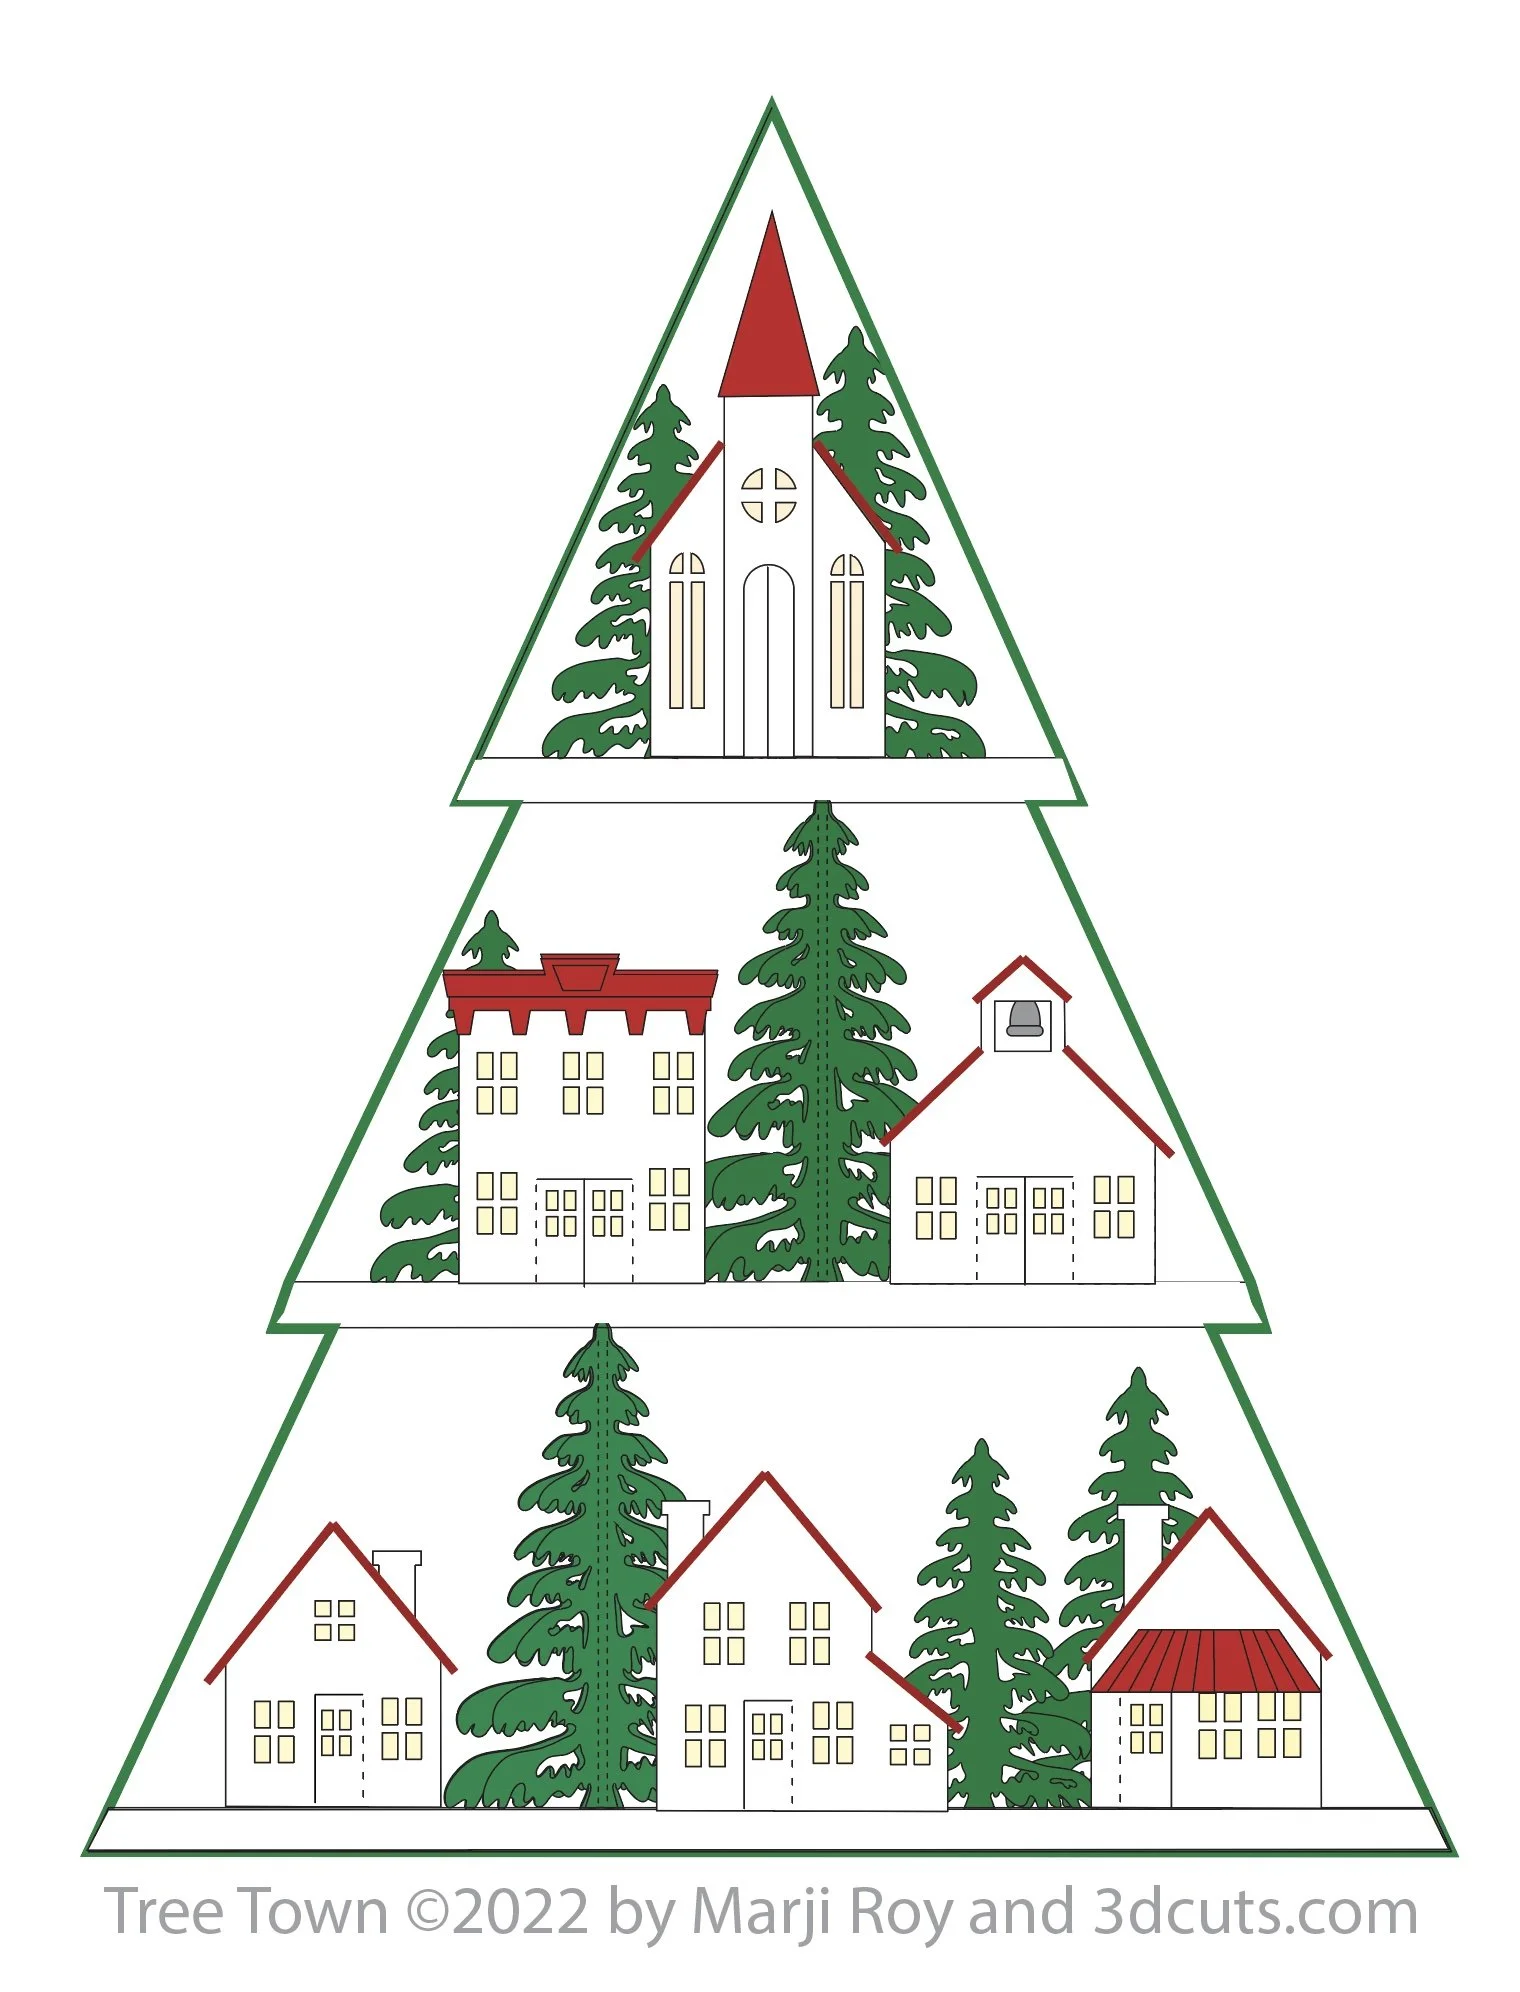
Tree Town is a tiny 3d village nestled into a pine tree base. It includes six buildings plus a pine tree shape display shelf. The buildings are a cottage, two-story house, cafe, school, business building and a church. The buildings range in size from 2” to 3.75” and when altogether the entire display is about 12.5 inches tall. It can be displayed as a free-standing piece on a table or hung in front of a window so light shines through the windows giving an additional glow.
The individual parts of this project are basic 3d construction and the video below guides you through easy step-by-step instructions.
Link for this cutting file is here.
Supplies Needed:
Cutting Files here - Available at https://3dcuts.com/christmas-projects/tree-town
Art Glitter Glue or ScorTape 1/8" and 1/4"
Card Stock - 4 white, 2 green, 1 red, gray scrap. 8.5 x 11”
Wax paper - Tracing paper works as well.
Scissors
Tweezers
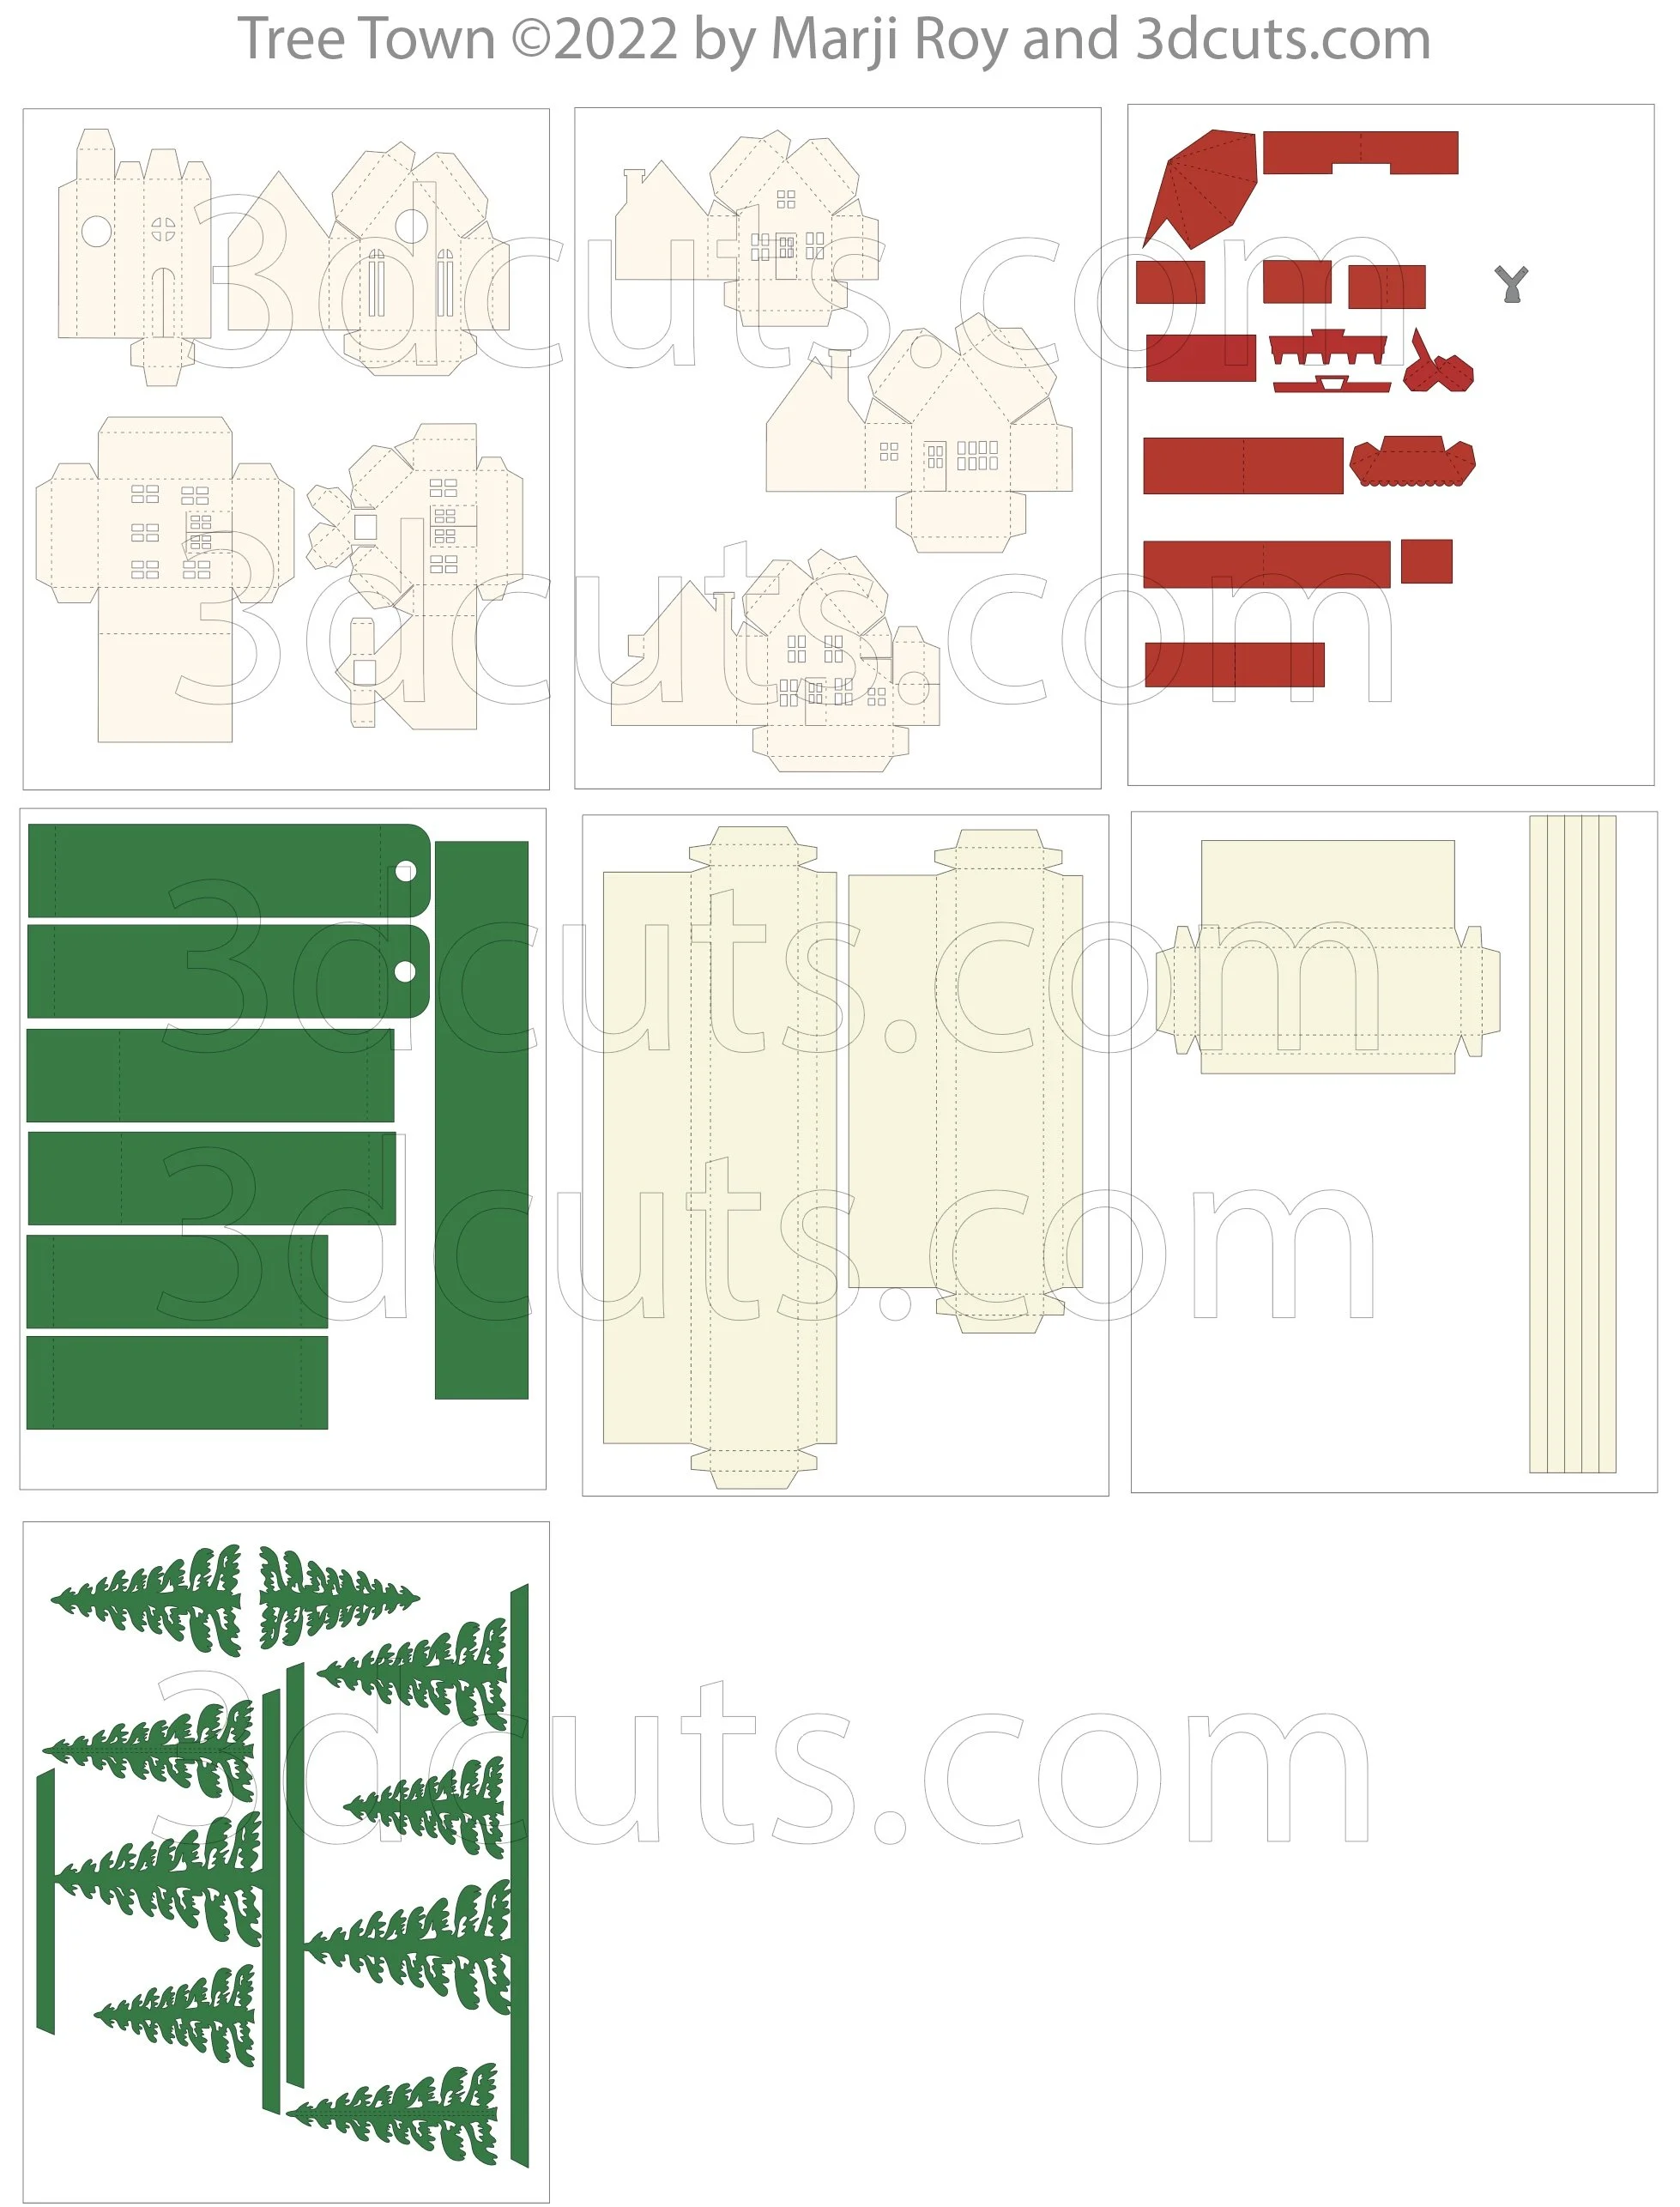
Parts Sizes- See orientation in diagram to right.
White buildings Group 1 (includes church, business building and schoo)l - 7.857” w x 9'.90” h
White buildings Group 2 (includes cottage, 2 story house and cafe)- 7.447”w x 10.364”h
Red Roofs grouped - 6.325” w x 8.993”H
Green Rectangles grouped - 8.097” w x 9.768”h
White bases -2 long ones grouped - 7.737” w x 10.690” h
White base 1 short and 5 skinny supports grouped - 7.424’ w x 10.606”h
Green Trees grouped- 7.939” w x 10.065” h
Order supplies from Amazon:
Order from Amazon: Neenah Exact Index Card Stock 110lbs. 250 sheets (Affiliate Link) (Note Index Card 100 is equivalent to 65 lb card stock. I find the index cuts better.)
Order from Amazon: Art Glitter Glue with metal tip (Affiliate Link)
Order from Amazon: Scor-Tape 1/4" X 27yds (5 Rolls) (Affiliate Link)
Order from Amazon: Premium Silhouette Blade (Affiliate Link)
Order from Michaels: Recollections Card Stock Forest Green Collection
Order from Michaels: Recollections Card Stock Shades of Red collection
Steps for completing Tree Town:
Special Note: I update the instructions online. Check here for adjustments and additional information.
Update: In the two-story house in the video I had a hole in the bottom for the possibility of adding fairy lights to this project. I decided to keep this version simple and removed the holes from the final files. Just ignore the fact that it looks a little different.
The Tree file! I forgot to include it in the folder. For the first 53 of you I sent a follow up email that includes the tree file. It has been added early on Oct. 15, 2022. If you ordered before then and don’t get the new files just let me know and I will send it again.
1. Download the cutting files for your cutting machine here from the 3dcuts.com store. https://3dcuts.com/christmas-projects/tree-town . For those of you that are reading this as a pdf I recommend viewing it online at my tutorials page at this url - https://3dcuts.com/tree-town-tutorial . There all the links will be live.
2. Load the files into your cutting software following the steps for your cutting machine.
3. Prepare the files:.
For the Silhouette:
SIL Files from upload SVG purchased from 3dcuts.com:
The SVG files may need to be turned into cutting files. Click here for detailed steps on how to use SVG files on your Silhouette. http://www.3dcuts.com/tutorial-upload-svg-silhouette
DXF files can be opened in the basic edition of Silhouette Design Studio but often require modifications. I recommend using the Designer Edition and using svg files. DXF files do not always maintain file sizes and you may need to adjust according to sizes noted above.
For Cricut Explore: Here is a guide for importing into Cricut Design Space. http://www.3dcuts.com/tutorial-adding-3dcuts-files-to-cricut. Use SVG files with Cricut. Remember to ATTACH files before cutting in Cricut.
For Brother ScanNCut: The svg files will need to be transferred to files for your particular machine. You can change SVG files to FCM files at http://www.canvasworkspace.com/ or Google "How to import SVG files into a ScanNCut" for links to tutorials. Some models of Brother Scan N Cut can directly import the SVG files.
4. Cut the files.
It is best to have good quality card stock and a good blade and clean, sticky mat. I use the Premium blade and the Nicapa mat. These files do have intricate cuts and you need to know which settings your machine works best with.
Assembly Video:
Below is a YouTube Video of the Assembly process. https://youtu.be/RouFUgCmIRM
Video Timeline: Use the following timings to fast forward to a specific building assembly.
4:53 - Christmas Tree Shelf Construction
19:19 - Cottage Assembly
24:40 - Two-Story House Assembly
30:24 - Cafe Assembly
34:33 - School Assmbmmly
48:10 - Church Assembly

Sharing…..
Send me photos of your completed Tree Town or other projects that use the tiny buildings. If the photos are clear and well lit I will share create ideas here. Love to see your work. Send it to marji@3dcuts.com.
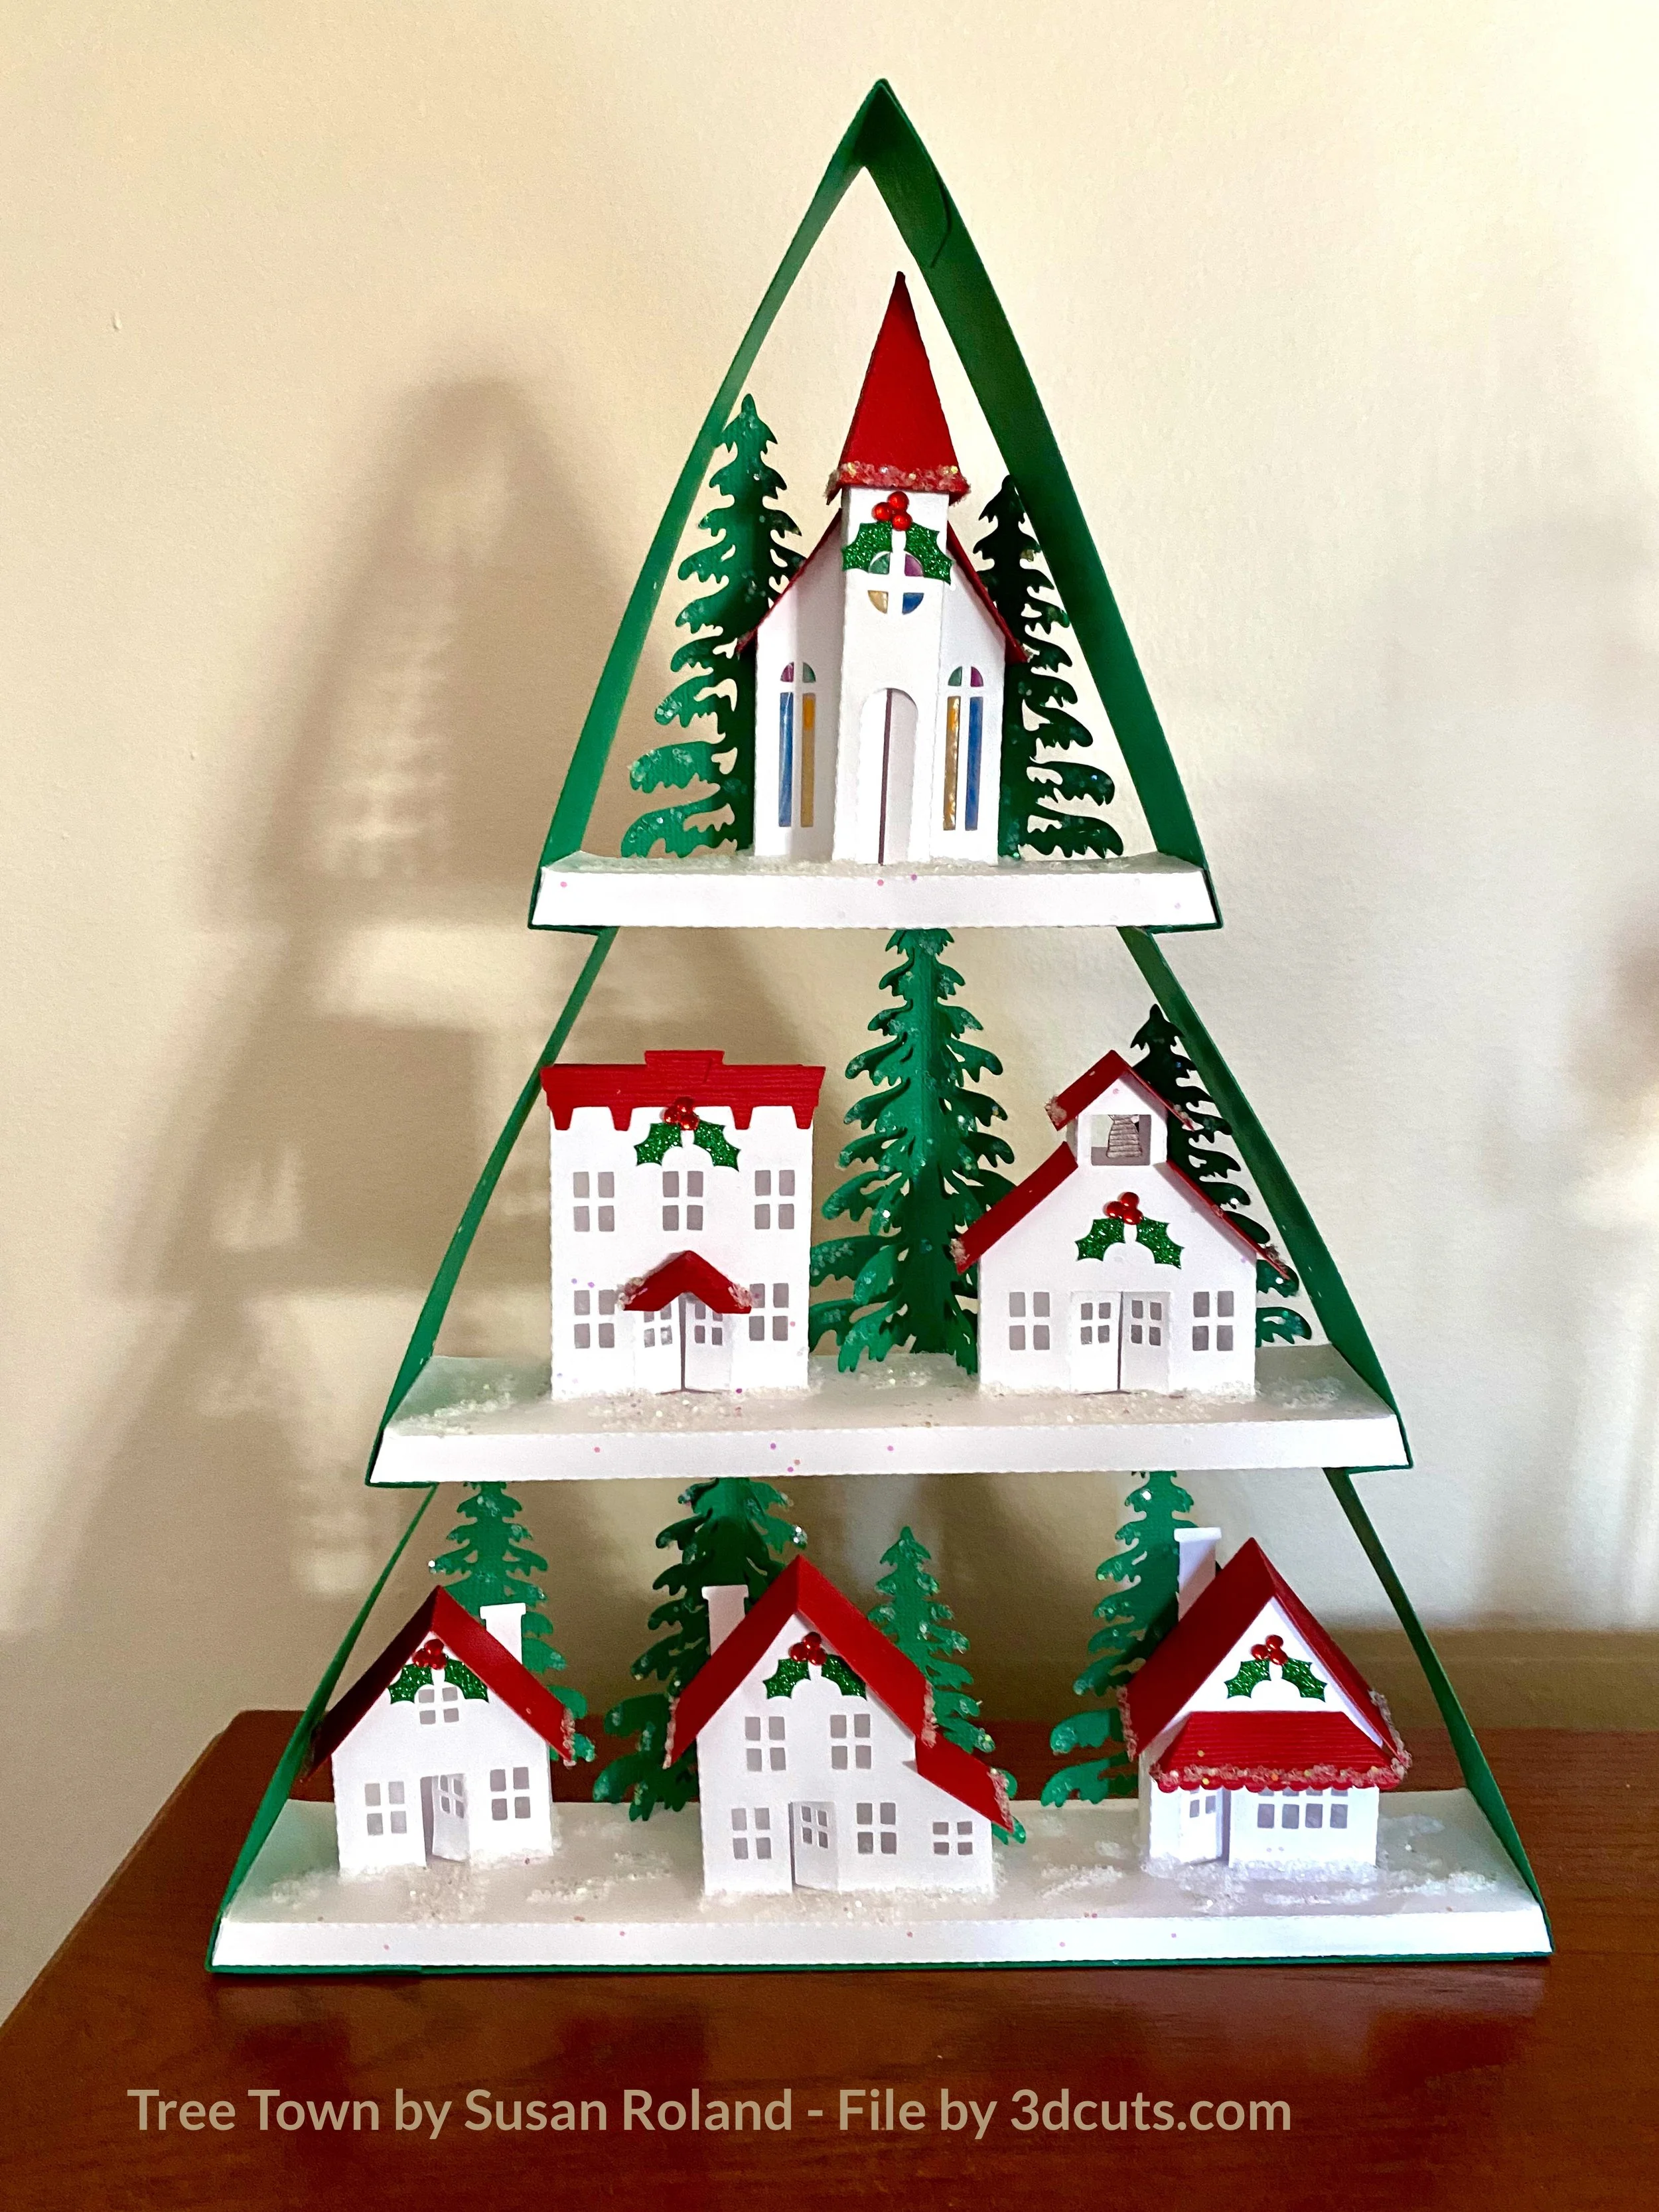
Tree Town completed by Susan Roland. Cutting file by Marji Roy of 3dcuts.com
Susan Roland sent me this photo of her completed Tree Town. She added sparkly snow and holly leaves with red berries. Also notice the church windows are stained glass! Love it!
Mary Fender added a beautiful topper to her Tree Town along with the festive wreathes.

Do something creative with these same files……..

Tree Town files used as the basis for these Christmas Tree ornaments by Patty Lee.