Peekaboo Kitties Shadow Box - Tutorial


About the Frames:
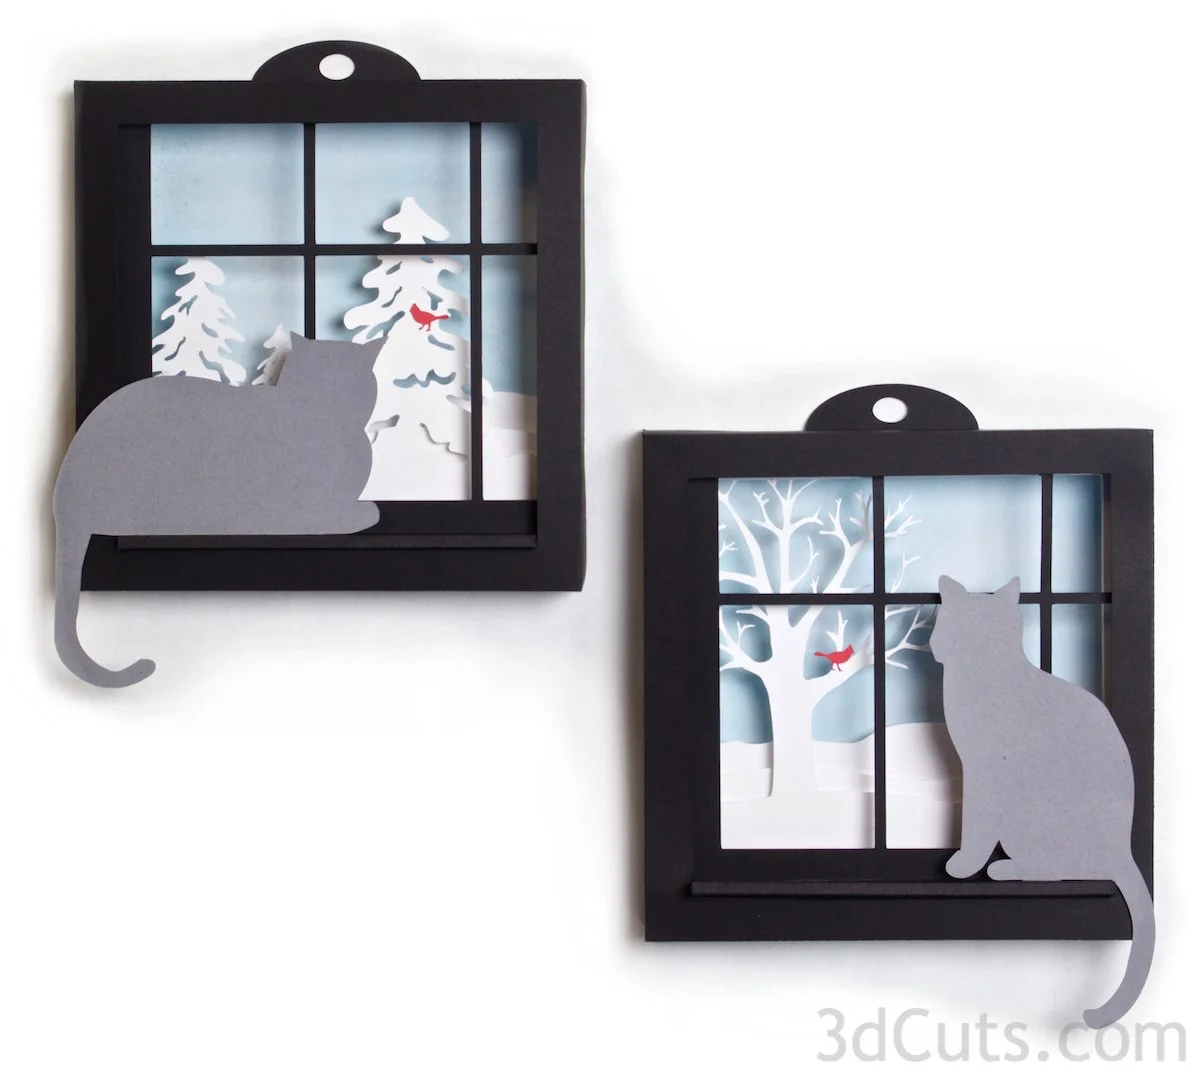
I constructed this shadow box in both a deep frame (blue version) and a less deep frame (purple version). The purple version has no glass and extends beyond the frame. The blue version is behind glass and better protected but harder to see. When completed, visually I liked the less deep frame without the glass better. I have included links to both frames on the right. Note that one measures 12 x12 on the outside (but sells as a 11 x 11) and the other measures 12 3/4 x 12 3/4 on the outside. Cut the back ground paper to fit your shadow box.
Project Description:
Here is a charming shadow box project combining kitties and boxes. What mischief! It is designed to be cut out of card stock and installed in a purchased 12 x12” shadow box frame.
Construction is simple 3d techniques to create a variety of boxes.
Cutting File available here from 3dcuts.com. https://3dcuts.com/cats/peekaboo-kitties
Supplies needed:
Cutting File available here from 3dcuts.com.
Card stock- high quality - I used:
Recollections 8.5 x 11” card stock for all the solid pieces in 3 shades of kraft brown -5 pieces needed
I used patterned card stock (12 x 12”) for the back ground.
Patterned scraps for the gift box.
Black - 1 piece for Kitties
Yarn
Adhesive - Art Glitter Glue
ScorTape
12 x 12 frame (see section on frames below). Yes, you can re-size for different frames.
Links to supplies on Amazon: All are Affiliate links
Order from Amazon: (Recollections Nostalgia CollectionCard Stock 50 CT 8.5 x 11” 65 lb
Order from Amazon: (Recollections Black Card Stock 50 CT 8.5 x 11” 65 lb)
Order from Amazon: THY Assorted Yarn 20 colors (Affiliate Link)
Order from Amazon: 11 x 11 Shadow Box Frame by AmericanFlat(Affiliate Link) deep frame
OR
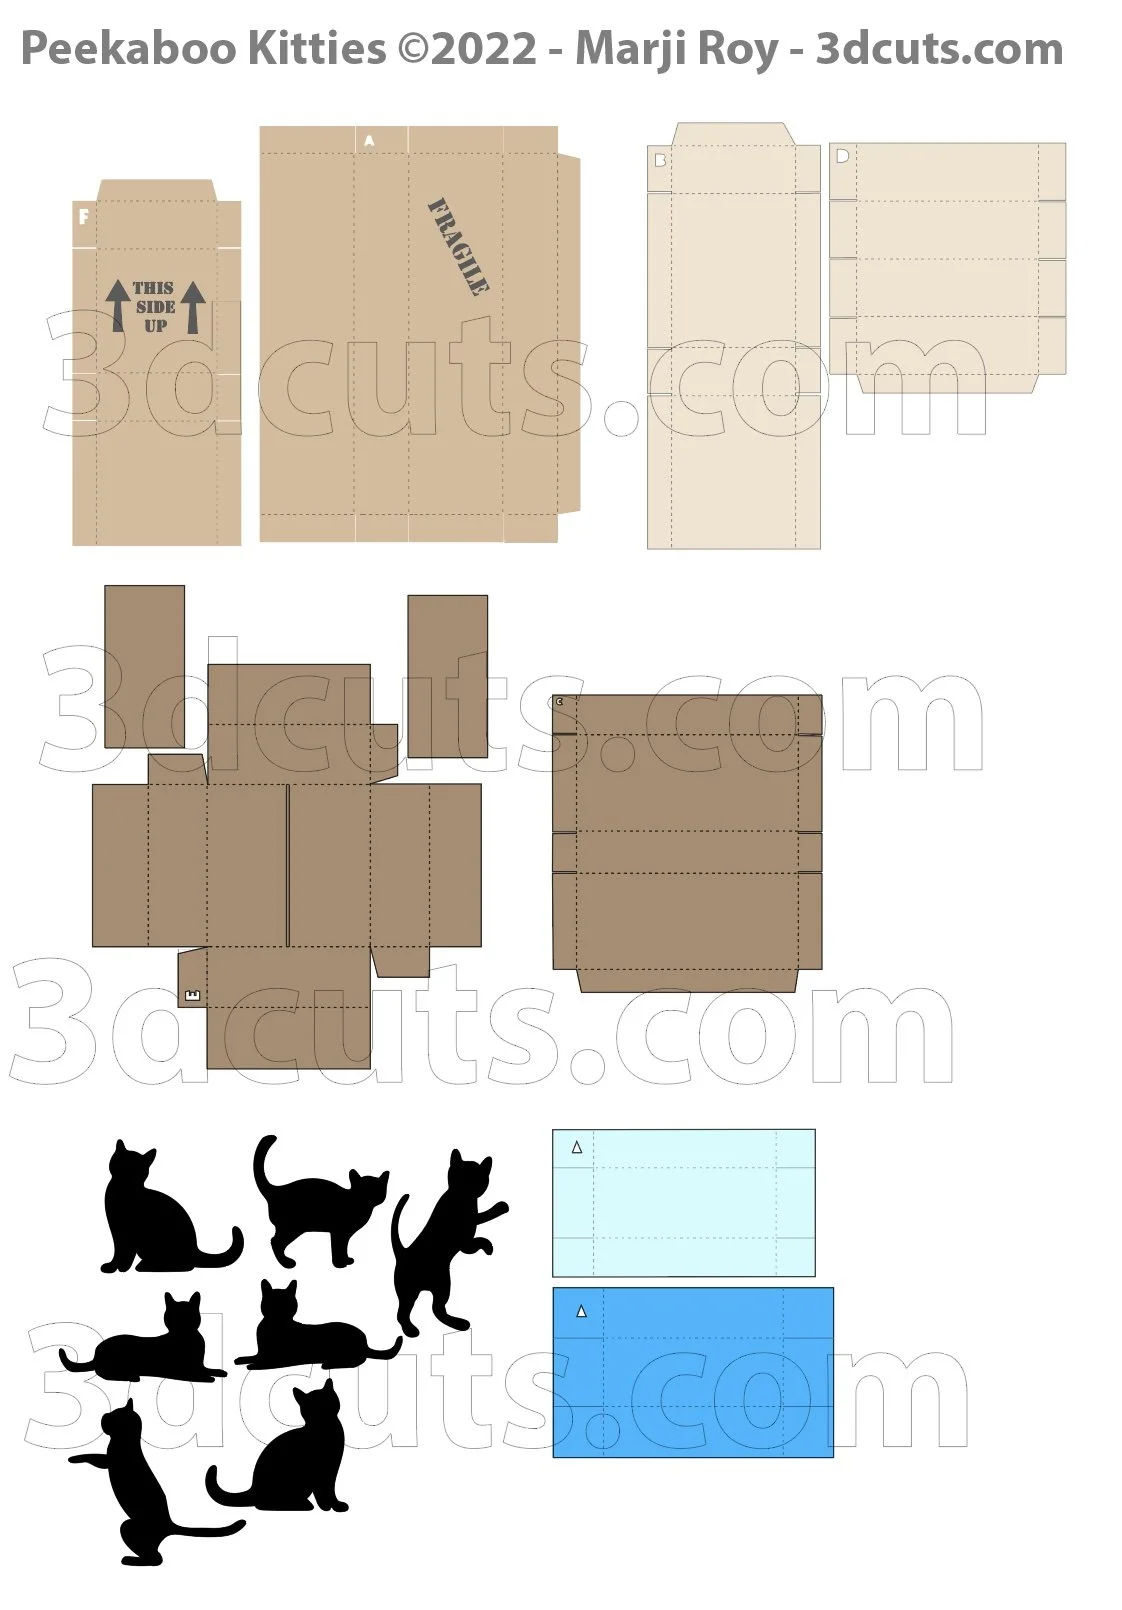
Major Parts Sizes - as download.
There are discrepancies in how various software import files and keep their sizing. Check these numbers before cutting. Keep grouped for sizing. Measurements maybe needed if using dxf files. Also check before cutting with Cricut.
Note: Some files as downloaded have multiple pieces. Keep them grouped together for these sizes
Box A - 5.918” w x 7.692” w
Box B & D together (cut on same sheet) 7.729” w x 7.872” h
Box C - 4.979” w x 5.494” h
Box E (with rectangles) 7.3” w x 8.931” h
Box F - 3.111” w x 6.765” h
Kitties (Grouped together) 8.297” w x 7.946” h
Colored Box (triangle grouped) 5.189m”w x 6.065” h
Note: Not all software and cutting machine combinations can use the ALL svg file. Some resize files to fit in a smaller mat area. Import the individual files if your machine has size limitations. I create the ALL file in case you want to re-size everything. When resizing you want to group all parts together and re-size proportionally.
Peekaboo Kitties ALL SVG file - 18.597” w”w x 26.654” h”h
Layout Notes:
The layout above is here to show you how the files are organized. The above sizes match those groupings in the split files.
Steps for completing the Peekaboo Kitties Shadow Box:
Special Note: I update the instructions online. Check here for adjustments and additional information.
1. Download the cutting files for your cutting machine here from the 3dcuts.com store. . For those of you that are reading this as a pdf I recommend viewing it online at my tutorials page at this url. https://3dcuts.com/cats/peekaboo-kitties . There all the links will be live.
2. Load the files into your cutting software following the steps for your cutting machine.
3. Prepare the files:
For the Silhouette:
SIL Files from upload SVG purchased from 3dcuts.com:
The SVG files may need to be turned into cutting files. Click here for detailed steps on how to use SVG files on your Silhouette. http://www.3dcuts.com/tutorial-upload-svg-silhouette
DXF files can be opened in the basic edition of Silhouette Design Studio but often require modifications. I recommend using the Designer Edition and using svg files. DXF files do not always maintain file sizes and you may need to adjust according to sizes noted above.
For Cricut Explore: Here is a guide for importing into Cricut Design Space. http://www.3dcuts.com/tutorial-adding-3dcuts-files-to-cricut . Remember to ATTACH files before cutting in Cricut. You should check dimensions before you cut. Design Space occasionally has import issues and sizing gets mixed up.
For Brother ScanNCut: The svg files will need to be transferred to files for your particular machine. You can change SVG files to FCM files at http://www.canvasworkspace.com/ or Google "How to import SVG files into a ScanNCut" for links to tutorials. Some models of Brother Scan N Cut can directly import the SVG files.
Additional Help files: Go here https://3dcuts.com/help for additional help files on downloading and importing your files.
4. Cut the files:
Check the measurements above before separating parts and cutting the files.
It is best to have good quality card stock and a good blade and clean, sticky mat. I use the Premium blade and the Nicapa mat.
5. Print and Cut for Boxes A and F.
If you have print and cut capabilities these two parts have printing on them. If you don’t have that ability you can just print the files on card stock and cut by hand. They are simple cuts.
6. Print Labels
There is a jpg file in the download folder of tiny shipping labels. These get printed and cut by hand.
7. Assembly
The assembly steps are detailed in the video below. Here is the YouTube url https://youtu.be/sFx8eHyXA6c
Here is a template for the layout of the boxes. You can follow this or do your own:

Creative Applications:
Send me your photos!
I will post photos of hoops other crafters have made. Send a good photo to marji@3dcuts.com if you have done something interesting with this file. And share in the crafting groups on facebook.
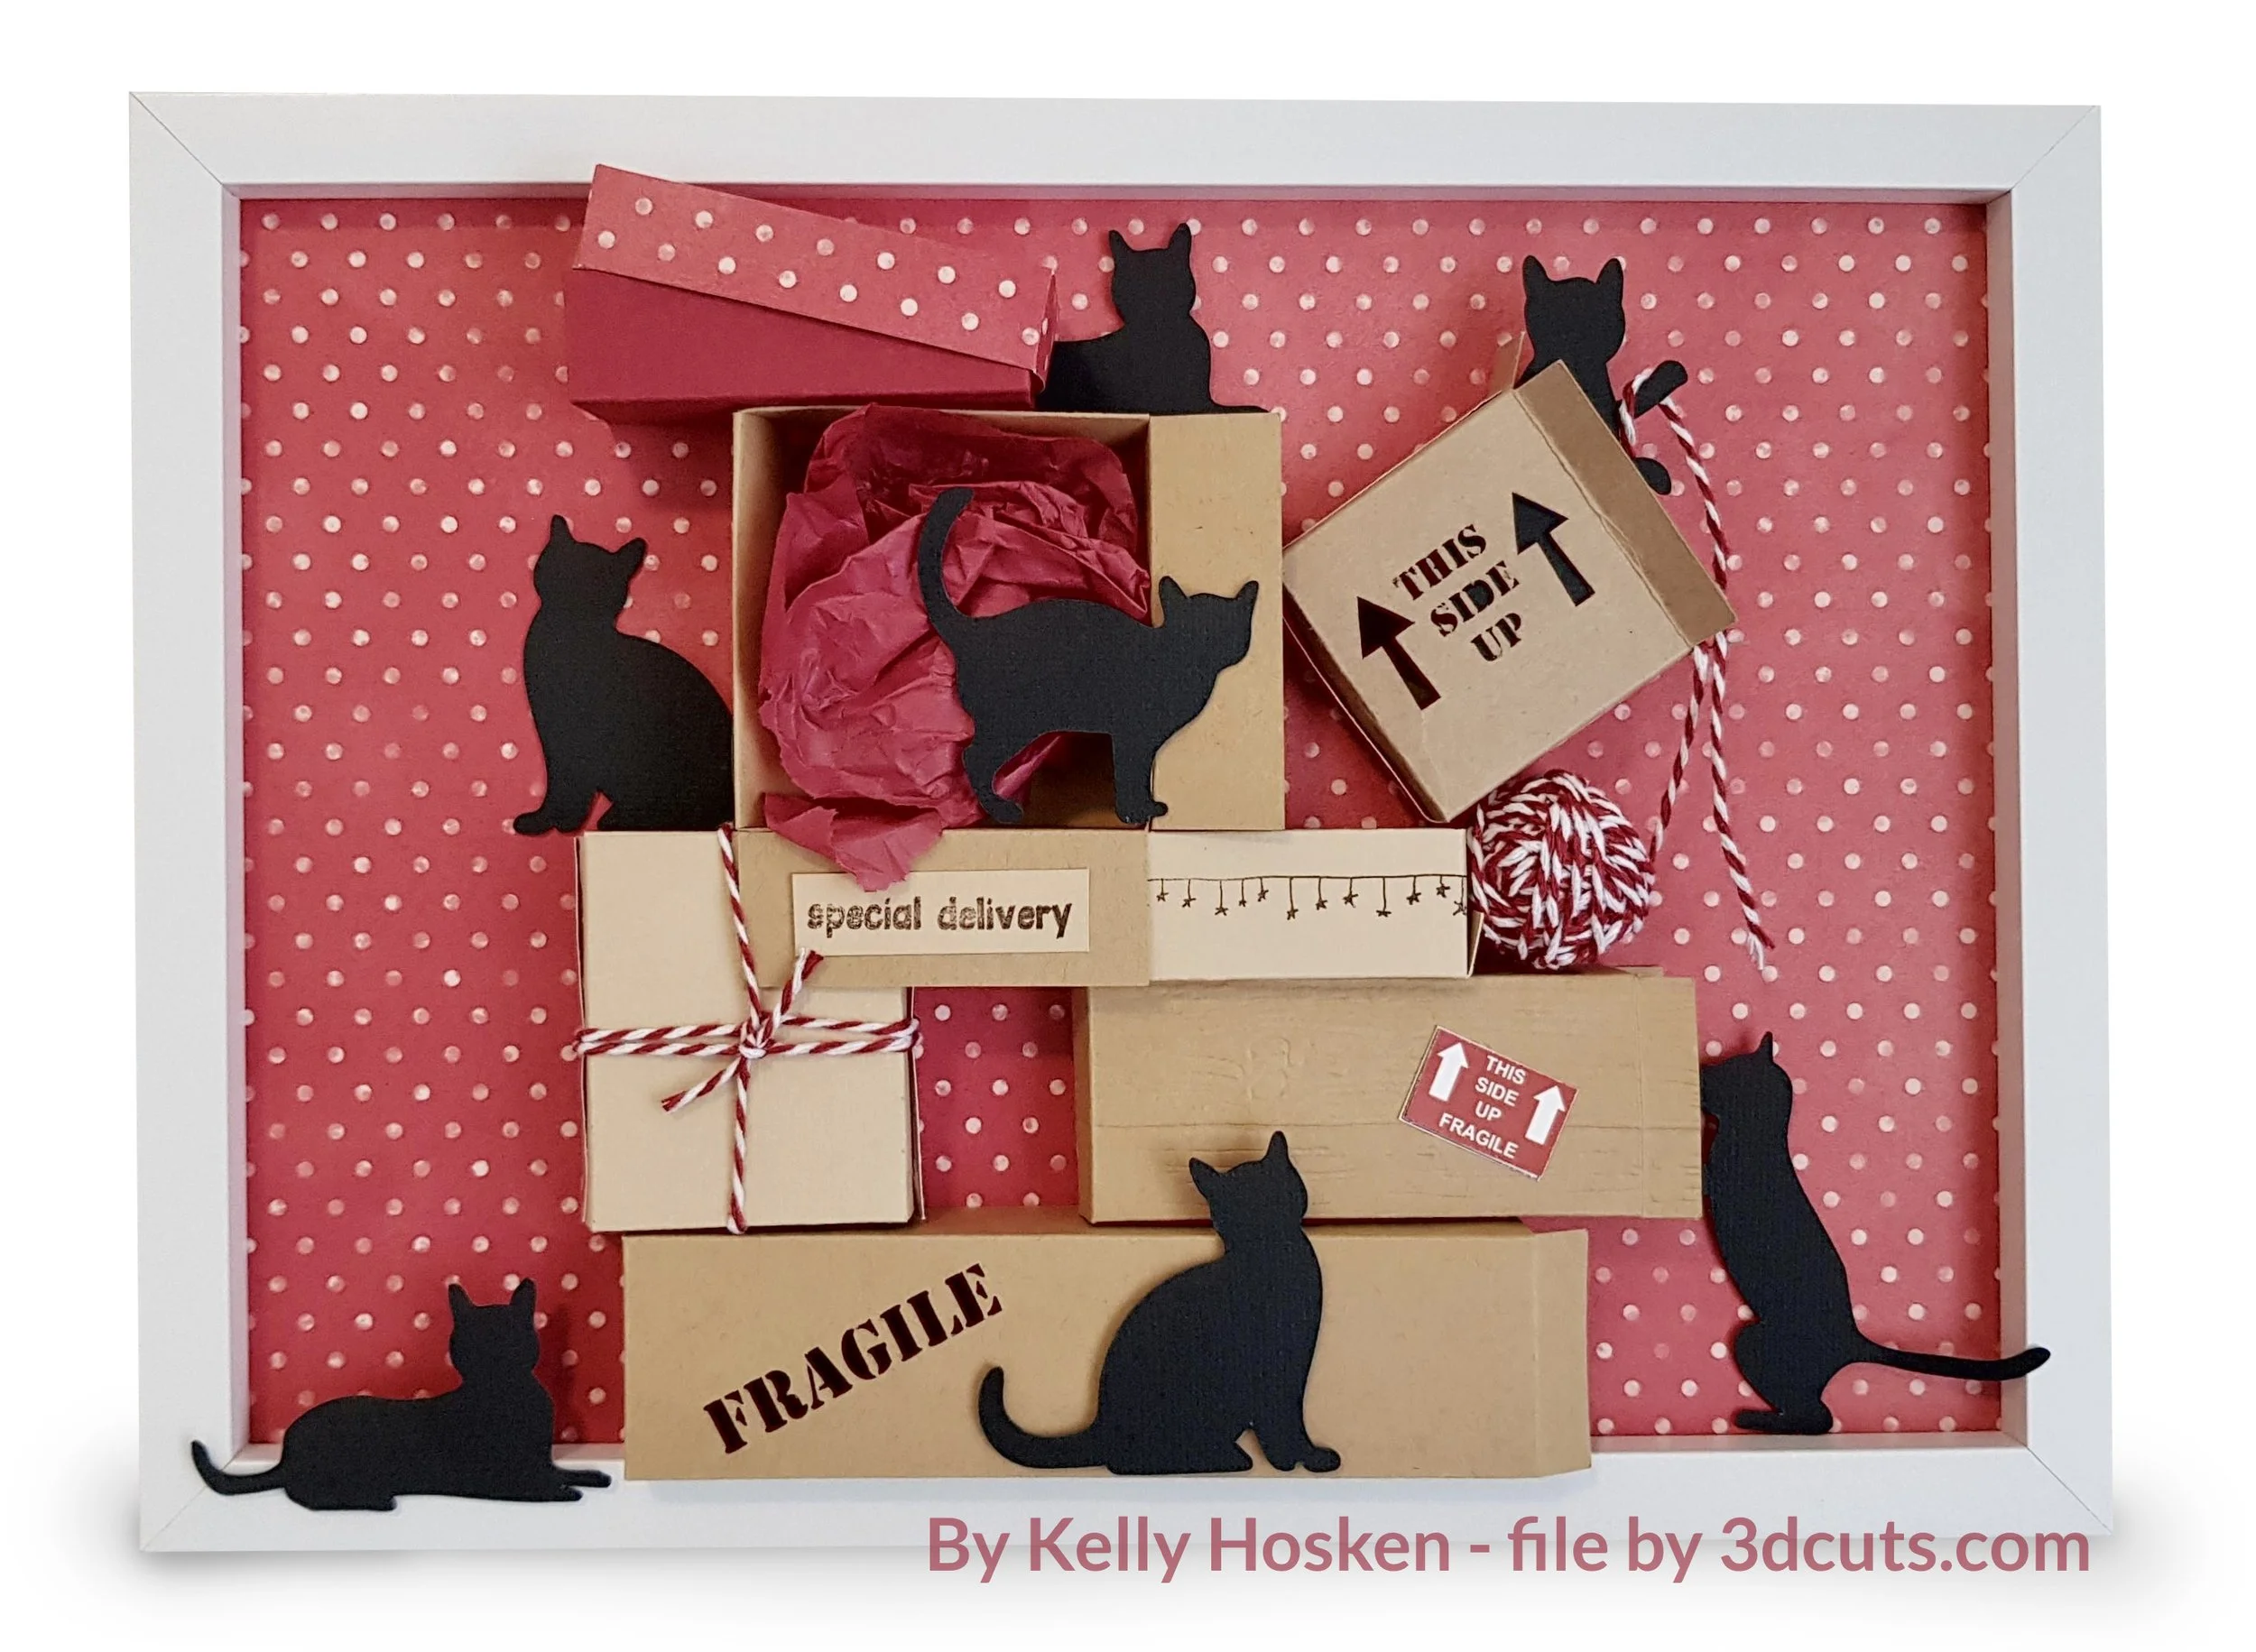
Kelly Hosken sent the first photo showing the Peekaboo Kitties with variations. Notice she modified it for a rectangular frame instead of a square one. I also love it with a white frame. The addition of tissue paper and baker’s twine just adds variety and interest. She also made some custom labels. I love to see creative variations!
Here are some other cat themed projects I have designed. You can see these on my store here.