
Deer at Moonrise Shadow Box - Tutorial

Project Description:
This projects has you creating a gorgeous winter scene to be installed in a purchased 11 x11 (12 x 12 exterior) shadow box. The peaceful scene includes two deer quietly grazing under a birch tree in the glow of a rising moon. This project features a new, easier construction technique that uses readily available straws as layer spacers. The print file for the shown sky is included however other styles can be substituted.
Cutting File available here from
https://3dcuts.com/shadow-boxes-nature-themes/deer-at-moonrise
Supplies needed:
Cutting File available here from 3dcuts.com.
Card stock 5 12 x 12 sheets in vanilla- I used the 80lb 12” x 12” American Craft Cardstock in Vanilla - affiliate link below.
Black and gray are 65lb Recollections (Michael’s) 2 sheets black and 1 gray needed.
1 12 x 12” color card stock for mat
19 10” x .28” clear drinking straws - link below
1/8” Scor Tape
Art Glitter Glue
Frame - Link below to the 11’ x 11” frame I got at Amazon. It measures 12 x 12” on the outside and 11 x 11” on the inside. You can re-size files to fit any square frame.
Inkjet printer to print background or make your own.
Order supplies from Amazon:
(Affiliate links work for USA customers only. Other countries will need to search in their local Amazon for the products.)
Order from Amazon: 11 x 11 Shadow Box Frame by AmericanFlat(Affiliate Link)
Order from Amazon: 12 x 12 American Craft Vanilla Card Stock (Affiliate Link)
Order from Amazon: 10 Inch Drinking Straws (10 Inch x 0.28 Inch) (250, Clear)(Affiliate Link) (As of 1/22 these seem to be out of stock. Here are a few other options your can try.
Order from Amazon: Art Glitter Glue with metal tip (Affiliate Link)
Order from Amazon: Scor-Tape 1/8" X 27yds (2 Rolls) (Affiliate Link)
Order from Amazon: (Precision Tip Applicator Bottle) for use with Glitter Glue
Order from Amazon: Premium Silhouette Blade (Affiliate Link)

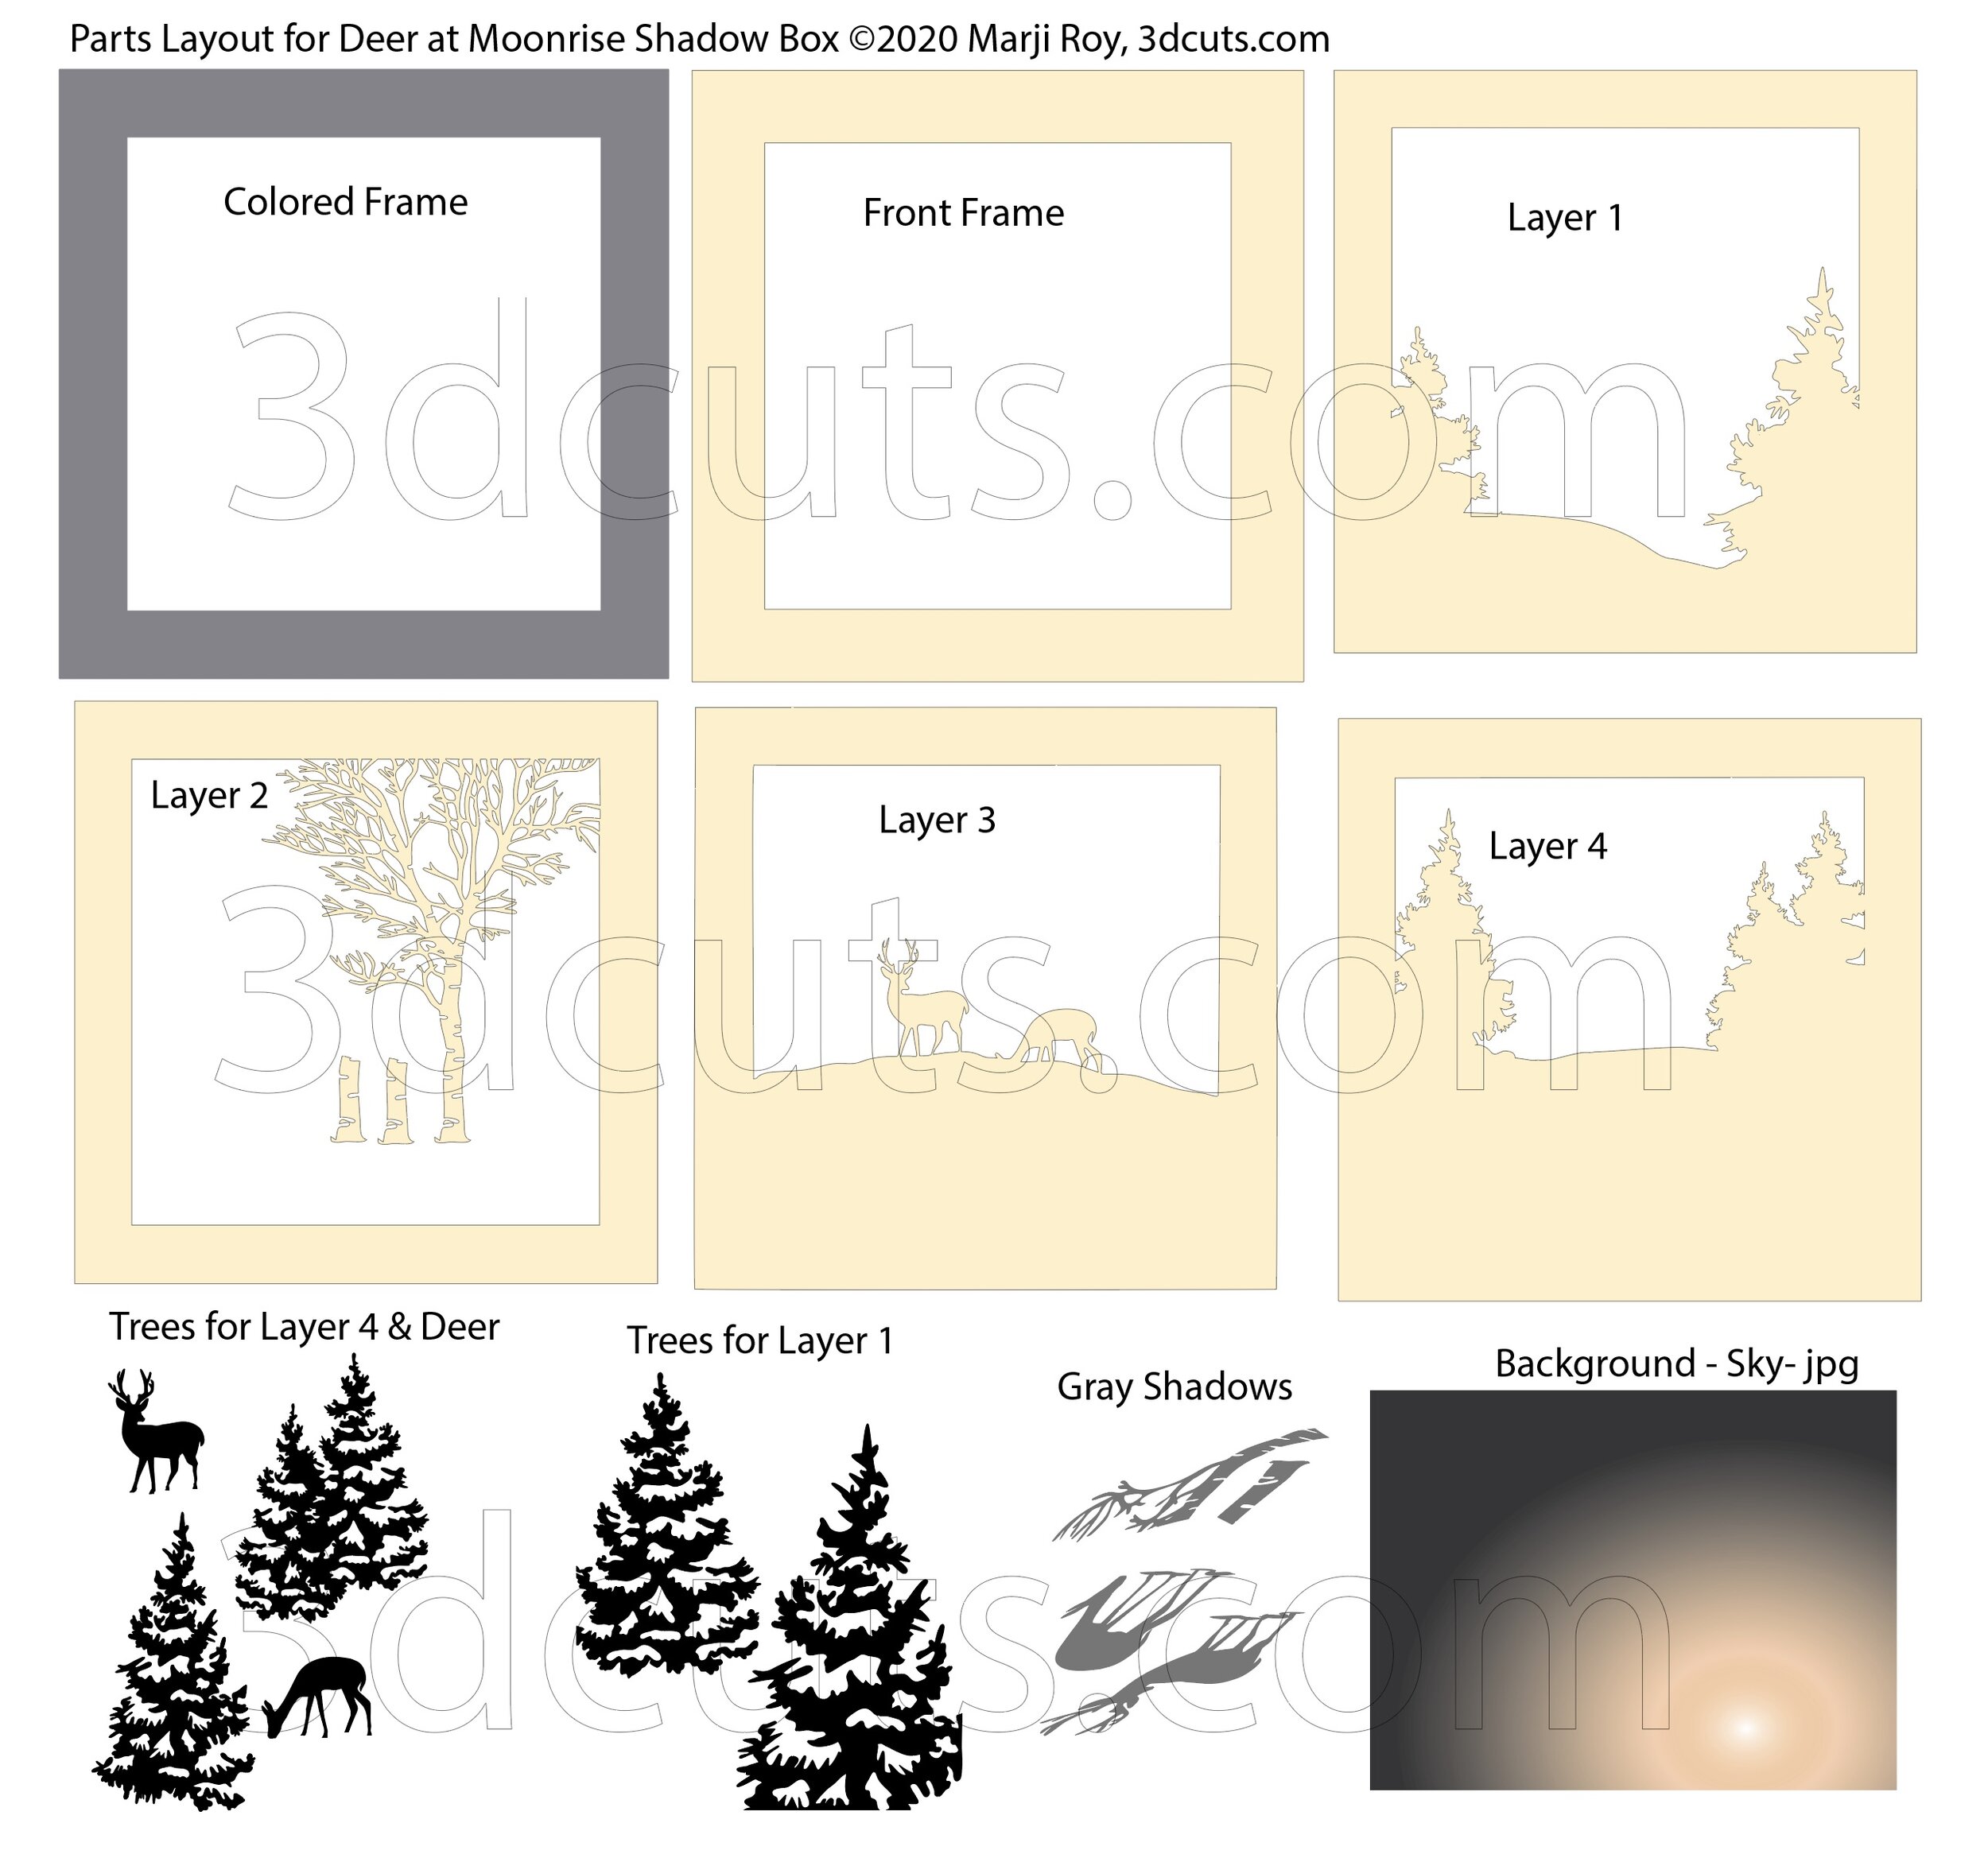
Major Parts Sizes - as download.
Measure the inside of you frame first. Cut the 8 layers to match that. Mine were:
Front frame - colored - 10.97” W x 10.97” H (optional)
Frame back - 10.97” W x 10.97” H
Layers 1-4 - 10.48 ”W x 10.48” H
Sky - 8.5 x 11” cut to size later.
Black sheet with 2 trees for Layer 1 - 8.9257” W x 7.8586” H
Black sheet with 3 trees and deer together - 6.0559” W x 8.2447”H
Gray sheet of shadows - 5.2023” W x 5.5248”H
Deer at Moonrise Shadow Box • 2020, 3DCuts.com, Marji Roy, 3D cutting files in .svg, .dxf, and .pdf formats for use with Silhouette, Cricut and other cutting machines, paper crafting files
Steps for completing the Deer at Moonrise Shadow Box:
Special Note: I update the instructions online. Check here for adjustments and additional information.
1. Download the cutting files for your cutting machine here from the 3dcuts.com store. https://3dcuts.com/shadow-boxes-nature-themes/deer-at-moonrise . For those of you that are reading this as a pdf I recommend viewing it online at my tutorials page at this url. https://3dcuts.com/deer-at-moonrise-tutorial There all the links will be live.
2. Load the files into your cutting software following the steps for your cutting machine.
For the Silhouette:
SIL Files from uploaded SVG purchased from 3dcuts.com:
The SVG files may need to be turned into cutting files. Click here for detailed steps on how to use SVG files on your Silhouette. http://www.3dcuts.com/tutorial-upload-svg-silhouette
DXF files can be opened in the basic edition of Silhouette Design Studio but often require modifications. I recommend using the Designer Edition and using svg files. DXF files do not always maintain file sizes and you may need to adjust according to sizes noted above.
For Cricut Explore: Here is a guide for importing into Cricut Design Space. http://www.3dcuts.com/tutorial-adding-3dcuts-files-to-cricut . Remember to ATTACH files before cutting in Cricut.
For Brother ScanNCut: The svg files will need to be transferred to files for your particular machine. You can change SVG files to FCM files at http://www.canvasworkspace.com/ or Google "How to import SVG files into a ScanNCut" for links to tutorials. Some models of Brother Scan N Cut can directly import the SVG files. Some files are on 12” mat so you may need to select 12 x 24” mat for correct sizing.
3. Cut the files.

Detail photo of the straw construction technique for shadow box spacers by Marji Roy of 3dcuts.com
Do you need to re-size? Do so before cutting.
If you want to re-size the files bring ALL parts into one work space, group together and do a proportional re-szing. Then ungroup the files and separate into individual cutting files again.
It is best to have good quality card stock and a good blade and clean, sticky mat. I use the Premium blade and the Nicapa mat.
4. Print the sky.
Included in the download is a jpg sky file. It is a gradation I created in Illustrator to reflect the glow of the rising moon. The file is designed to be printed on an 8.5 x 11” piece of card stock on a color printer. I used my ink jet printer on high quality and printed on regular white card stock. Make sure to print in landscape orientation.
You may insert any sky you wish behind this shadow box. Options include:
Using the one included in the download.
Printing a photo of a sky from another source (Have you photographed a favorite sky?)
Making a watercolor wash on paper
Using another type of gradated paper.
5. Assembly
The assembly steps are detailed in the video below. Here is the YouTube url https://youtu.be/iwFxz8pdtUQ .
6. Share
I love to see your finished projects. Please send photos to me at marji@3dcuts.com or share your photos on facebook, facebook crafting groups, pinterest and instagram.
7. Give
Who are you making this for? Enjoy giving.
If you try something new please share it with me. You can also send good quality photos to me at marji@3dcuts.com. I will insert interesting variations below as people share them so we can see how others apply their own creativity to this file.
Chantal Fisher of the UK shared some UK specific directions for this shadow box. She said, “I had a great time making the Deer at Moonrise papercut! Being in the UK, I couldn't source the frame you recommend, so I re-sized the design to fit a 25cm square frame (9.8 inches) I also couldn't find a box frame deeper than 2cm (0.79 inch) so... I bought some very sturdy cardboard straws (all covered in gold paper which reflects any light that reaches them) and squished them to about 1/2 the size - that worked a treat! I also only used the score tape on the last couple of inches of each straw also a success.

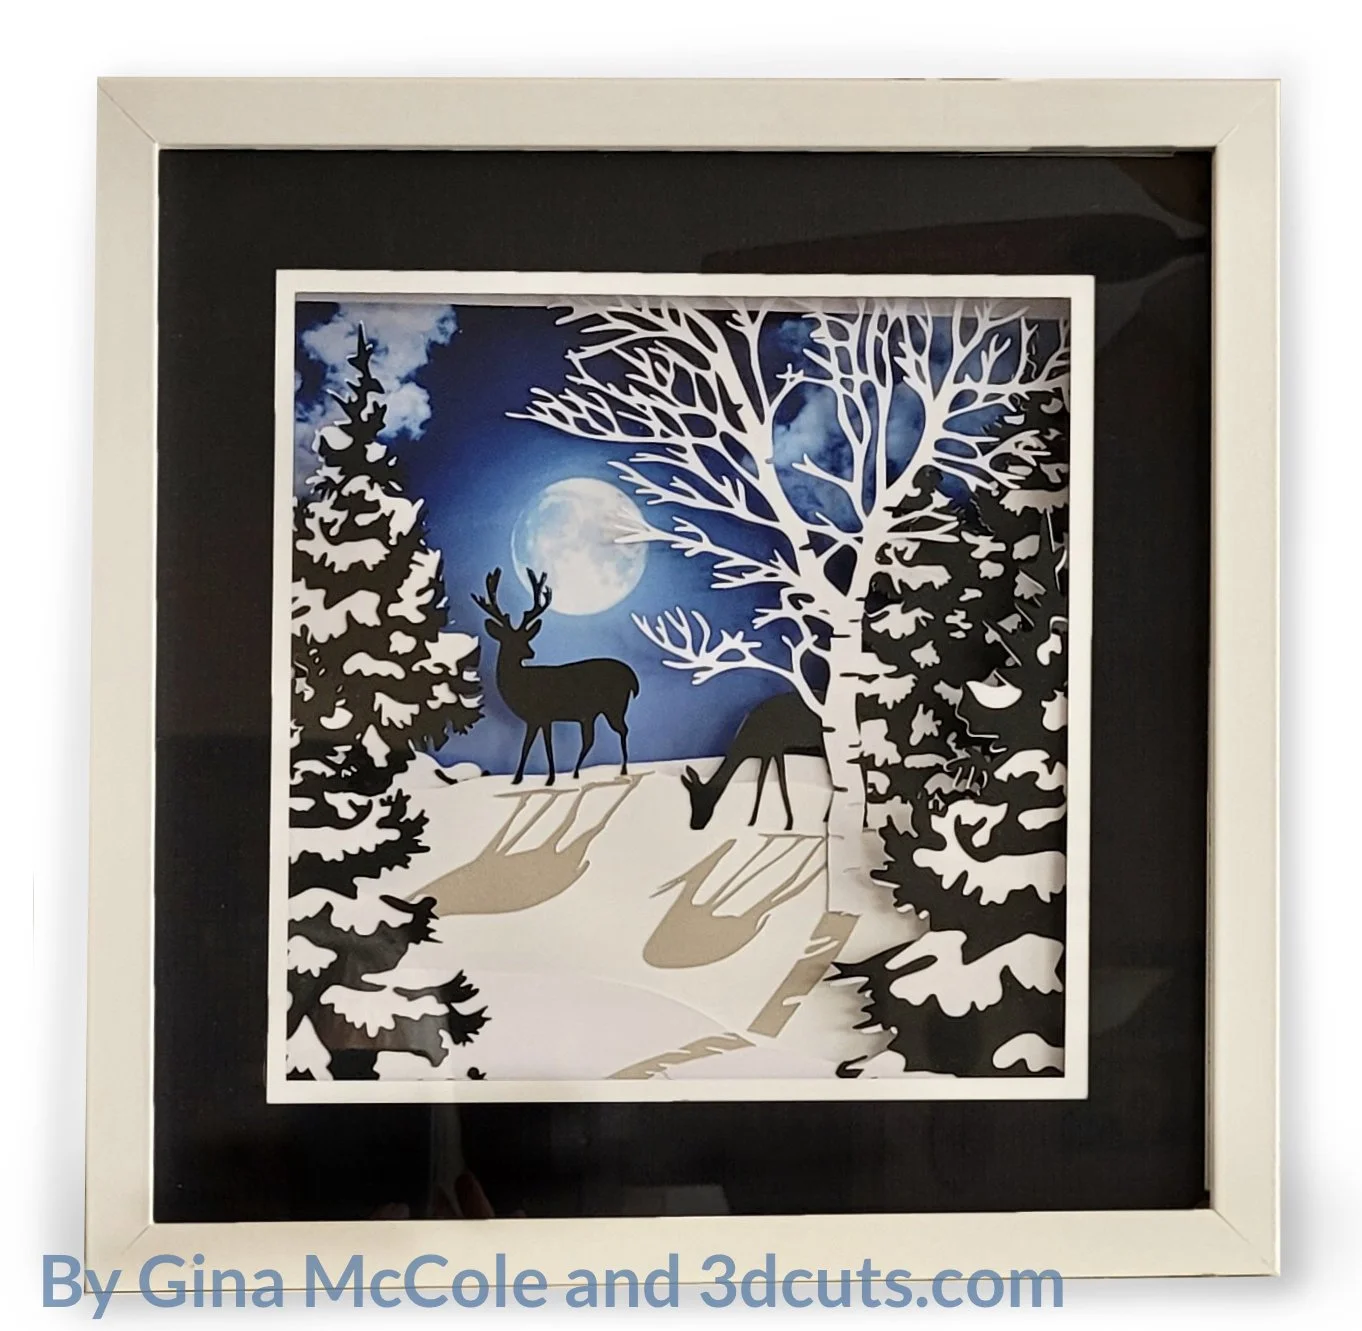
Gina McCole found the perfect background paper for her shadow box. Just look at that moon! Gina also discovered that the straws noted above are no longer available. She instead used foam core strips as spacers. I have since added other straw options above. It is a quick solution!
Deborah Verkerke from Canada shared her completed project with me via email. Her choice of background paper was perfect. I asked if she had made it. She responded that no, she didn’t have a color printer so she went looking through her papers and used this one. It is beautiful!

Kathy Crouse’s printer wasn’t working and she had finished the shadow box. She went looking for an appropriate background paper and found this one on Amazon. There are so many good options for the sky so don’t get hung up by limiting yourself to my option.

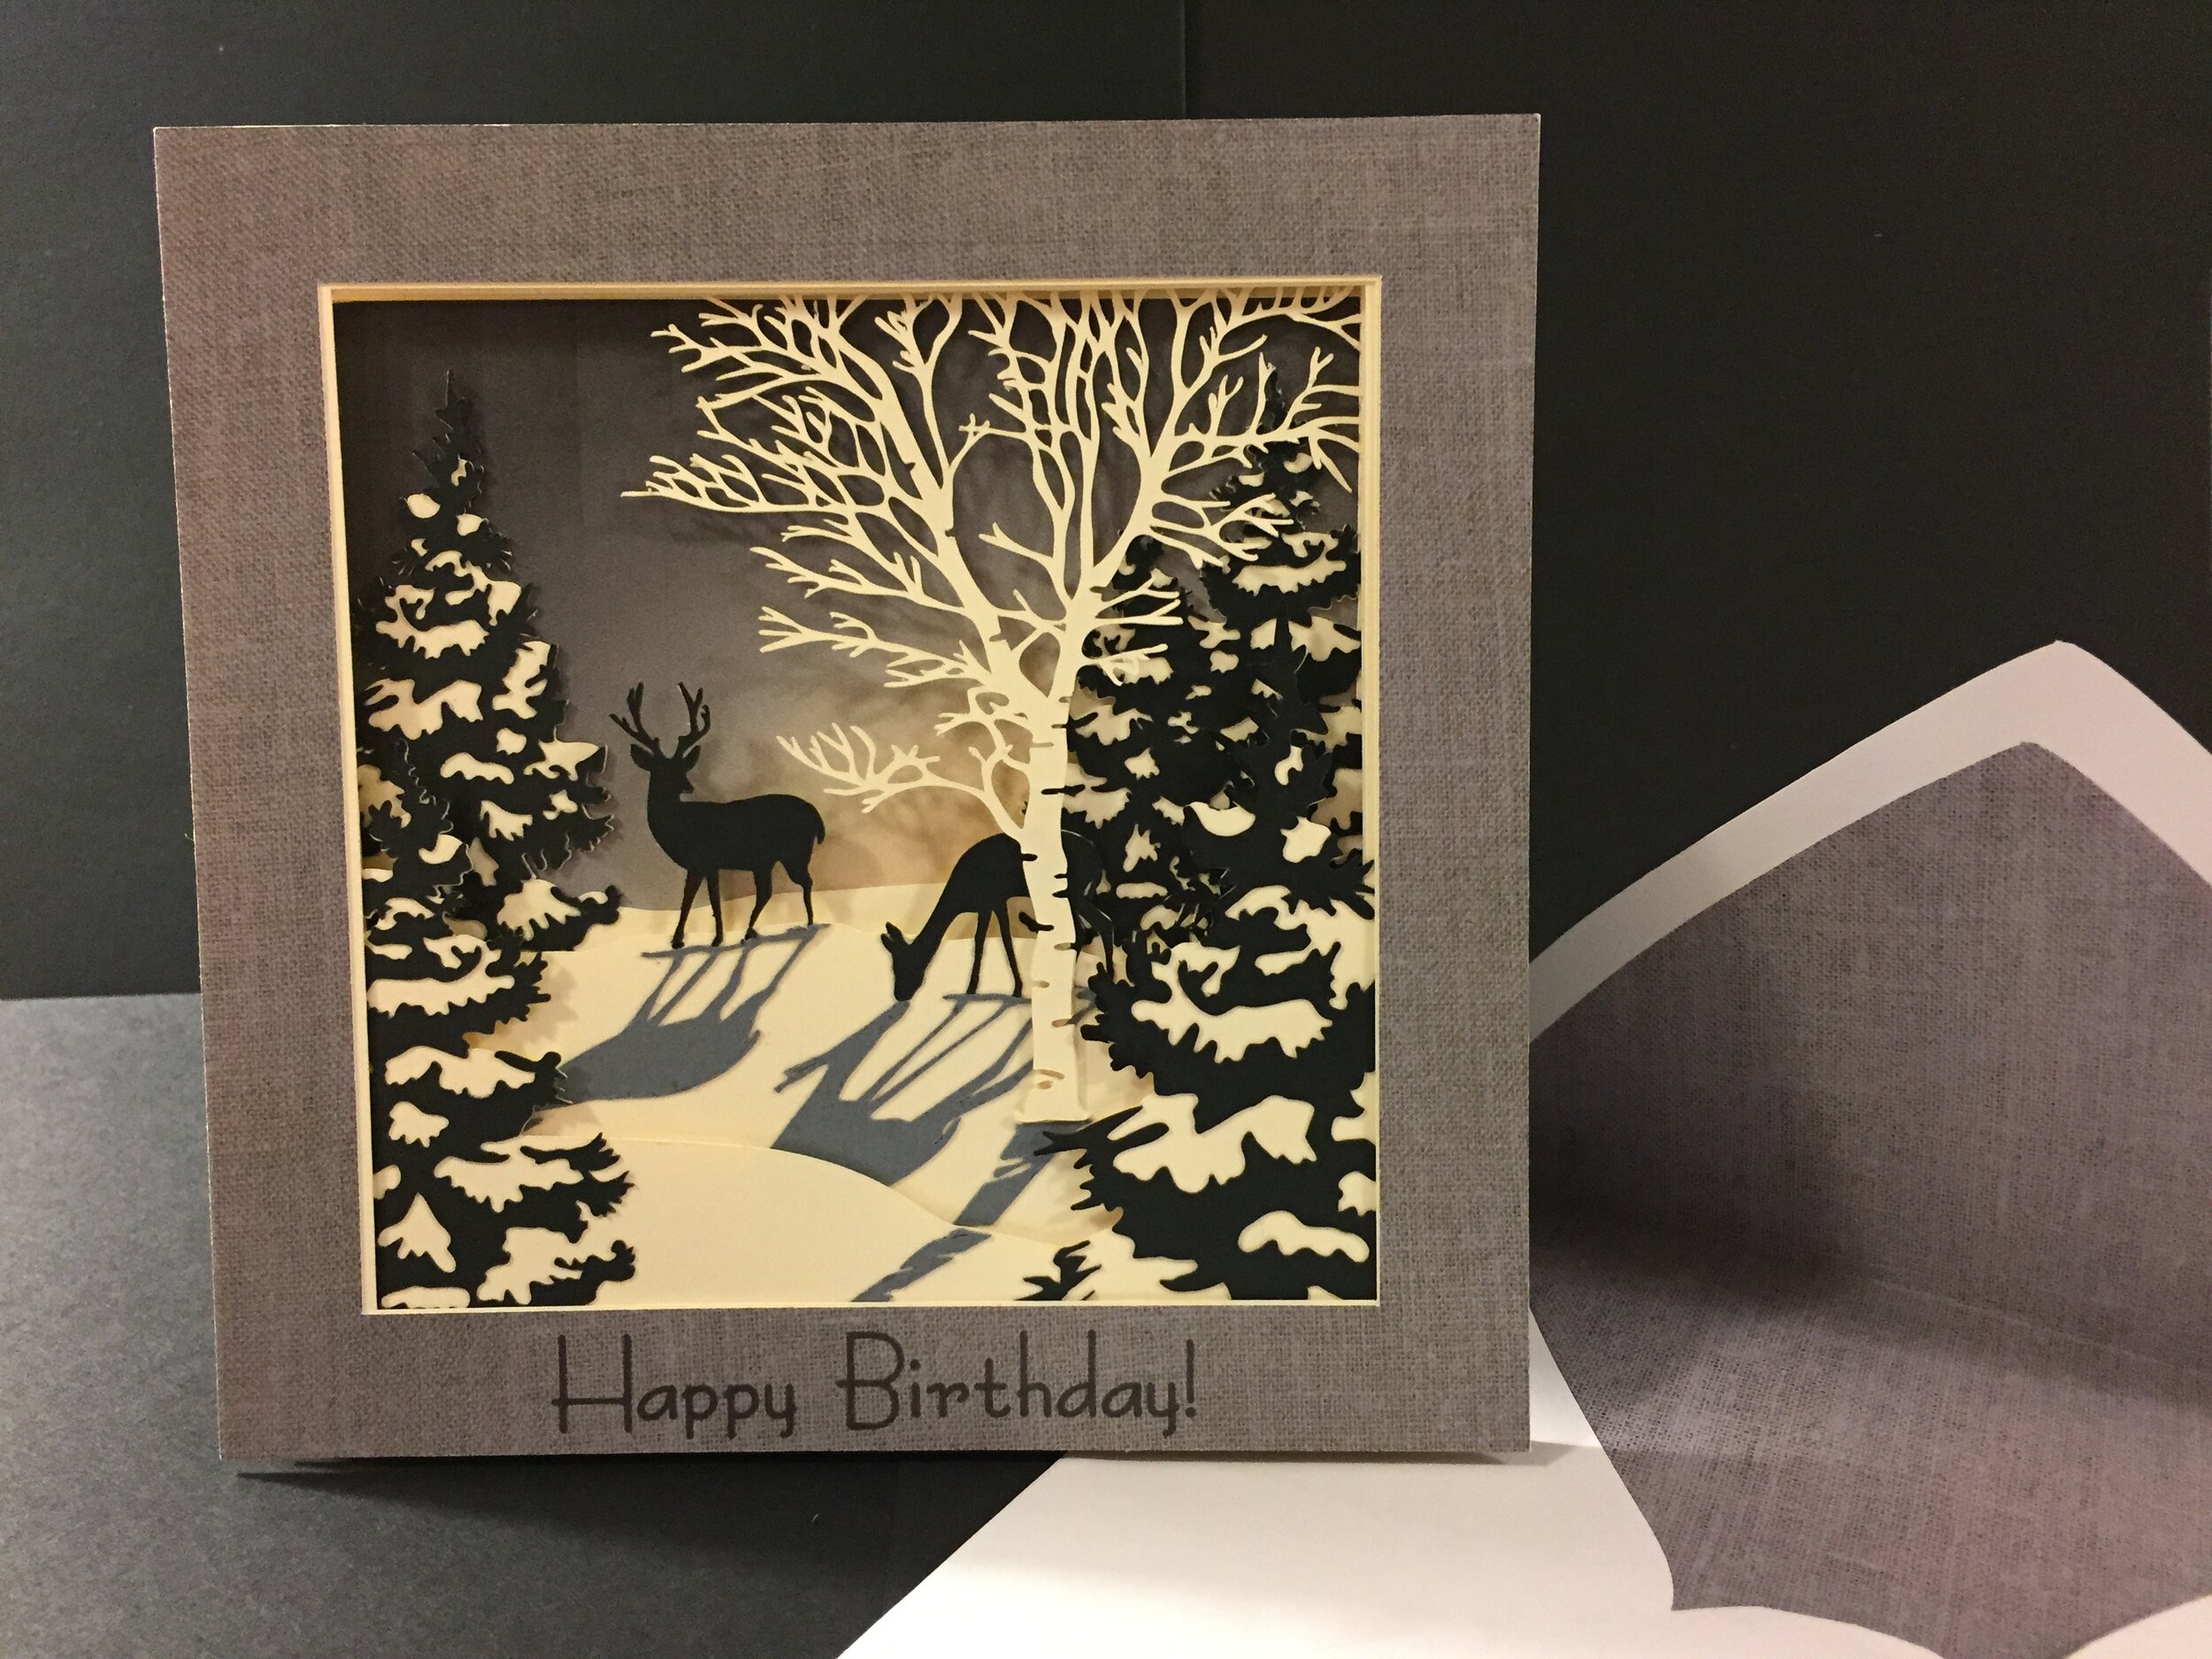
Cheryl Beck downsized the files and flattened them to make this beautiful card. Notice how she repeated the textured mat on the inside of the envelope. What beautiful attention to detail!
Melanie Burton of New Zealand added LED fairy lights to the shadow box for an entirely different effect.

Leslie Gigee is the latest to share a photo of her Deer at Moonrise shadow box made with lights. She incorporated a starry ski with her lights for a new effect. It is beautiful!

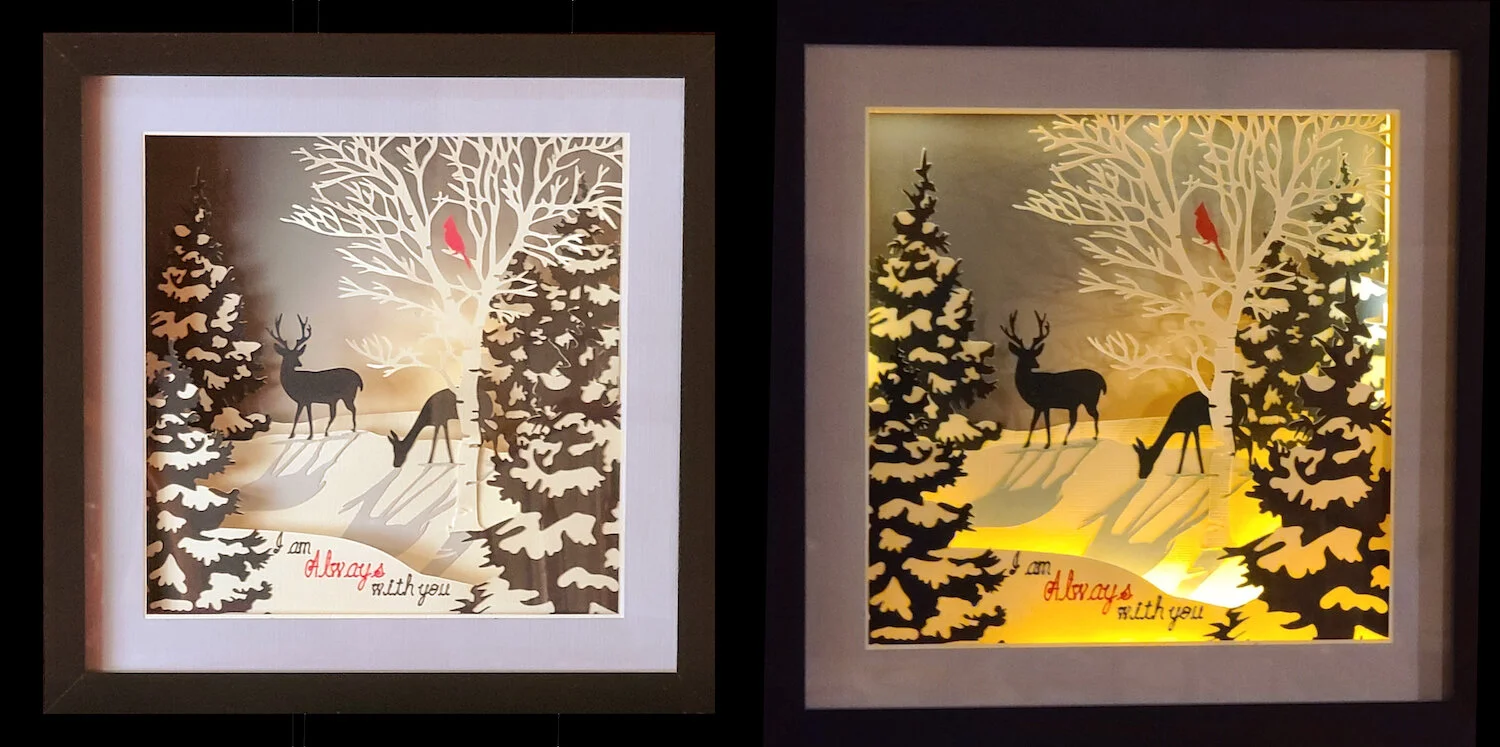
Melinda Leblanc added a cardinal and some words of comfort for a friend who recently lost someone special. She also illuminated her shadow box.
Sue Mejia did some creative composition changes by adding a pond. She also did some beautiful paper choices in this rendition of this shadow box.
