Christmas Eve Shadow Box - Tutorial
Project Description

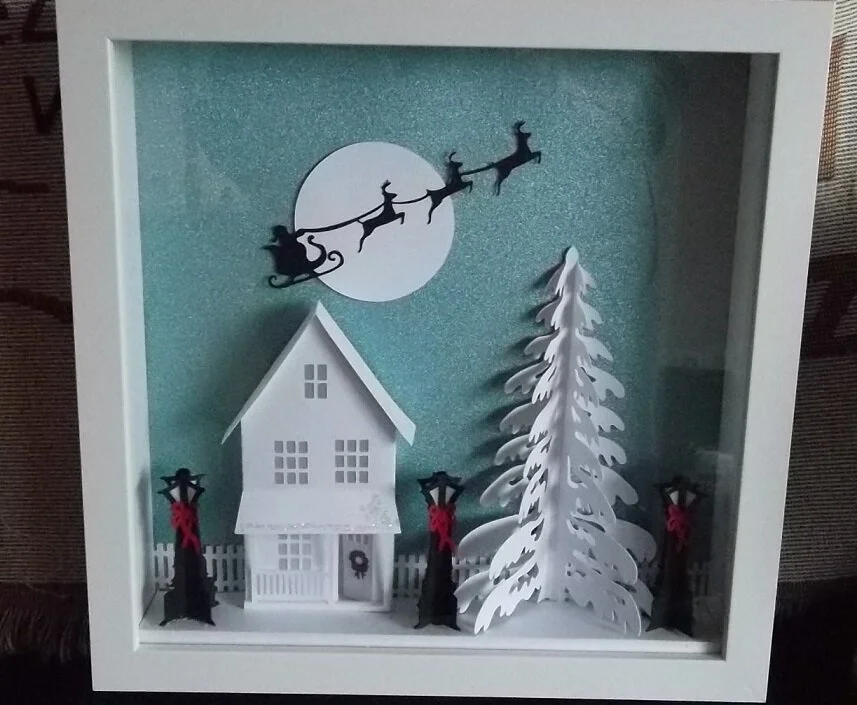
Combine several Ledge Village files with a shadow box along with some other parts and a beautiful, illuminated shadow box for the holidays is created. This tutorial combines the Ledge Village Porch House file, the lamp post file and the shadow box accessories all together to make this holiday decor piece. You can download all the parts together, or if you have other buildings you can substitute to create your own composition.
Ledge Village is a large group of narrow buildings created for displaying villages on tiny ledges. Because they are thin (under 1”) they are perfect for incorporating into deeper shadow boxes.
Cutting File available here from https://3dcuts.com/ledge-village/ledge-village-christmas-eve-shadow-box
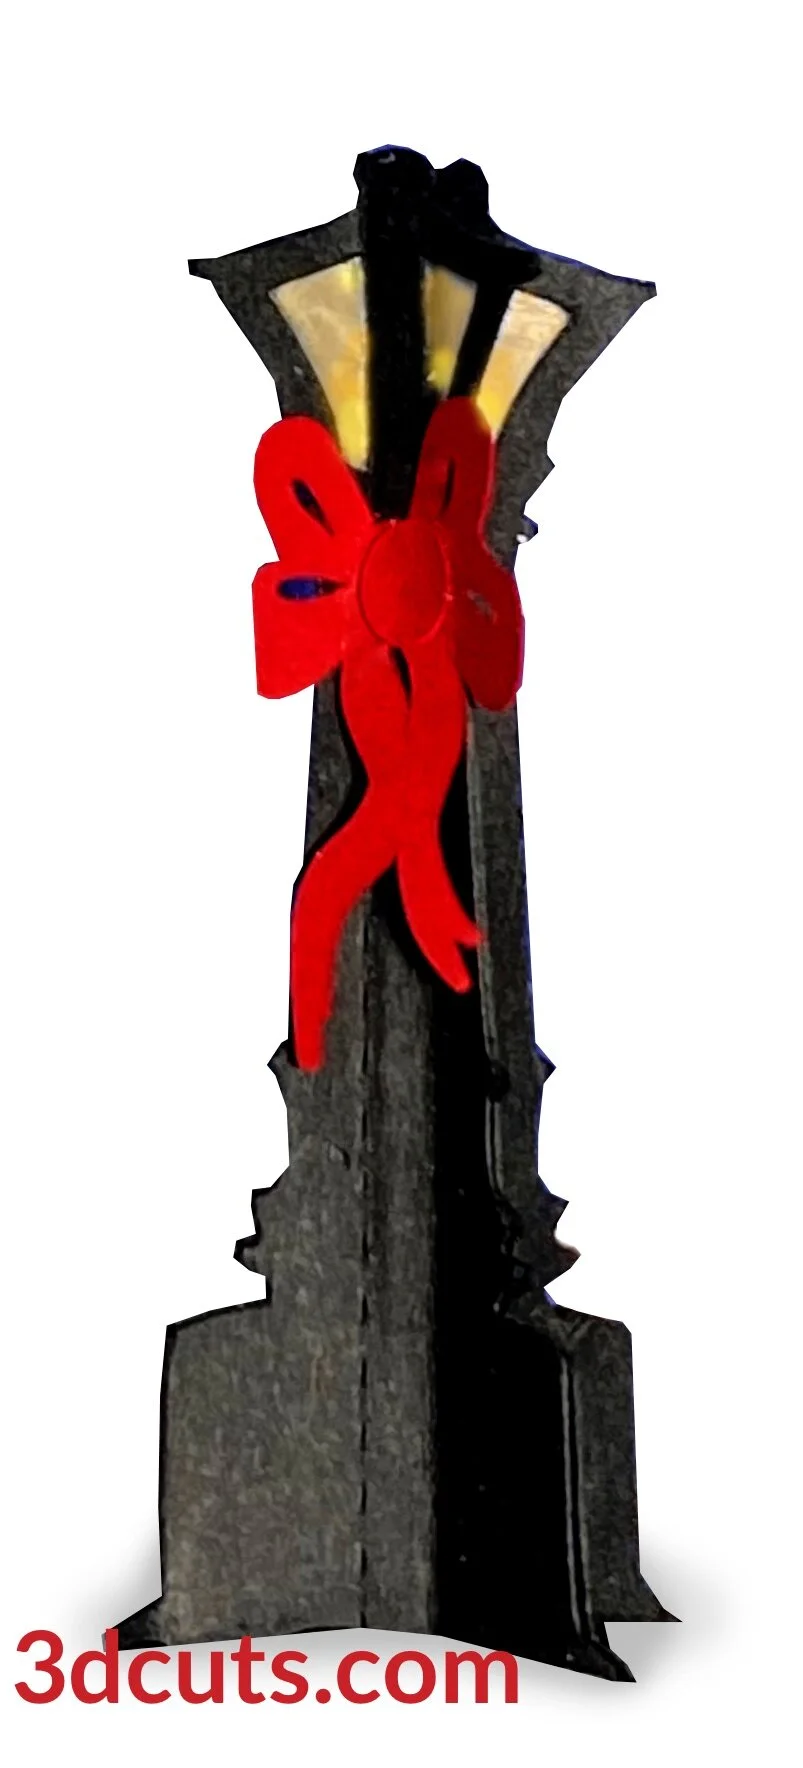
Credit: The idea of using Ledge Village houses in shadow boxes comes from a photo I saw on Pinterest posted by Cheryl Leclaric. She used purchased lamp posts. I created the lamp post file here and the additional parts needed for this display. Thank you Cheryl for this excellent idea!

Here are many of the other buildings available for Ledge Village. These cutting files are available here.

Supplies needed:
Order supplies from Amazon:
(Affiliate links work for USA customers only. Other countries will need to search in their local Amazon for the products.)
Order from Amazon: Neenah Exact Index Card Stock 110lbs. 250 sheets (Affiliate Link)
Order from Amazon: 11 x 11 Shadow Box Frame by AmericanFlat(Affiliate Link)
Order from Amazon: (Precision Tip Applicator Bottle) for use with Glitter Glue
Order from Amazon: Art Glitter Glue with metal tip (Affiliate Link)
Order from Amazon: CR2032 Lithium Batteries for LED Tea Lights (Affiliate Link)
Order from Amazon: 6 Pack of 20 Micro LED Fairy Lights in Warm White (Affiliate Link)
Order from Amazon: Premium Silhouette Blade (Affiliate Link)
Cutting File available here from 3dcuts.com. https://3dcuts.com/ledge-village/ledge-village-christmas-eve-shadow-box
Card stock- 3 pieces 8.5 x 11” white - I used the Neenah Index Card stock from Amazon - affiliate link below- for the white. (Note Index Card Stock weight is different than regular card stock. The 110 lb is just a little heavier than 65 lb regular.)
8.5 x 11 Black card Stock - 1 piece -The colors are all from Michael’s Recollections collection.
Optiona red and green card stock small pieces
12 x 12” cardstock - 1 piece for sky in a dark sky color
Spray snow (optional)
Art Glitter Glue
Frame - I recommend you watch the video for the measurements on the frame. I purchased an 11 x 11 frame from Amazon (link to right). It is really 12 x12 outside measurements but the interior space was 11 x 11”.
Wax paper
Weather stripping or other spacer
Lights (optional) I used the LED 20 light strings.
Major Parts Sizes - as download.
Trees and fences as grouped - 7.5708” w x 9.7932” h
Building Parts as grouped - 7.8917” w x 10.0278” h
Base and Back as grouped - 7.5486” w x 10.5” h
Sky - 11” x 11” square
LampPosts, Santa, Bows as grouped - 6.10998” w x 10.3722” h
The image below shows all the parts in the groupings as downloaded. There is one file that has ALL the parts in it. It is labeled with ALL in the name. Download that only if you want to re-rized all parts for use. It is easier to download the individual groupings unless you need to re-size.

Steps for completing the Christmas Eve Shadow Box:
Special Note: I update the instructions online. Check here for adjustments and additional information.
1. Download the cutting files for your cutting machine here from the 3dcuts.com store. https://3dcuts.com/ledge-village/ledge-village-christmas-eve-shadow-box . For those of you that are reading this as a pdf I recommend viewing it online at my tutorials page at this url. https://3dcuts.com/christmas-eve-shadow-box-tutorial - There all the links will be live.
2. Load the files into your cutting software following the steps for your cutting machine. Re-size if necessary and then ungroup and separate all layers. If re-sizing isn’t necessary open the separated layer and use that one.
For the Silhouette:
SIL Files from uploaded SVG purchased from 3dcuts.com:
The SVG files may need to be turned into cutting files. Click here for detailed steps on how to use SVG files on your Silhouette. http://www.3dcuts.com/tutorial-upload-svg-silhouette
DXF files can be opened in the basic edition of Silhouette Design Studio but often require modifications. I recommend using the Designer or Business Edition and using svg files. DXF files do not always maintain file sizes and you may need to adjust according to sizes noted above.
For Cricut Explore: Here is a guide for importing into Cricut Design Space. http://www.3dcuts.com/tutorial-adding-3dcuts-files-to-cricut . Remember to ATTACH files before cutting in Cricut.
For Brother ScanNCut: The svg files will need to be transferred to files for your particular machine. You can change SVG files to FCM files at http://www.canvasworkspace.com/ or Google "How to import SVG files into a ScanNCut" for links to tutorials. Some models of Brother Scan N Cut can directly import the SVG files. Some files are on 12” mat so you may need to select 12 x 24” mat for correct sizing. Check sizing before you cut. Sizes are noted above.
3. Cut the files.
It is best to have good quality card stock and a good blade and clean, sticky mat. I use the Premium blade and the Nicapa mat.
4. Assembly
The assembly steps are detailed in the video below. Here is the YouTube url https://youtu.be/Zz4GT_p4dPI
I made a separate video for the assembly of the lamp post. Here is that one as well.
6. Share
Ledge Village - by Marji Roy of 3DCuts.com, 3D cutting files in .svg, .dxf, and .pdf formats for use with Silhouette, Cricut and other cutting machines, paper crafting files
I love to see your finished projects. Please send photos to me at marji@3dcuts.com or share your photos on facebook, facebook crafting groups, pinterest and instagram.
7. Give this to someone special.
Who are you making this for? Enjoy giving.
8. Experiment!
This project can be modified using other parts of Ledge Village. If you choose to add a different building add an opening on the back and holes on the bottom for lights just like in the porch house file. These can be added to the file if you have the design skills or you can cut them out with an exacto blade after you have cut the file.
If you try something new please share it on facebook or pinterest. You can also send it to me at marji@3dcuts.com.
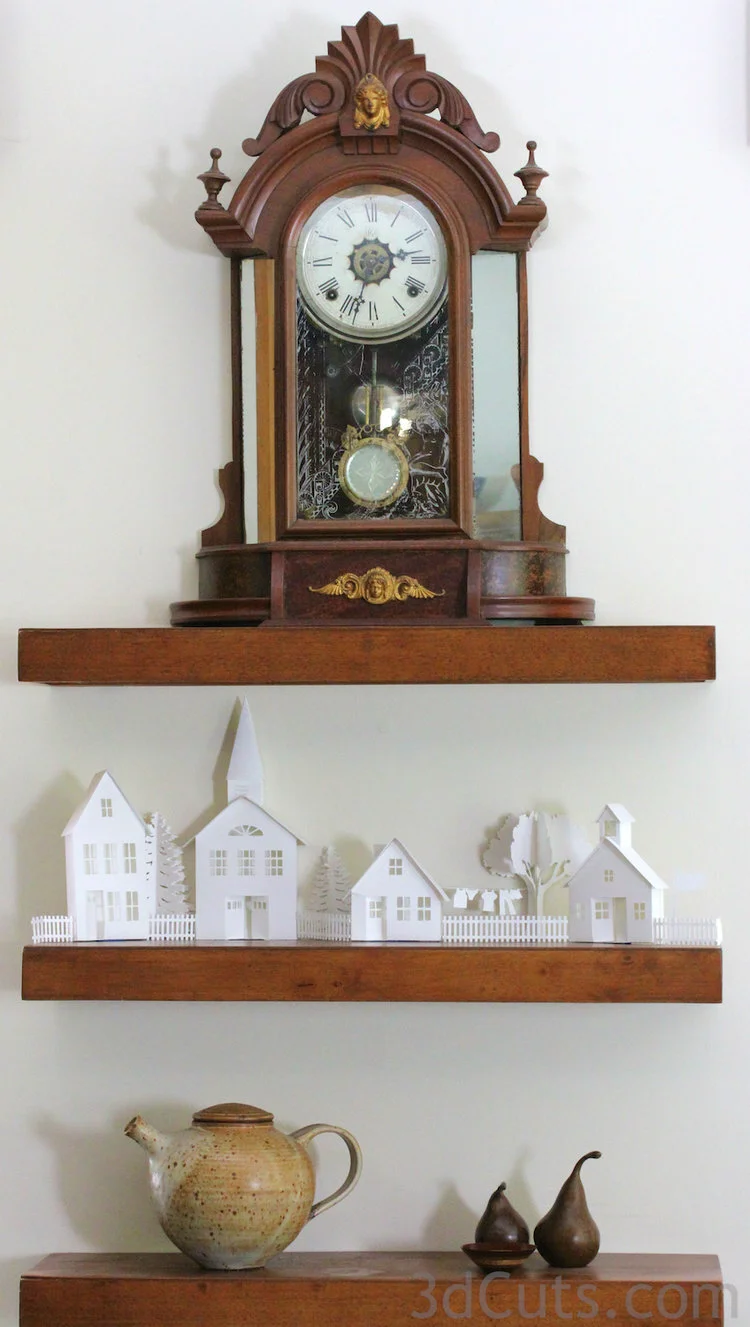
To see other Ledge Village displays visit this page on my website - https://3dcuts.com/ledge-village-ideas

Other variations of the stacked shadow boxes……
Chris Pecherzewski used a glittery background and added sparkly glitter to the roof. The snowflakes ere also not added.