
Valentine Towers - Tutorial

Project Description:
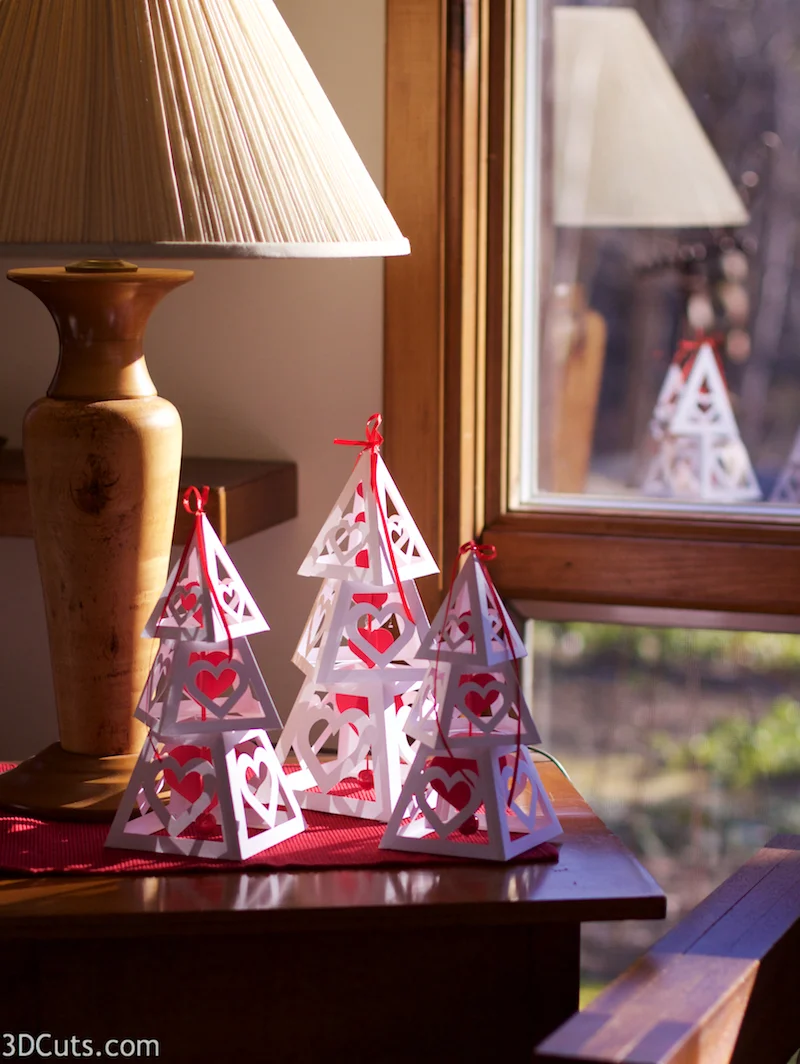
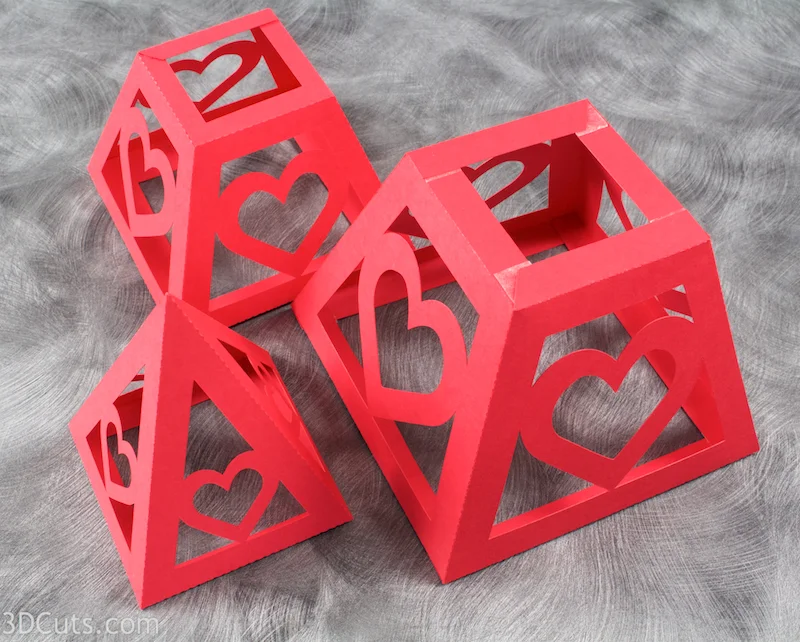
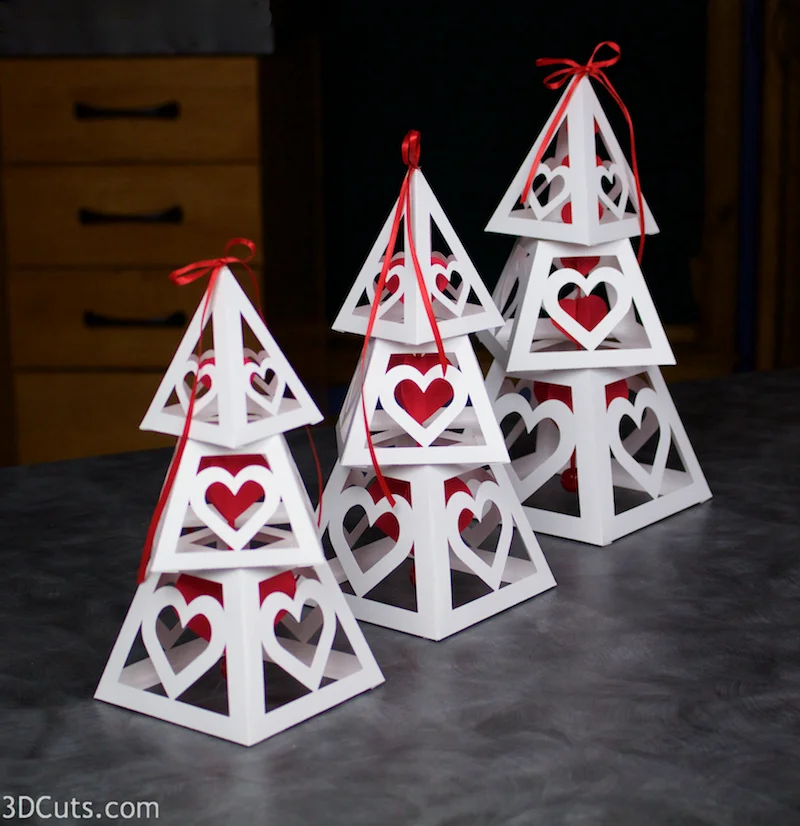
This tutorial is for the assembly of the Valentine Towers cutting files designed by Marji Roy of 3DCuts.com. It is a 3d sectional tower with heart cutouts surrounding an optional ribbon of hearts suspended in the center. This project is easy to assemble and a good beginner project for 3d paper work.
This design makes a stunning table centerpiece especially in groups of three. The tower is 11" tall when cut as is but can be re-sized to make towers of different heights. At this size parts fit onto 8.5 x 11" card stock.
Supplies Needed:
- Cutting File available here from 3dcuts.com here.
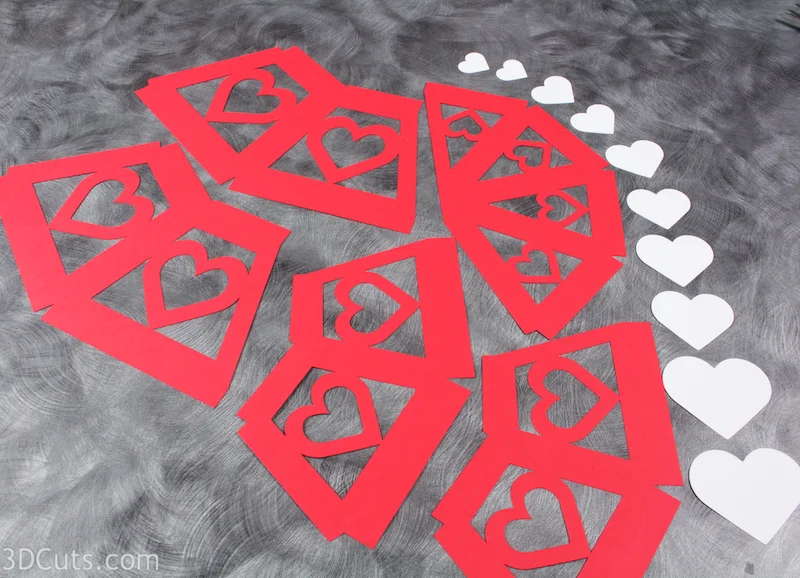
- 8.5 x 11" card stock - I used the 65lb Cardstock from Recollections. Tower takes 4 sheets. I like the towers in white with red hearts but I have also made them in red.
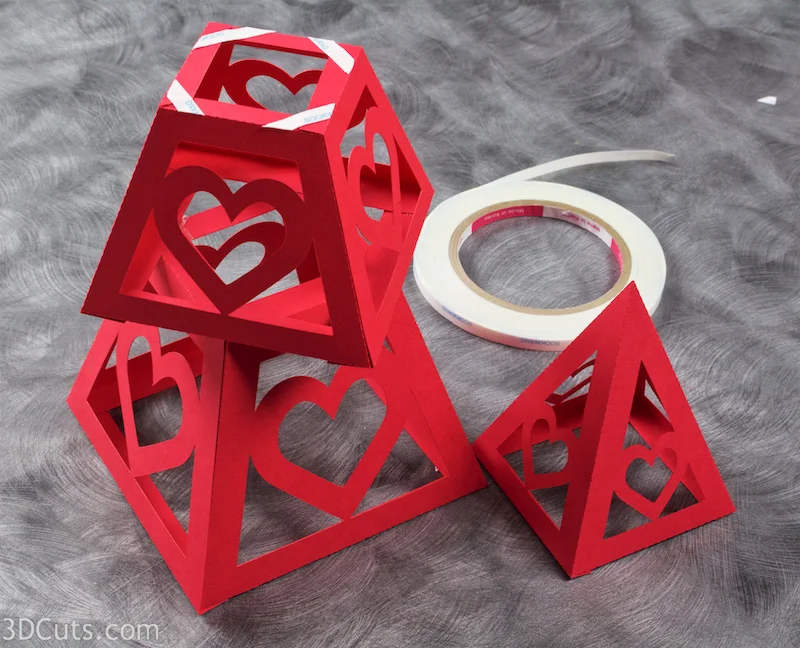
- Adhesive - I used Scor-Tape both 1/8" and 1/4"
- Hot Glue
- 1/8" satin ribbon
long craft needle or florist wire to make one
Steps for completing the tower :
Note: This tower assembly is red. I created it in red to make viewing of the assembly easier. I personally like them better in white with red centers.
1. Download the cutting files for your cutting machine from the 3dcuts.com store. Link here.
2. Load the files into your cutting software following the steps for your cutting machine.
3. Prepare the files:.
- For the Silhouette: The SVG files from this site will need to be turned into cutting files. Click here for detailed steps on how to use SVG files on your Silhouette. http://www.3dcuts.com/tutorial-upload-svg-silhouette
- For the Silhouette files from the Silhouette online design store: This download comes in one long file with cut lines already enabled. You will need to ungroup the file and then copy and paste the parts into separate page sized files to cut. All the text instructions are non cutting items.
- For Cricut Explore: Here is a guide for importing into Cricut Design Space. http://www.3dcuts.com/tutorial-adding-3dcuts-files-to-cricut
4. Cut the files
Cutting Info:
- The bottom will only fit 1 per 8.5 x 11 piece of card stock and you will need to cut 2.
- The 2 parts to make the middle section fit on one piece of 8.5 x 11" card stock.
- The top part is made from 1 piece of card stock.
Sizes of pieces:
Some software doesn't import in fixed sizes. Here are the sizes of the parts.
- Tower bottom - 9.7495" w x 6.3492" h
- Tower middle- 5.1412" w x 7.956" h (turned)
- Tower top - 9.5447" w x 4.9819" h
- Hearts together -4.2356 " w x 5.5011 " h
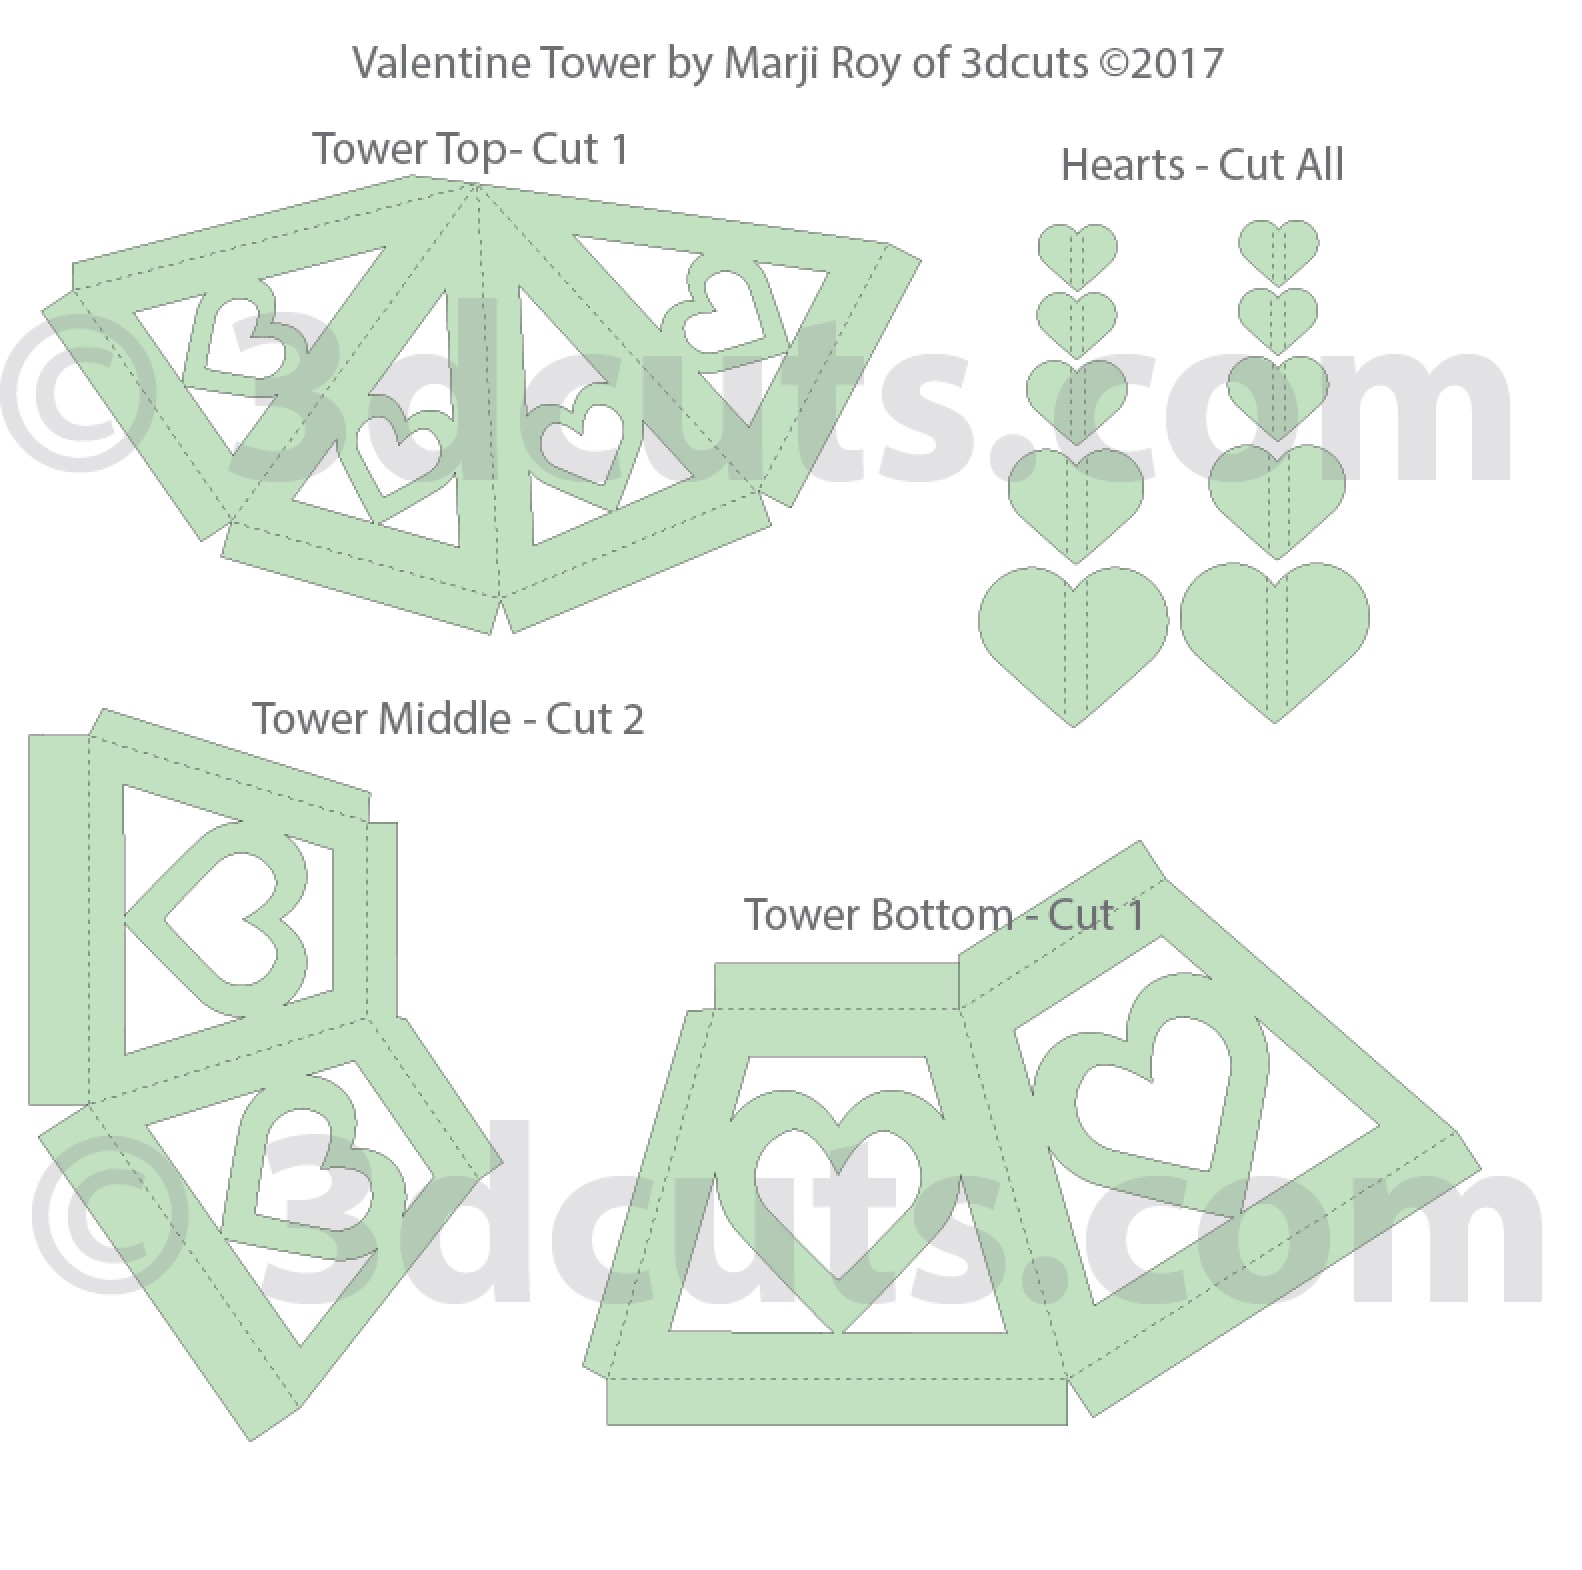
Here is a diagram of all the files and the number to cut of each.
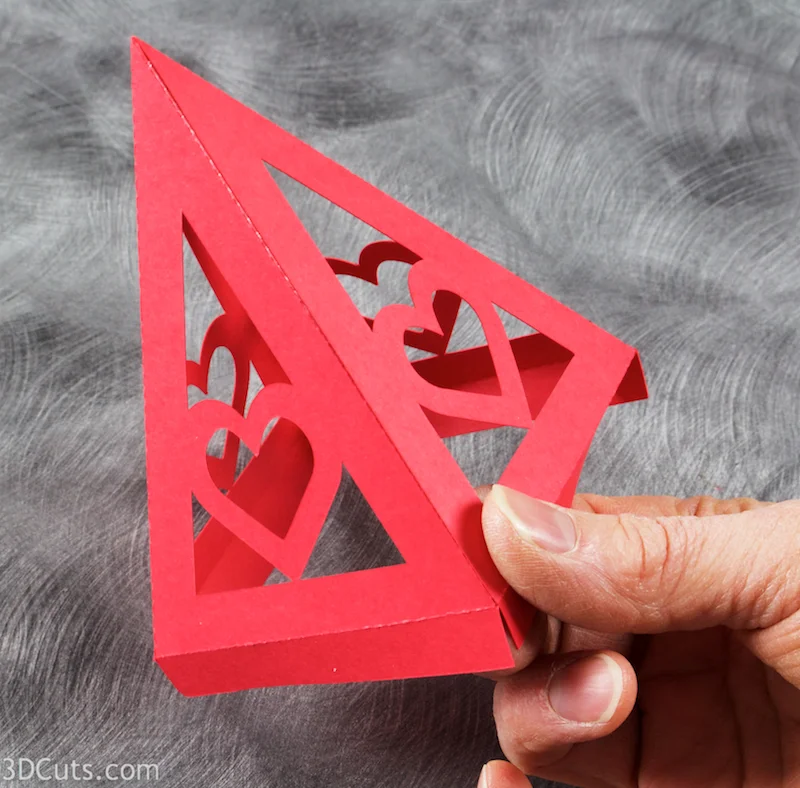
5. Build the top of the tower.
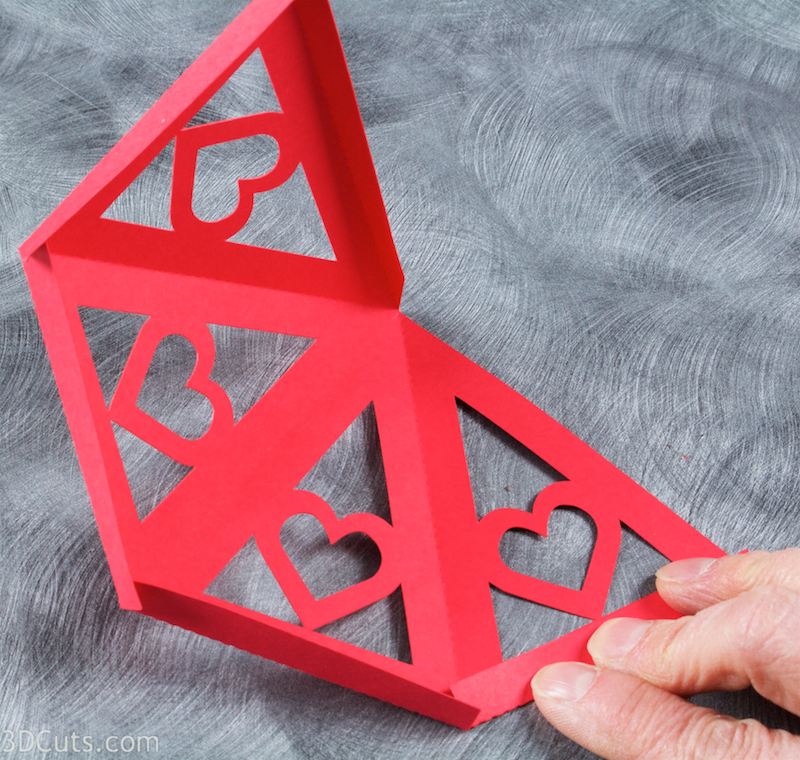
- Locate the top of the tower. It is a single piece made up of four connected triangles.
- Fold and crease on all dotted fold lines. All folds go in the same direction to the inside.
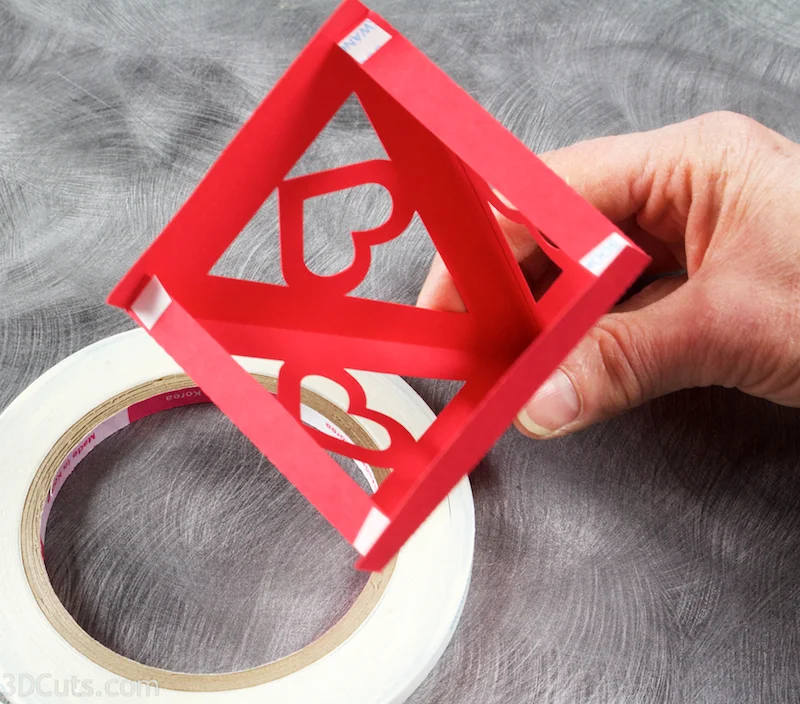
- Apply Scor-Tape to the outside of end tab . Peel the backing off.
- Fold it around and adhere it to the inside of the first triangle being careful to align the edge with the dotted fold line.

- On the bottom side apply 4 tabs of Scor-Tape, peel the backing and adhere all four corners. These are cut square to help you in aligning the edges to make a nice square bottom.

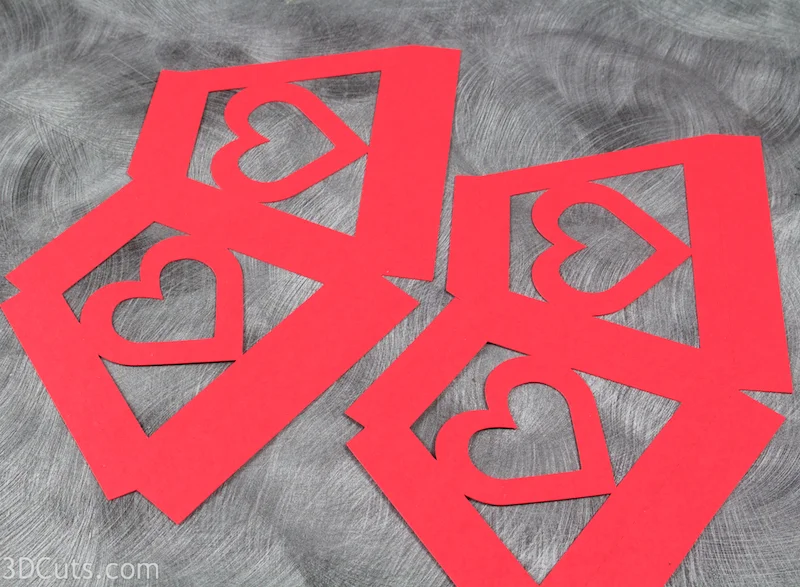
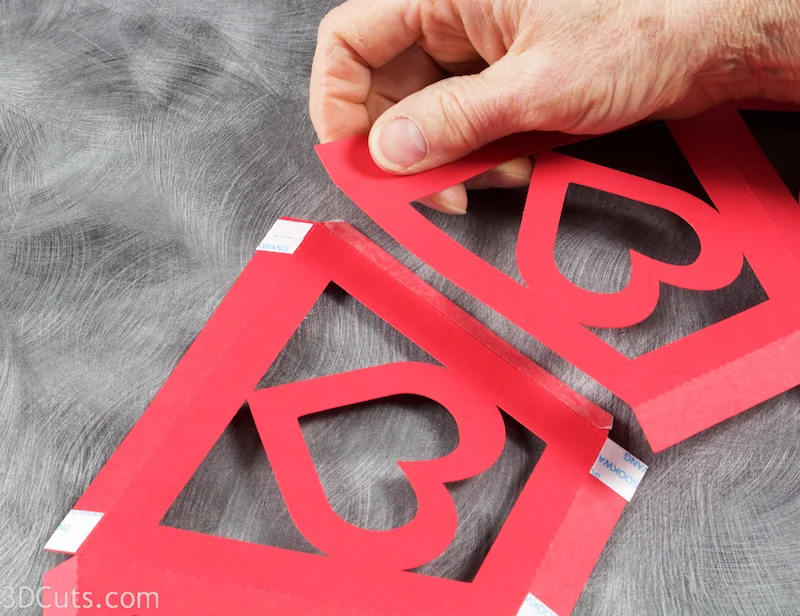
6. Assemble the middle portion of the tower.
- Locate the two pieces for the tower middle section. They match and are the smaller pair.
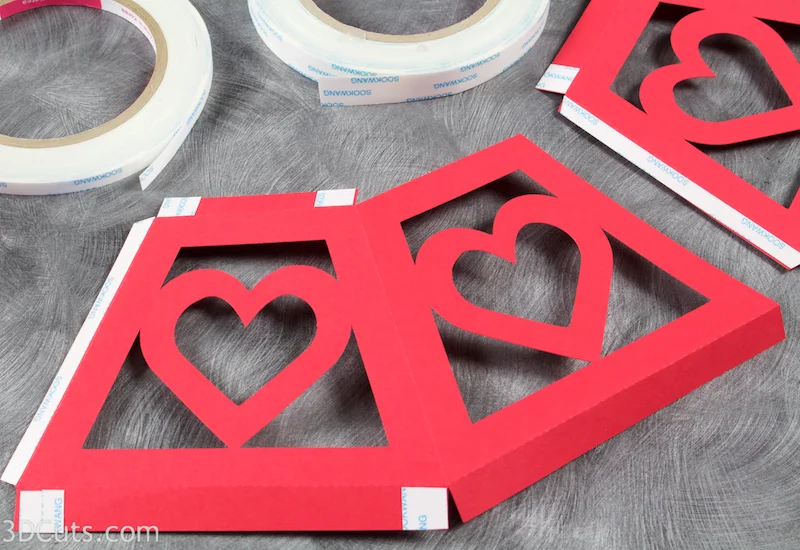
- Fold toward the inside on all dotted fold lines being careful to fold each identically. If you flip one over and fold it the opposite way (easy to do on solid color paper) your tabs will be in the wrong location. Re-fold to match.
- Position them so they both have the outside up and apply Scor-tape to both long side tabs, and four tabs on each corner of the panel to the right of the side tab. Do this to each piece. (I apply the Scor-Tape now while it is flat because it is easier. You can apply it after as you fold in the top and bottom and that is ok, too.)
- Attach the two halves of the middle portion together.
- Peel the backing from the Scor-Tape on one long end tab, overlap the opposite end of the second half and adhere them together forming the four sides in one piece. The edge lines up with the dotted score line. Press in place

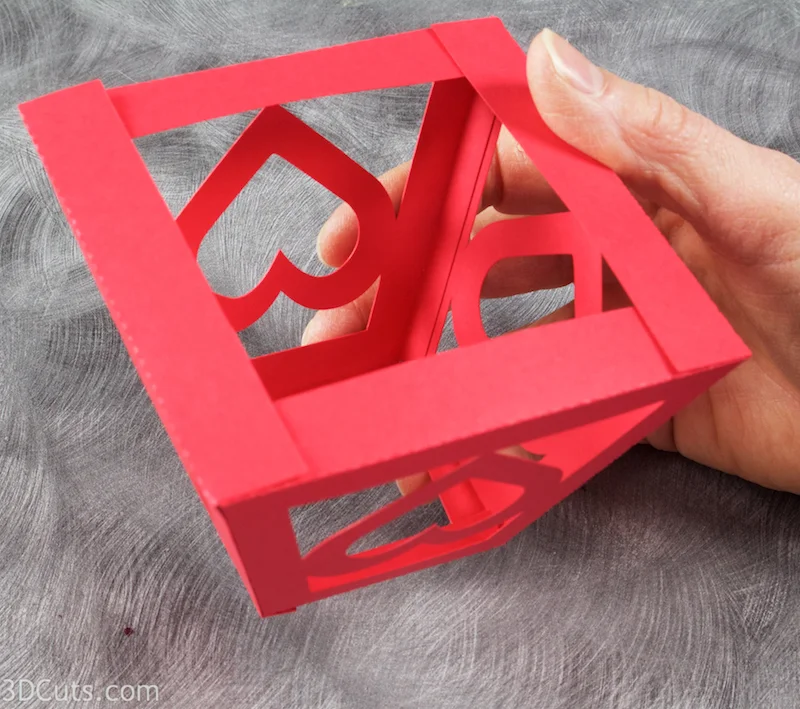
- Wrap the ends around to meet each other forming the middle block.
- Peel the backing tape and adhere edges together lining up the edge with the dotted fold line.

- Peel the backing off the Scor-Tape on the 4 corners of the bottom and adhere the flaps in place.
- Do the same for the top.
7. Make the bottom portion of the tower
- Follow exactly the same steps above for the bottom portion of the tower. It is made from the two matching larger base pieces.
- Fold on all lines, add Scor-Tape in the same locations and adhere the two parts together. Adhere the ends together and then the top and bottom making a strong base.

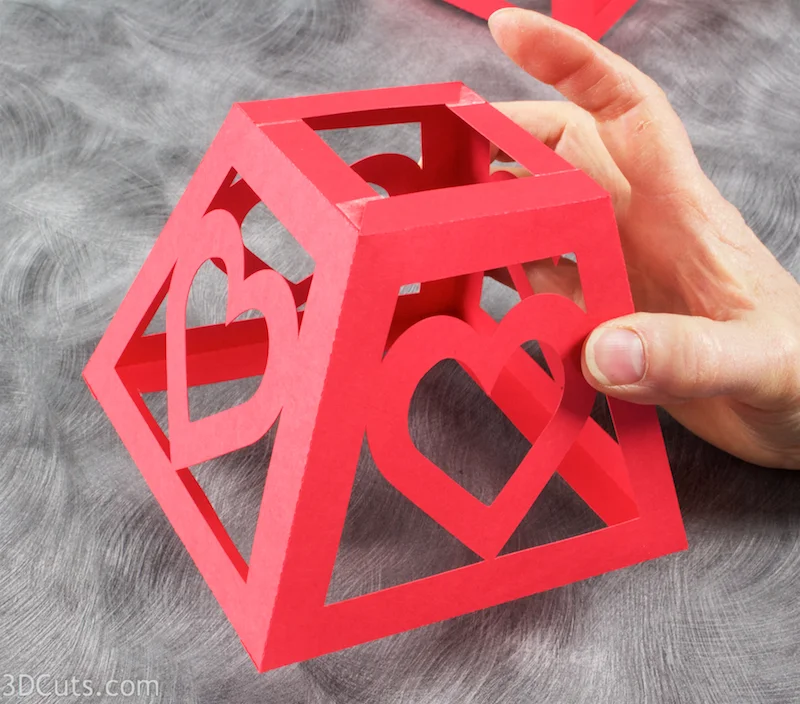
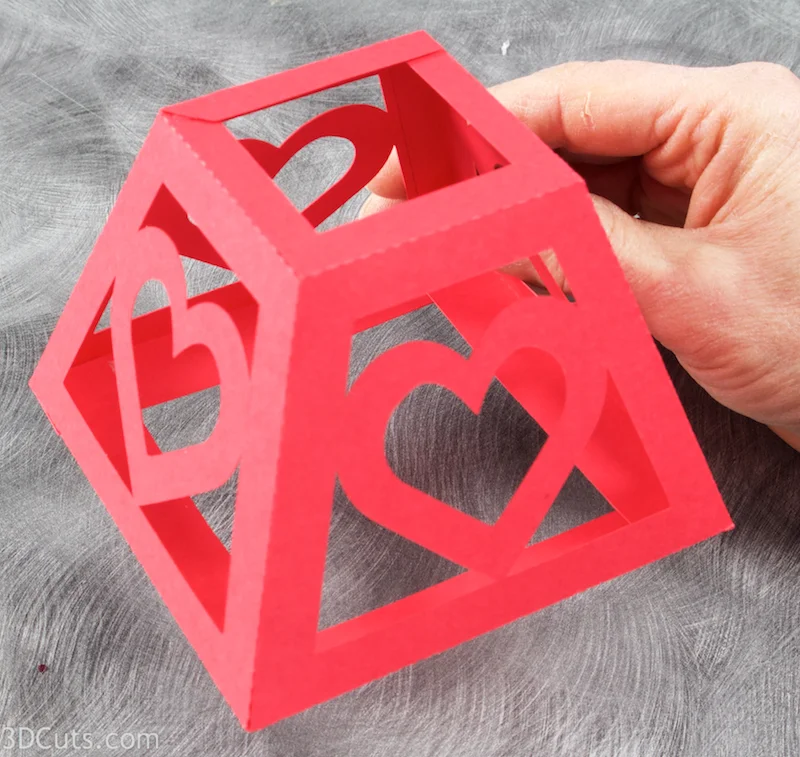
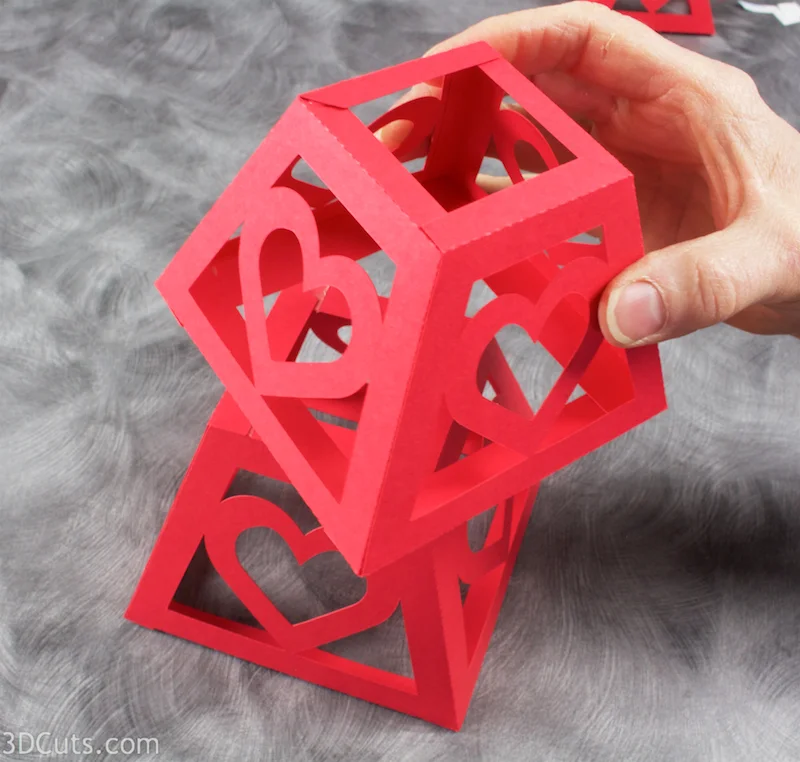
- You will now have the 3 forms made, large, medium and pointed. The large one is the bottom.
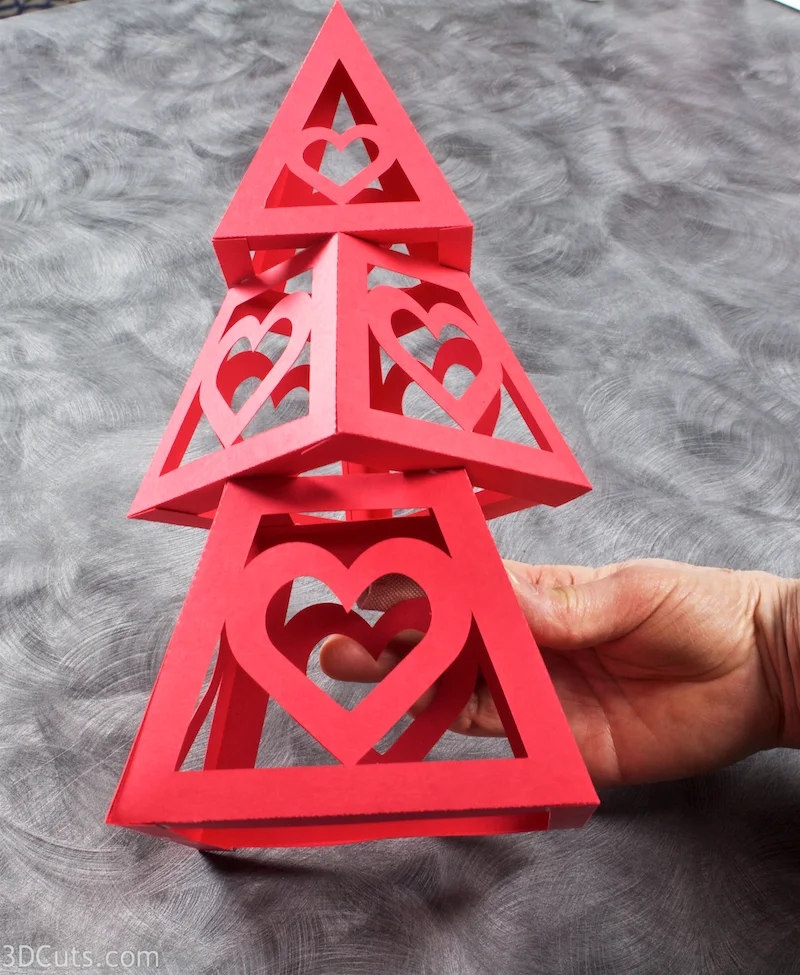
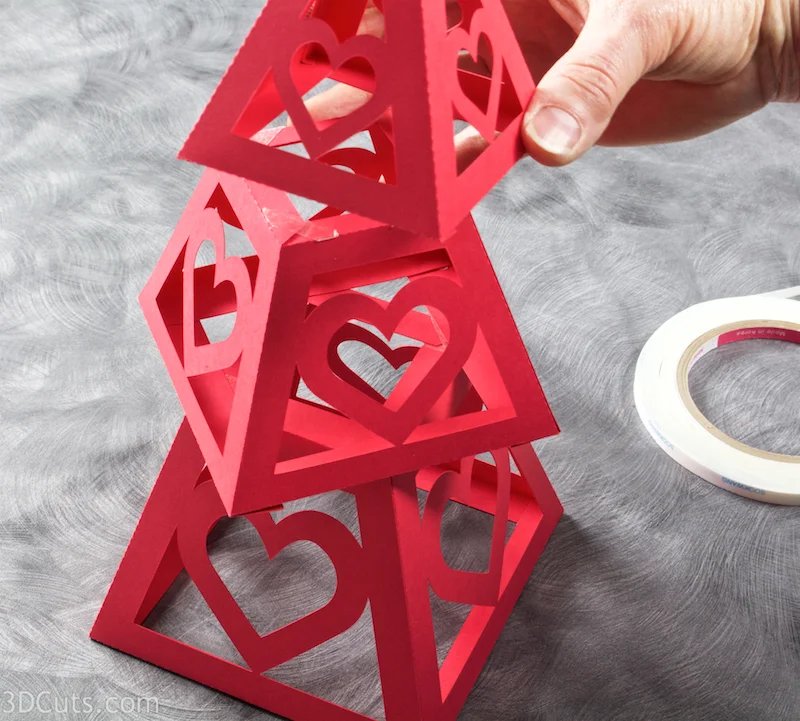
8. Adhere the three tower parts together.
- They will stack, one on top of the other with adhesive at the corners. Each gets rotated 45º from the previous.
- Start with the base and apply Scor-Tape to each of the corners.
- Peel off the back on all four.

- The middle piece gets positioned on top, centering it. The corners will jut out over the center of the sides on the base. Watch carefully looking for things to be even before pressing together.
- Pinch each of the over-laps to get good contact between layers.
- Repeat on top of the center layer.
- Apply the Scor-Tape, peel the backing and adhere the top piece.
9. Add Center Hearts
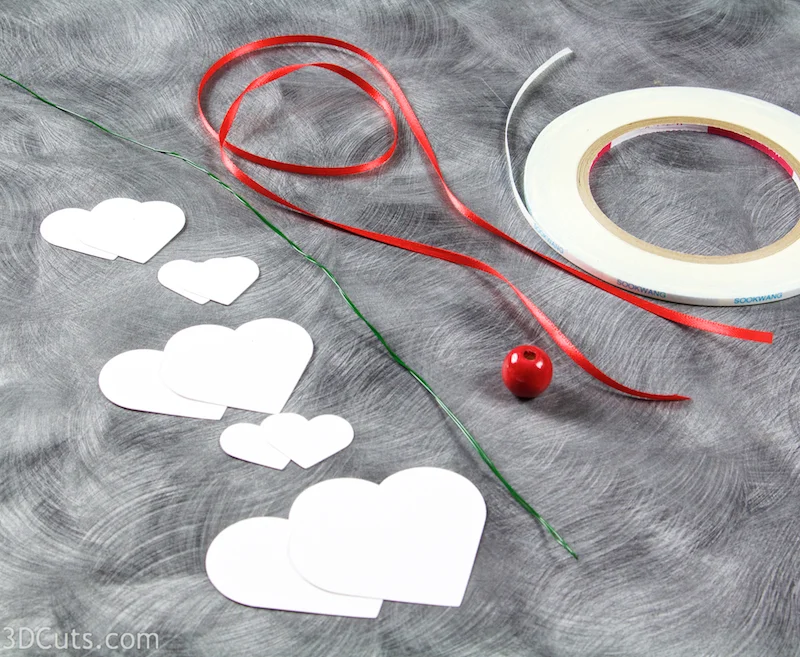
- I made the Valentine Towers with a center core of hanging hearts. This is certainly optional but I like the color contrast visible through the holes.
- To add this you will need: Paper hearts cut from card stock in a contrasting color. (Cutting files are included in the download.)
- About 2 feet of 1/8" satin ribbon.
- A weight (Optional). I used a red wooden bead but a steel washer would work also.
- A long needle. I couldn't find mine so I made one from florist wire, just a long piece, folded in half and twisted leaving an eye opening at the folded end.
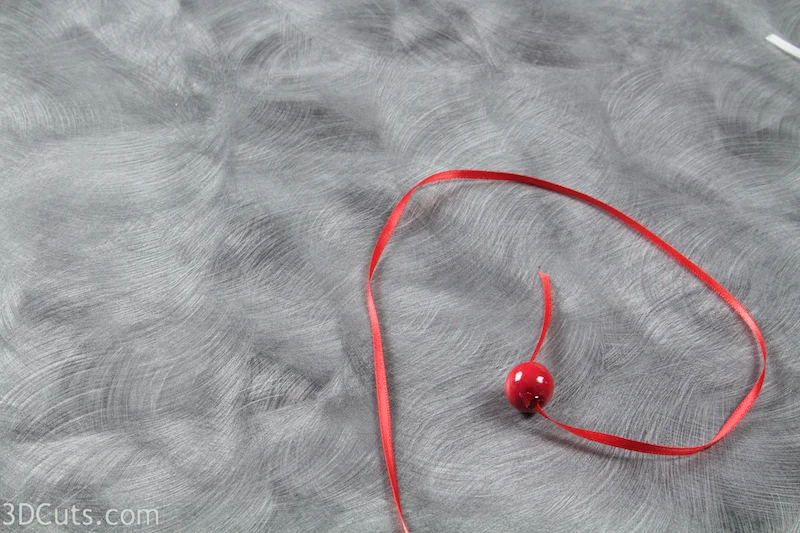
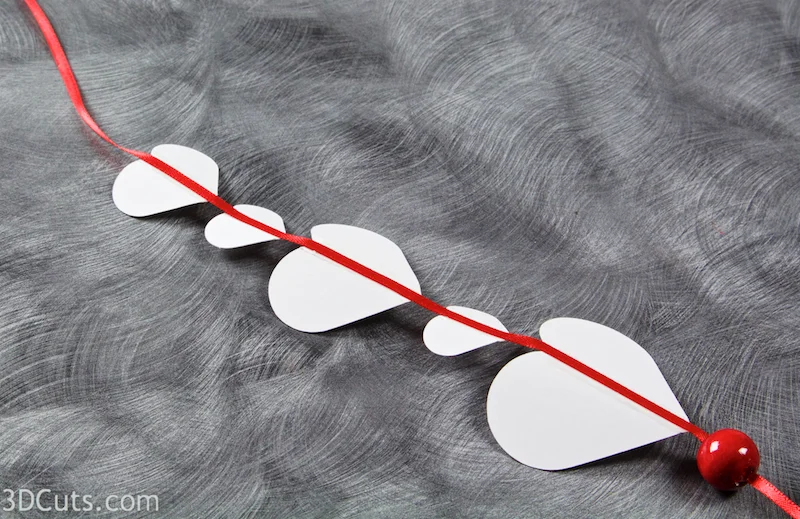
- Tie a big knot into one end of the ribbon and thread the bead on. Slide it down over the knot and add a dab of glue (I used hot glue) to hold the bead in place.
- If you are using something else like a washer for the weight then cover it with a paper heart to hide it.

- The hearts all have double dotted fold lines. Fold on all these lines in the same direction.
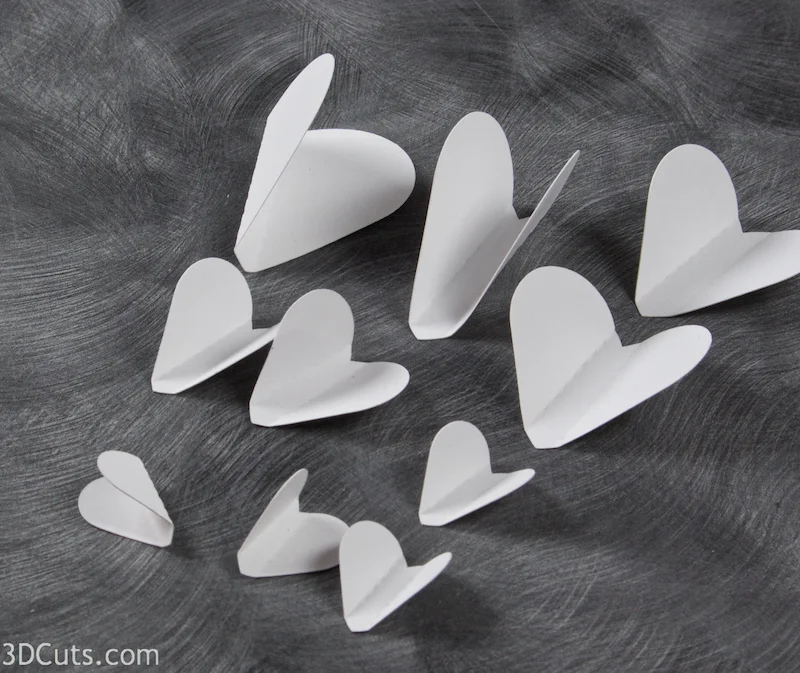
- Apply a length of Scor-Tape adhesive to the outside of the folded center on each of the hearts.
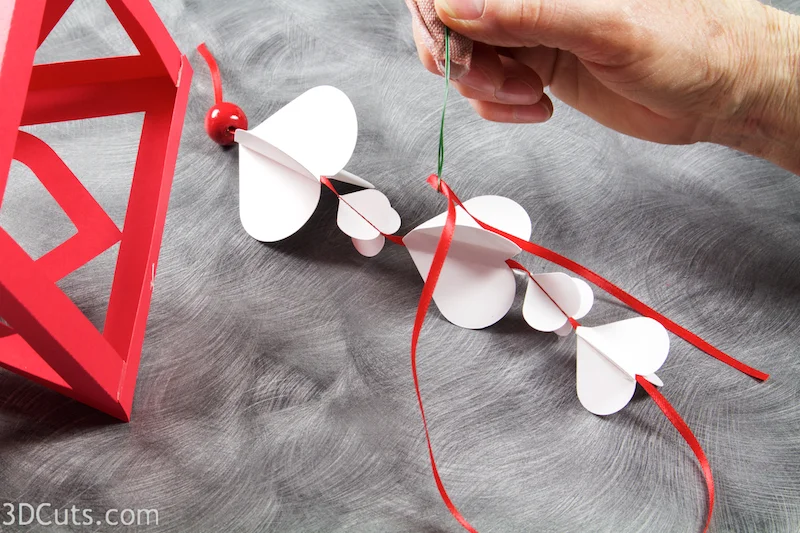
- How many hearts you add depends on the size of the tower you build. I added 5 hearts to the center ribbon for the full-sized version. Once I reduced the size to make smaller towers, I only used 3.
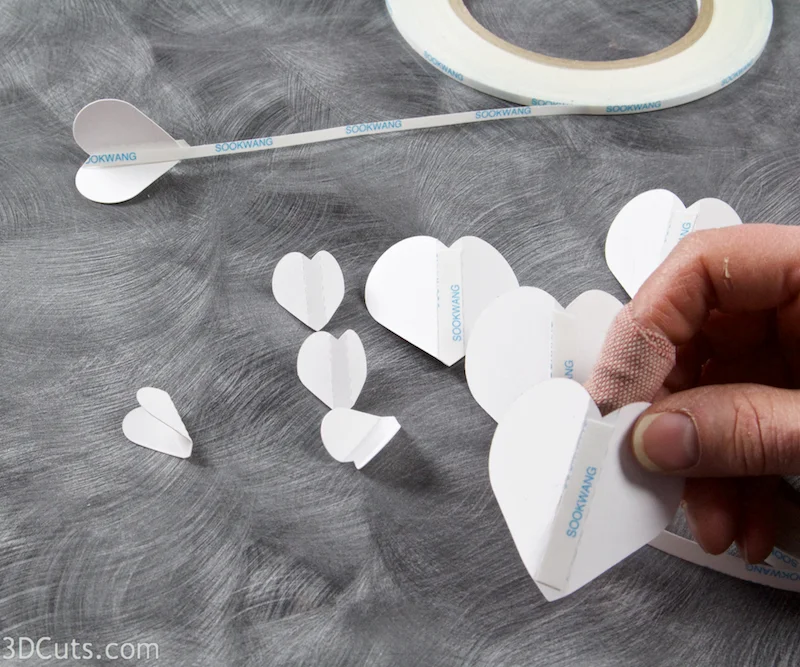
- Adhere the hearts to the satin ribbon. The first large heart goes immediately above the weight.
- I then positioned them as shown in the photograph.
- Do not allow the length to be taller than your tower. The full-sized tower is 11" tall. You want the top of the top heart to be about 9" above the bottom of the weight so it hangs freely in the center of the tower. Adjust these measurements if you make towers of multiple sizes. Just hold the ribbon next to the tower and position accordingly.
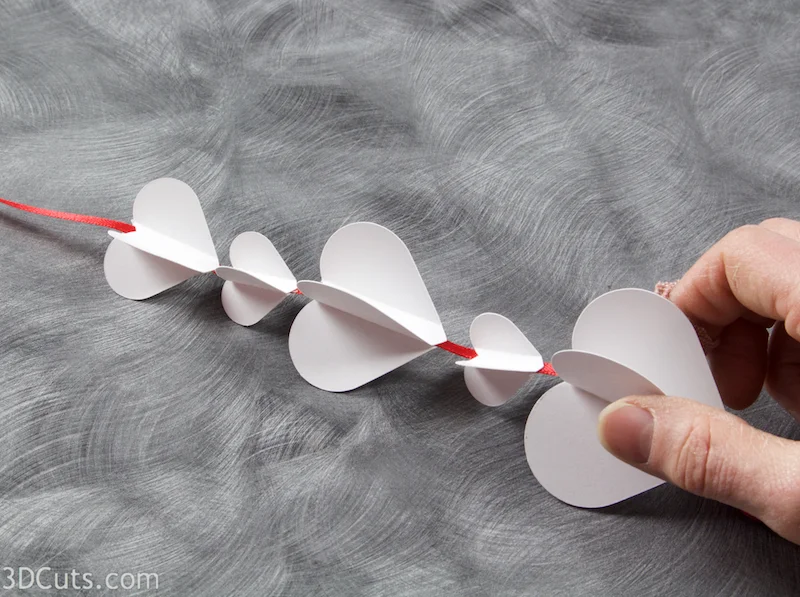
- Attach the matching second side of each heart on the opposite side of the ribbon. Do this for all the hearts on your ribbon.
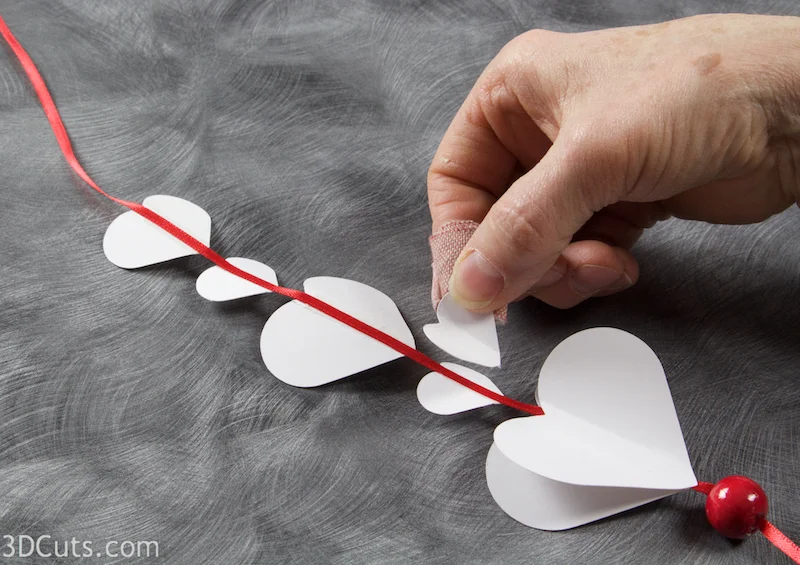
- Bend the hearts out to make them three dimensional.
- Snip off the tip of the tower - just a tiny snip, big enough to get your needle through. (Don't do this if you aren't hanging the hearts in the center.)
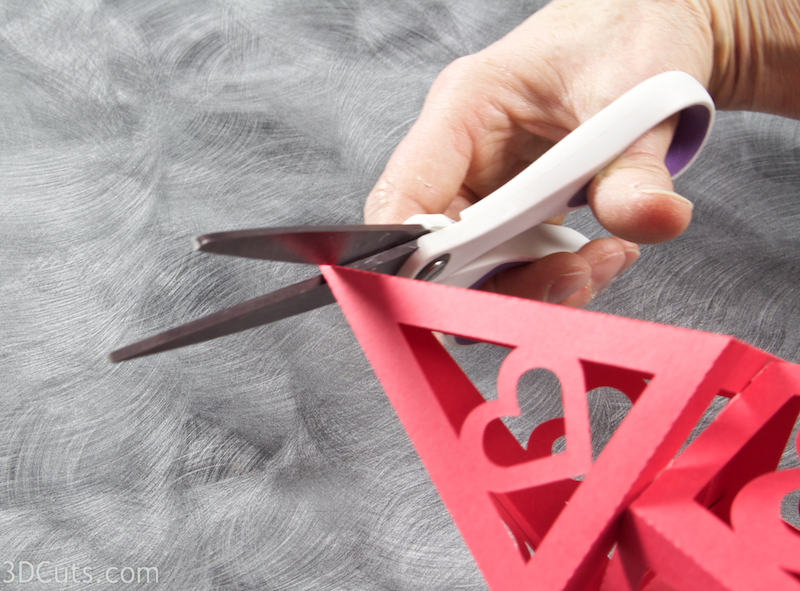
- Thread the ribbon onto the long wire needle and then thread that up through the center of the tower, and through the snipped hole on the top.
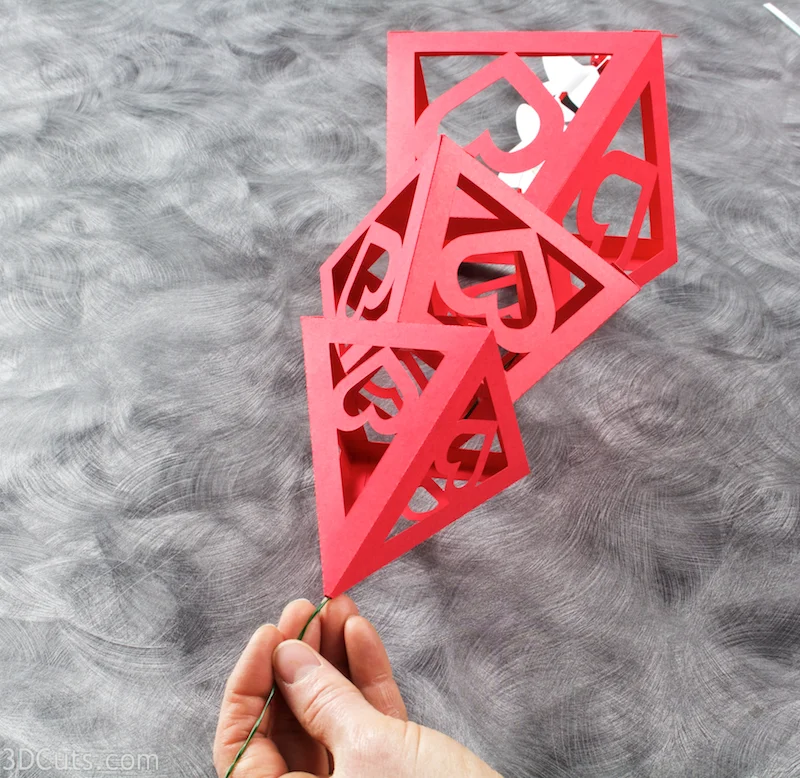
- I tied the ribbon off to another small bow and then applied a drop of hot glue to hold the center ribbon in place, again making sure the weight at the bottom was suspended just above the surface and the inside hearts were freely suspended.
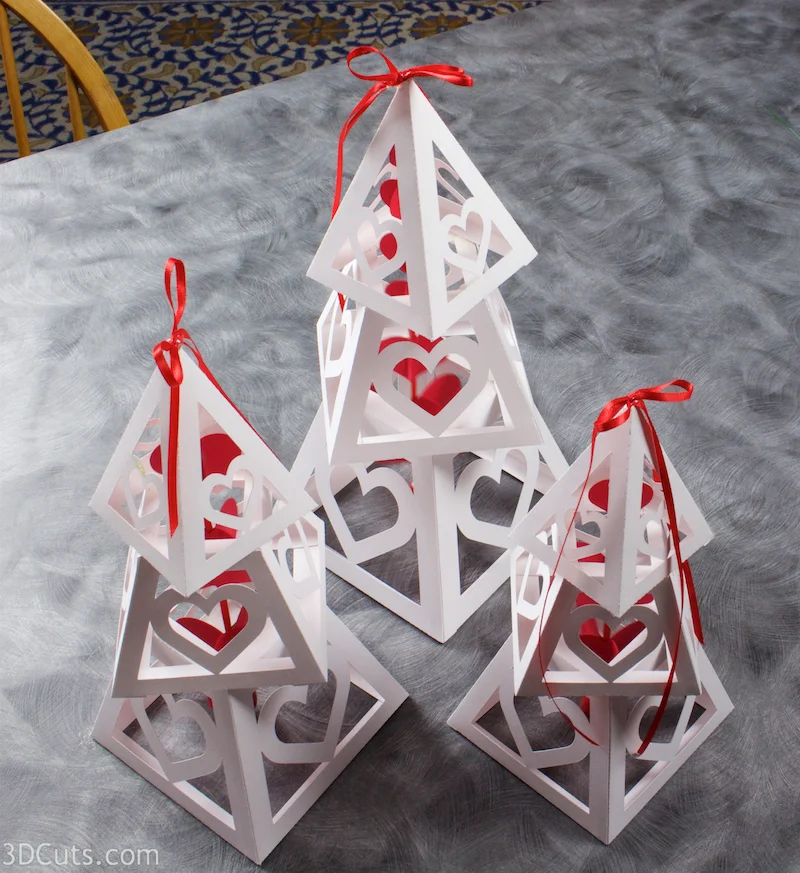
10. Make more!
- I combined all the cutting files into one file in the software, grouped them together and the proportionally reduced their sized to create two more towers each about 1" shorter than the previous. I like arrangements of three in various sizes although attractive displays could be made with matching towers in a line or larger groupings.
Find a place to display the towers and Happy Valentine's Day to all!

Tutorial by Marji Roy of 3dcuts.com ©2017