
Adjusting Layers in Cricut Design Space to See All
The transition of my files into the Cricut Design Space software is an ongoing learning experience. This tutorial is to help those of you that are discovering what appears to be missing letter layers in the Alphabet Shadow Boxes, letters, numbers and shapes. The biggest culprit seems to be layer 2 although others have experienced some other layer issues as well.
I have learned that Design Space is filling in layers that are created empty and this results in other layers being hidden. I will walk you through the steps of fixing layer 2 T.
- Upload the svg file into the Cricut Design Space.
- When it arrives it is a black box.
- Ungroup it. (Right click on it and select Ungroup)
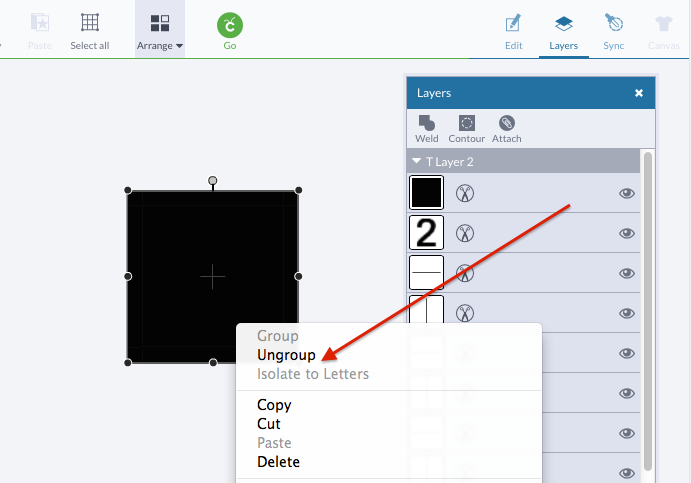
- Notice in the list of layers, the first layer is a black box .
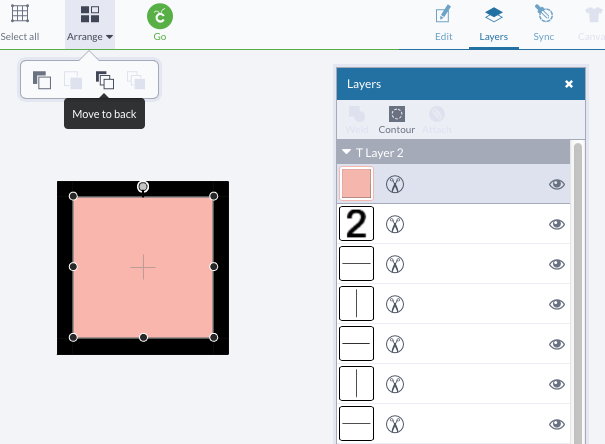
- Click in that black box of that first layer and a color menu appears. Select a light color from the choices.

- Close the color selection box by clicking in the X in the upper right.
- Next, move that box to the back (or the the bottom) of the layer list.
- Click on it and select MOVE TO BACK option from the ARRANGE icon.
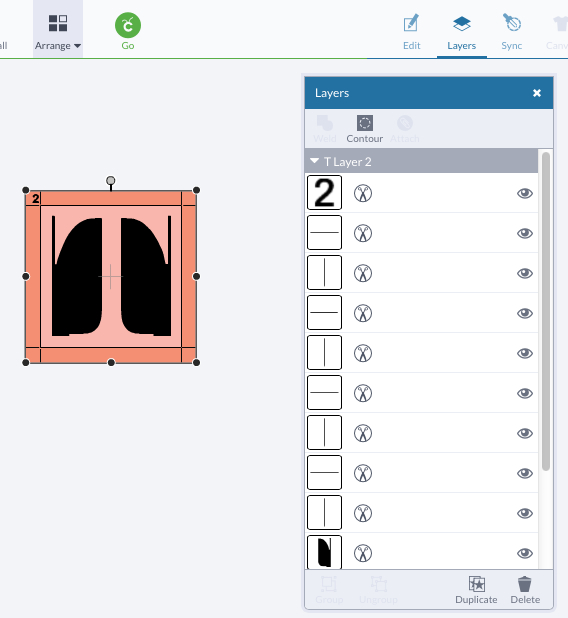
- If you look further down the list of parts, you will se another black square.

- Select that one, change its color to a different shade, and move it to the back as well.
- Finally, the hidden T is visible!
- This rearranging of layers is the process you use to find hidden info. The process maybe a little different on different files but this process should help you understand the layers.