Tutorial - Ledge Village Haunted Cottage
Project Description:
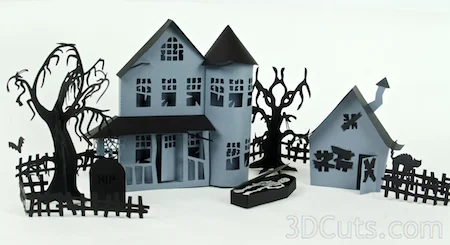
The Ledge Village is series of 3D buildings and accessories that can be combined in a mix and match fashion to build tiny villages on small ledges around your home. The buildings are thin, with all detail on the front so they fit on small trim ledges. The finished cottage is about 4" high. A growing number of files for Ledge Village can be found at 3dcut.com
This tutorial is for the Ledge Village Haunted Cottage. The file includes fences (with cat), and a haunted tree. There are other files to coordinate with the Haunted Cottage included the trees, Haunted Mansion, and casket with skeleton.
Supplies Needed:
Combined with Haunted Mansion cutting file.
- Cutting File downloaded on 3DCuts.com here.
- Your preferred adhesives
- Glue Dots
- Scor-Tape
- Zig Glue Pen
- Card Stock
Parts Sizes:
(For people importing into Cricut Design Space)
- All parts together - 11.325" w x 11.215 h
Steps for completing the 3-D Ledge Village Cottage project:
1. Download the cutting files for your cutting machine here.
2. Load the files into your cutting software following the steps for your cutting machine.
3. Prepare the files:.
- Click here for detailed steps on how to use .SVG files on your Silhouette (with Design Studio).
- Click here for steps on how to use these .SVG files in Design Space with your Cricut Explore.
4. Cut the files:
- Paper colors are your preference. I made it out of dark gray card stock with contrasting black roofs and accessories.
- You will need to cut 2 of the tree pattern.
5. Fold on all dotted fold lines.
- All folds are in the same direction. You can choose. One way will end with a door on the left, the other with a door on the right.
6. Glue the basic house piece together
- Start at the base and work up. It is important to keep things square and the base is a good rectangle to work from.
- Use Glue Dots on both base corners gluing the base to the 2 sides.
- Proceed up the sides gluing the sides to the roof edges and finish with the peak tab.
7. Glue the back in place
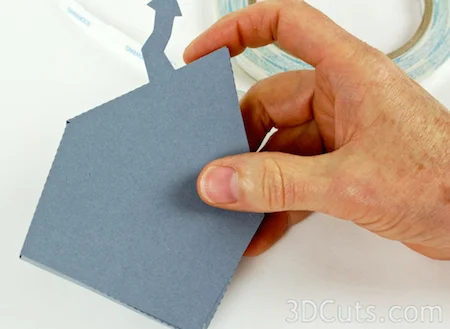
- I use Scor-Tape and apply it to all tabs. I leave the paper backing on all tabs except the bottom on.
- Fold the back in place and seal the bottom edge.
- Remove the paper backing from the side edge and seal in place.
- Seal the roof last.
8. Press everything together
- Press the back in place.
- Insert a long thin tool into the front space and press together any seams you can reach.
9. Add the boards over the windows.
- There are 4 sets of broken boards. Apply adhesive and place over the windows of your choice.
10. Add the roof.
- Fold the roof piece in half along the dotted fold line.
- Curl each end around a pencil to bend the tips up.
- The roof will be positioned so there is an over hang in the front but no over hang in the back. It is to be flush with the back surface.
- Apply Scor-Tape to the roof.
- Peel off one side and attach the roof.
- Peel off the second side and press the roof into place.
- The cottage is compete.
11. Add Accessories
- The file comes with a tree, and a picket fence.
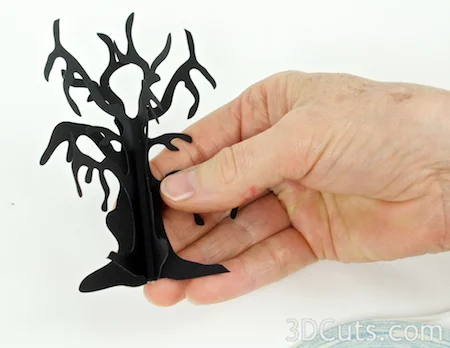
- You will need to cut the tree file twice.
- Add a line of Scor-Tape between the 2 dotted lines on one tree.
- Fold the other along both dotted lines.
- Place the folded one over the Scor-Tape and press in place.
The picket fence with cat can be arranged to fit your scene. It can be attached to the house or bent and positioned in the yard.
This file is part of the Haunted series which also includes the Haunted Mansion and the Casket with Skeleton.
3DCuts.com, Marji Roy, 3D cutting files in .svg, .dxf, and pdf. formats for use with Silhouette and Cricut cutting machines, paper crafting files, Ledge Village Haunted House Series
This tutorial is available online at:
http://www.3dcuts.com/tutorial-ledge-village-haunted-cottage
©2014 3DCuts.com, Marji Roy


