3D Advent Calendar Tree
Project Description:
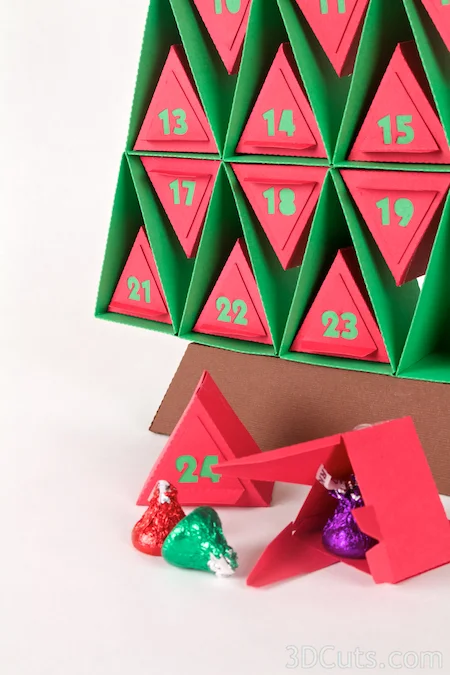
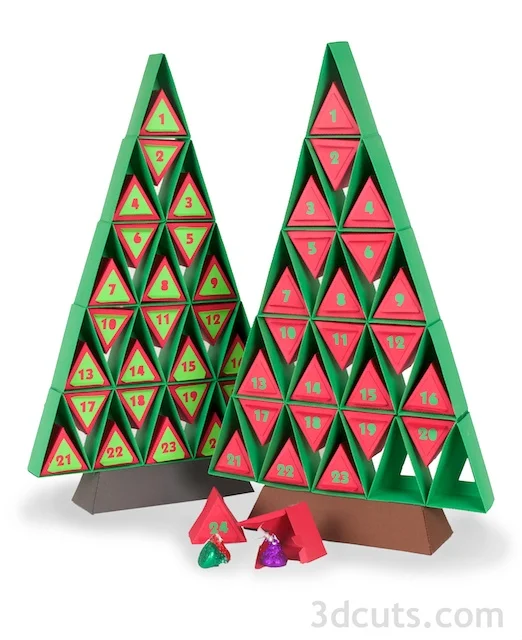
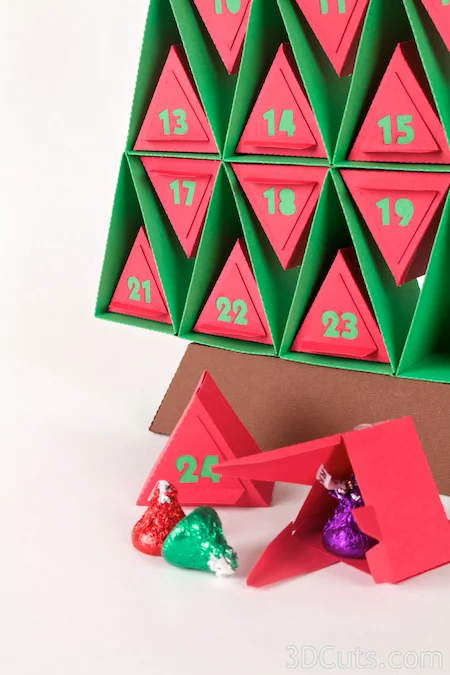
We all loved Advent calendars when we were young. Here is a new design built by making a triangular box 15 times and linking them together. The result is a graphically stunning yet truly functional Advent Calendar. Each tree triangle has a small one-piece box inserted to hide a treasure or Advent thought to help with the count down of days until Christmas.
When completed the tree stands 17" tall.
3D Advent Calendar Tree
Supplies Needed:
- Cutting File available here.
- 8.5 x 11" card stock -
- 15 sheets green
- 13 sheets red
- 2 sheets brown
- 2 contrasting sheets for labels
- Adhesive - I prefer Scor-Tape for this type of project
- A variety of paper adhesives. I used:
- Scor Tape
- Tacky Glue
- Zig 2-way glue
- Hot Glue & Gun
- Weights - some heavy items (I used carriage bolt nuts.)
- Treats! (optional)
Parts sizes: (For those importing into Design Space) - in inches
- Green polygon for triangle shape- cut 15 - 7.760"w x 8.530"h
- Red polygon for box - 2 per sheet - 7.185"w x 9.865"h (two together - cut 13)
- Red polygon for box - size each - 5.385"w x 5.150"h
- Brown base - main piece - 7.730"w x 10.06"h
- Base supplemental pieces (2 together) - 4.430"w x 10.51"h
- Numbers file - All together 7.555"w x 9.265"h
- Backing triangles (optional) 1.09 "w x0.92"h
Steps for completing the 3D Advent Tree:
1. Download the cutting files for your cutting machine.
2. Load the files into your cutting software following the steps for your cutting machine.
3. Prepare the files:.
- Click here for detailed steps on how to use .SVG files on your Silhouette (with Design Studio).
- Click here for steps on how to use these .SVG files in Design Space with your Cricut Explore.
4. Cut the files from the card stock. There is certainly many color/pattern possibilities for this file.
- Cut the green polygon 15 times along with 25 little triangles.
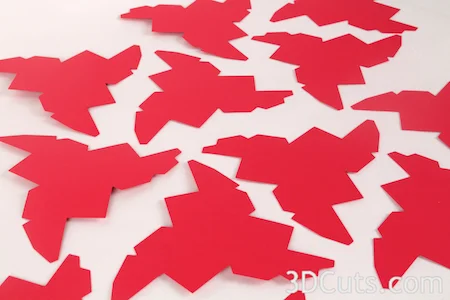
- Cut the red polygon 25 times (2 per page so 13 cuts).
- Cut one each of the brown base pieces and the numbers file in red.
5. Construct the 15 Green triangle units for the tree.
- Important: You must fold and construct all of them in the SAME orientation. Start everyone with the tab I am pointing at sticking out to your lower right. If you flip it over, it will not nest together during assembly. The tab is marked with a red X in the diagram below.
- I am using a piece of two-toned card stock for this tutorial. That is to help clarify the instructions. It is not needed for the actual tree so cut yours from regular green card stock.
- Note all the dotted lines on the piece. Many of these are fold lines but they do not fold in the same direction!
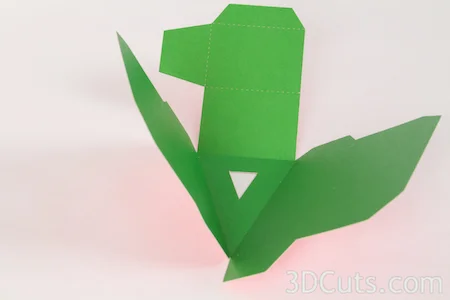
- First fold the 3 legs up (Image 2). Fold up on lines 1-2-3 in diagram.
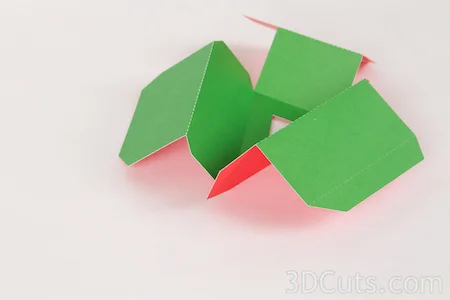
- Then fold the 3 legs back (image 3). Fold down on lines 4-5-6 in diagram.
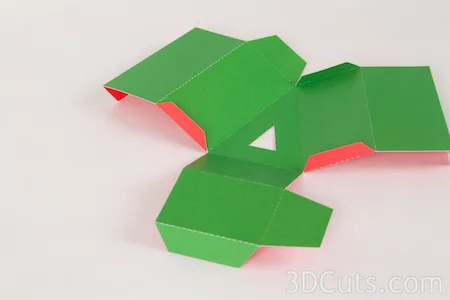
- Then fold the end tabs on the 3 legs under (image 4). Fold back on lines 7-8-9 in diagram.
- Fold up the 3 small end tabs up (Image 5 - two shown in red and one in green). Fold on lines 10-11-12 in diagram.
Image 1-Diagram
Image 2
Image 3
Image 4
Image 5
- I like using Scor Tape because it keeps my fingers clean as I work. Other good paper adhesives are appropriate but you want permanent glue solutions.
- Run a line of Scor-Tape along each of the short tabs - 10-11 and 12 in diagram above BUT NOTICE - The score tape on tab 12 at the peak is on the back side and the score tape on tabs 10 and 11 are on the inside.
- Peel and stick the sharp peak corner first. This is tab 12 in the diagram. It gets glued on the inside and lines up with the dotted line.
- Press in place.
- Peel and glue in place tabs 10 and 11. These get wrapped around the bottom and glued up to the bottom.
- Wrap the bottom back and glue the end tab to the back using Score Tape. DO NOT put any glue on the bottom. You are forming and open pocket there. I have inserted scissors into that open pocket in the bottom images just to demonstrate what I mean.
Image 1
- Add Score Tape to each of the long tabs (7-8 in diagram). Image 1
- Peel one and wrap in around to the back and press in place. (Image 2)
- Repeat for the other long tab. (Image 3)
- Again, you are forming long pockets along the sides. Do not add glue in these pockets.
Image 2
Image 3
- Repeat 14 more times.
- Make sure you always start with the tab marked by the RED X sticking out to the lower right for every triangle shape you make.
6. Assemble the 15 triangles into the tree form.
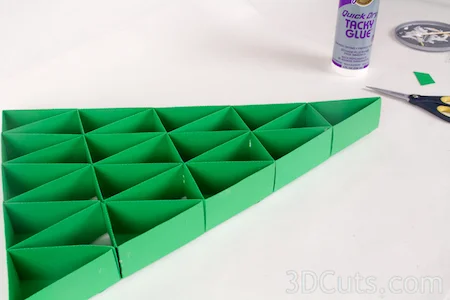
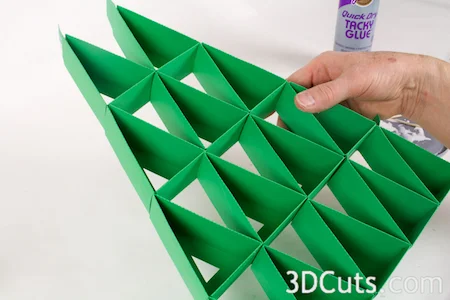
- The assembled tree is shown in the image. It has 5 green triangles on the bottom. It gains a lot of strength as the parts are glued together.
- Use a tacky glue like Aileen's Quick Drying Tacky Glue. You need one that dries clear.
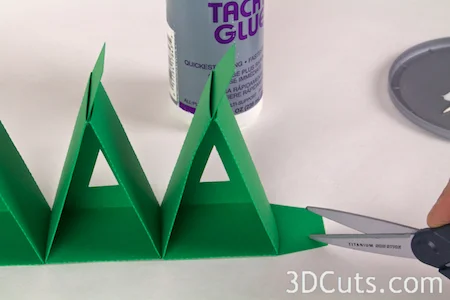
- Start with 2 triangles aligned as shown in the image. The tab of the left one will slide into the pocket on the base of the right one.
- Apply a thin layer of Tacky Glue to both the top and bottom of the tab........
- And slide them together and press to get the glue to hold.
- Repeat for triangles 3, 4, and 5 on the bottom row.
- Cut off the last tab on triangle 5 on the bottom row.
- Add row 2.
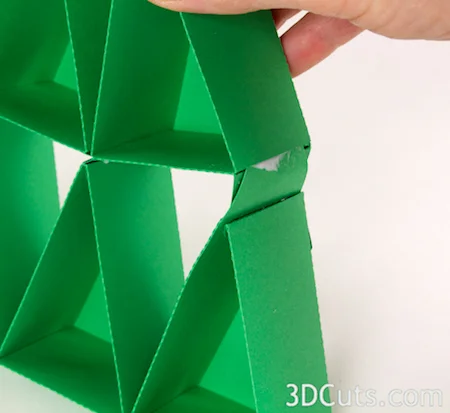
- Start on the left and apply glue to the tab sticking up from row 1.
- Slide that into the slot along the left edge of the second row.
- Then glue the side tab to the tab sticking up from row one, add glue to that and slide it into the pocket on the base of the next triangle on row 2.
Image 1
Image 2
Image 3
- Slide it over and hug it tight to the first triangle.
- Repeat for triangles 2-3-4 on this row.
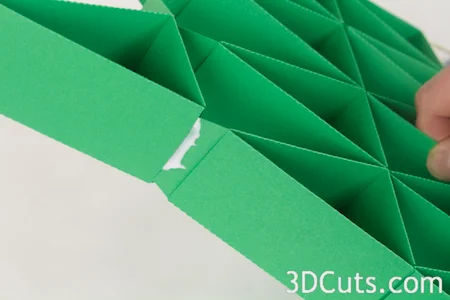
- At the end of row 2 slide the last tab on row 2 DOWN into the inside pocket on row 1.
- Add glue to the top tab on row 1 and slide that up into the side pocket on the end of row 2.
- You must work quickly before the glue gets the paper soggy.
- Press all pockets to seal the glue joints.
- Make sure every thing is aligned.
- Start row 3 the same way you did row 2.
- And end it the same way you did row 2.
- Add only 3 triangles to row 3.
- Repeat with row 4, this time with only 2 triangles.
- Glue the very top triangle in place.
- You will need to carefully cut off the top tab on this piece.
7. Construct the tree base.
- The tree base requires those pieces cut from brown card stock plus some weights.
- I like to weight down tall paper structures for stability. They can be top heavy.
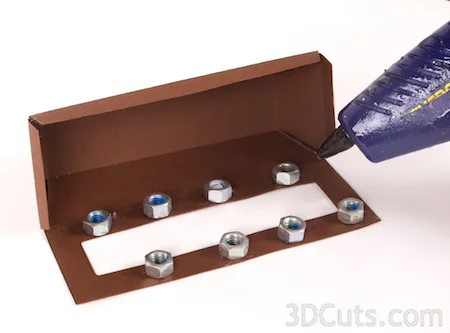
- I use 8 - 3/8" carriage both nuts available from any hardware store but other heavy things from your craft supplies would be appropriate.
- Start by gluing the base reinforcement piece onto the inside of the base. Match up edges.
- Match the edges and glue together. I used Aileen's Tacky glue to make this layer stronger.
- Glue all four corner tabs together using a strong adhesive. I used my hot glue gun but score tape might have been neater!
- The tabs meet together on the inside.
- Hot Glue 8 nuts in an alternating pattern along the rim of the bottom.
- Stagger them on opposites sides to allow spacing for the zigzag support.
- Fold the zig zag support and place in the base. Do not glue in place.
- Fold over the base cover and position the zig zag piece around the nuts.
- Fold over the three tabs to hold the cover in place and glue using the hot glue.
- Apply a liberal amount of hot glue to the top of the brown base and position the tree op top. Be sure to center it and press in place.
8. Construct the 25 triangle boxes for the treats.
- All edges fold up and in, in the same direction.
- Fold on all dotted fold lines.
- Use hot glue or Score Tape to glue the 3 side seams together to form the base of the triangle box.
- To close the box, fold down the long point, cover its tip by folding down the next long point, and finish by folding the short point and tucking the short point in and under.
Add the triangle drawer numbers.
- Pay close attention to the layout by looking at the photo. They alternate whether the handle is on the top or bottom and whether they are inserted into the tree with the point of the triangle up or down.
- You have choices on how you want to display the numbers. My favorite was to cut the numbers from the same color as the drawer and then back the numbers with green. I glued a green triangle on the back and then glued it to the drawer, with handle folded up to decorate the drawer front.
- A quicker alternative solution is to cut the numbers from a contrasting color card stock. Then no backing color is needed. That is shown in the left tree.
Load treats into each of the drawers, insert them into their assigned space and and count down the days until Christmas.
© 2014 Marji Roy, 3DCuts.com

