
Moose and Trees • Tutorial
Project Description:
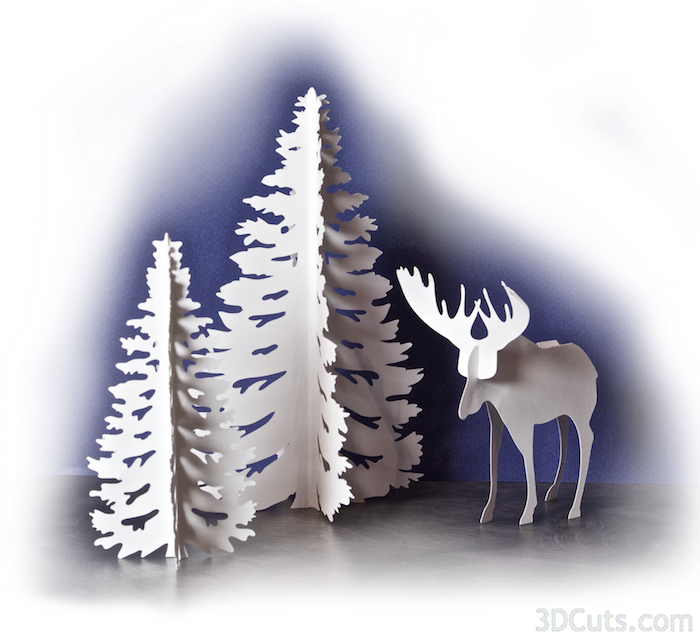
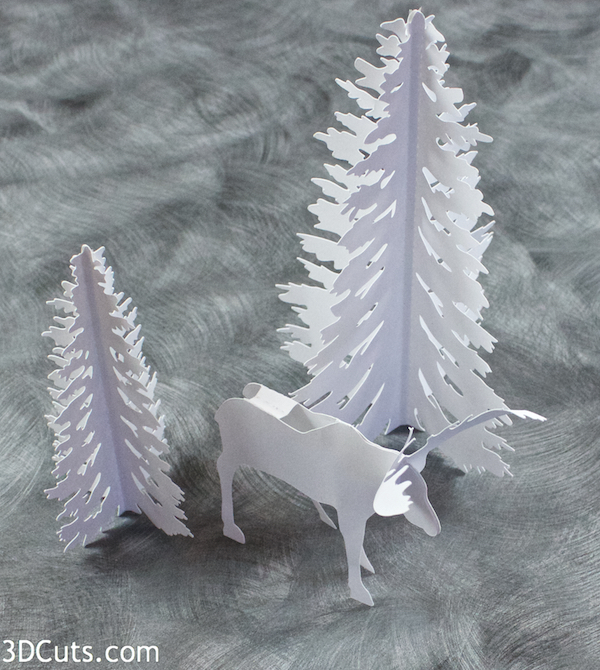
Create an easy 3D diorama featuring a stately moose standing in the fir trees. This project includes detailed cutting files for simple 3D construction techniques to make this stunning set. It looks wonderful on a mantel or shelf.
I first made this design many years ago and below is a photo of it on the mantle of a friend's home. It was a great hostess gift - but the original files were too complicated to cut well so the file has been updated to make it easier.

Moose and Trees - Tutorial
Supplies Needed:
- Cutting File here.
- 8.5 x 11" card stock - I used the 110lb Neenah Cardstock from Amazon for the white
- Glue Dot
- 1/8" Scor-Tape adhesive
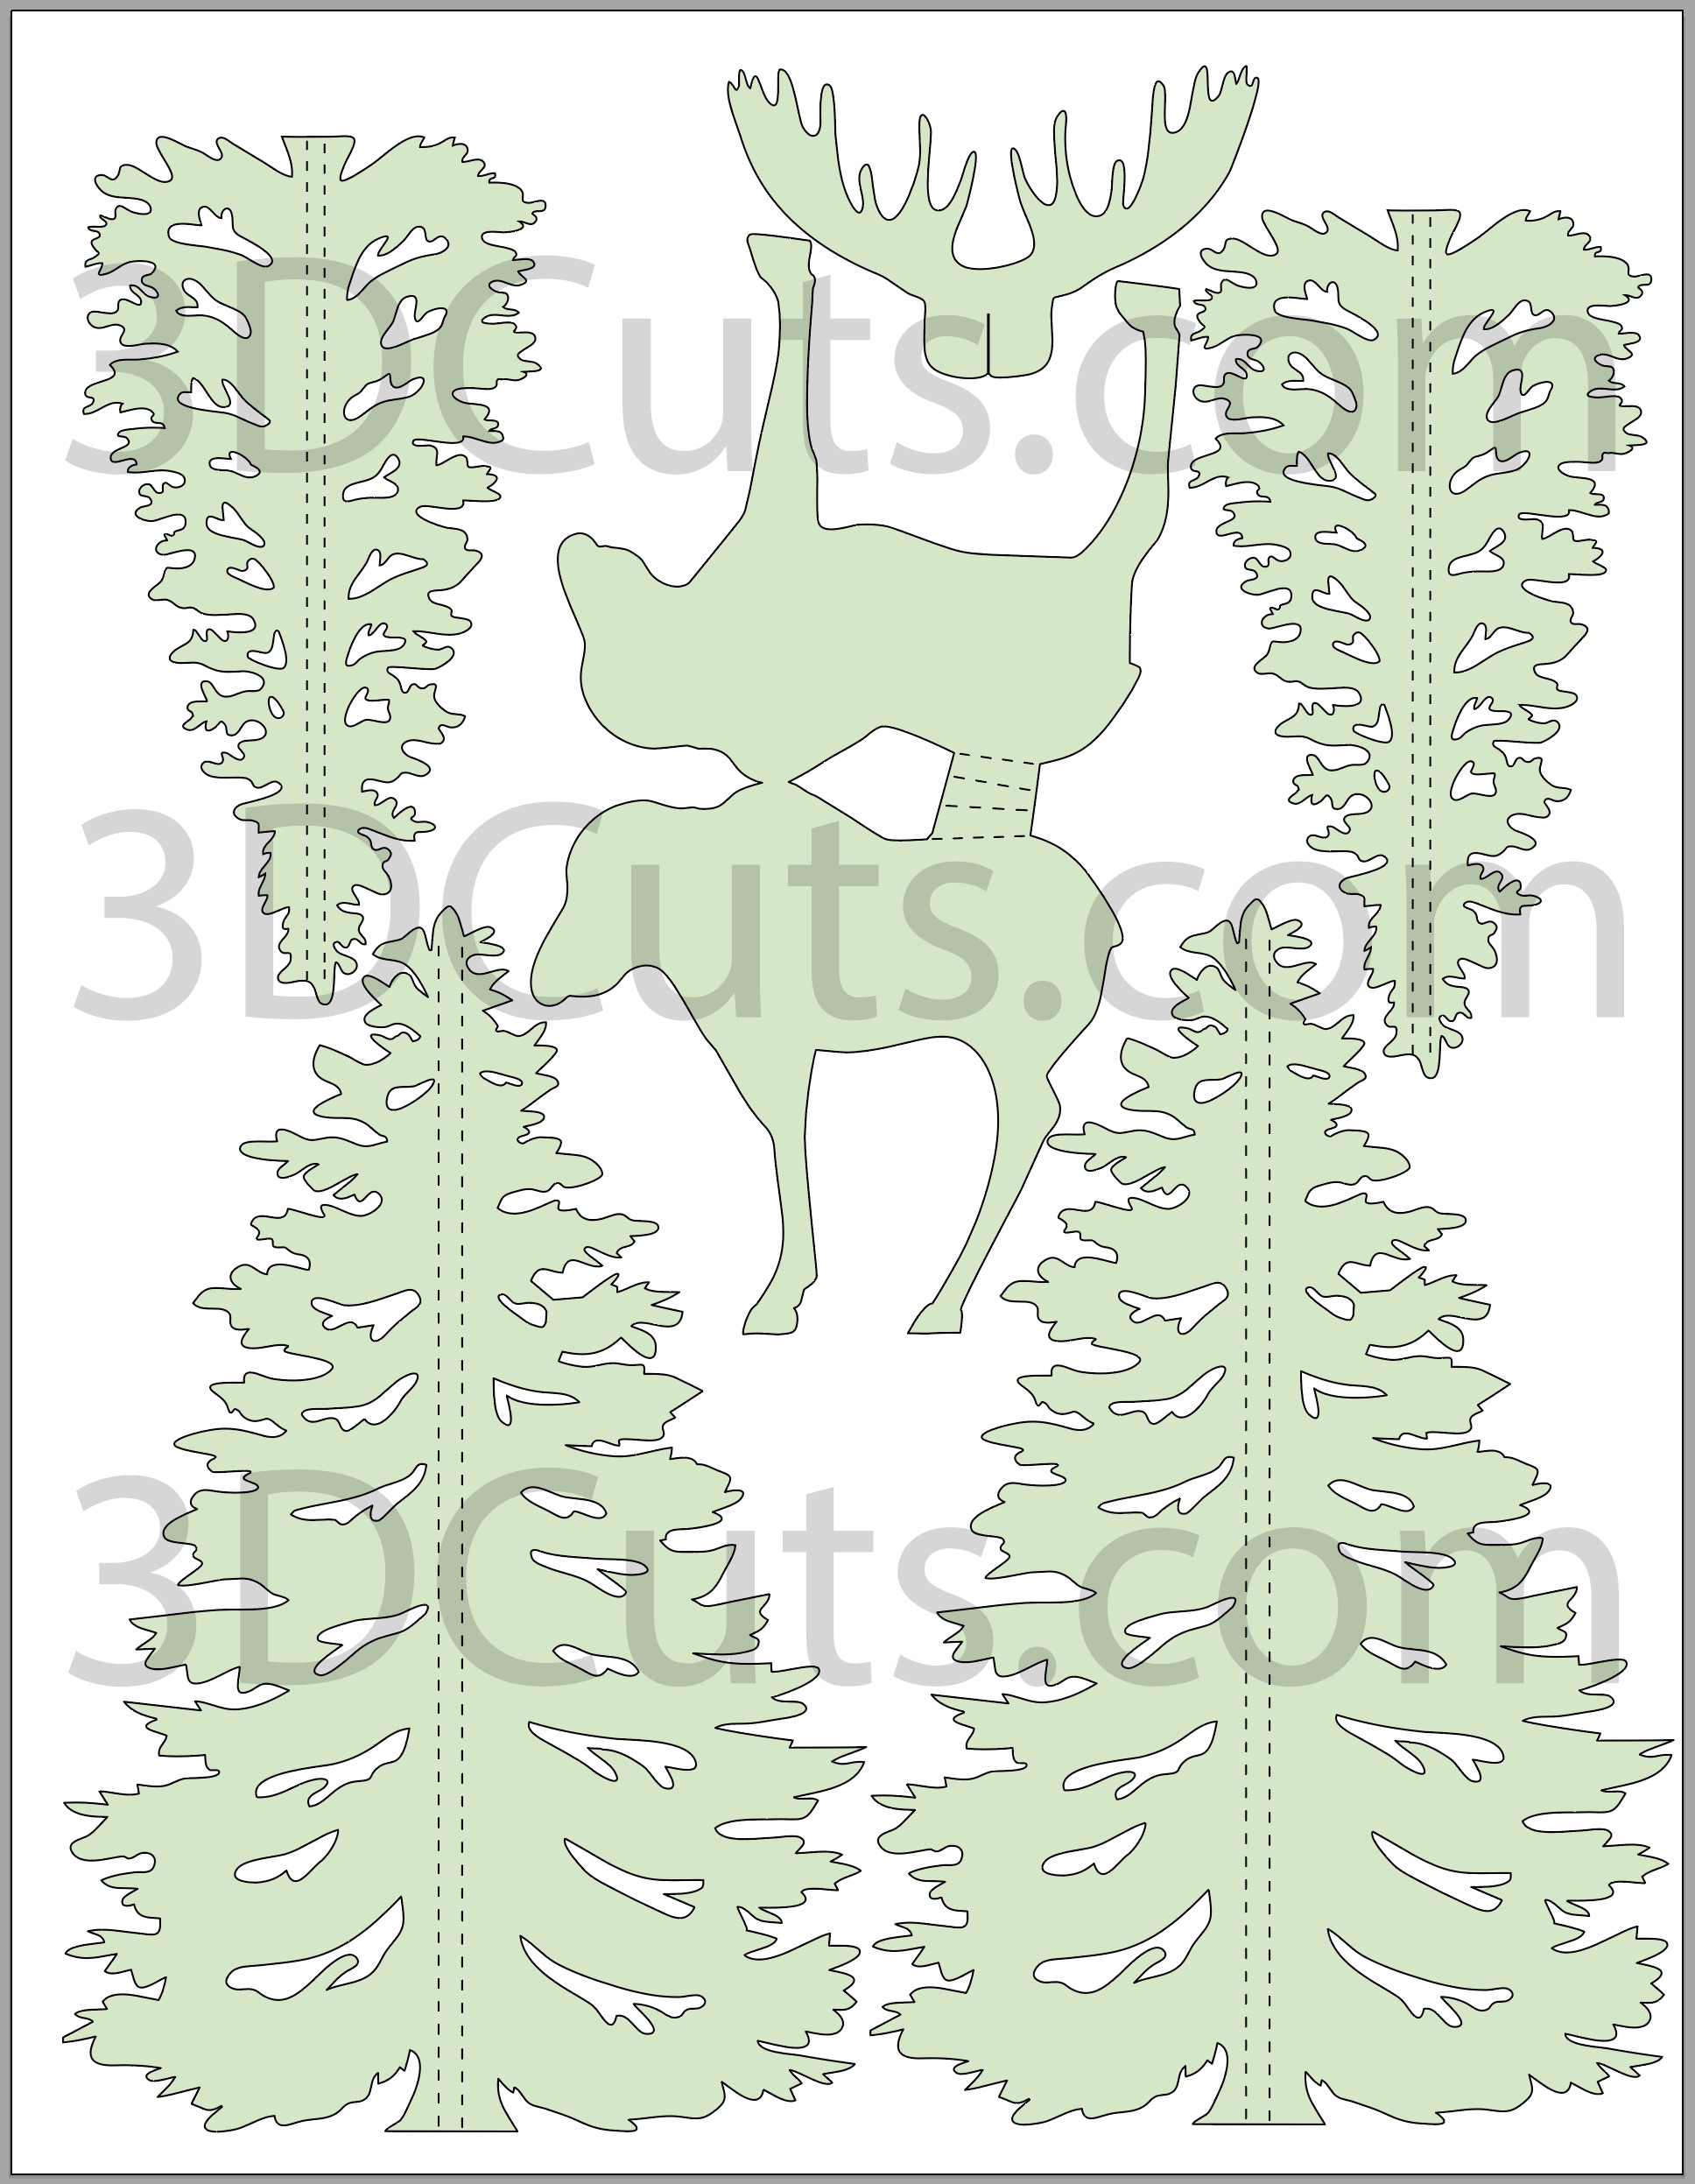
Parts sizes: - in inches - Sizes are when in orientation shown to right.
All pieces when grouped as shown will fit on 1 - 8.5 x 11" piece of card stock.
- Moose: 3.301" w x 5.593" h
- Antlers: 2.698 "w x 1.588" h
- Small tree: 2.351" w x 4.426" h
- Large Tree:4.083" w x 6.230" h
Order supplies from Amazon:
Steps for completing the Moose and Trees:
Special Note: I update the instructions online. Check here for adjustments and additional information. Don't just rely on the pdf file that comes with the download. This file is located at http://3dcuts.com/moose-and-trees-tutorial
1. Download the cutting files for your cutting machine from the 3dcuts.com store here.
2. Load the files into your cutting software following the steps for your cutting machine.
3. Prepare the files:.
- For the Silhouette: The SVG files from this site will need to be turned into cutting files. Click here for detailed steps on how to use SVG files on your Silhouette. http://www.3dcuts.com/tutorial-upload-svg-silhouette
- For Cricut Explore: Here is a guide for importing into Cricut Design Space. http://www.3dcuts.com/tutorial-adding-3dcuts-files-to-cricut
- For Brother ScanNCut: The svg files will need to be transferred to files for your particular machine. You can change SVG files to FCM files at http://www.canvasworkspace.com/ or Google "How to import SVG files into a ScanNCut" for links to tutorials.
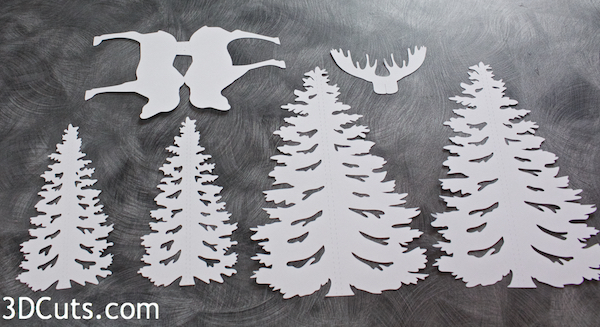
4. Cut the files.
- The trees have some intricate cuts. I like using the Silhouette Premium Blade for this type of cut.
5. Remove the cutting mat carefully. I find the paper curls less if I peel the mat away from the paper and not the other way around.

6. Assemble the moose.
- Note each cut file has dotted cut lines. These are fold lines.
- Fold the moose in half along the fold lines on its back. The connector tab on the back first forms a hump...
- But then double fold it down in between its sides like this:
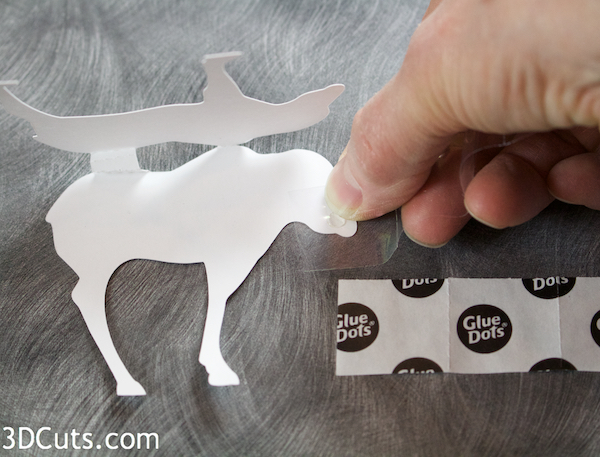
- A glue dot placed on the nose between the halves will hold it in place.
- I finger-shaped the moose body especially around the shoulders to give it a little bulk in appearance.

- The file does not include a slit for inserting the antler rack on the head although it does have one on the antler rack. This is to allow you more flexibility in assembly. You can change the character of the moose by altering the angle of the antlers just a little bit. If you want to make an arrangement with multiple moose, then change the sizes of the moose and the angle of the antlers just a little and they will look different.
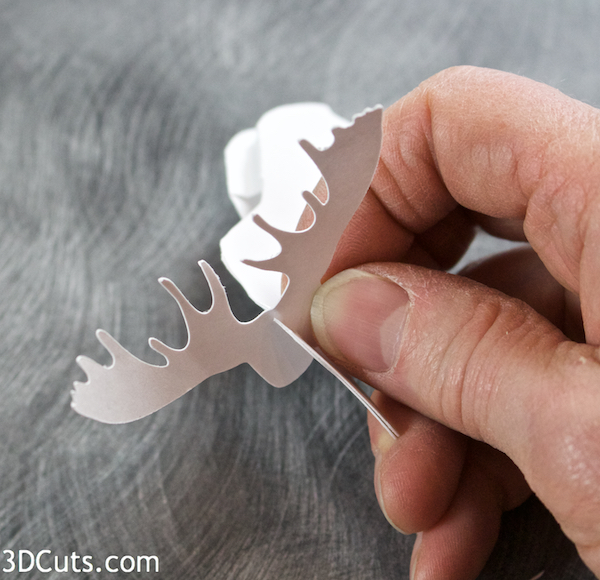
- Use scissors to cut a slot in the top of the head about 1/4" down and slide the antlers into place.
- Finger-curl the antlers to add character.


- The moose is complete. Stand him up. Depending on how you adjusted the body form he may need to have the hoofs trimmed slightly to properly balance. Determine which hoof is too long and snip a small sliver off the bottom. Adjust so the moose stands easily.
7. Assemble the trees.
- Each tree has two dotted fold lines down the center. Fold along both of these on the two matching larger trees.

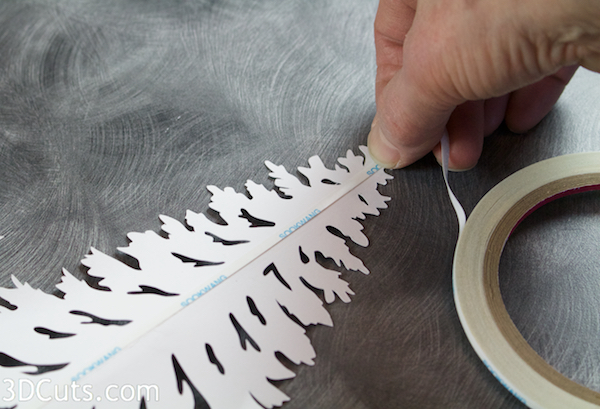
- Run and strip of Scor-Tape adhesive down the middle of the tree on the outside. I used 1/8". Other adhesives can be used.
- Place the second folded tree on top being carefully to line up the bottoms. Press in place to adhere.

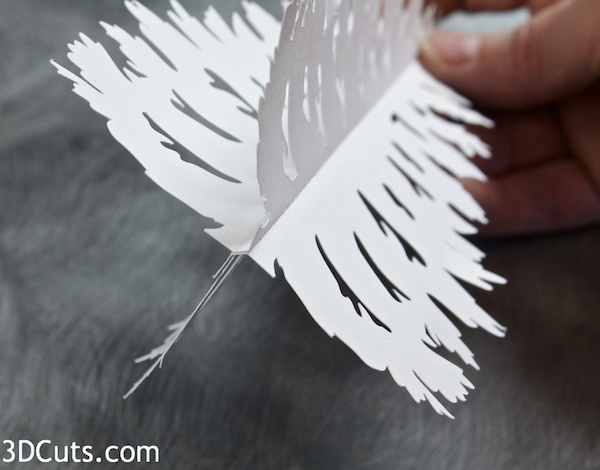
- Here is a bottom view of the tree. Spread the four "wings" out in four directions.
- Make the second tree, and possibly a third if you want.

- The moose and trees diorama is complete. Where will you display it?

File Design © 2014 • 3DCuts.com • Marji Roy
Tutorial © 2017 • 3DCuts.com • Marji Roy