Ledge Village - Adding Lights -suggestions


Ledge Village is a large group of narrow buildings created for displaying villages on tiny ledges. Because they are thin (under 1”) they are perfect for displaying tiny villages on the thin ledge around your home.
This tutorial is to provide suggestions on how to add lights to these buildings. This tutorial is more a series of suggestions than a step-by-step complete tutorial. How you approach this will depend hugely on the layout of your display. So use some creativity and be flexible as you approach this.
To see ideas for displaying these buildings check out the Ledge Village Ideas page here.
Cutting File for all these Ledge Village Buildings available here from https://3dcuts.com/ledge-village
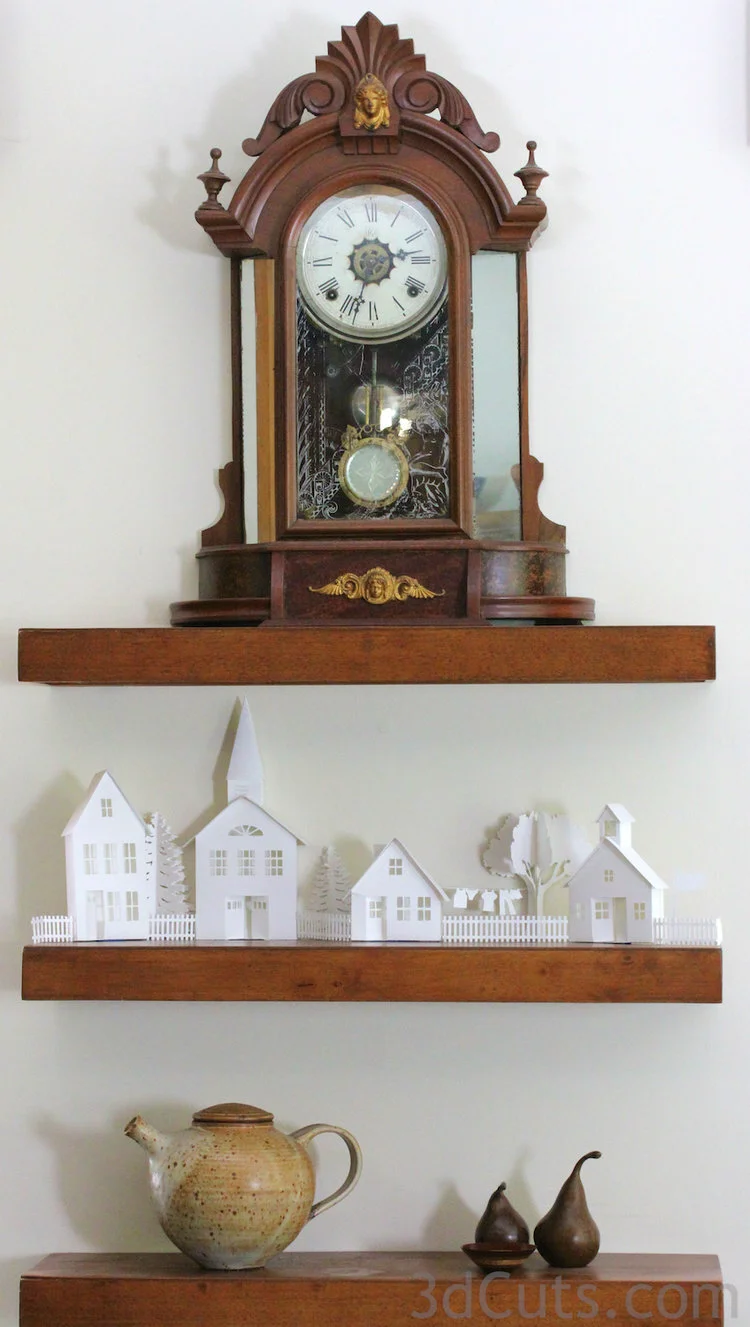
You can purchase a crown molding floating shelf to display your Ledge Village. Above is a display I made in 2020 with the two new buildings plus some old favorites. From left to right Tudor Manor, Tower House v2, Chapel, Store 2, Dormer house. If you need a shelf there are many options at Amazon. Or just search for photo ledge shelf or crown moulding ledge.
You can also purchase groups of shelves and have the village staggered on the wall.
To add lights:
I use fairy lights with 50 lights and 3 batteries with a remote to light a number of them. I like these because they do not burn out as quickly as the 20 light version but you need to find a place to hide the battery pack. They also have larger sets available for bigger displays.
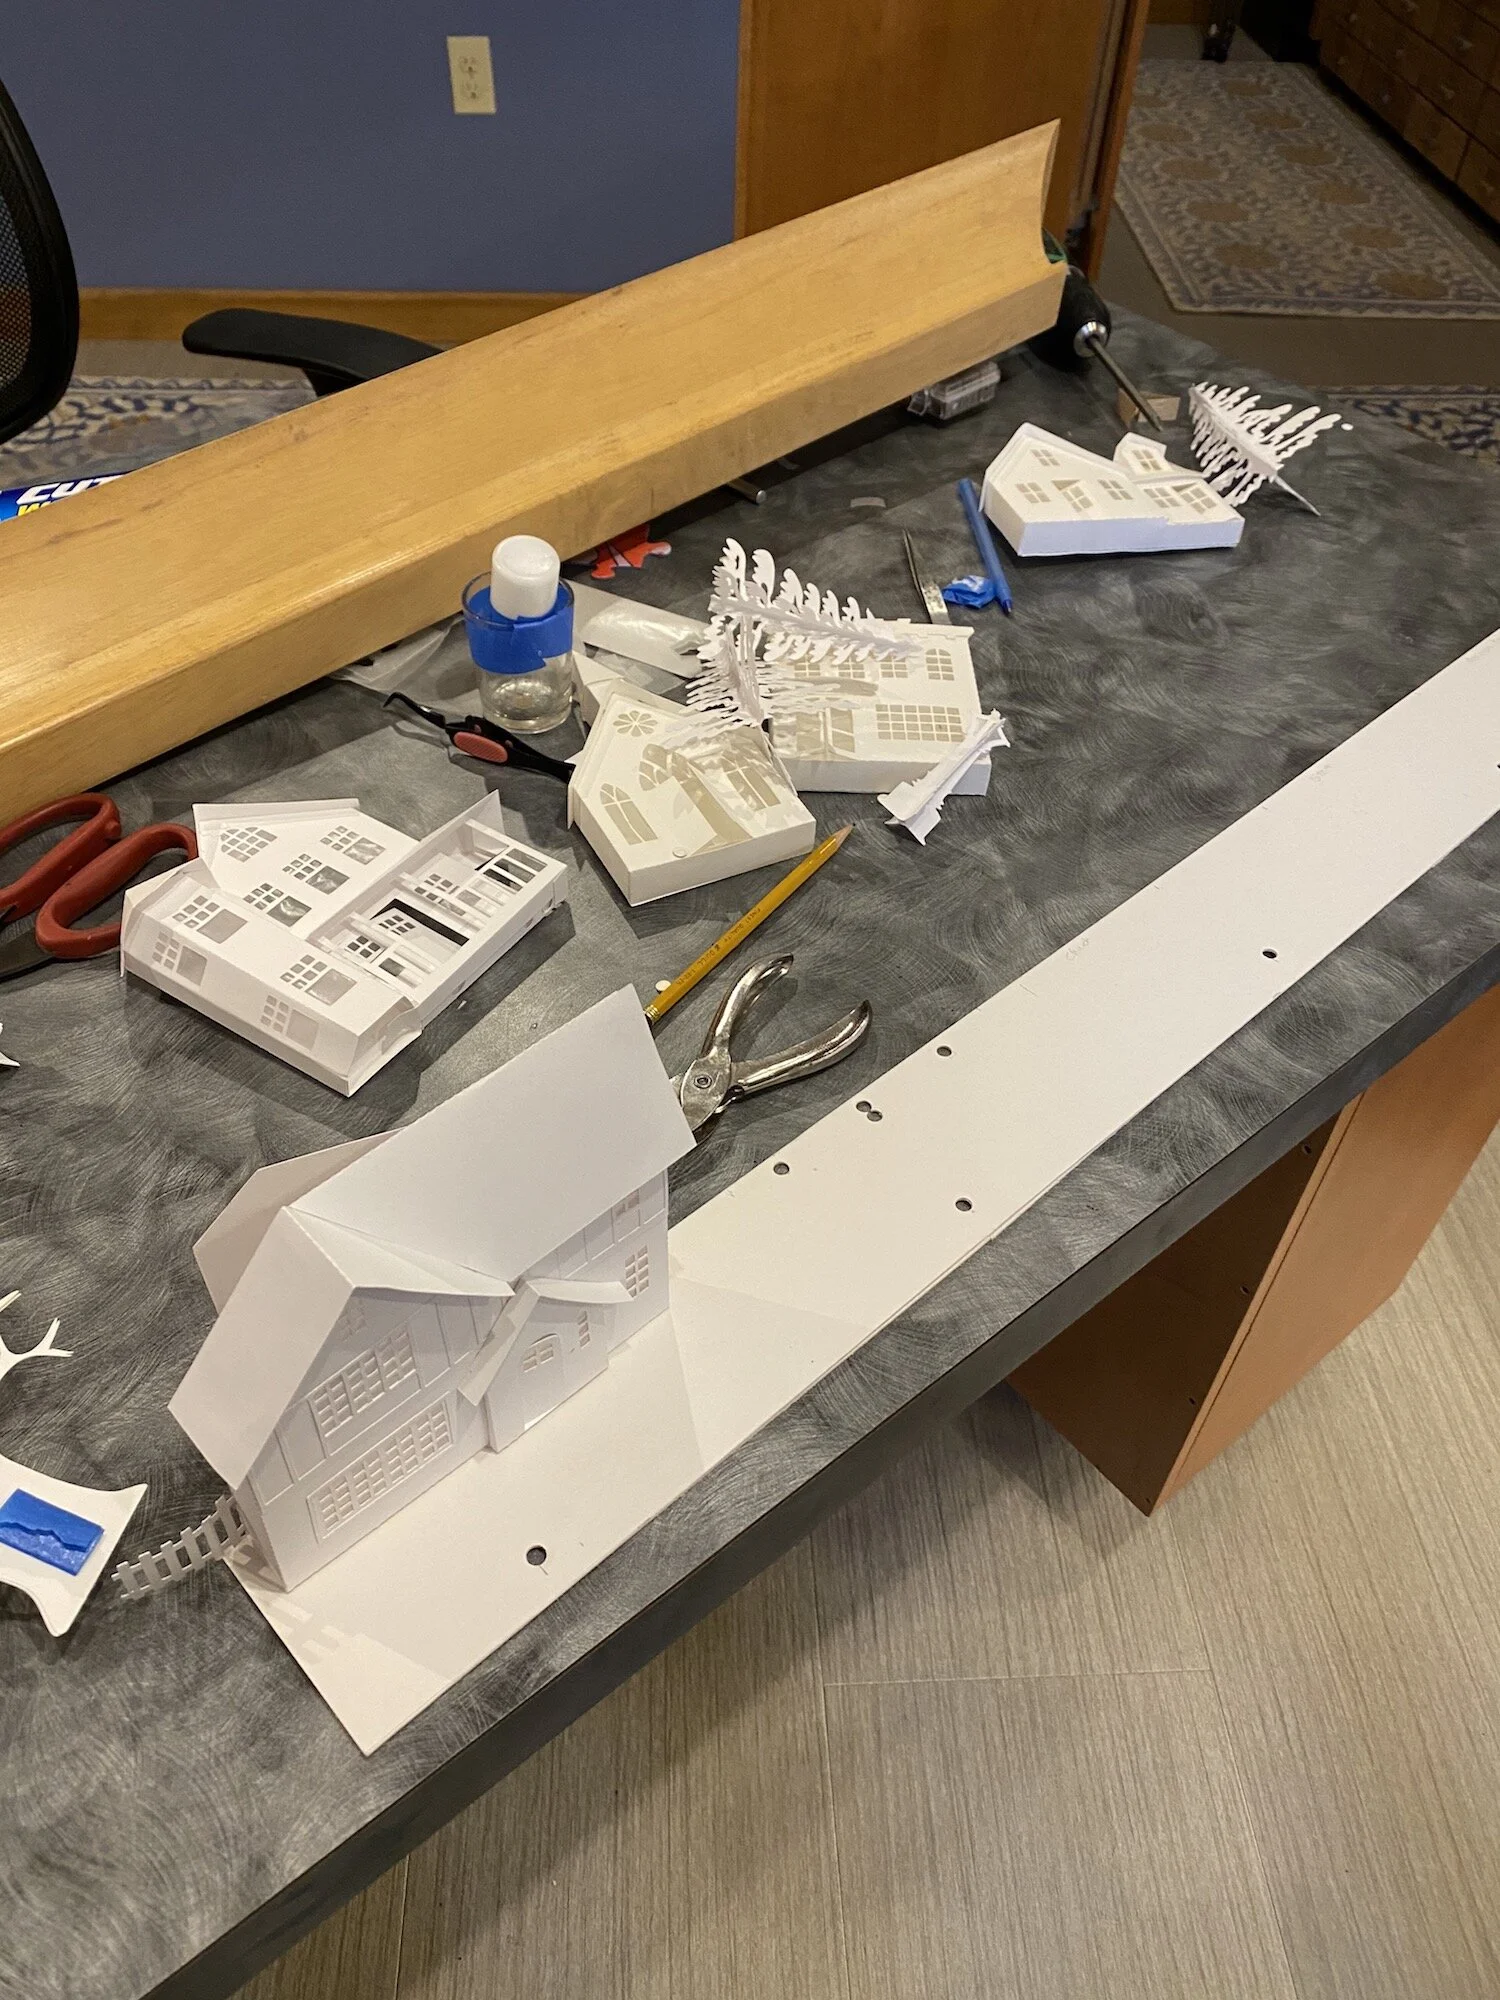
Preparing the buildings:
Decide on which buildings you want to use in the display. Check out all the options on the Ledge Village site here. Older buildings did not have an opening door on the backside to place lights. If you have already made some of the buildings you can retro fit them from a previous display or if you are making them new you can adjust the file before cutting.
To adjust before cutting:
To adjust a file you already own, open it in your software.
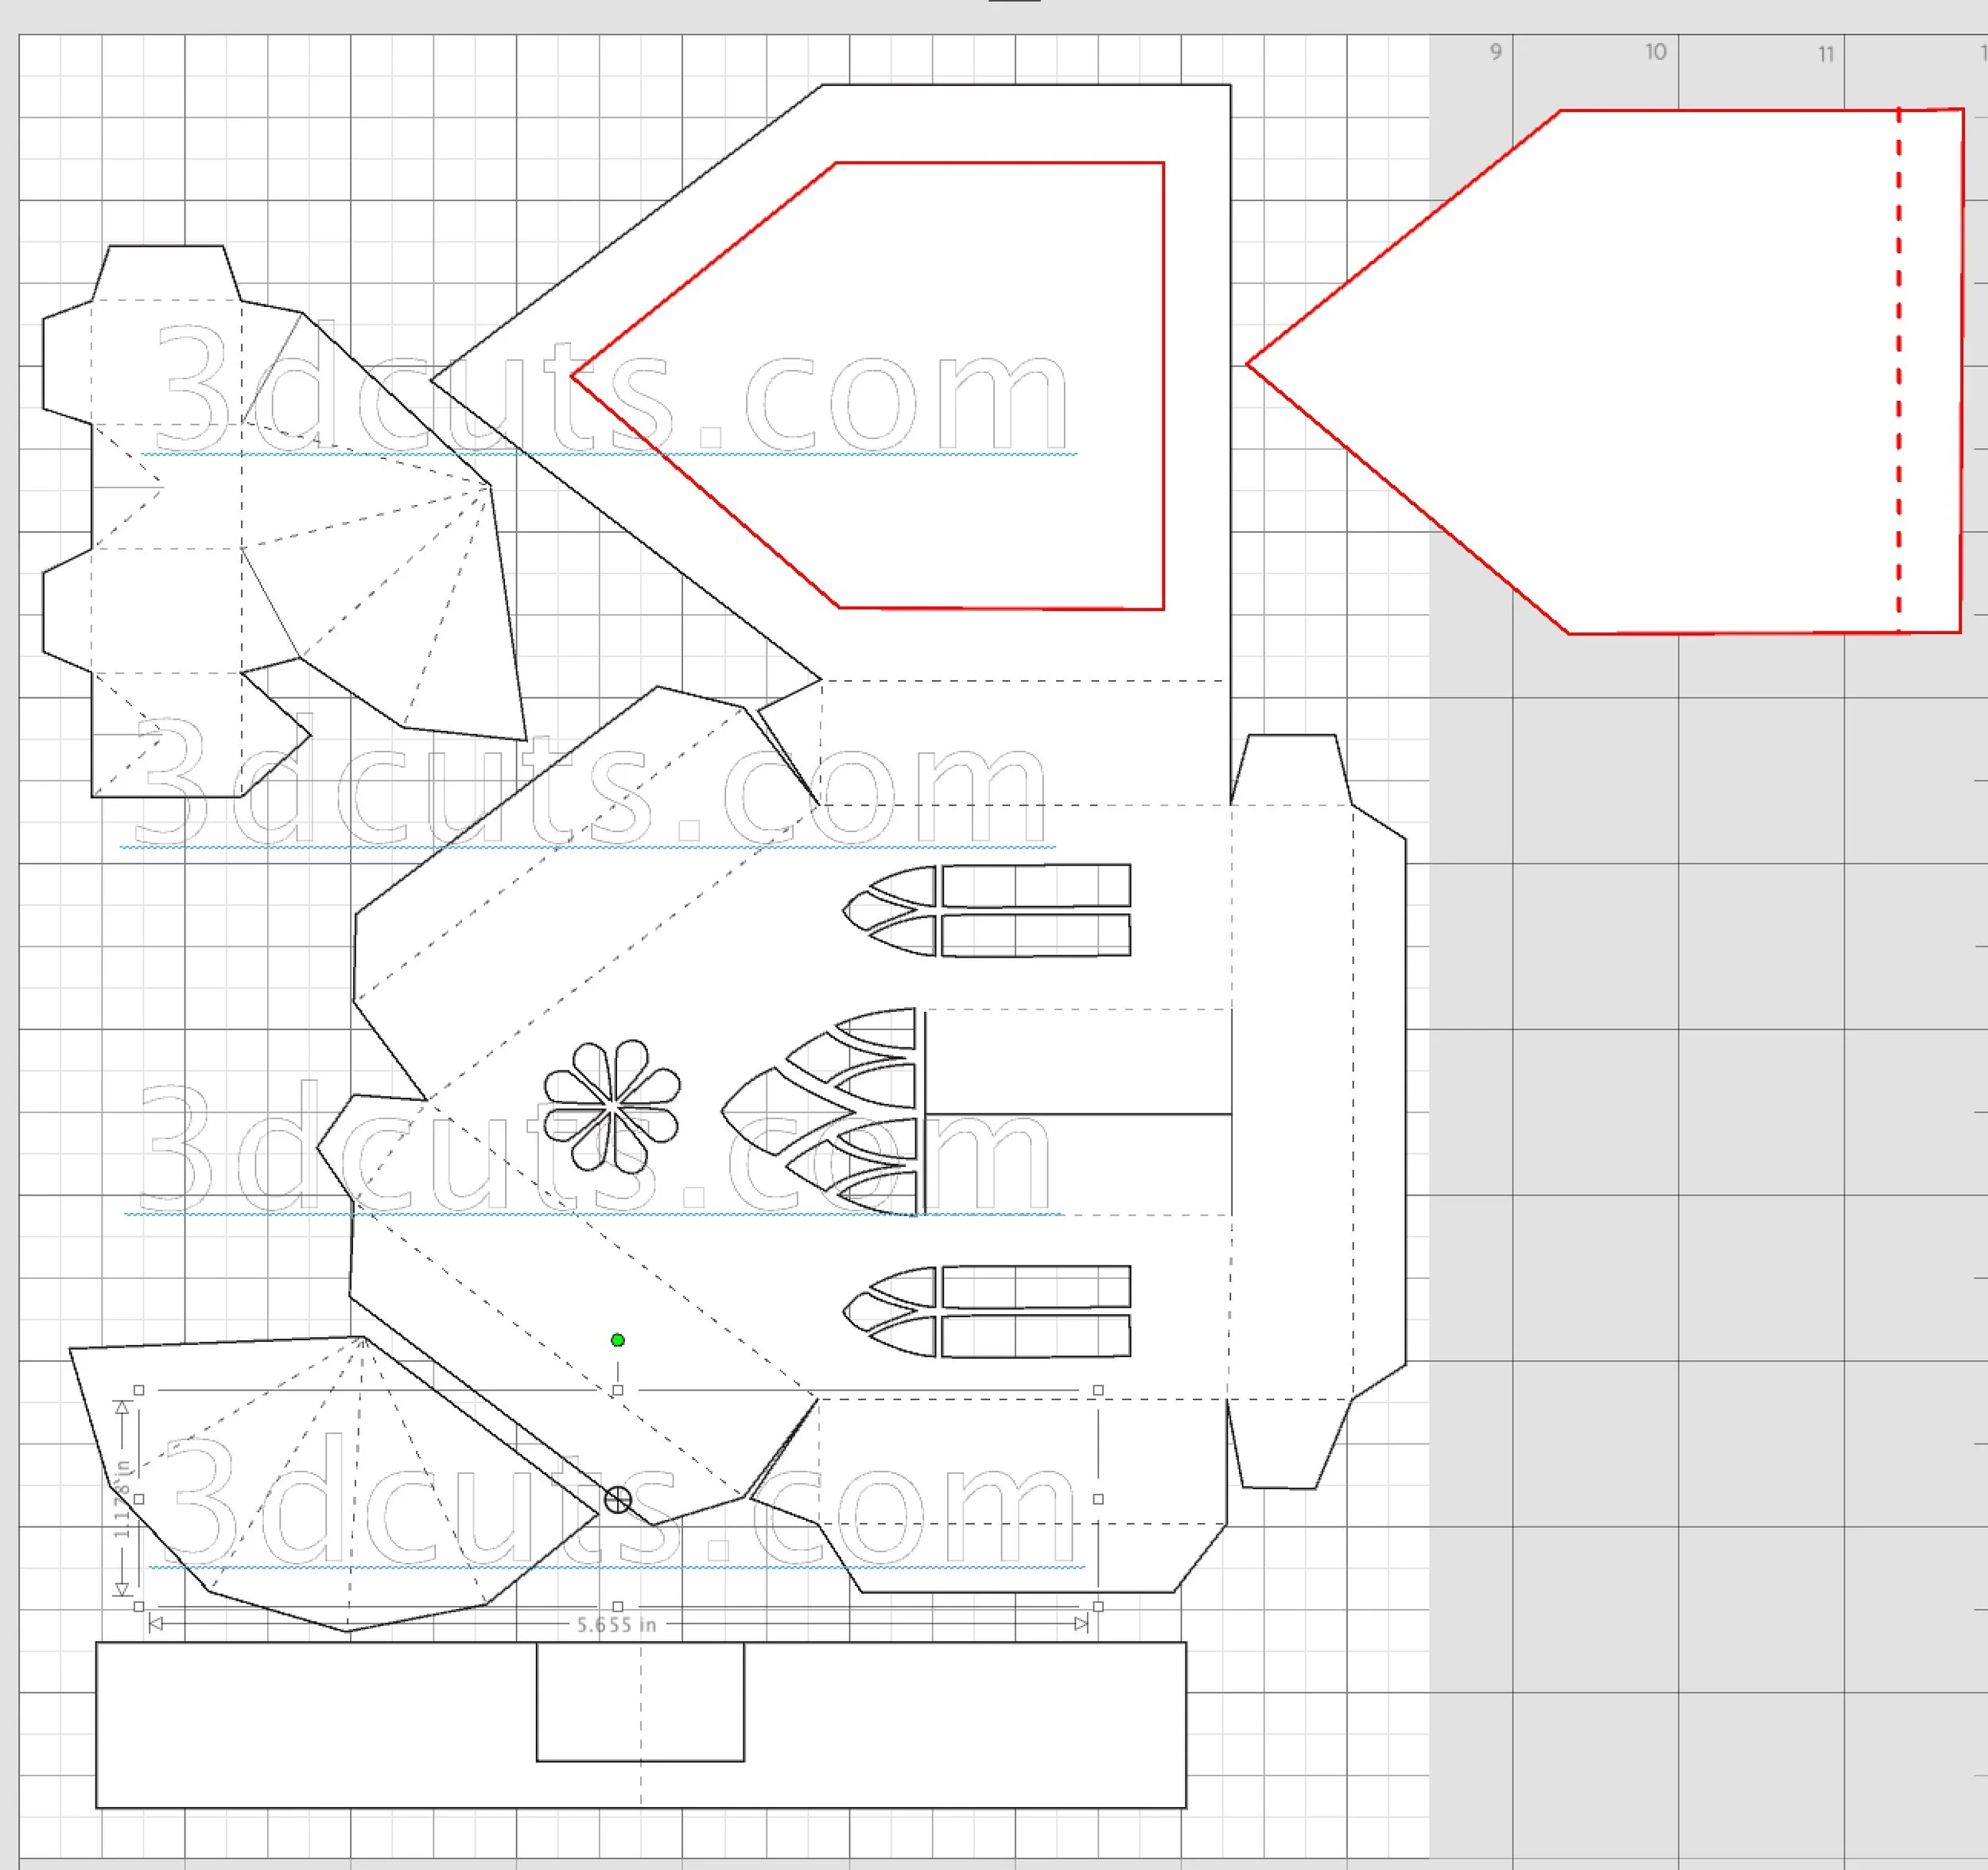
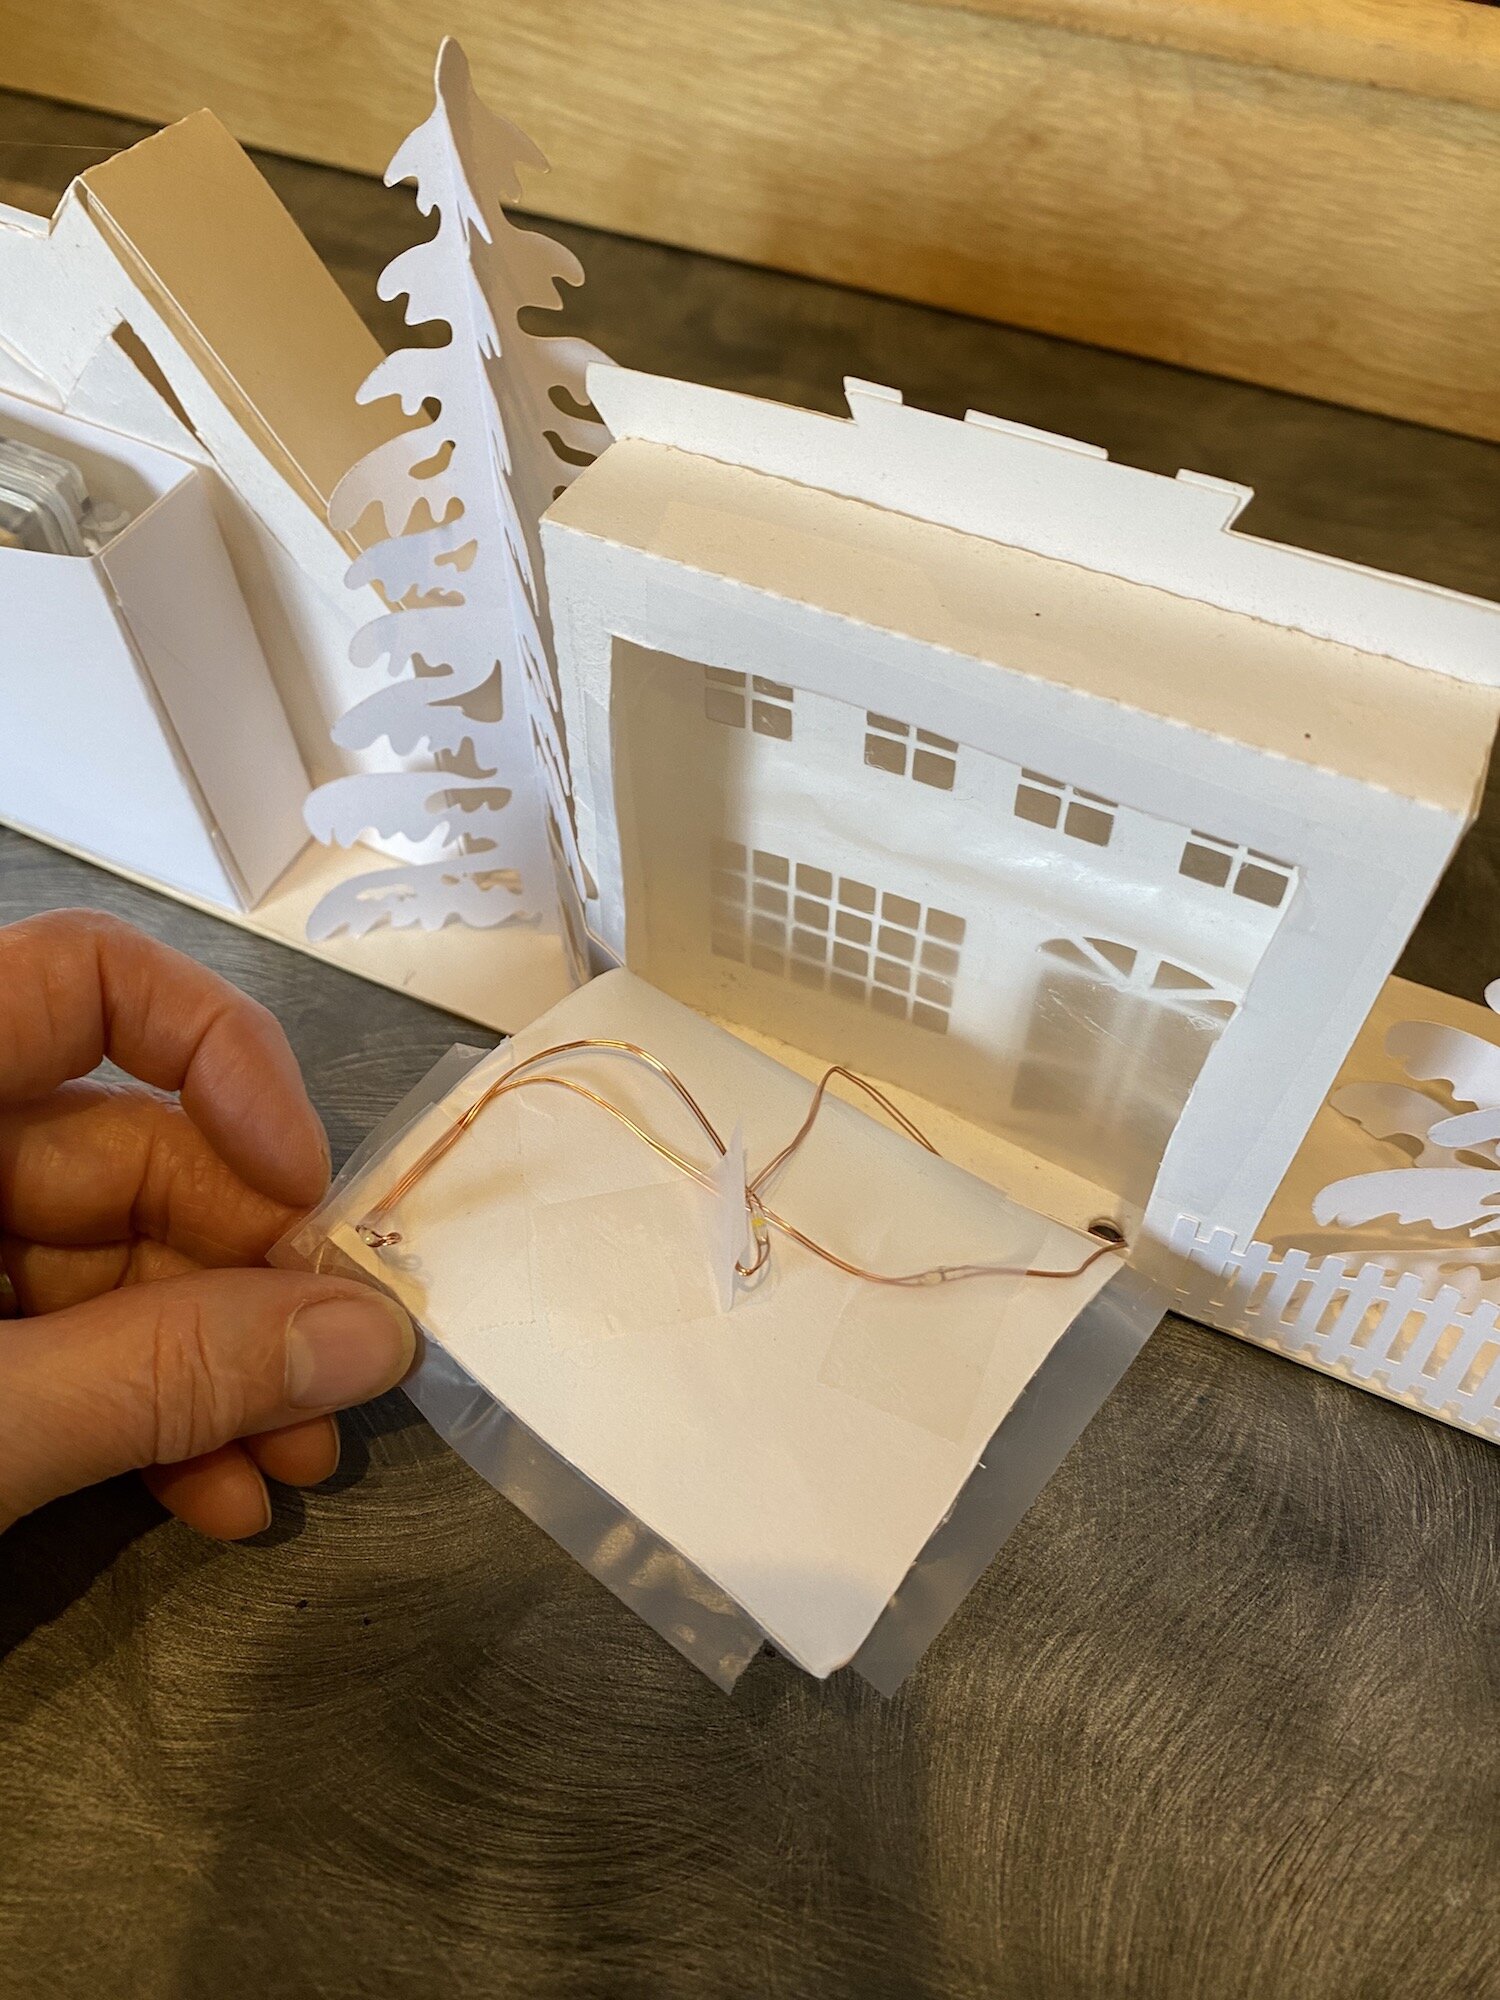
Identify the large back panel of the building and draw a new cut shape inside it about 3/8” in from the edge. (example for the chapel to the right. Red line is the new cut line.)
Make a door to cover this opening. It is the same shape only 1/4” larger with a dotted fold line at the bottom.
Lights will get attached to that back panel and then it will be taped in place.
When you make the new buildings add wax paper to the back side of all windows and doors.
To Retro fit a Ledge Village Building you have already made:
On the back side, using an xacto blade cut a opening that is 3/8” smaller than the main back panel. Leave the bottom edge and fold back along that. Make a matching door 1/4” bigger.
Apply wax paper to the insides of all openings to defuse the light. You have access once it is open from the back.
After all the accessories are made including lamp posts, buildings, trees and fences create a base. The wires will need to string under this base. Your choice of base will depend on what it will be displayed on.
Mine is on a crown moulding ledge that has a lip on the edge. I cut a piece of white mat board the size of the shelf inside this ledge. That will be the covering for the wires.
I applies additional spacers on the edges to make a cavity under the mat board for the wires and extra lights. Foam core board would work for this.
I decided where all the buildings would be located and I used a hole punch to punch a hole for the wires to poke up through. (Takes strong hands!)
Tower House v2 of Ledge Village by Marji Roy of 3DCuts.com, 3D cutting files in .svg, .dxf, and .pdf formats for use with Silhouette, Cricut and other cutting machines, paper crafting files
It is important to design in a place for the battery pack. Make a small box out of card stock, open at the top that your battery pack can go in. It should fit completely behind one of the buildings and not be visible. You want to be able to slide the battery pack out to change the batteries if needed.
Mine is behind the dormer house on the right. You can see it is just a simple sleeve with bottom - no top.
Once I knew where all the buildings were going to be located I hot glued them in place over the holes that had been punched in the mat board. I also glued the battery box in place.

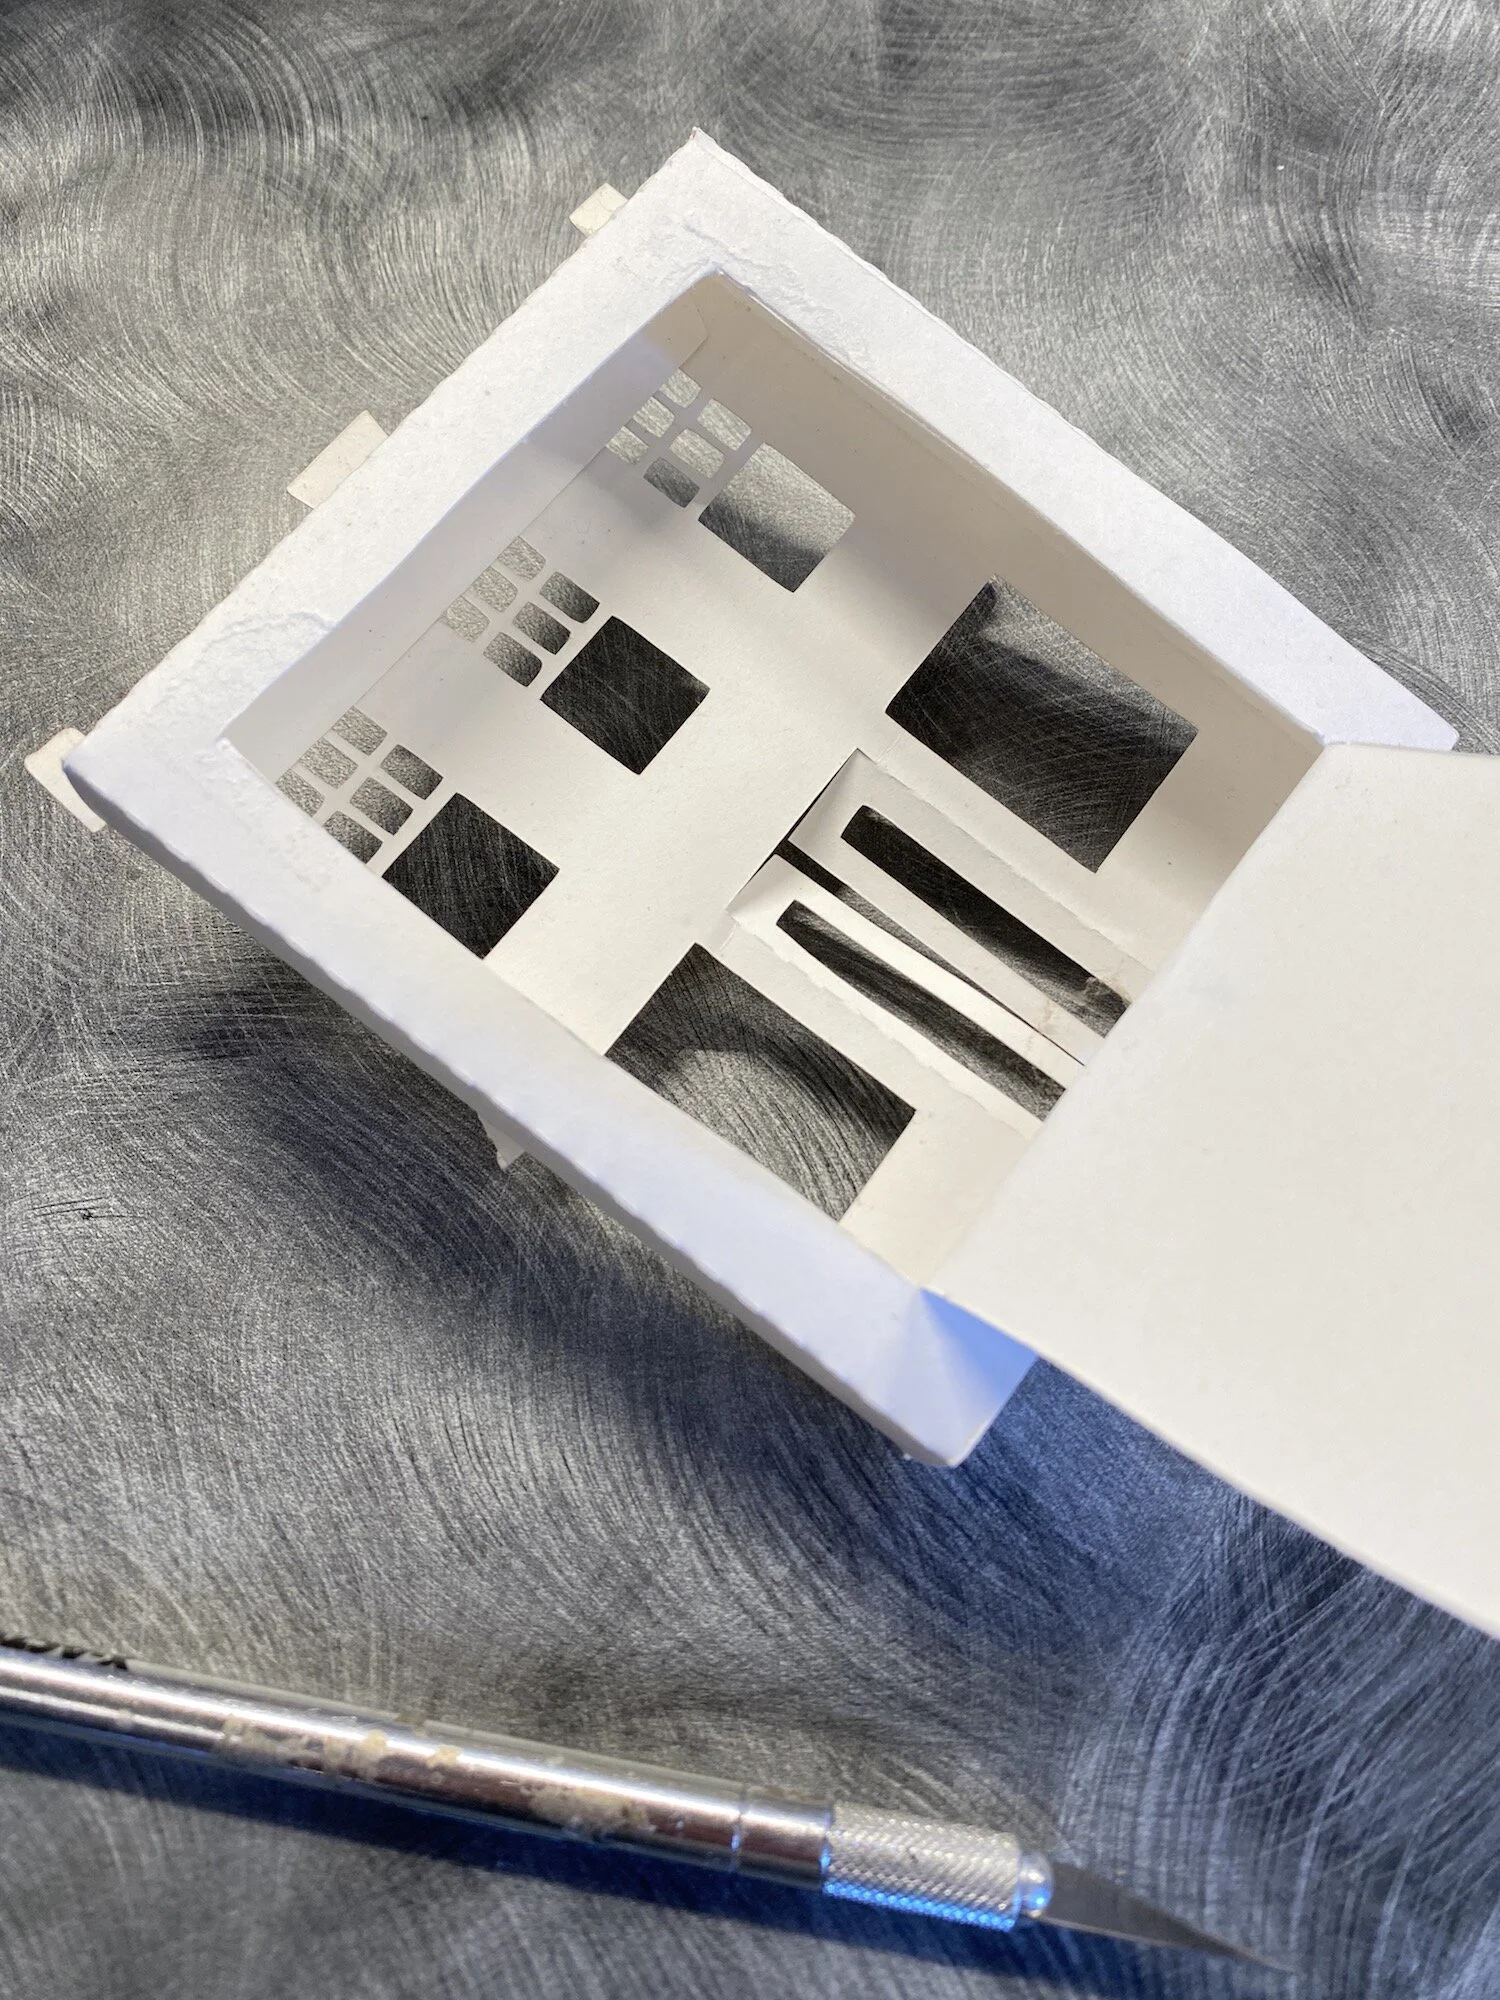
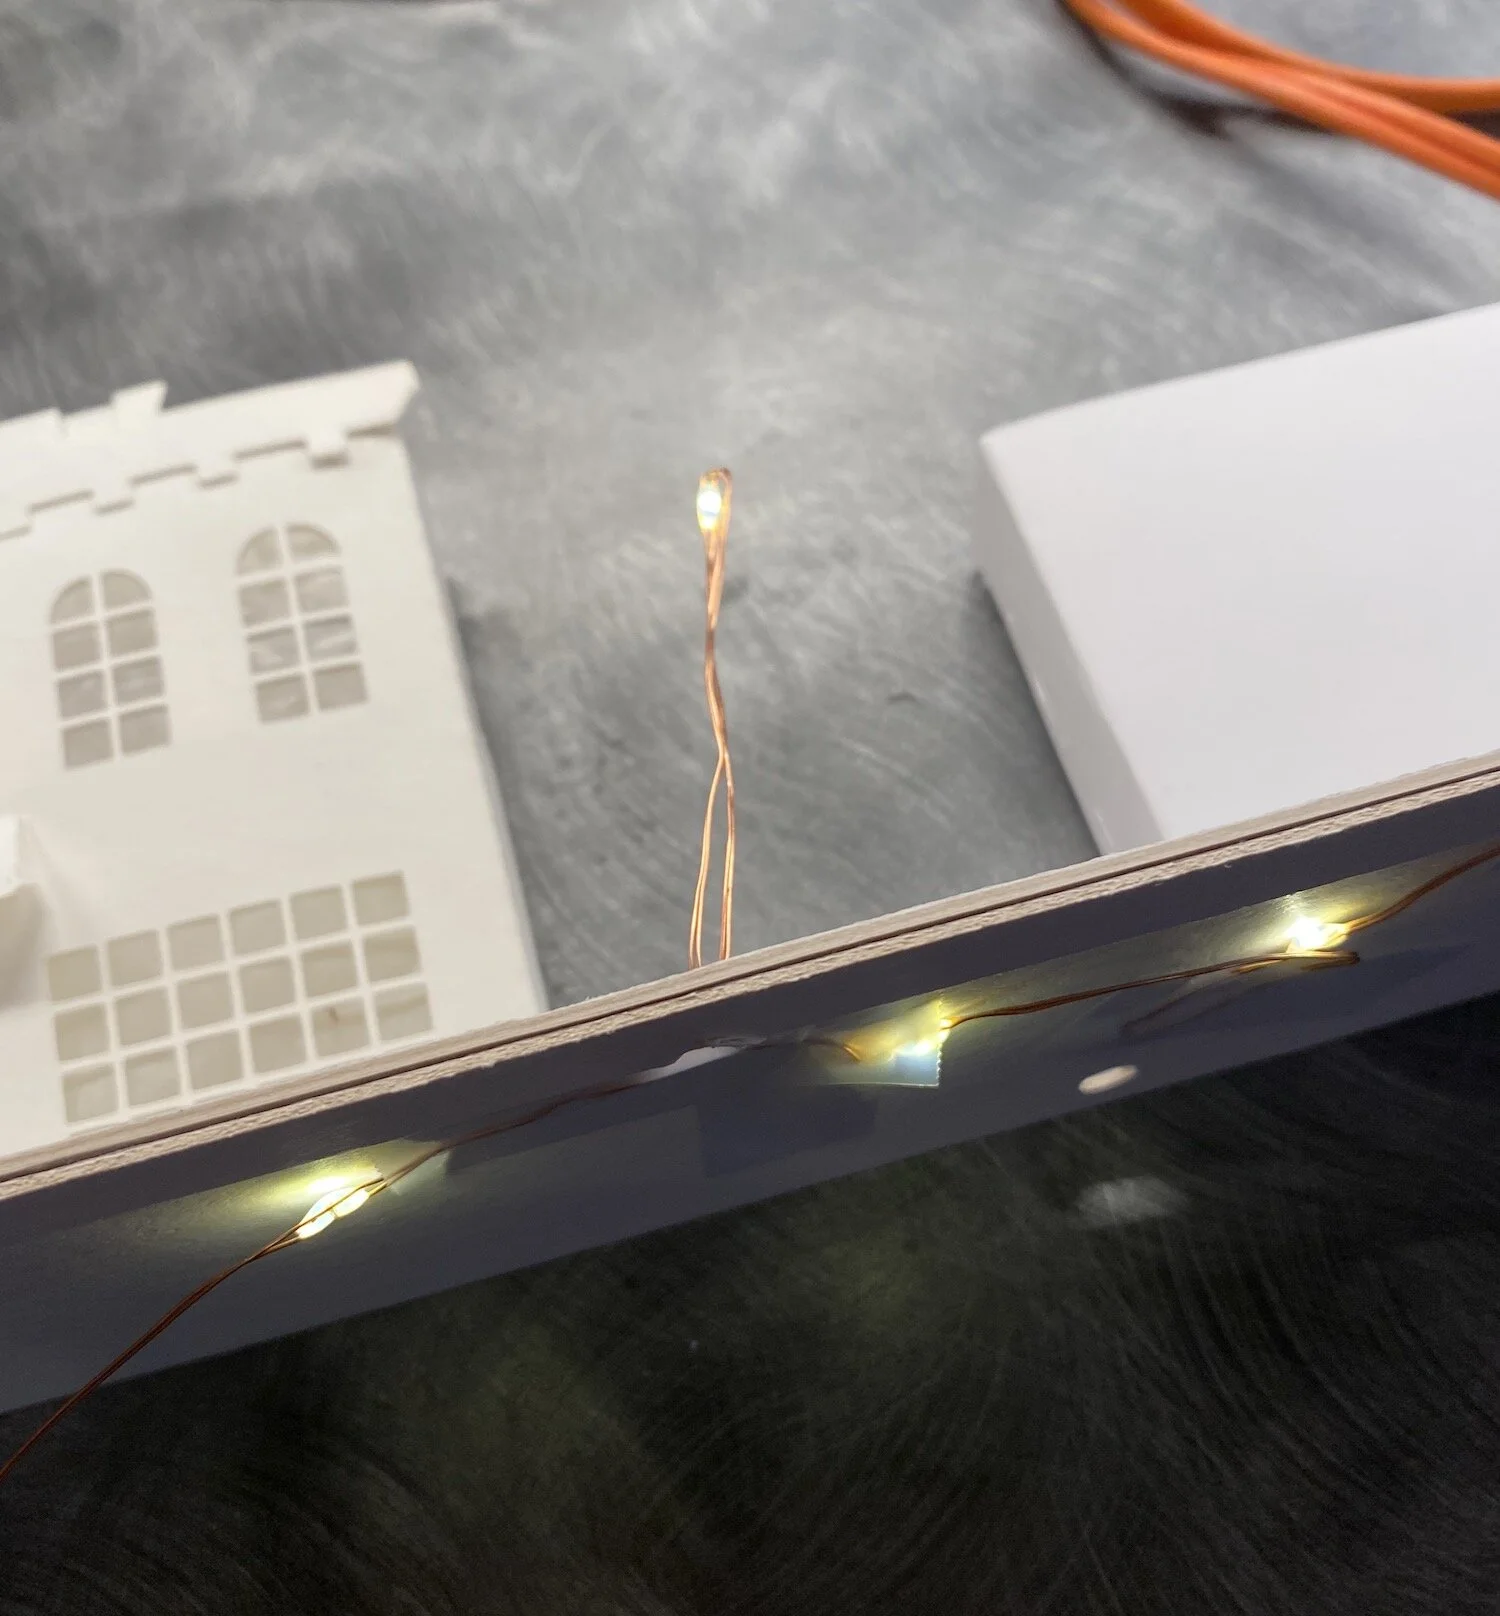
Next you need to figure out the lights. I found each building need about 3 although there are 5 in the tower house. I also needed one for each lamp post, and a bunch end up hidden below as I worked to travel from building to building.
A 50 light string was just enough for 5 buildings and 5 lamps on a 36” ledge. Depending on your layout you made need more. Then you will need to design in additional battery boxes.
To the right is an image of how I bent the wire and inserted it up through the hole. This one would have a lamp post on top. The lamp posts are designed with a chanel up the center. Glide the wire with the light up to the top, glue the post to the mat board and tape the wire in place on the bottom side.
I wired the lamp posts first starting with the end of the string of fairy lights gluing each in place and taping the wire underneath. I often had to tape lights below so the spacing would be correct for a light to be at the top of the lamp post.
For each building I first took pointed tweezers, inserted them into the punched hole in the mat board and up through the bottom of the building “drilling” as I went. This was very effective in getting a hole into each building.
I then threaded 3-5 lights into the hole. The wire went in and out the same hole. I arranged the lights on the back wall and taped into place. Visually it was best if the lights weren’t visible through a window - but hidden of to the side or below.
When I was certain of light location through out the project I tape the backs back in place.
Continue wiring all the buildings. Use tape to hold the wires in place on the bottom. When done it will look something like this (below).

Place your mat base onto the shelf and turn the lights on!
Wow!

Share
I love to see your finished projects. Please send photos to me at marji@3dcuts.com or share your photos on facebook, facebook crafting groups, pinterest and instagram.
Experiment!
This project can be modified in many ways. Share photos of your display in the crafting groups on Facebook, in Pinterest or by emailing them to me - marji@3dcuts.com
To see other Ledge Village displays visit this page on my website - https://3dcuts.com/ledge-village-ideas