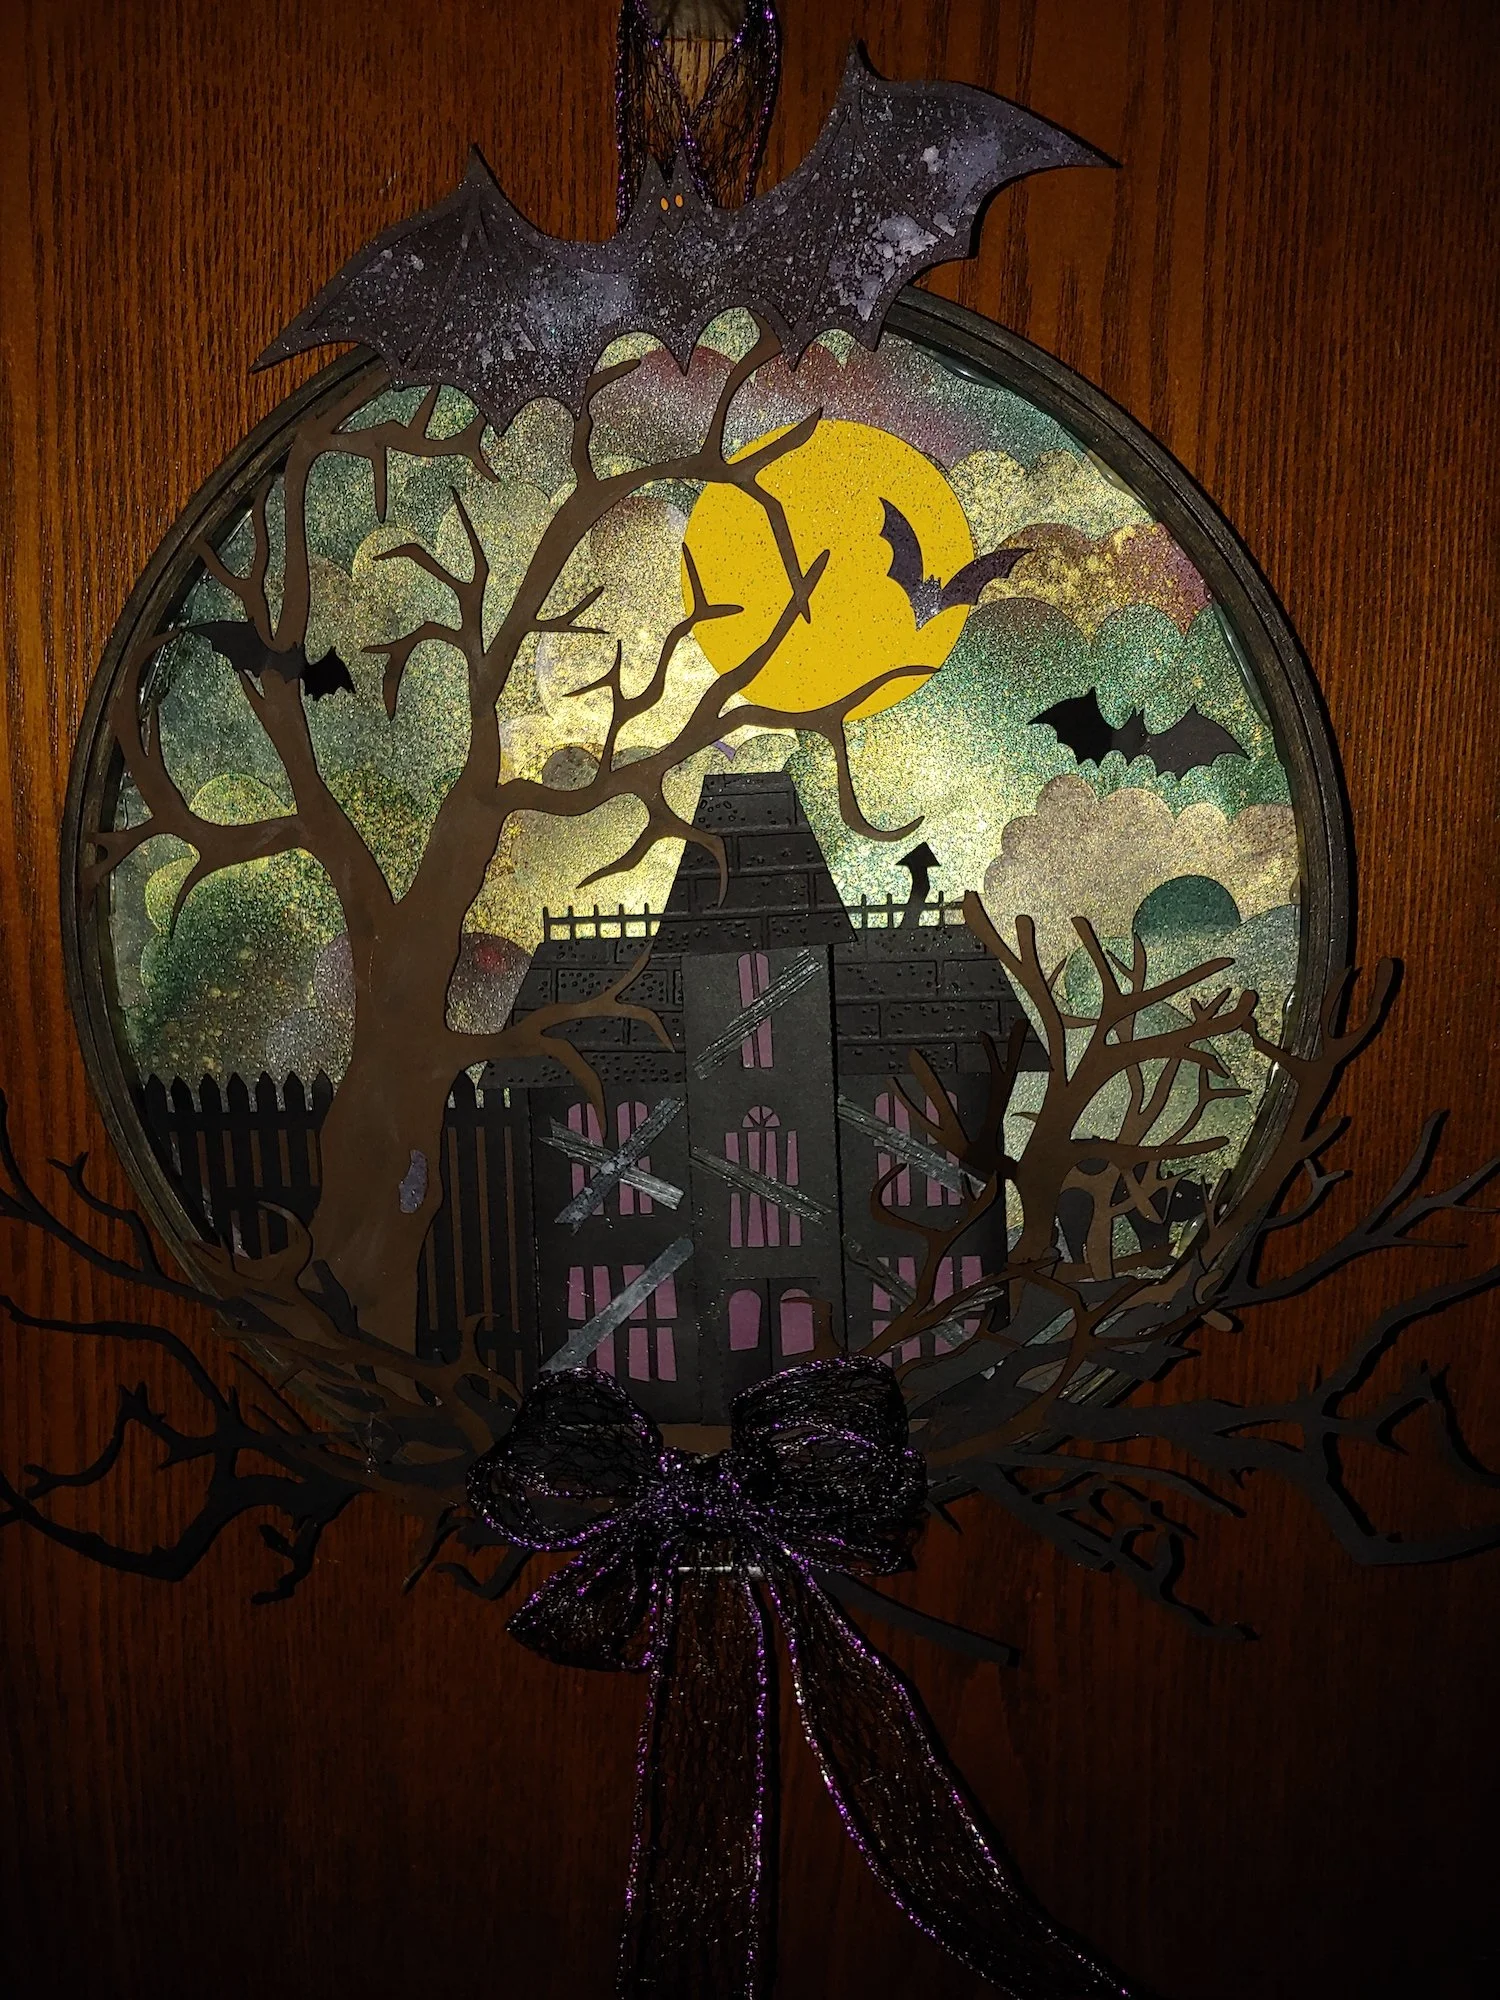
Haunted House Embroidery Hoop - Tutorial
Project Description
Create this spooky Halloween wall decor item from a 12” embroidery hoop and card stock. This easy to cut and assemble project combines a haunted house with scraggly trees and ribbon. LED strings lights can be added for optional illumination. It is card stock applied to a wooden hoop. This can be re-sized to fit other embroidery hoops.
Cutting File available here from 3dcuts.com. https://3dcuts.com/embroidery-hoops/haunted-house
Supplies needed:
Cutting File available here from 3dcuts.com.
12” embroidery hoop from Amazon
Card stock- high quality - I used:
2 12 x 12” Bazzill Blackbird (two black layers)
1 12 x 12” Bazzill Brown
1 12 x 12” Bazzill Pixie Dust (background) (No cut file for this- trace and cut by hand)
1 scrap light yellow (moon)
1 scrap orange (pumpkin)
8.5 x 11 scrap for cloud template
Adhesive - Art Glitter Glue
Hot glue
Ribbon - 36” x 2” black and orange wired ribbon
Silver ink -
Purple distressing ink (optional)
Scotch tape
Orange LED Tea Lights (optional)
Black Satin Spray Paint
Links to supplies on Amazon: All are Affiliate links
12 x 12 card stock shop is where I ordered my Bazzill papers in individual colors. https://www.12x12cardstock.shop
Major Parts Sizes - as download.
Keep grouped for sizing: . Measurements maybe needed if using dxf files. Also check before cutting with Cricut.
Note: Files have multiple pieces. Keep them grouped together for these sizes
Brown Group - as downloaded - 11.35” w x 11.60”h
Black Group 1 branches - as downloaded -11.38”w x 11.11 “ h
Black Group 2- mansion- as downloaded - 11.2514”w x 11.3438” h
Assorted Parts - mixed colors 9.2”w x 7.108”h - separate after importing
Note: Not all software and cutting machine combinations can use the ALL file. Some resize files to fit in a smaller mat area. Import the individual files if your machine has size limitations. I create the ALL file in case you want to re-size everything.
Haunted Hoop ALL 3dcuts.svg - 24.604”w x 23.6462”h
There is also a png file of the moon if you want to do a print and cut on yellow paper.
Layout Notes:
The layout below is here to show you how the files are organized. The above sizes match those groupings in the split files.
Steps for completing the Haunted House Embroidery Hoop:
Special Note: I update the instructions online. Check here for adjustments and additional information.
1. Download the cutting files for your cutting machine here from the 3dcuts.com store. . For those of you that are reading this as a pdf I recommend viewing it online at my tutorials page at this url.https://3dcuts.com/embroidery-hoops/haunted-house . There all the links will be live.
2. Load the files into your cutting software following the steps for your cutting machine.
3. Prepare the files:.
For the Silhouette:
SIL Files from upload SVG purchased from 3dcuts.com:
The SVG files may need to be turned into cutting files. Click here for detailed steps on how to use SVG files on your Silhouette. http://www.3dcuts.com/tutorial-upload-svg-silhouette
DXF files can be opened in the basic edition of Silhouette Design Studio but often require modifications. I recommend using the Designer Edition and using svg files. DXF files do not always maintain file sizes and you may need to adjust according to sizes noted above.
For Cricut Explore: Here is a guide for importing into Cricut Design Space. http://www.3dcuts.com/tutorial-adding-3dcuts-files-to-cricut . Remember to ATTACH files before cutting in Cricut. You should check dimensions before you cut. Design Space occasionally has import issues and sizing gets mixed up. You will not be able to import the background ring because it is larger than 11.5”. Just place your embroidery hoop ring on the card stock, trace and cut by hand.
For Brother ScanNCut: The svg files will need to be transferred to files for your particular machine. You can change SVG files to FCM files at http://www.canvasworkspace.com/ or Google "How to import SVG files into a ScanNCut" for links to tutorials. Some models of Brother Scan N Cut can directly import the SVG files.
Additional Help files: Go here https://3dcuts.com/help for additional help files on downloading and importing your files.
4. Cut the files:
It is best to have good quality card stock and a good blade and clean, sticky mat. I use the Premium blade and the Nicapa mat. For Bazzill Card stock I use the double cut option.
5. Prepare the embroidery hoop.
I used 2x black satin spray paint to spray the hoop. Do this so it has time to dry before assembly.
6. Assembly
The assembly steps are detailed in the video below. Here is the YouTube url https://youtu.be/XLfmLWweSX4 .
Creative Applications:
There is room for experimentation with this file. Here is another variation I did. It is without the LED lights. I also made the background with blue and white stenciled clouds. I filled the windows with orange paper. And the top bat was re[laced with a skeleton.
Send me your photos!
I will post photos of hoops other crafters have made. Send a good photo to marji@3dcuts.com if you have done something interesting with this file. And share in the crafting groups on facebook.
Michelle Please sent me this photo of her Haunted House. She did a very creative thing with the sky. She cut the clouds out and layered them after spraying with a variety of shimmer spray. The effect is spooky! I love it.
Other Embroidery Hoop Designs:
I love this technique of using the wooden embroidery hoop as the structure for wall-decor. I have designed several new projects in this area and hope to do more. Check these out here https://3dcuts.com/embroidery-hoops/ .


