
Can you download 3dcuts.com files to an iPad?
Yes you can download the files to newer iPads. The steps are outlined below.
Place your order in the store and check out. If you need help on this go to my tutorial on how to place an order here.
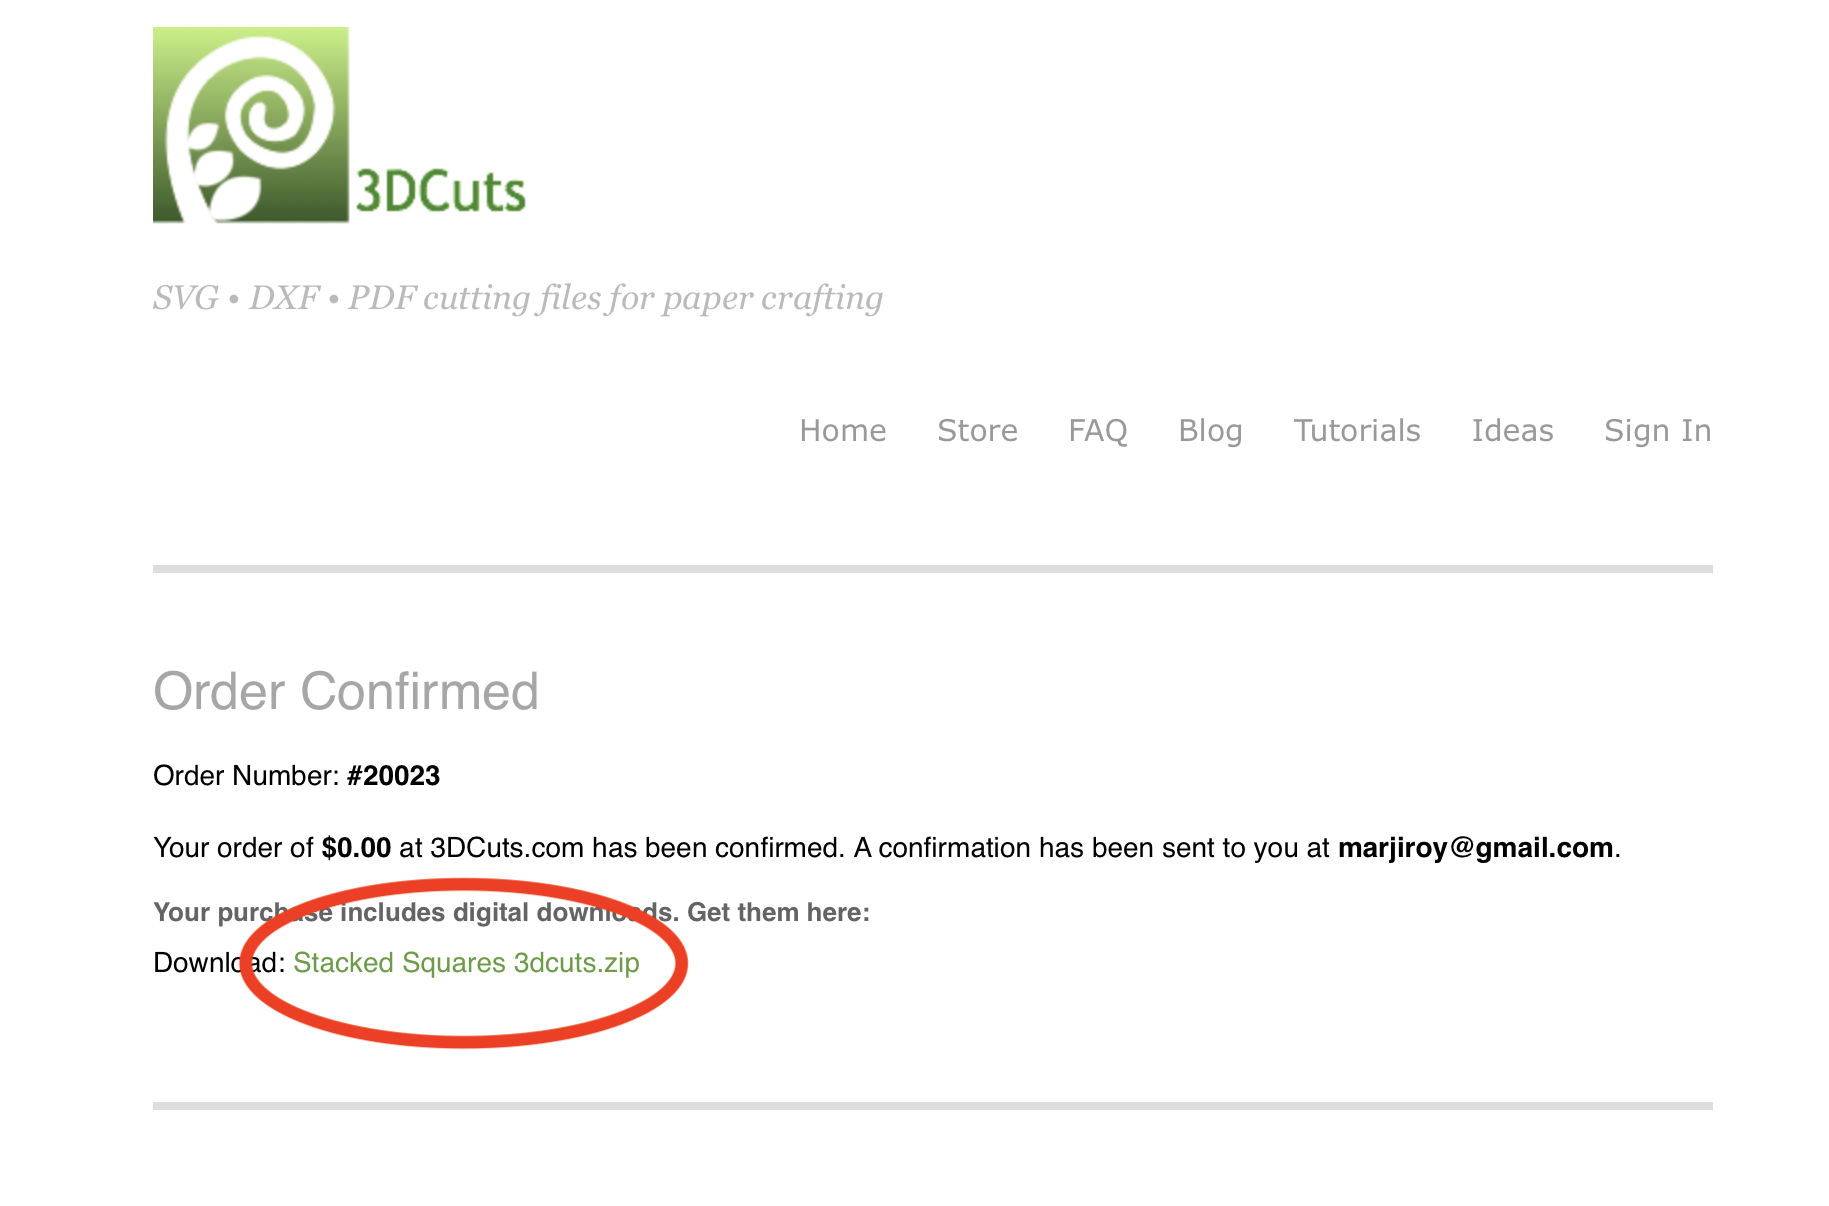
Download the order. Once you have completed the order you will have a choice of two different places to finish the download but please understand - the download link is only good for 24 hours after you first access it. The first download link is right in the order confirmed window after you have completed the purchase. It looks like this and the download link is circled below. You can click on that to proceed with the download OR……
OR…….
You will also automatically receive an email with another download link. You can use this one if you want to download the file later on your computer or home device.
That will look like this and the download link is circled.

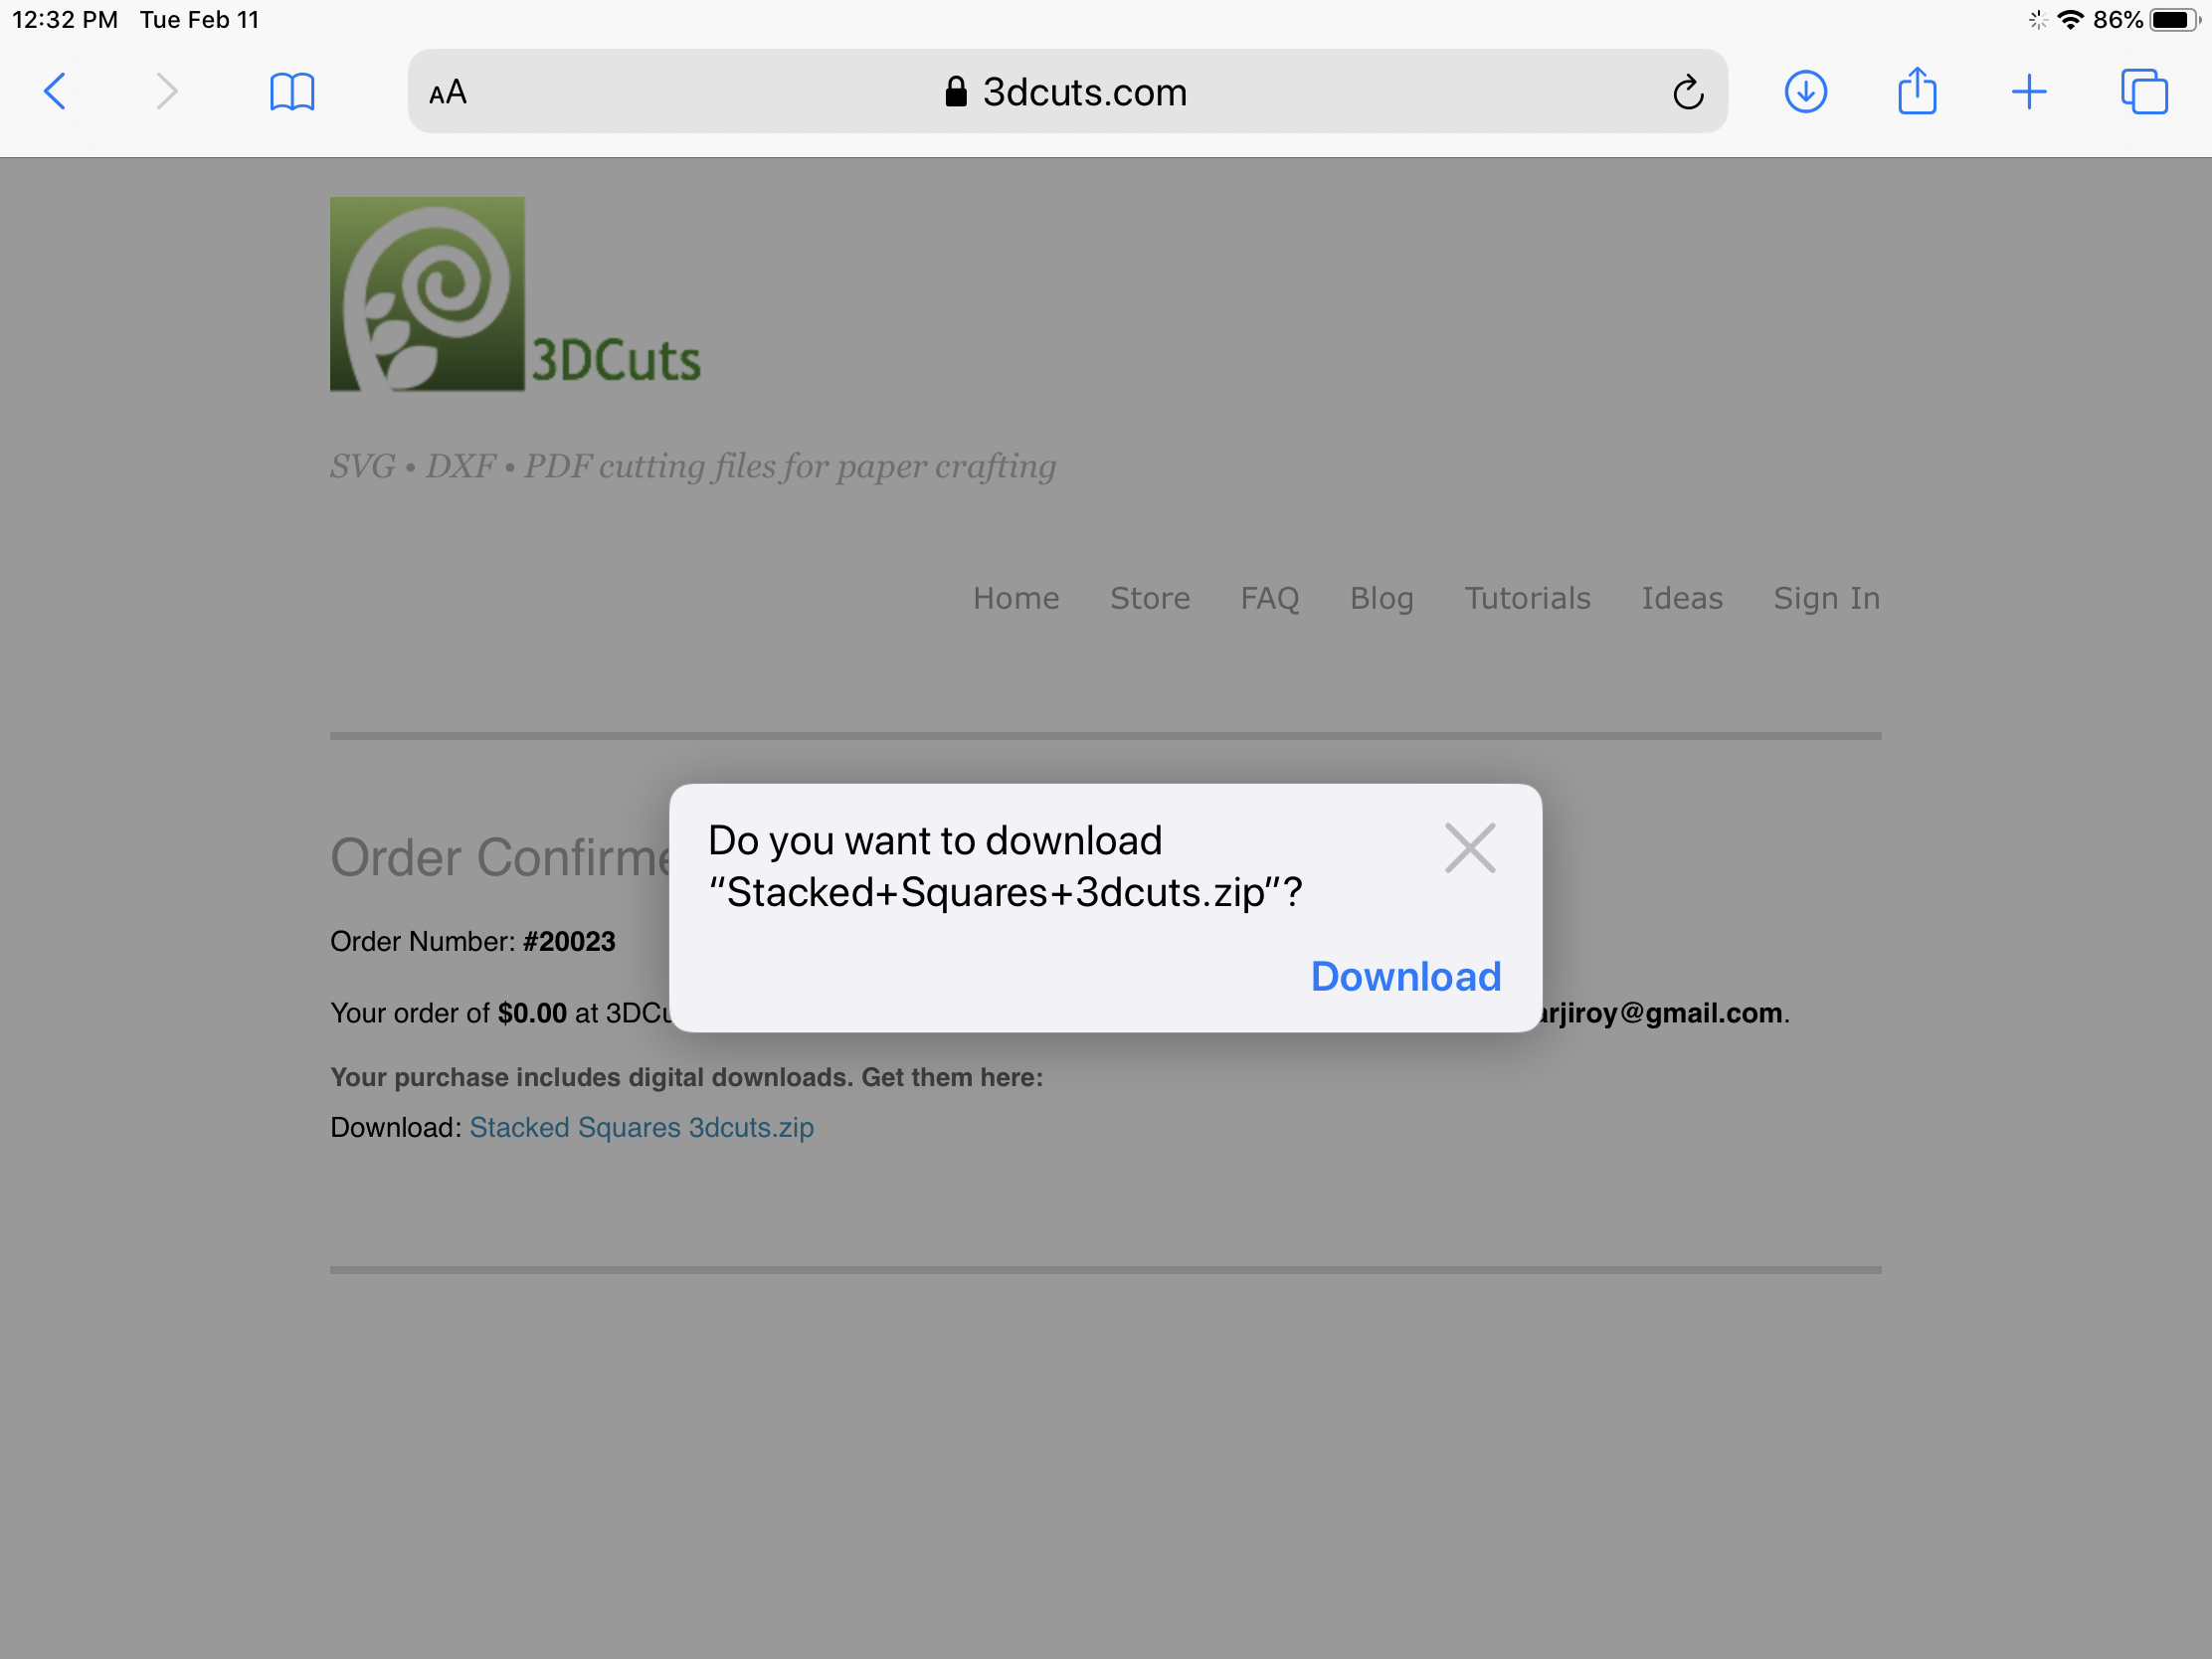
When you click on this link on an iPad the zipped file will be downloaded to the location you have your iPad set to save. It might be an iCloud account, a dropbox account or the Files folder. You will be asked if you want to download the file.
Click on Download.
The file will then download to your device.
3. Located the Zipped file on your device.
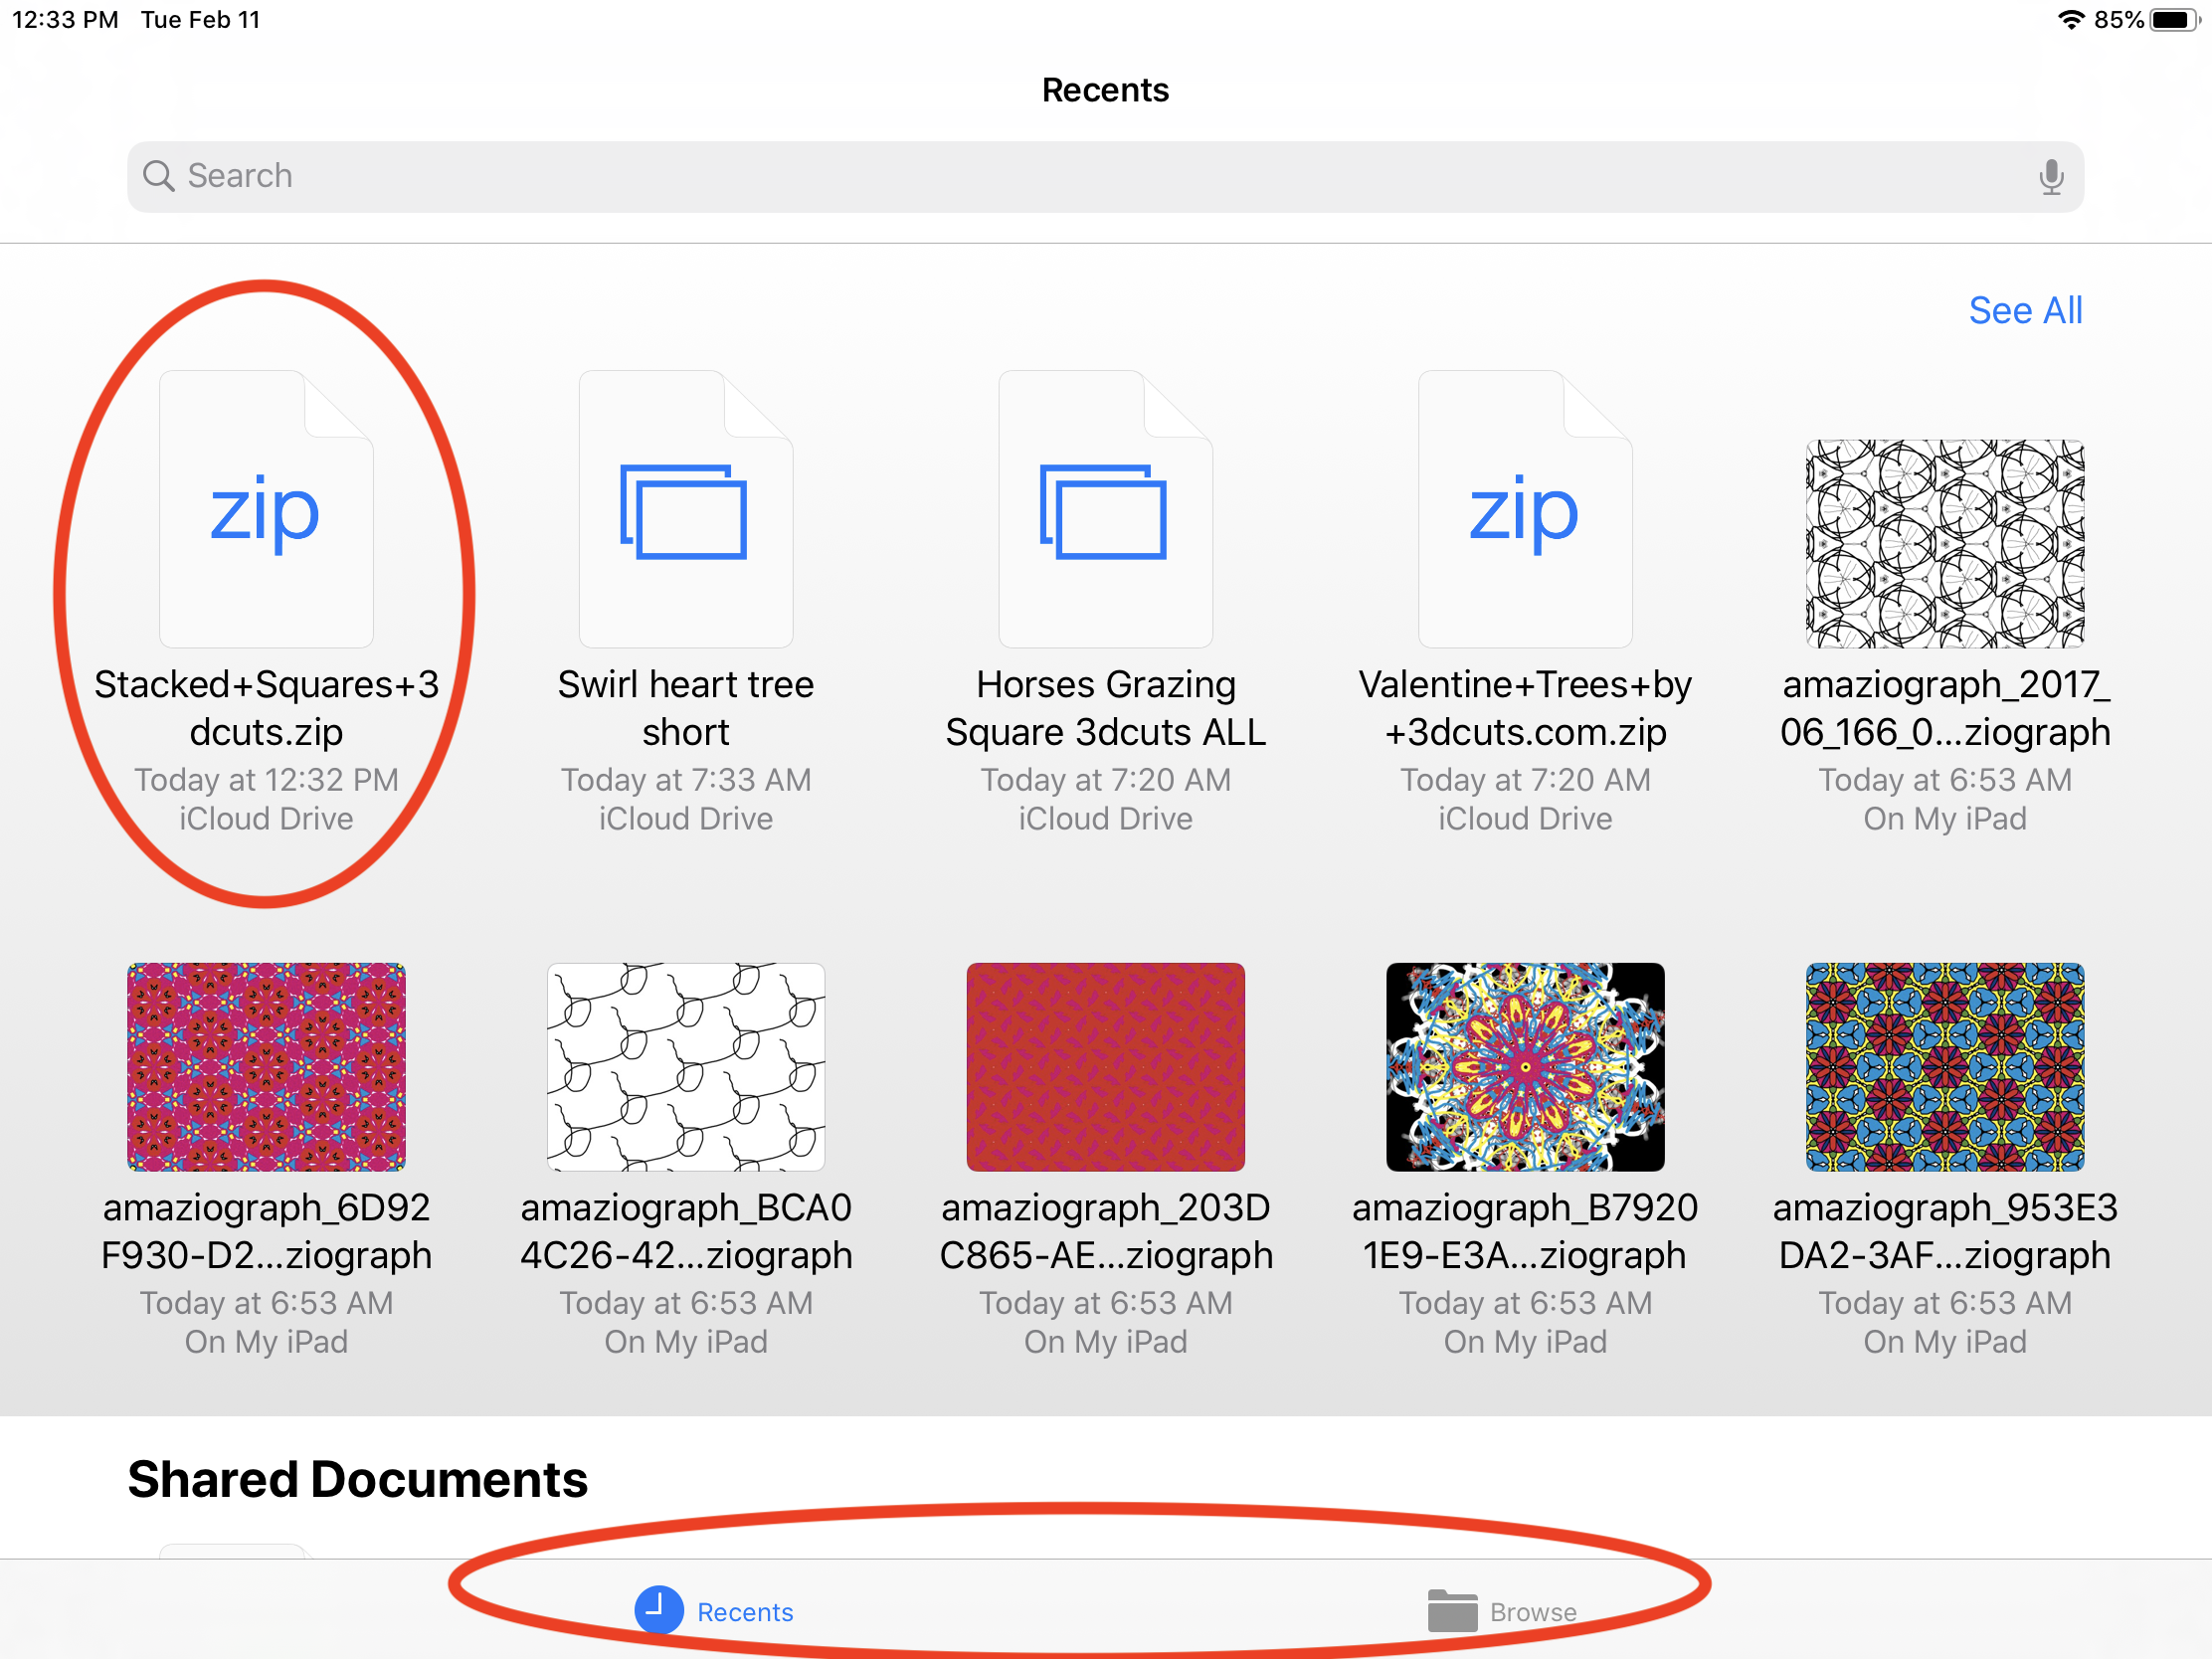
Open the location where your files are stored. For me I searched in the App search bar for Files and that brought me to the FILES Folder. Inside that I could see the Zipped file. For this demonstration I am downloading the Stacked Squares 3dcuts file. You see if below circled in red.
4. Switch to Browse Mode
Also note the Recents and Browse at the bottom of the screen. I am currently in Recents. I know this because it is blue. It appears that unzipping does not work in this view currently. You must click on BROWSE to be in Browse view in order to unzip. Browse is circled in red below.
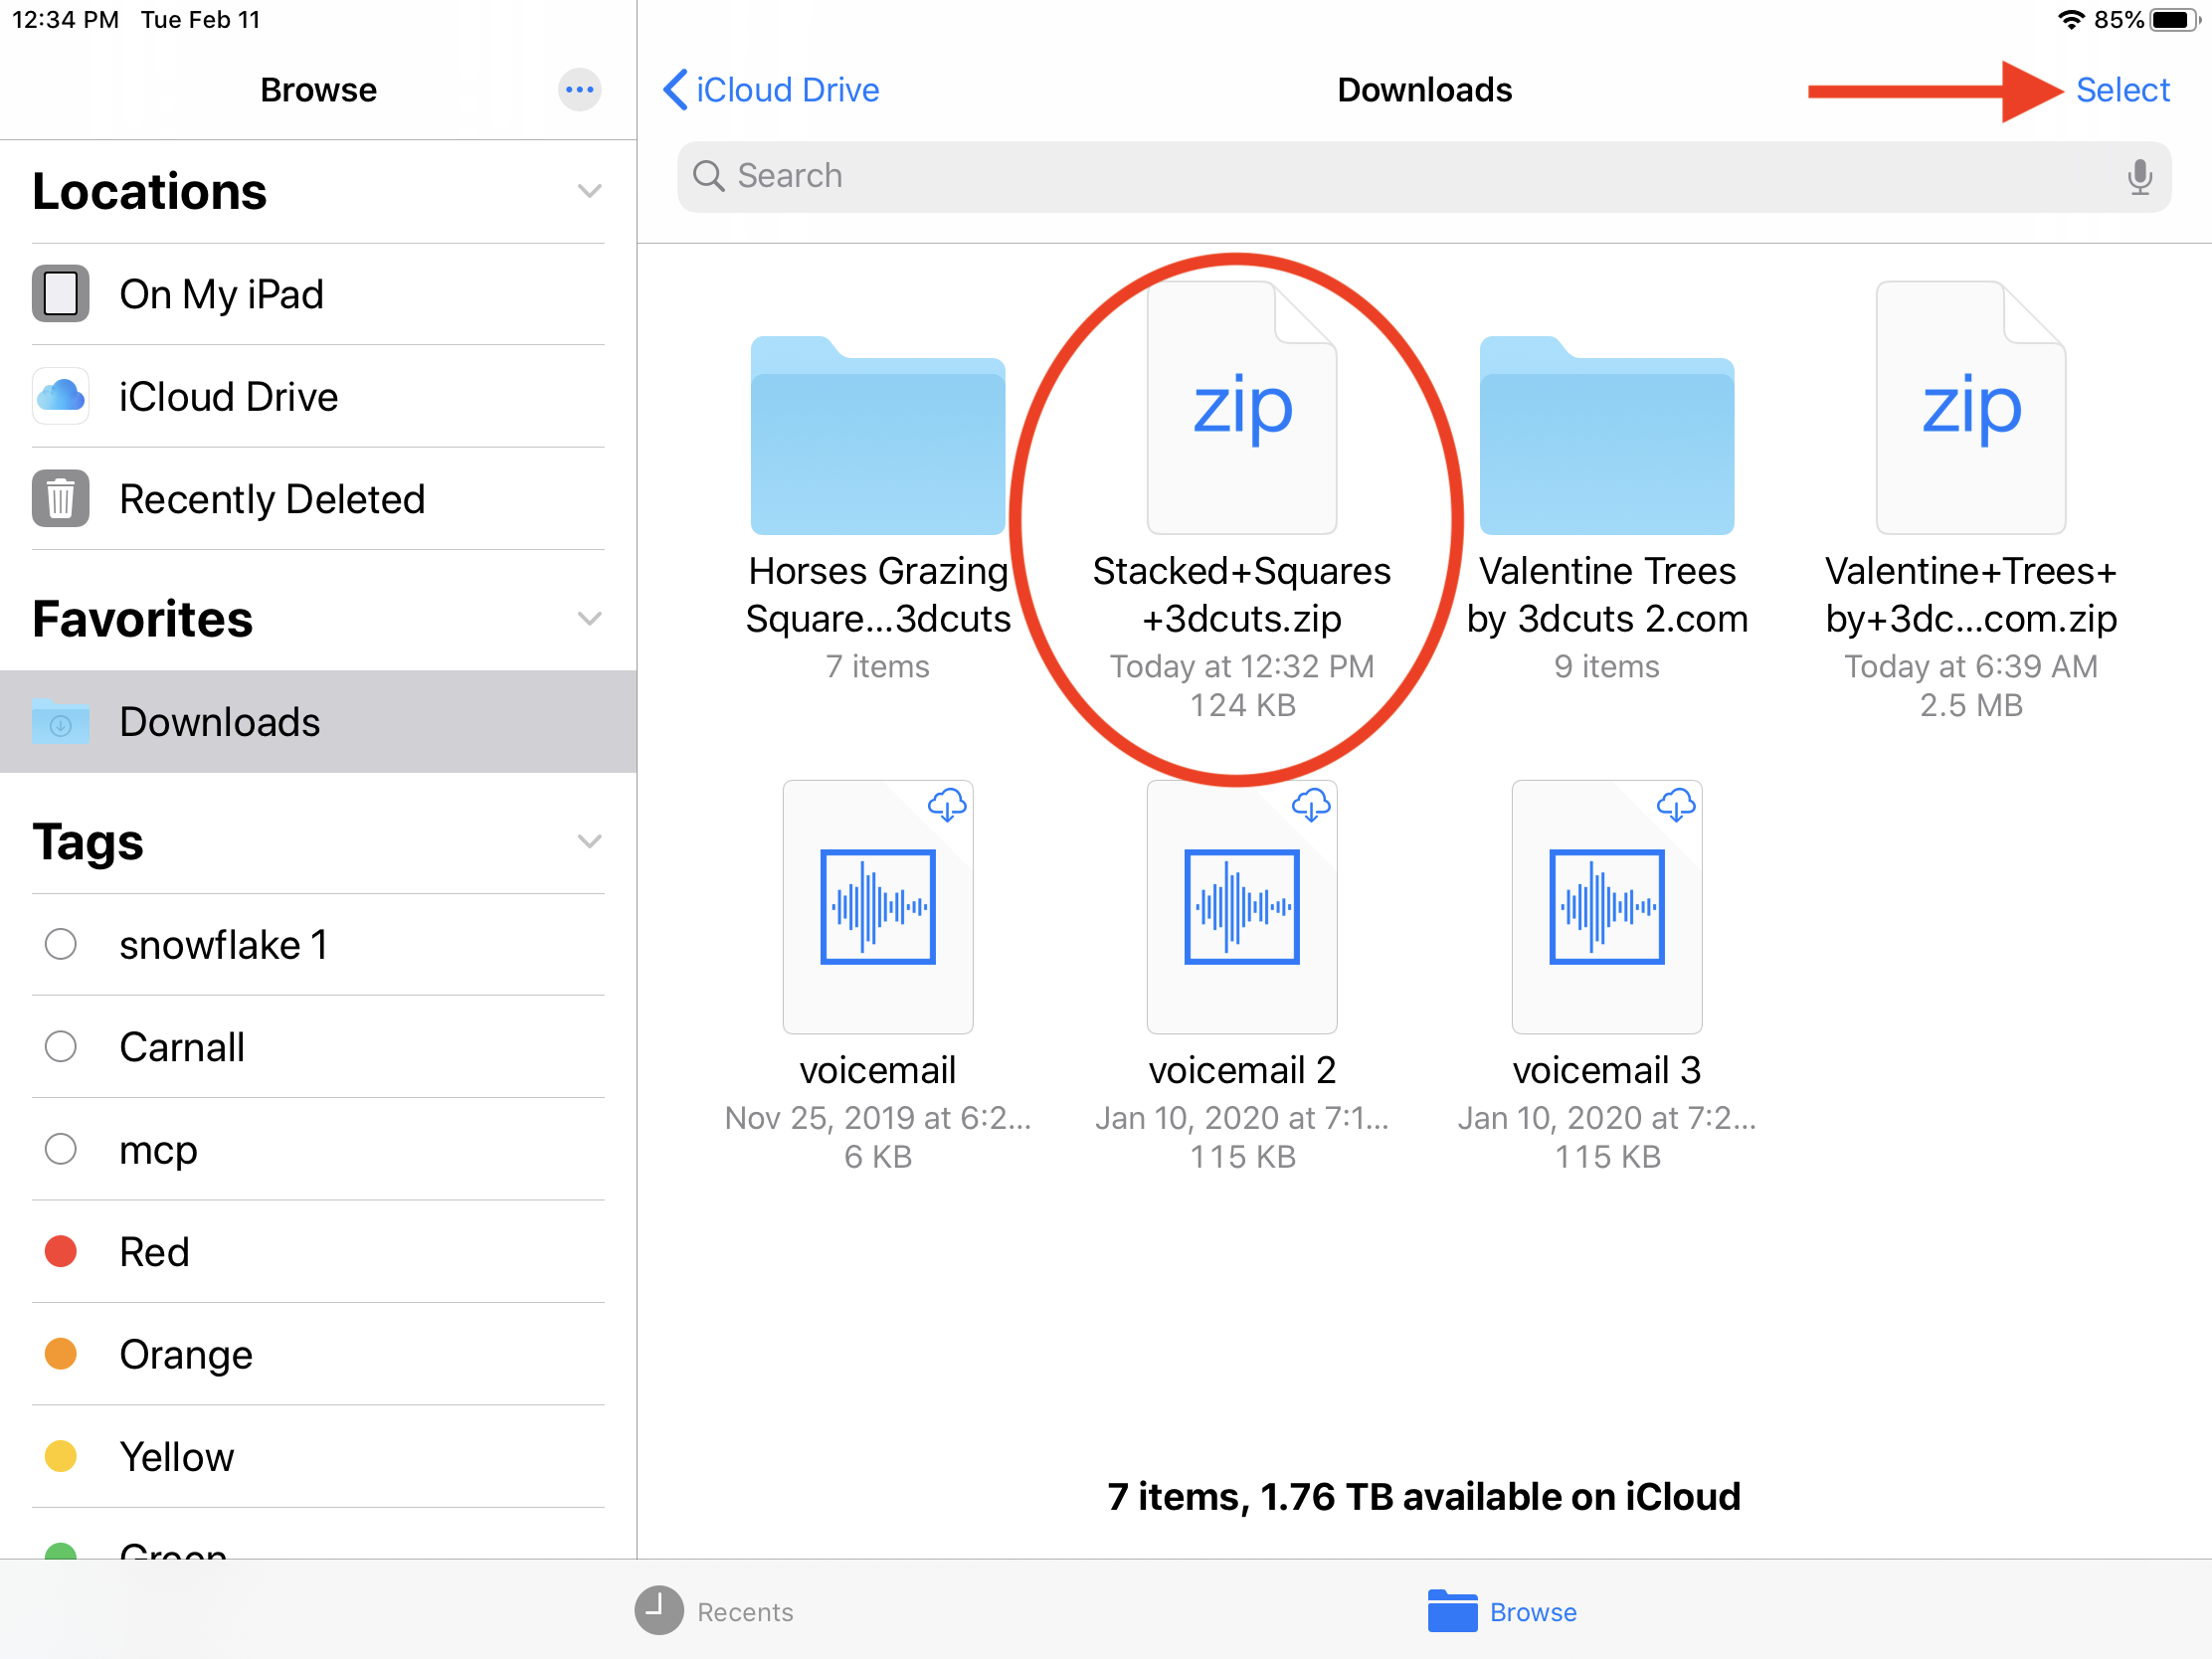
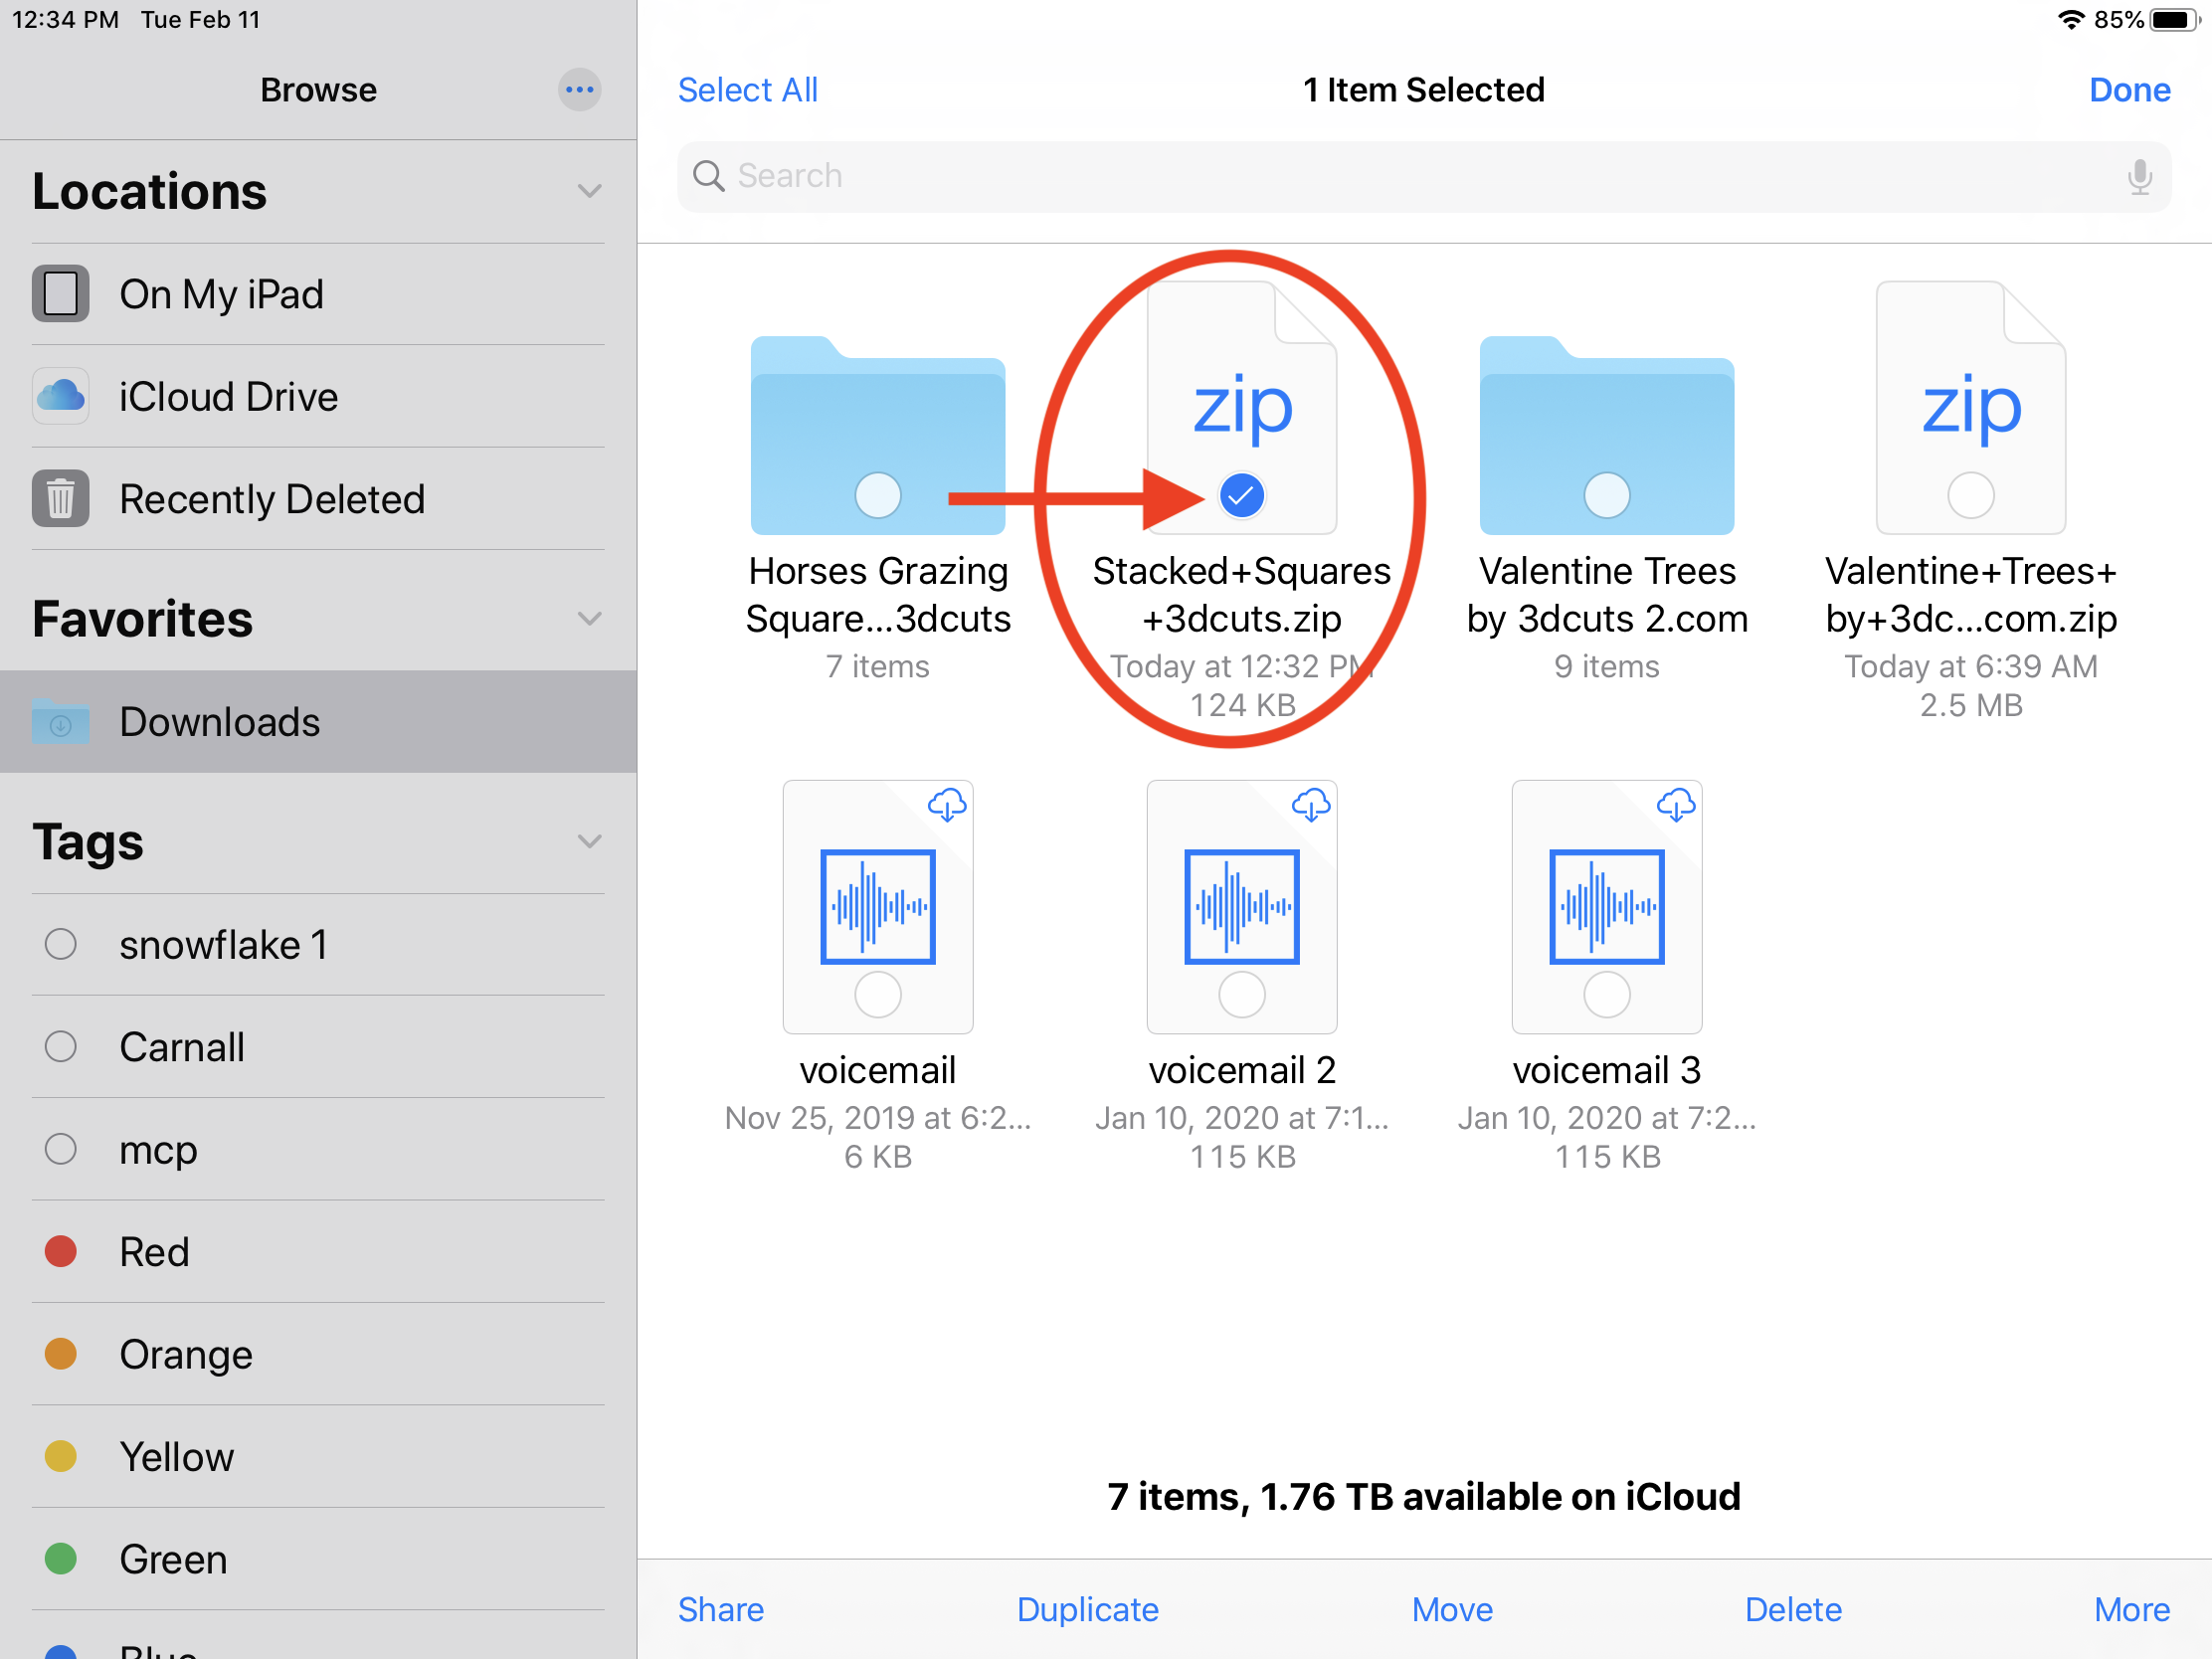
Located the Zipped file in Browse mode. Some of the images will have changed and the organization will have changed. You might need to scroll to find it. My zipped file is circle in red below.
5. Select the file.
You need to SELECT this file. First Click on the SELECT button in the upper right corner (bye red arrow in my diagram).
After clicking on SELECT all the items will have empty cycles on them. Click in the empty circle on the file you want to unzip. A check mark will appear to indicate you have selected it.
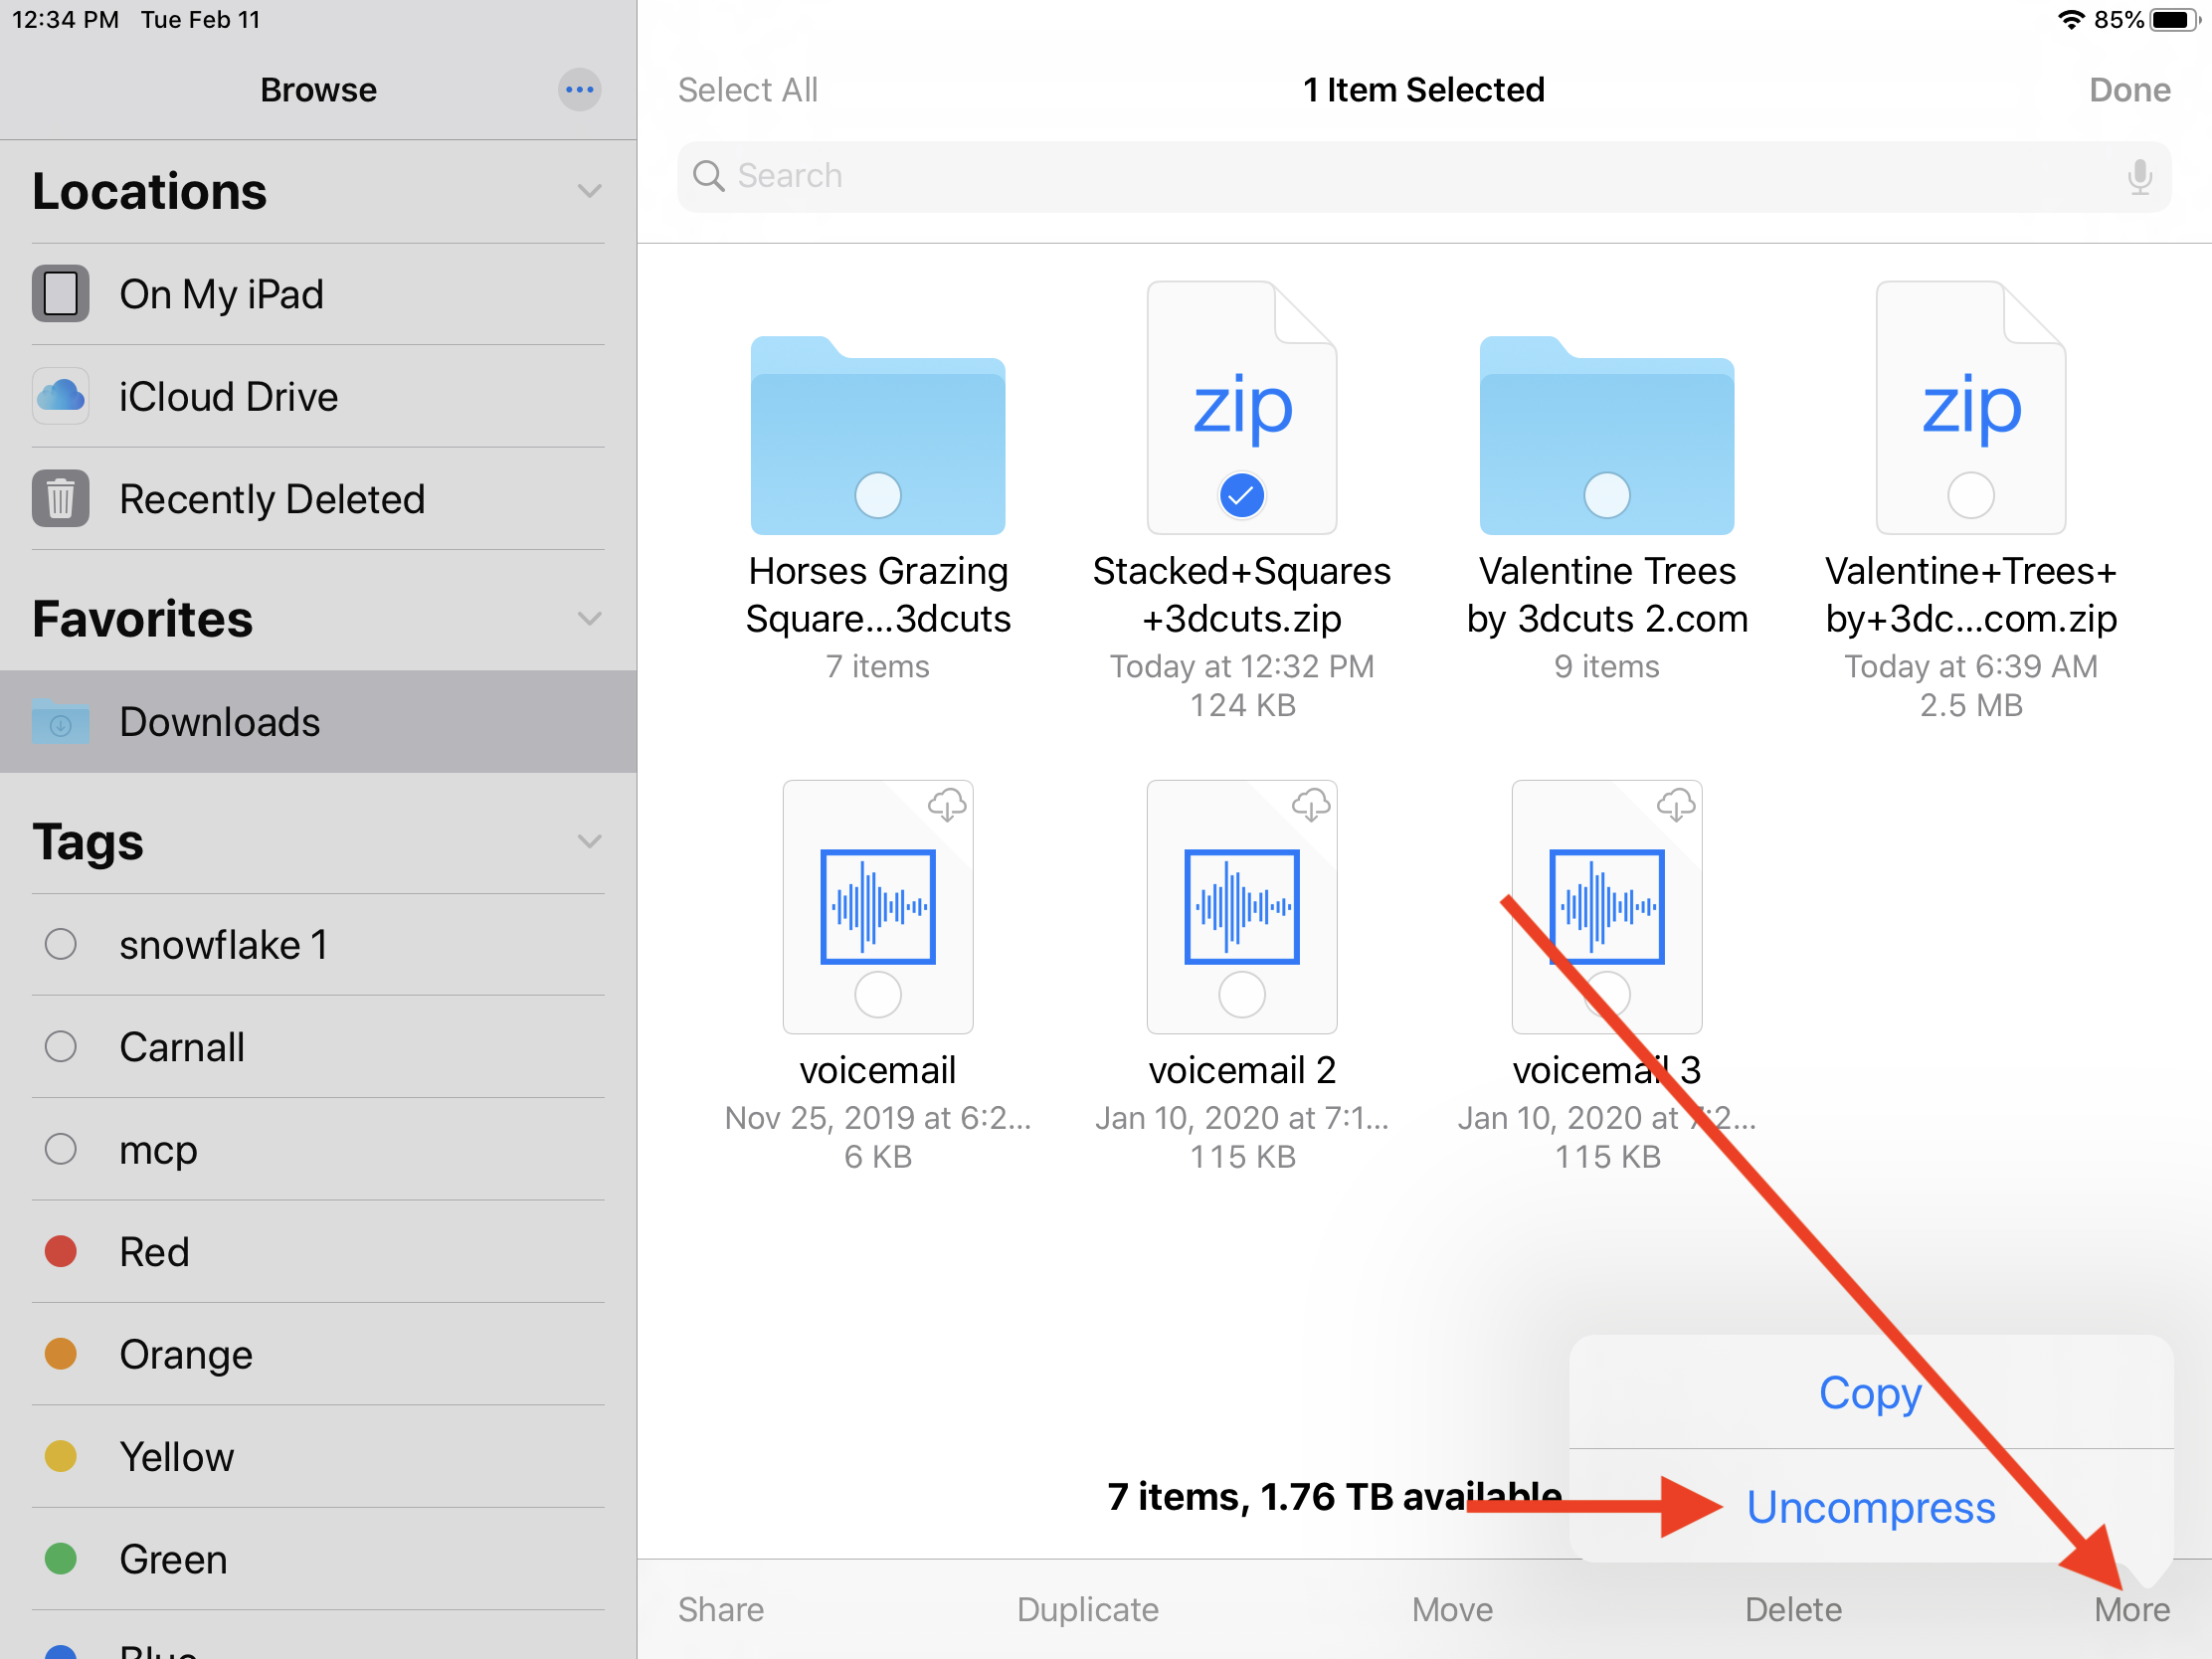
6. Unzip the file.
With check mark still on the file, look for the MORE menu in the lower right. Click on that and select UNCOMPRESS. Uncompress is another work for unzip.
The Zipped file(circle in YELLOW) will create an unzipped folder (circled in RED). You do not need to save the zipped folder although you might want to incase your working file gets lost or corrupted further on down the road.
The folder is now what you will work with. Once it is unzipped you can open Cricut to import in the Design Space software but before you do check out the contents of the folder.

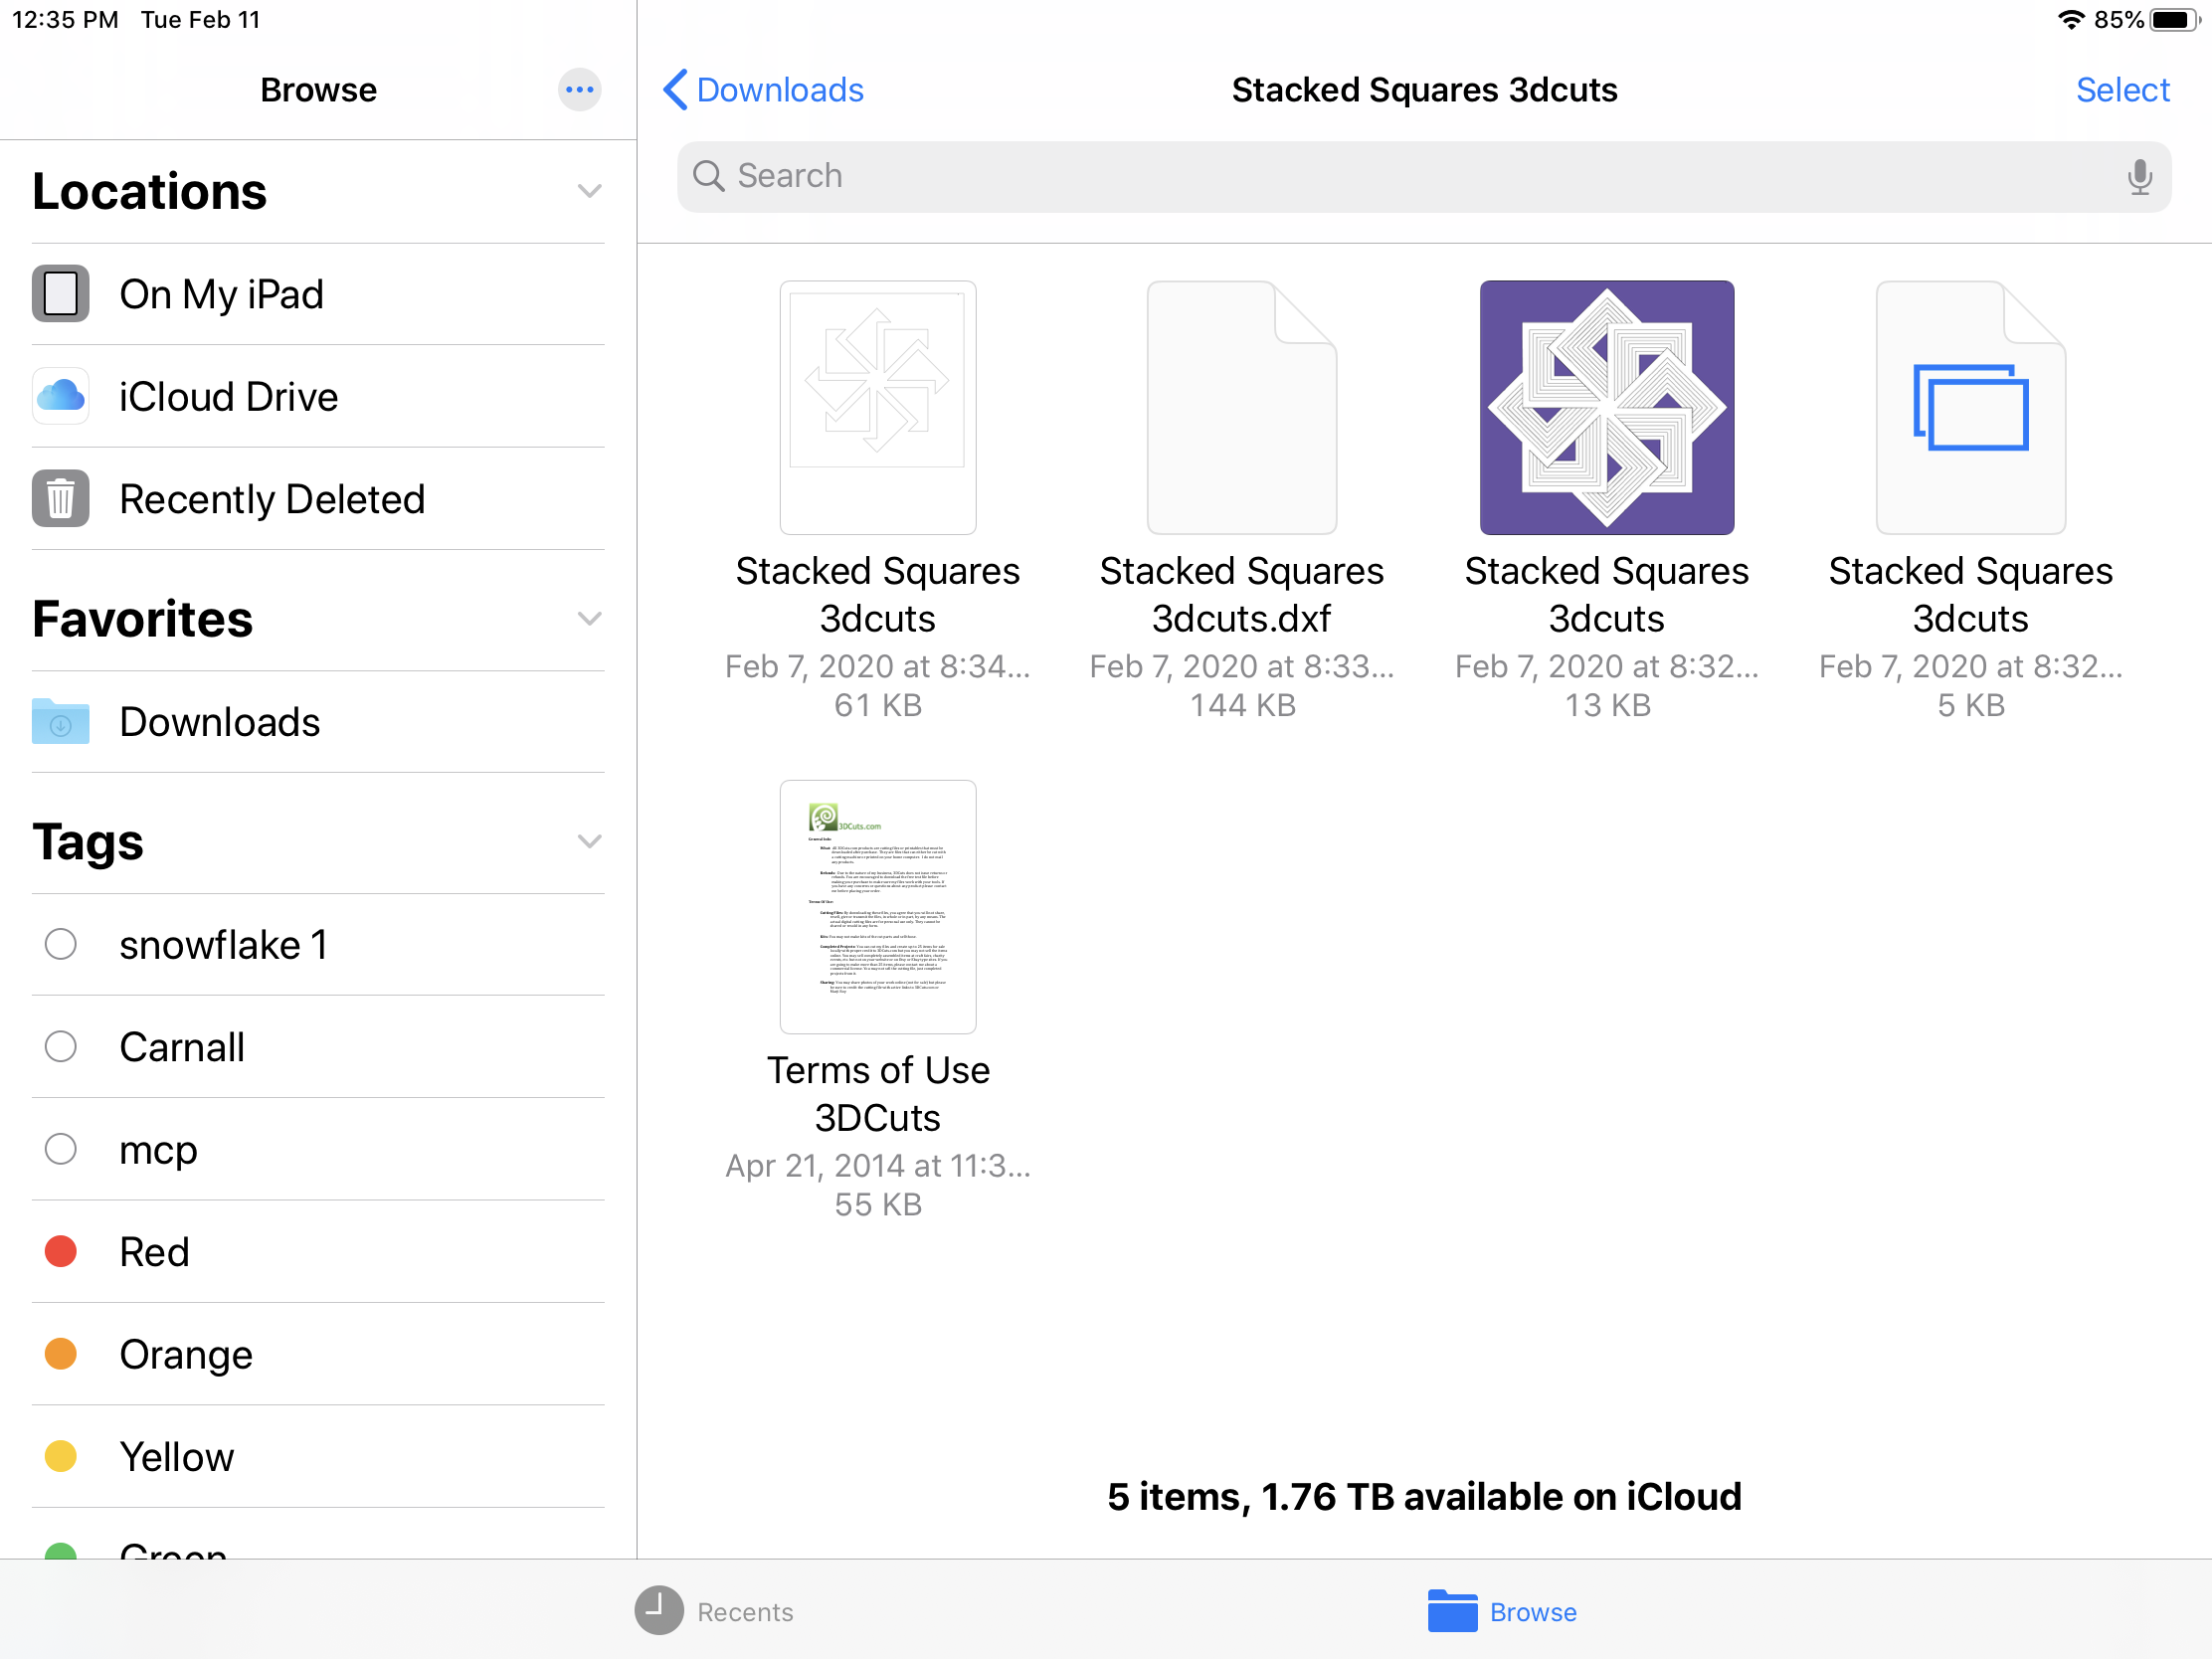
Double click on the folder to open it. Every project will have different items in here and you need to understand them all.
In the first row you see 4 files. Three are named Stacked Squares 3dcuts. They do not look alike because the are all different file formats. I do not know why iOS does not show the file format extender but you can find it out. I’ll explain how below. First let me explain the different formats.
The first one is a PDF file. You use this if you don’t have a cutting machine and you are going to print the file and cut by hand.
The 2nd one is a dxf file. It does have its extender. This one gets used by people with a Silhouette with only the BASIC edition of Design studio. Be careful using this file because sizing isn’t always maintained.
The 3rd file is a PNG file. This is just and image.
The last file here with the two blue boxes is the svg file.
There is also a pdf with Terms of use and sometimes there will be a pdf with assembly instructions although the best ones are online here.
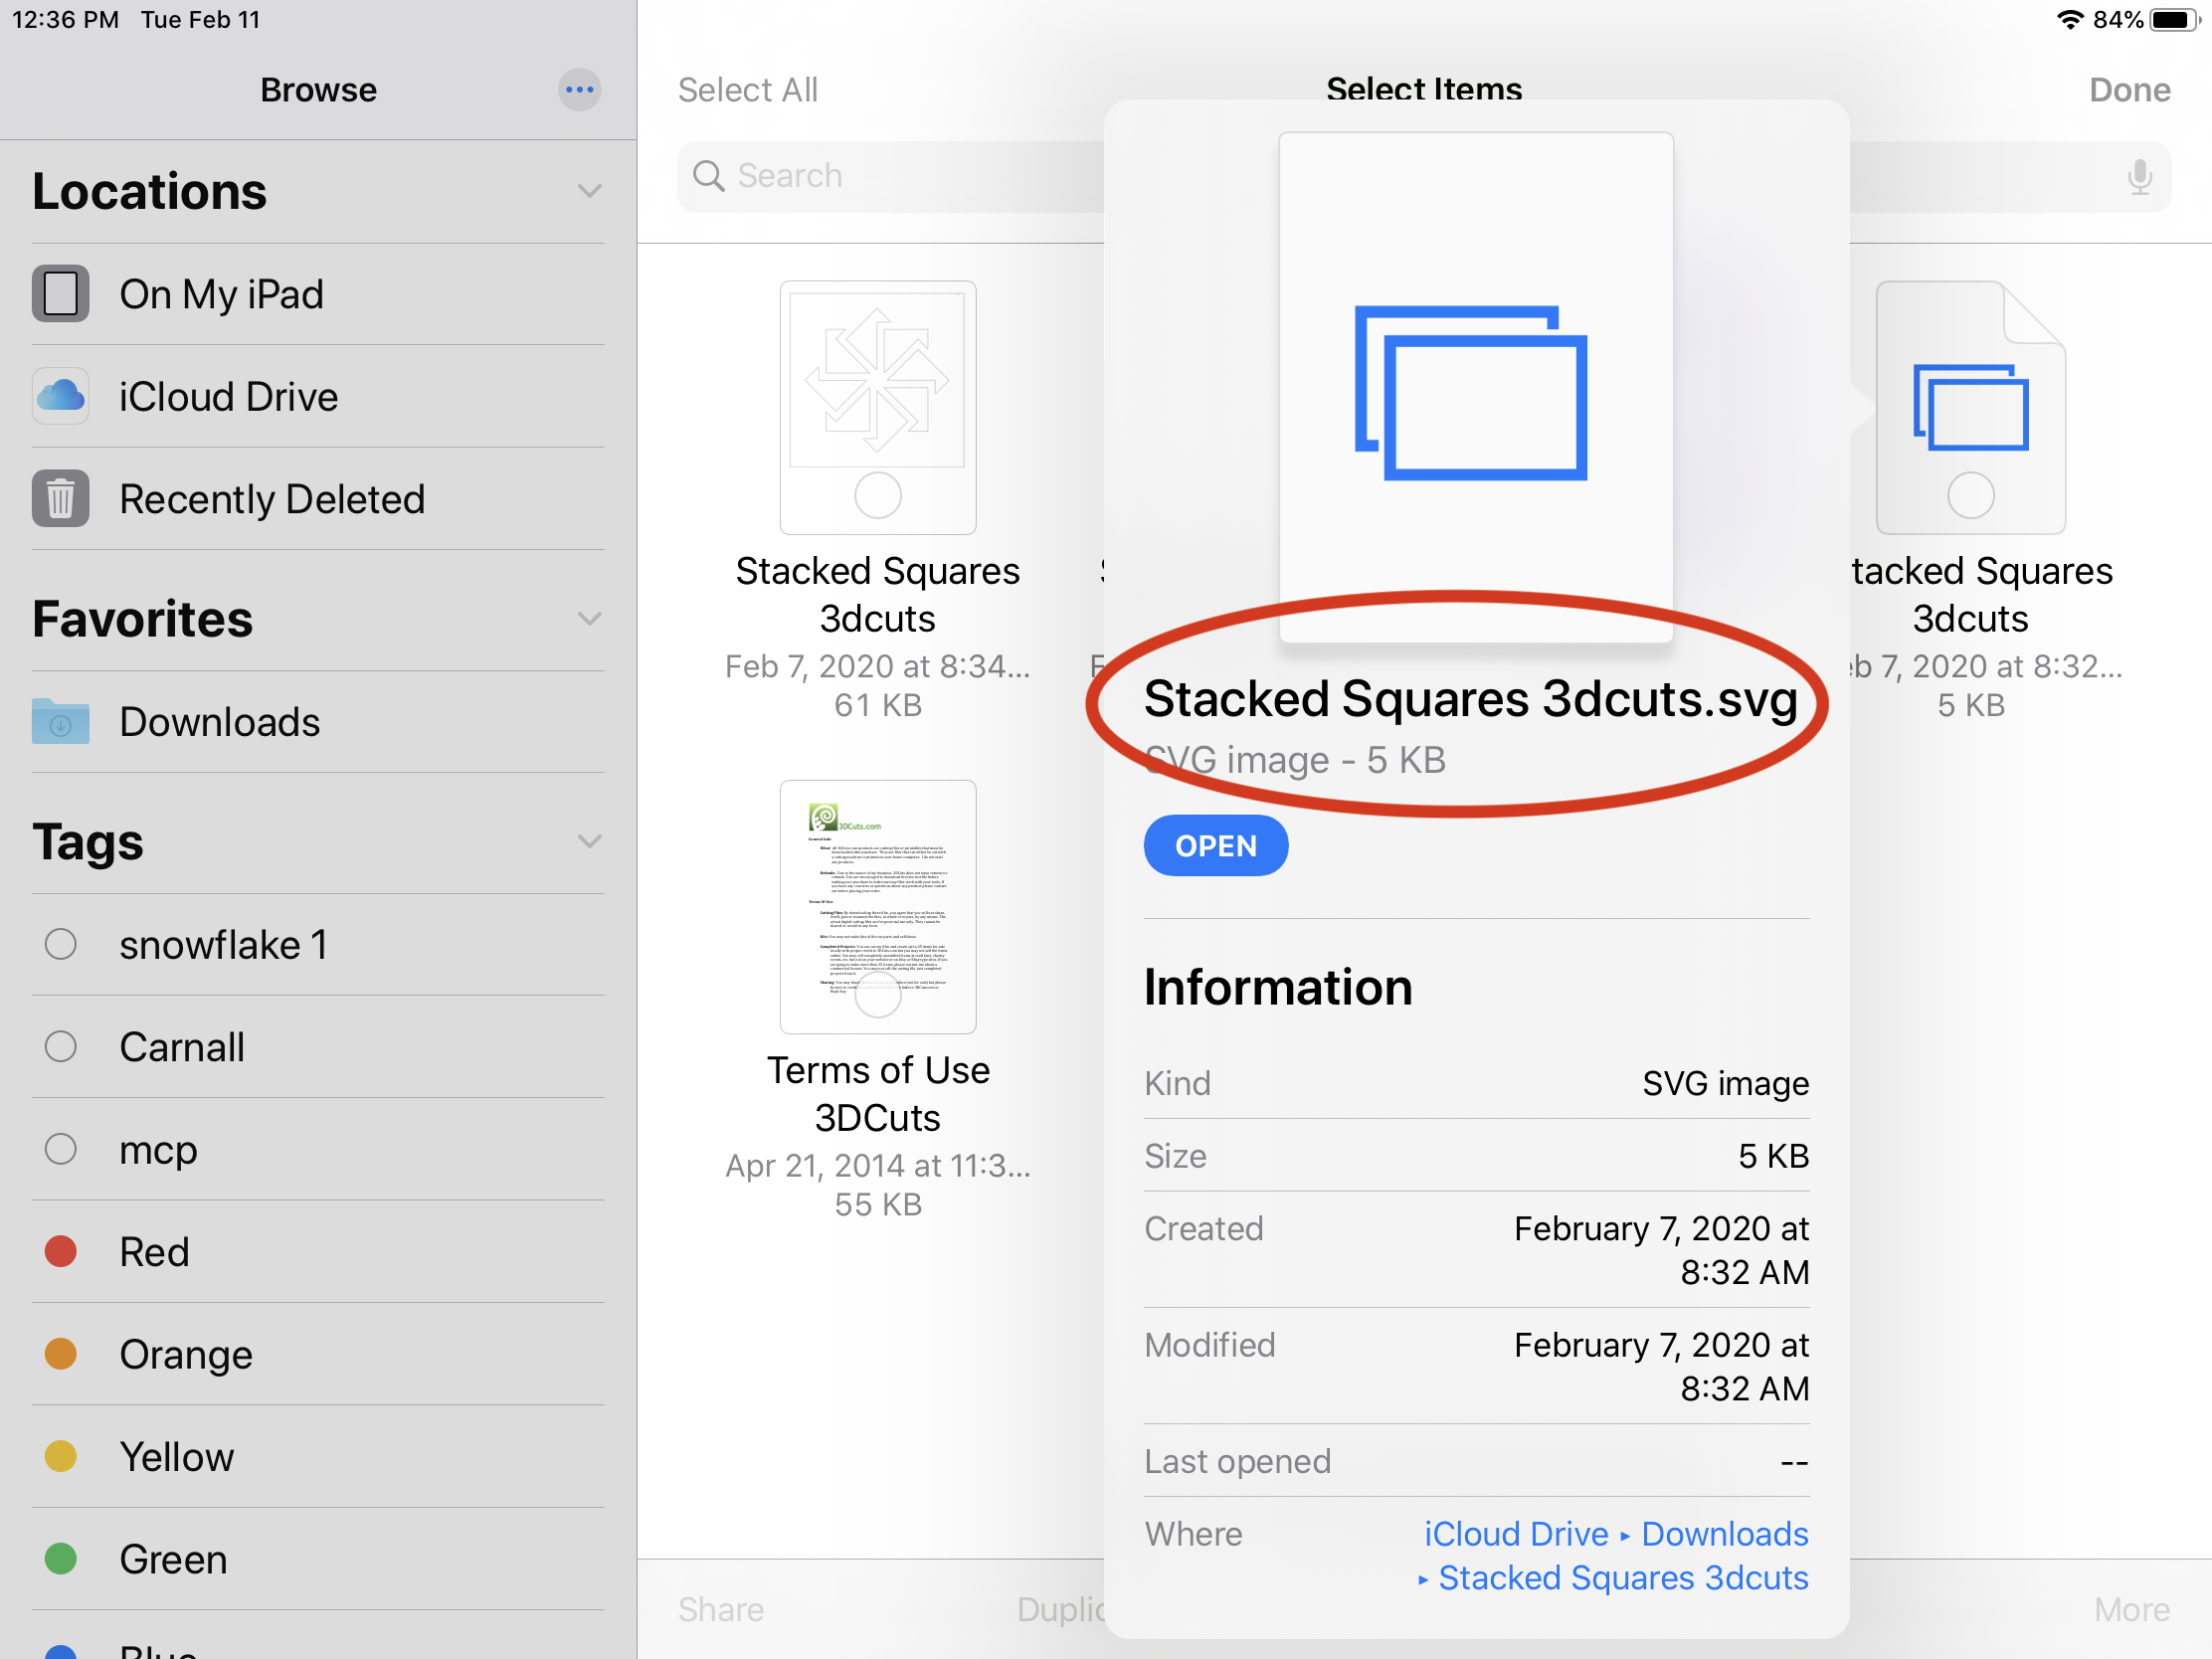
Do determine what each file is you can get more info by placing your finger on the file and holding. A pop up menu appears and one of the items on the list is INFO. Select it.
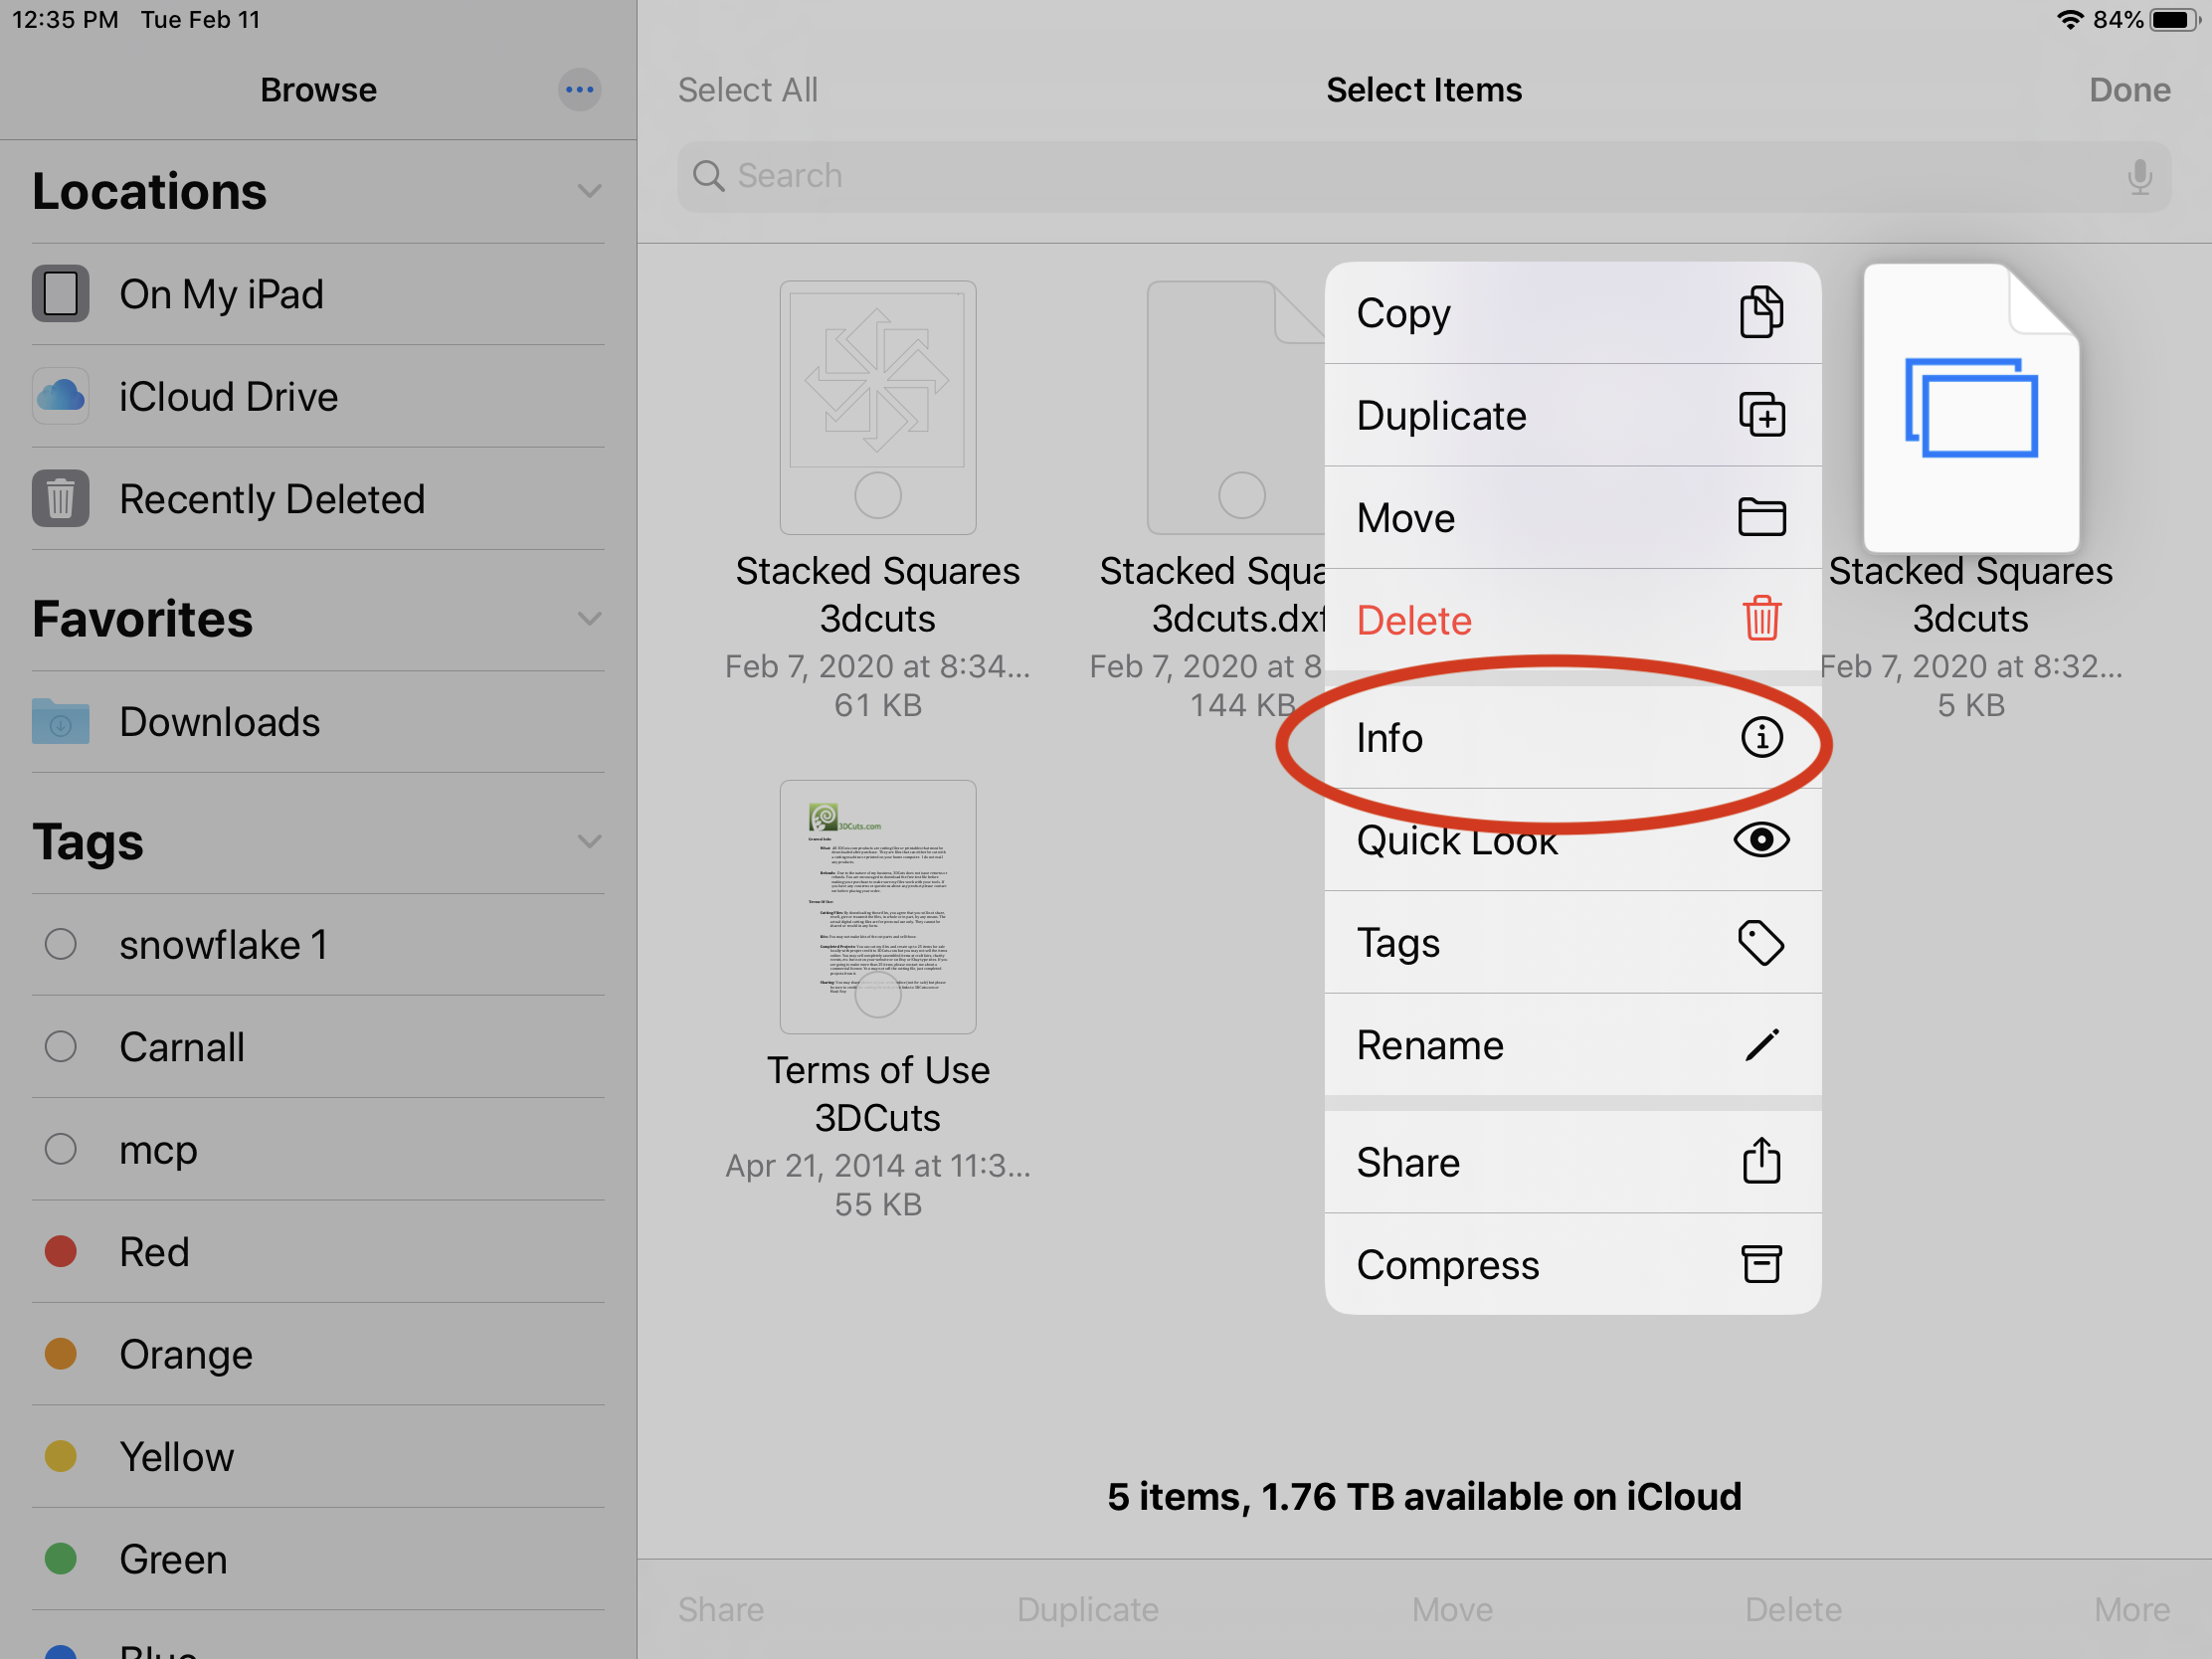
An expanded view about that specific file appears and it includes the complete name with file type. You can now see that the icon with the 2 blue rectangles is the svg file. This will be the file you want to upload in your cutting software.
Now that you have successfully downloaded and unzipped your file you can import it into the software you use with your cutting machine. Launch that software and IMPORT.
Here are some links to additional tutorials you might find helpful.
How to import into Silhouette Studio Software.
How to import into Cricut Design Space Software on a computer.
How to import into Cricut Design Space Software.on an iPad.