Dove 3D Peace Christmas Card Tutorial
Project Description:
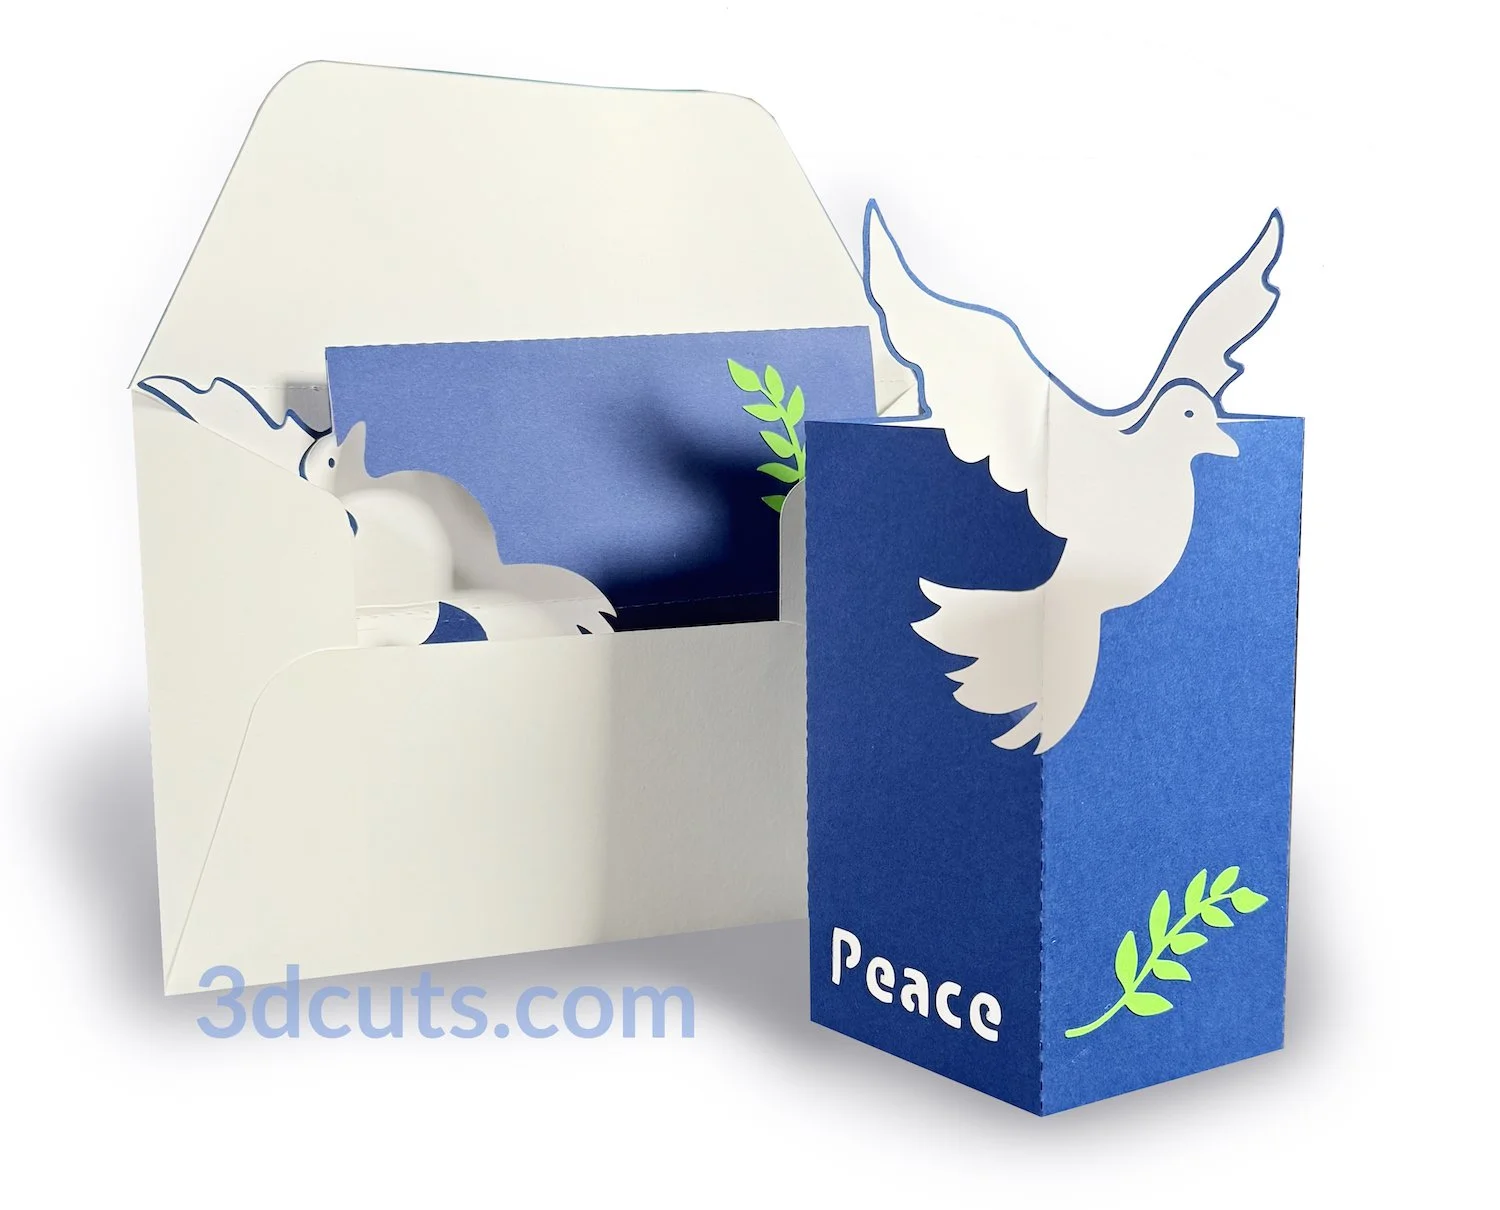
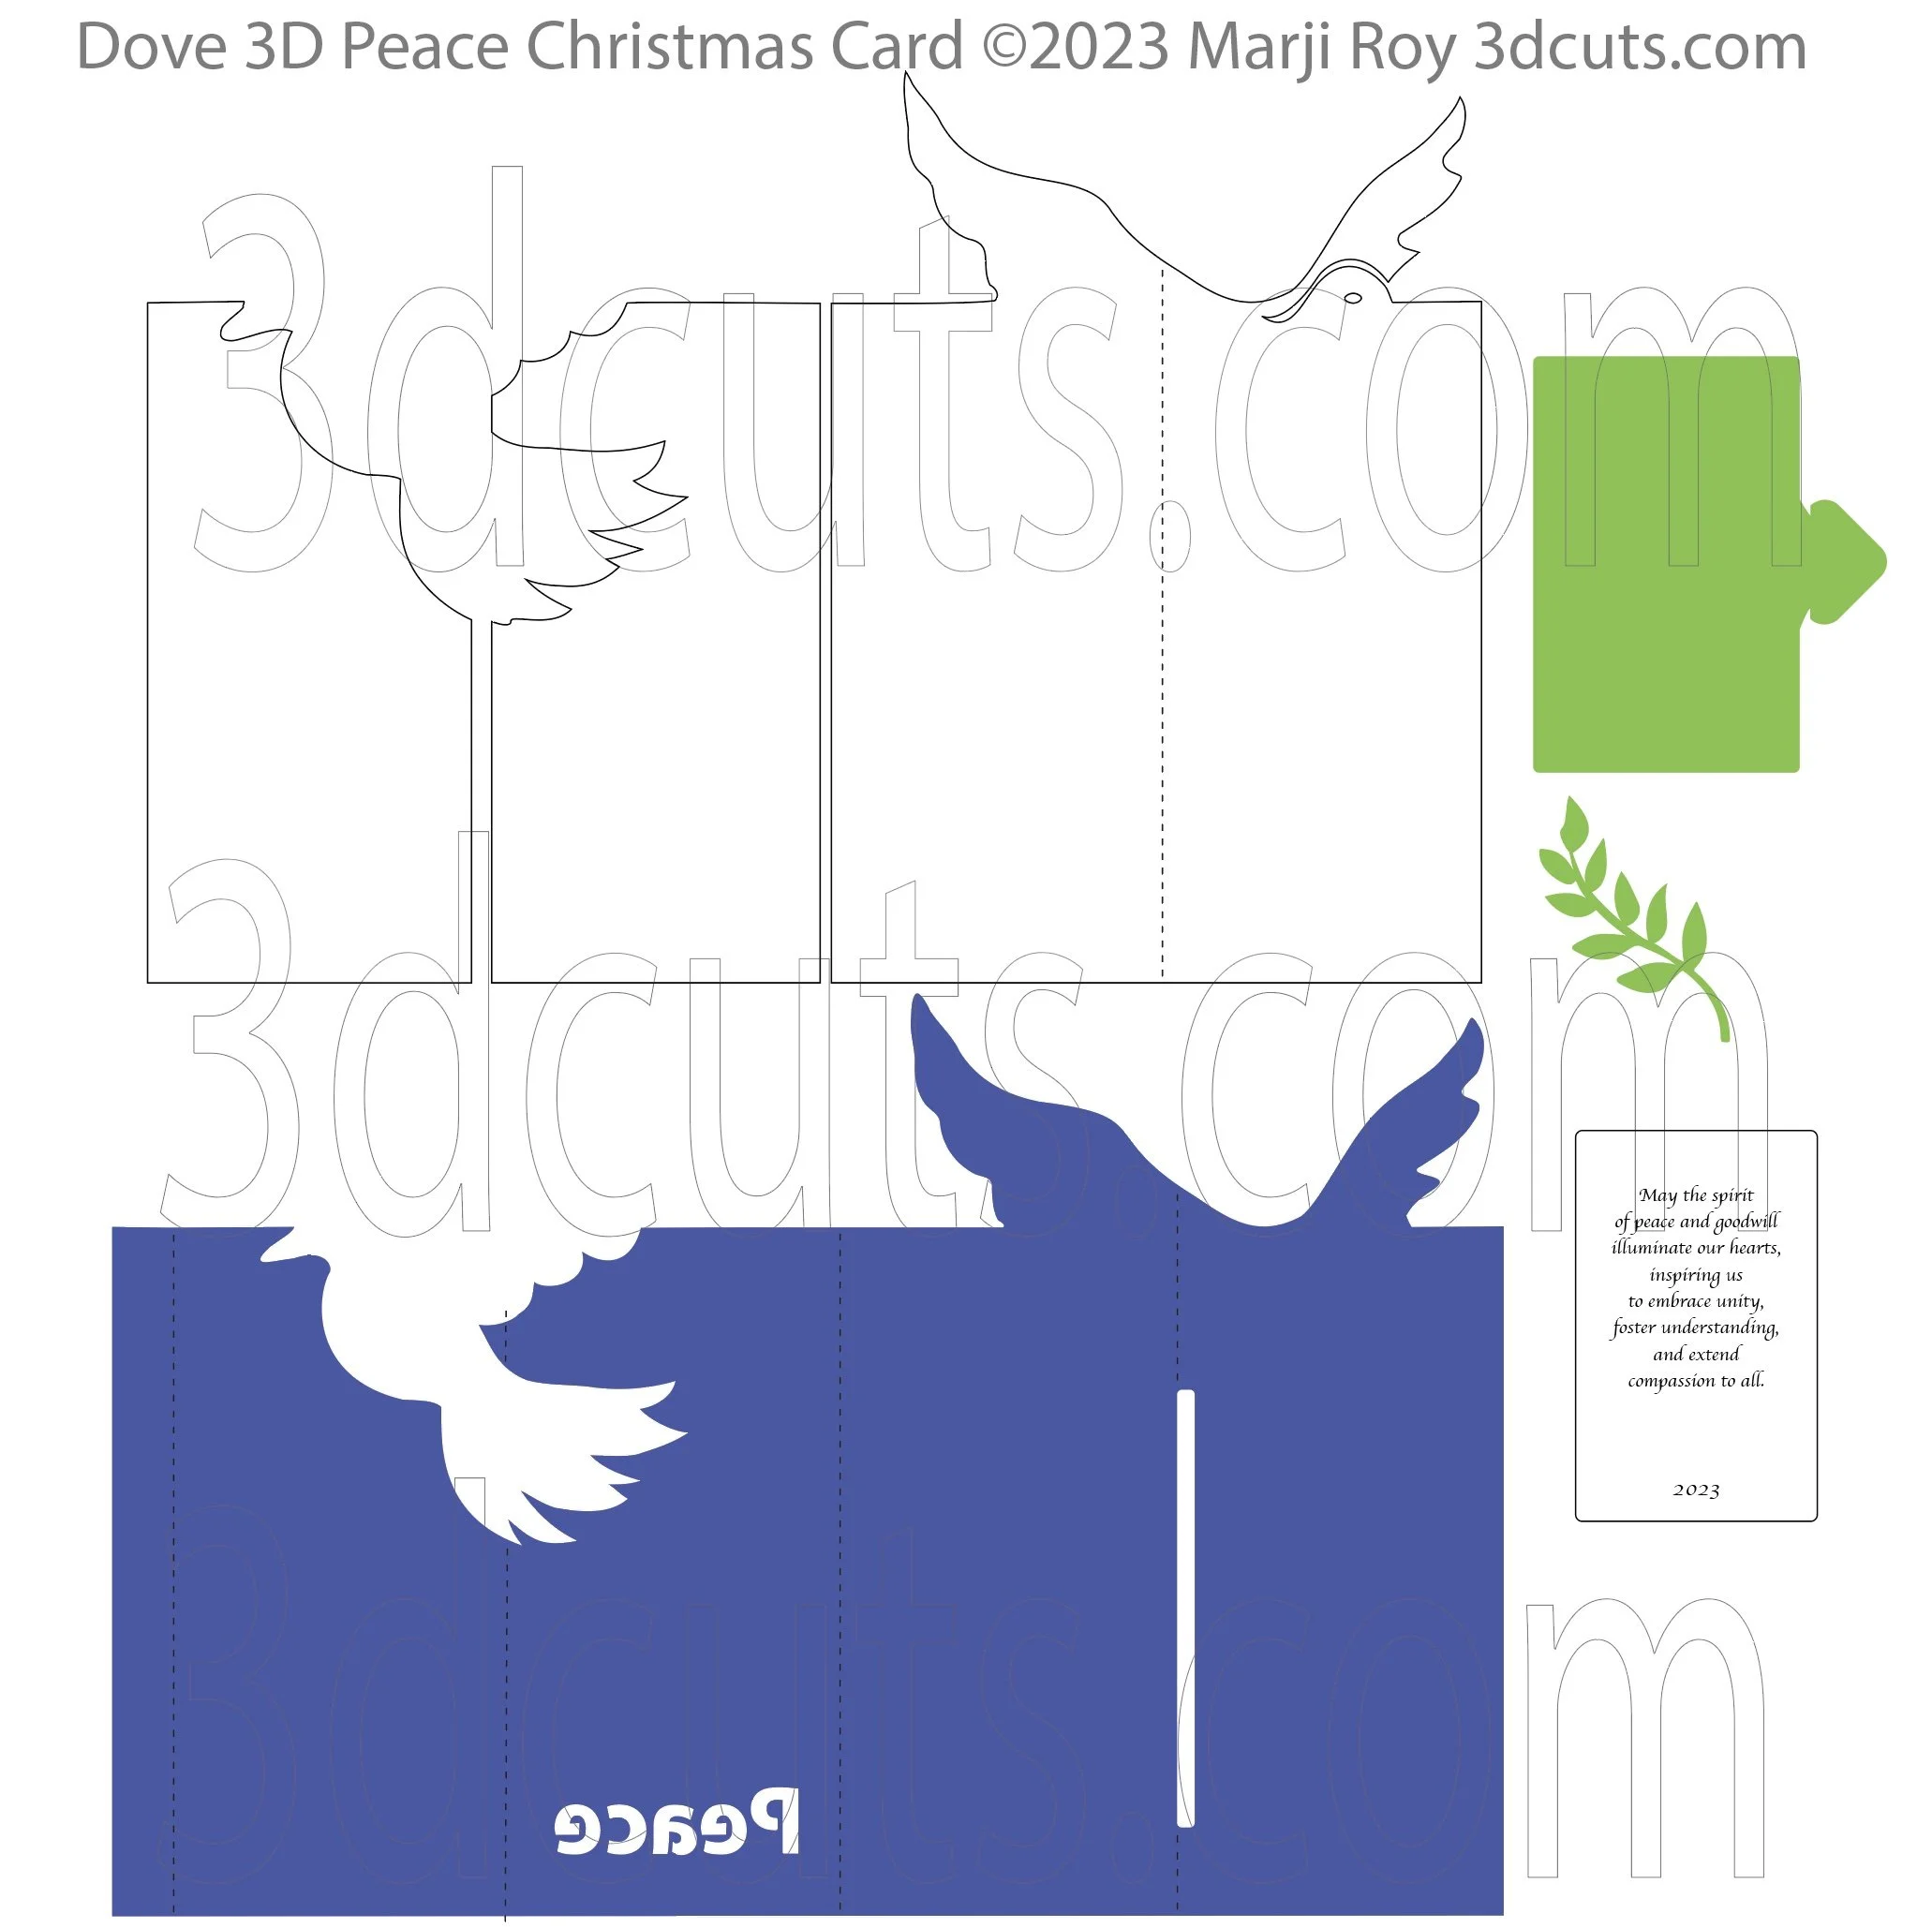
Everyone loves a 3D card. This is the assembly tutorial for the Dove 3D Peace Christmas Card introduced in 2023. It is a creative design use of positive and negative shapes. The dove appears by combining the two together visually. This card is designed to fit into a standard A7 envelope although the download does include the cutting file for a 5.25 X 7.25 envelope if you want to make your own. The card parts can all fit on 8.5 x 11” card stock. The envelope requires 12 x 12”.
The cutting file is available here.
Supplies Needed:
Cutting Files - https://3dcuts.com/christmas-projects/dove-3d-card
Card Stock - I used 8’5 x 11” All was Recollections from Michaels although other brands would work well.
1 Navy Blue
1 White
1 Green
1 white 12 x12 for envelope (optional)
1 sheet 32 lb write printer paper
Glue - I use Art Glitter Glue
Parts Sizes- See orientation in diagram to right.
Navy card base - 10.2222” W x 6.8187” H
White (Pieces from left to right)
2.378” W x 5.001” H
2.411” W x 4.993” H
4.771” W x 6.686” H
Green Card - 2.607” W 3.067”H
Green Olive Branch 1.397” W x 1.809”H
Green Card - 2.607” W 3.067”H
Green Olive Branch 1.397” W x 1.809”H
1 12 x 12” card stock for envelope 0r purchased A7 envelope
All Pieces grouped together as shown and downloaded 13.00346” W x 13.5778
Envelope - In separate file 10.7258”W x 11.1289H
Order supplies from Amazon:
Order from Amazon: Art Glitter Glue with metal tip (Affiliate Link)
Order from Amazon: Premium Silhouette Blade (Affiliate Link)
Order from Amazon Recollections Navy Card Stock (Affiliate Link)
Order from Amazon Recollections White Card Stock (Affiliate Link)
Order from Amazon Recollections Green Card Stock (Affiliate Link)
Steps for beginning the Dove 3D Peace Christmas card:
Special Note: I update the instructions online. Check here for adjustments and additional information. Don't just rely on the pdf file that comes with the download.
1. Download the cutting files for your cutting machine from the 3dcuts.com store at https://3dcuts.com/christmas-projects/dove-3d-card
3. Decide on if you want to use print and cut features on some of the parts.
Sentiment: I used print and cut for the sentiments that got pasted onto the green card. You can just print them and cut them to size using a paper cutter or you can cut the rectangles and use stamps to add the sentiment. Lots of options here. Be sure to select only the outer edge to cut.
3. Load the files into your cutting software following the steps for your cutting machine.
4. Prepare the files:.
For the Silhouette: The SVG files from this site will need to be turned into cutting files. Click here for detailed steps on how to use SVG files on your Silhouette. http://www.3dcuts.com/tutorial-upload-svg-silhouette
For Cricut Explore: Here is a guide for importing into Cricut Design Space. http://www.3dcuts.com/tutorial-adding-3dcuts-files-to-cricut
For Brother ScanNCut: The svg files will need to be transferred to files for your particular machine. You can change SVG files to FCM files at http://www.canvasworkspace.com/ or Google "How to import SVG files into a ScanNCut" for links to tutorials.
5. Cut the files.
All pieces are cut from card stock. I used Recollections card stock from Michaels.
I cut using a premium blade. I set my Silhouette to blade depth of 4, speed of 4 and thickness of 30. I also use a good mat that is still sticky. I like the Nicapa mat. Blade settings vary for every blade.
The PEACE is fine cuts. I do not use the auto blade on fine cuts.
Assembly Video:
Below is a YouTube Video of the Assembly process. Watch this to see how I assembled this card. The video is here https://youtu.be/uygj_I3duRI
Here are some of the other 3d Christmas Cards I have designed and are available in my Christmas Projects store.