
3D Aspen Tree Shadow Box • Tutorial
Project Description:
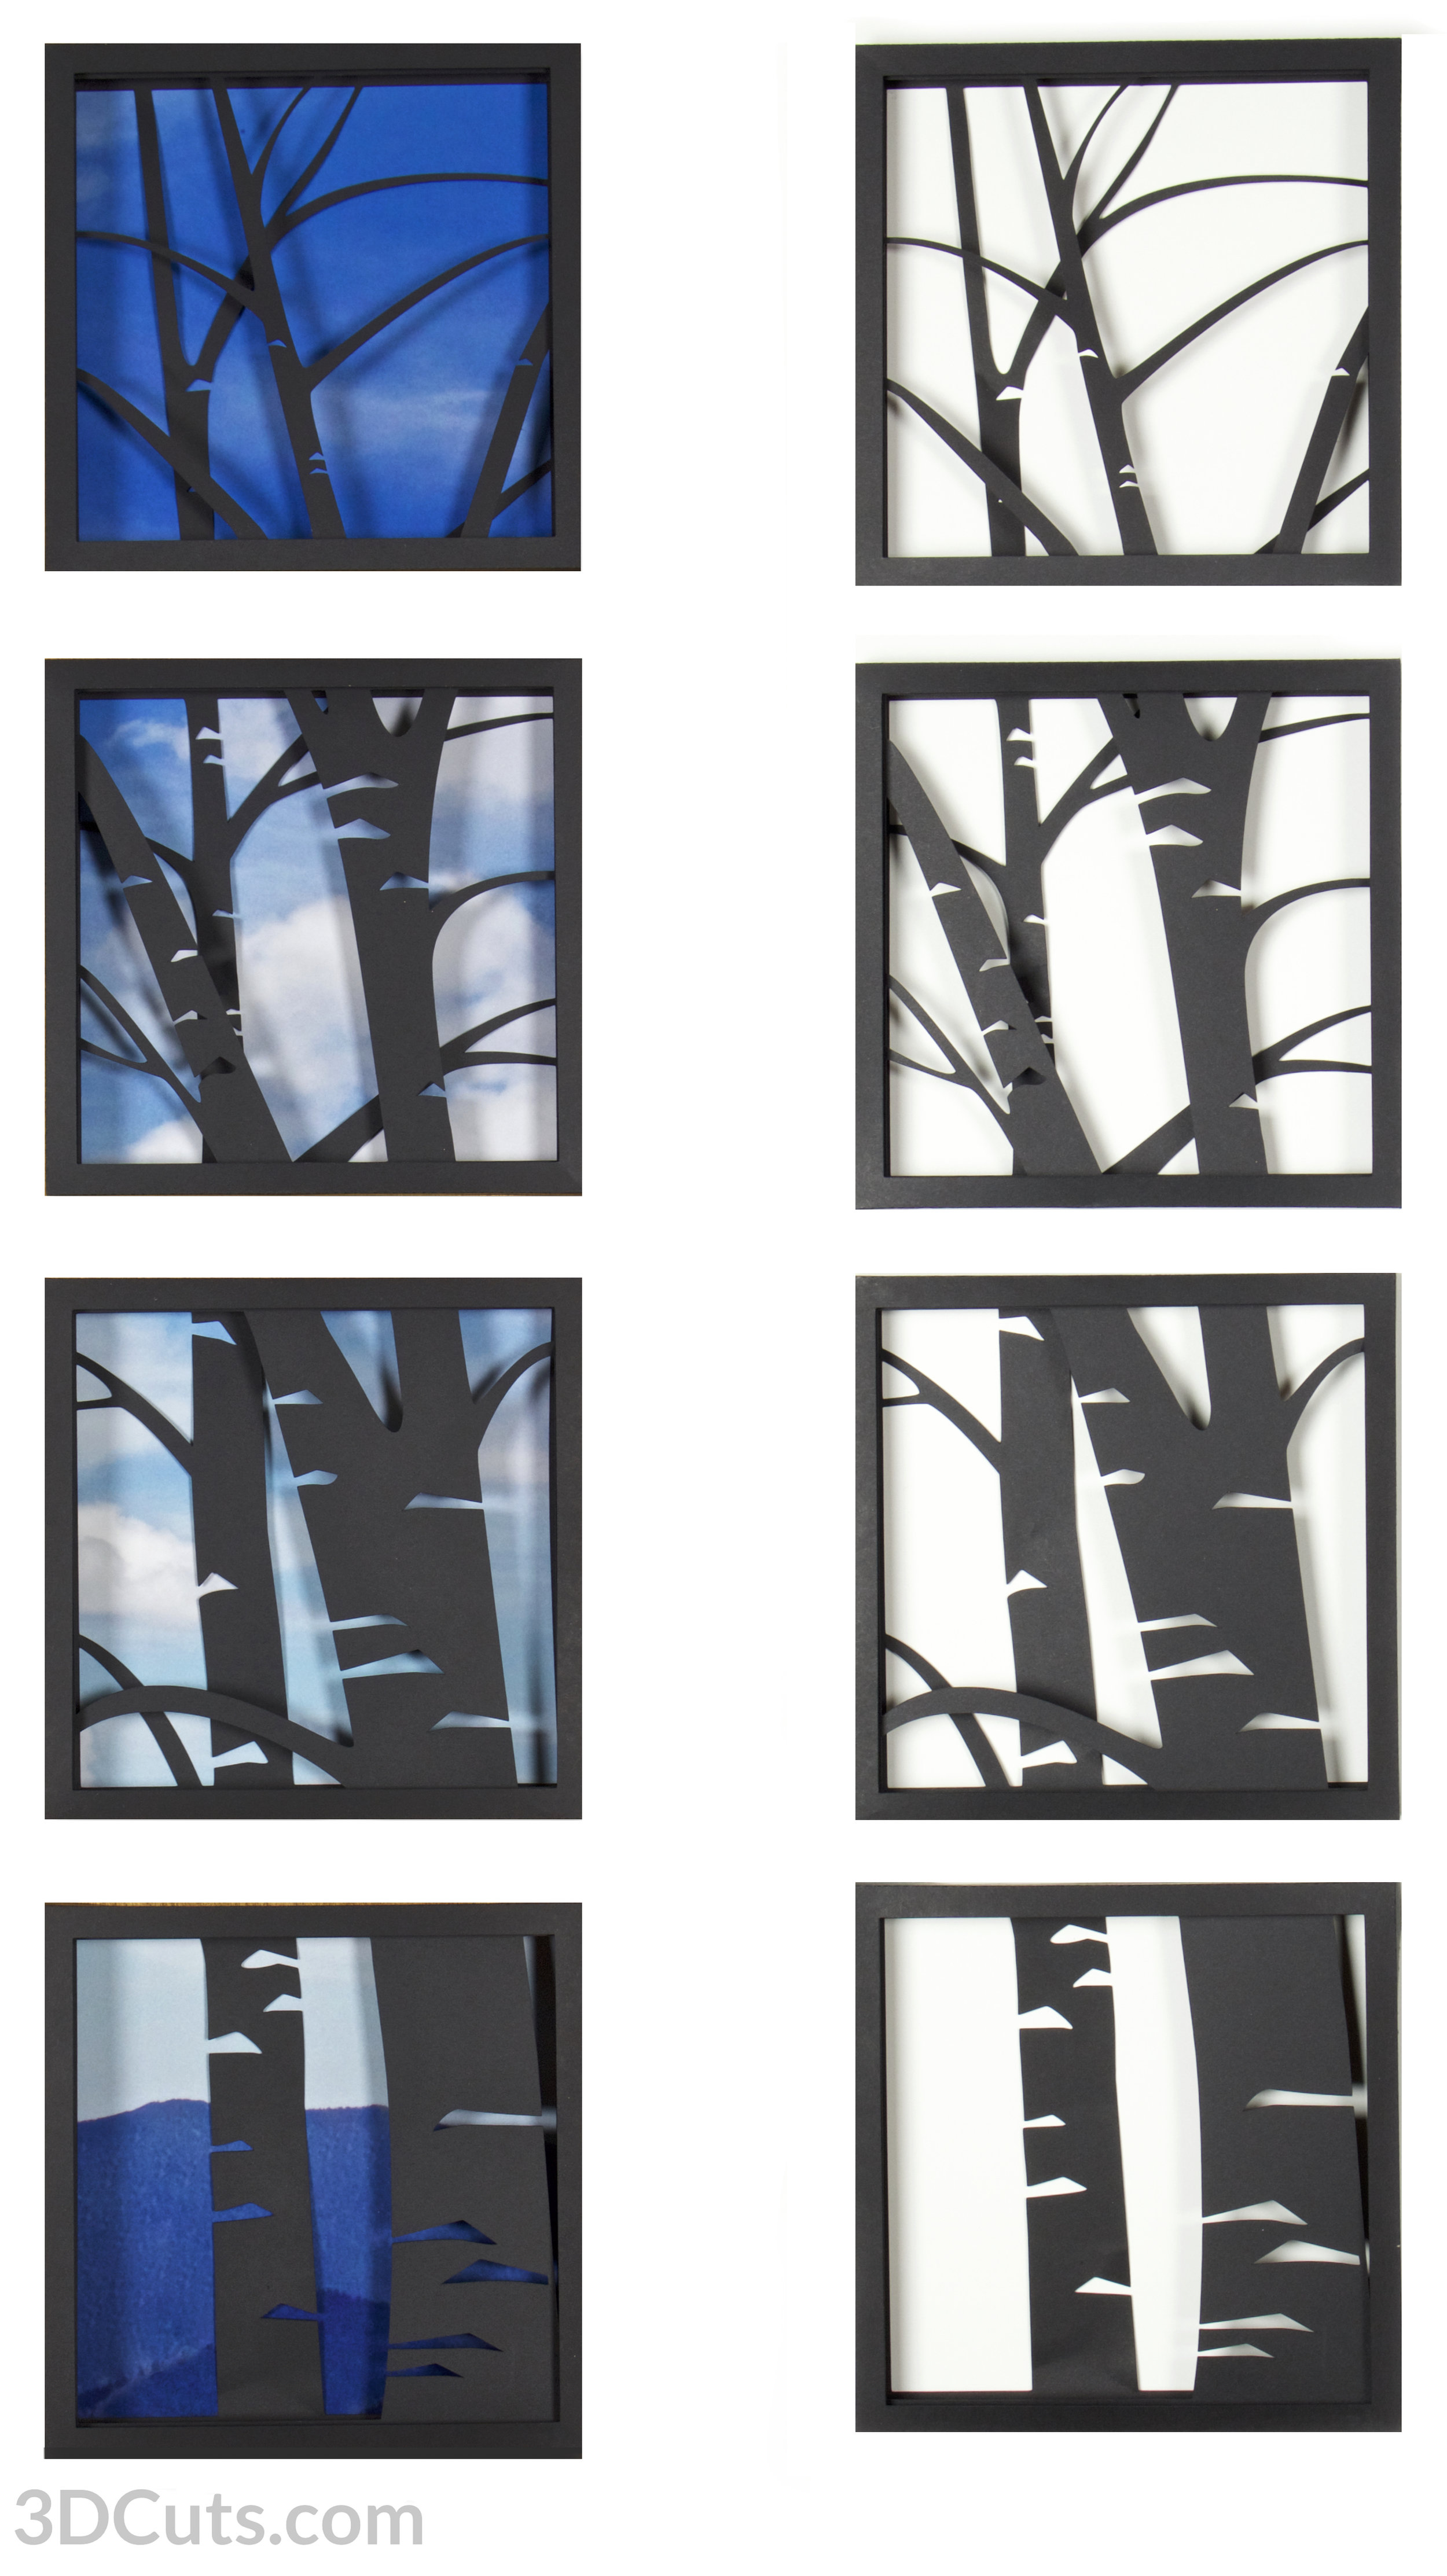
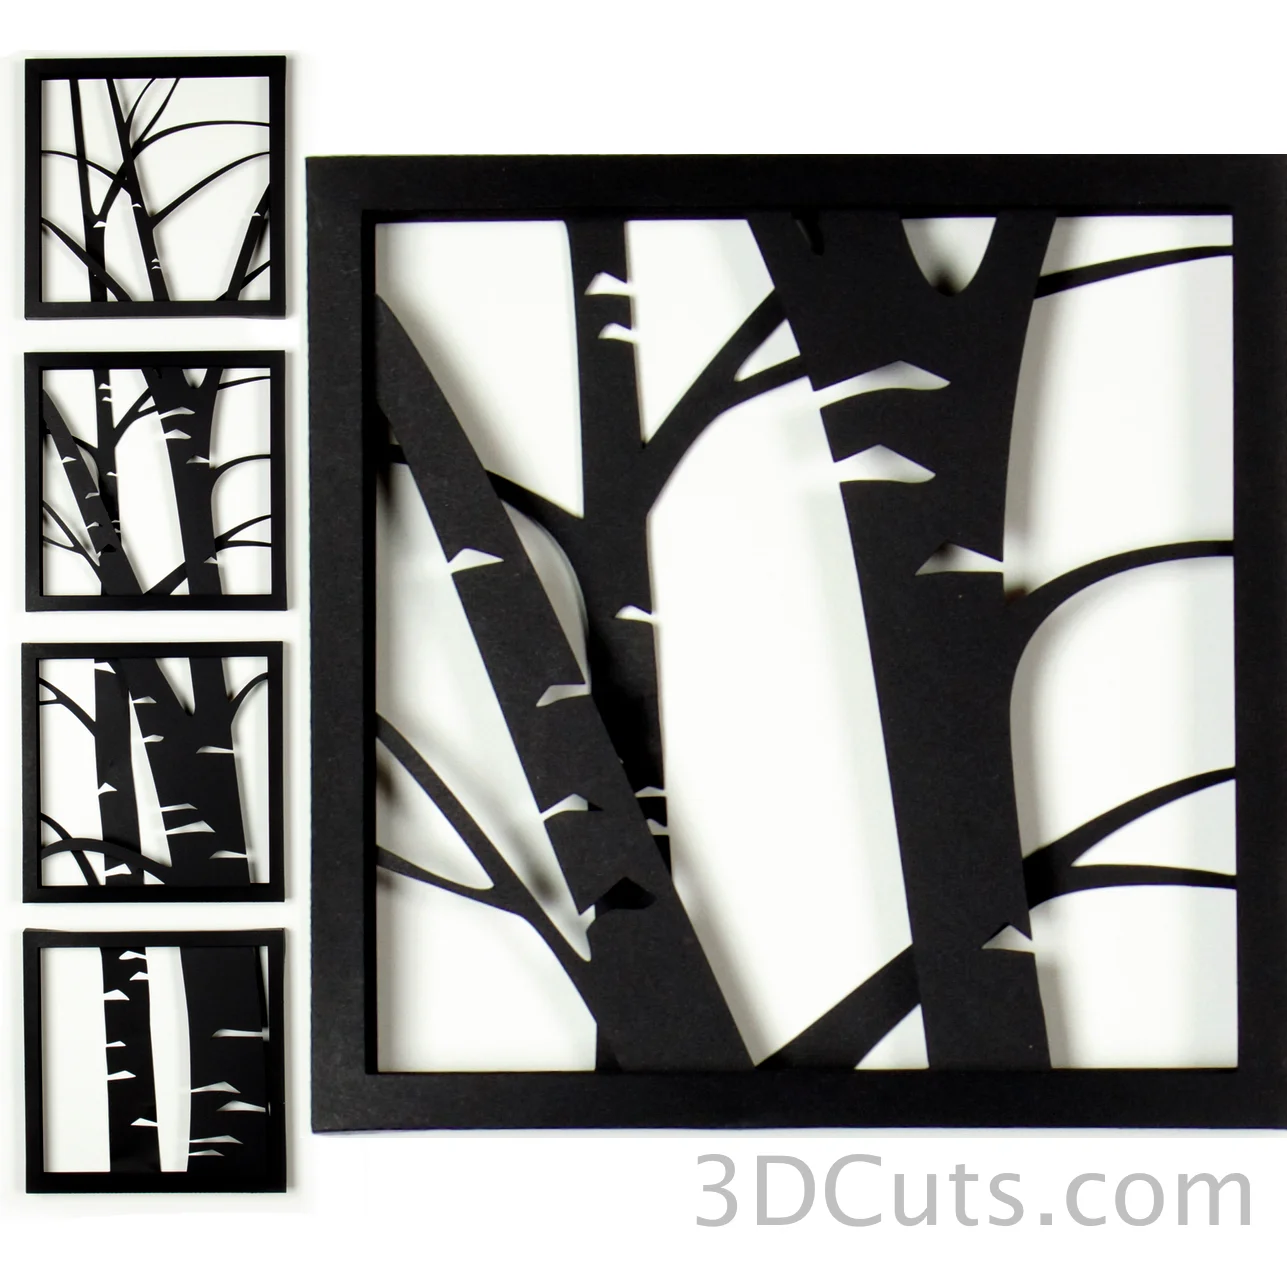
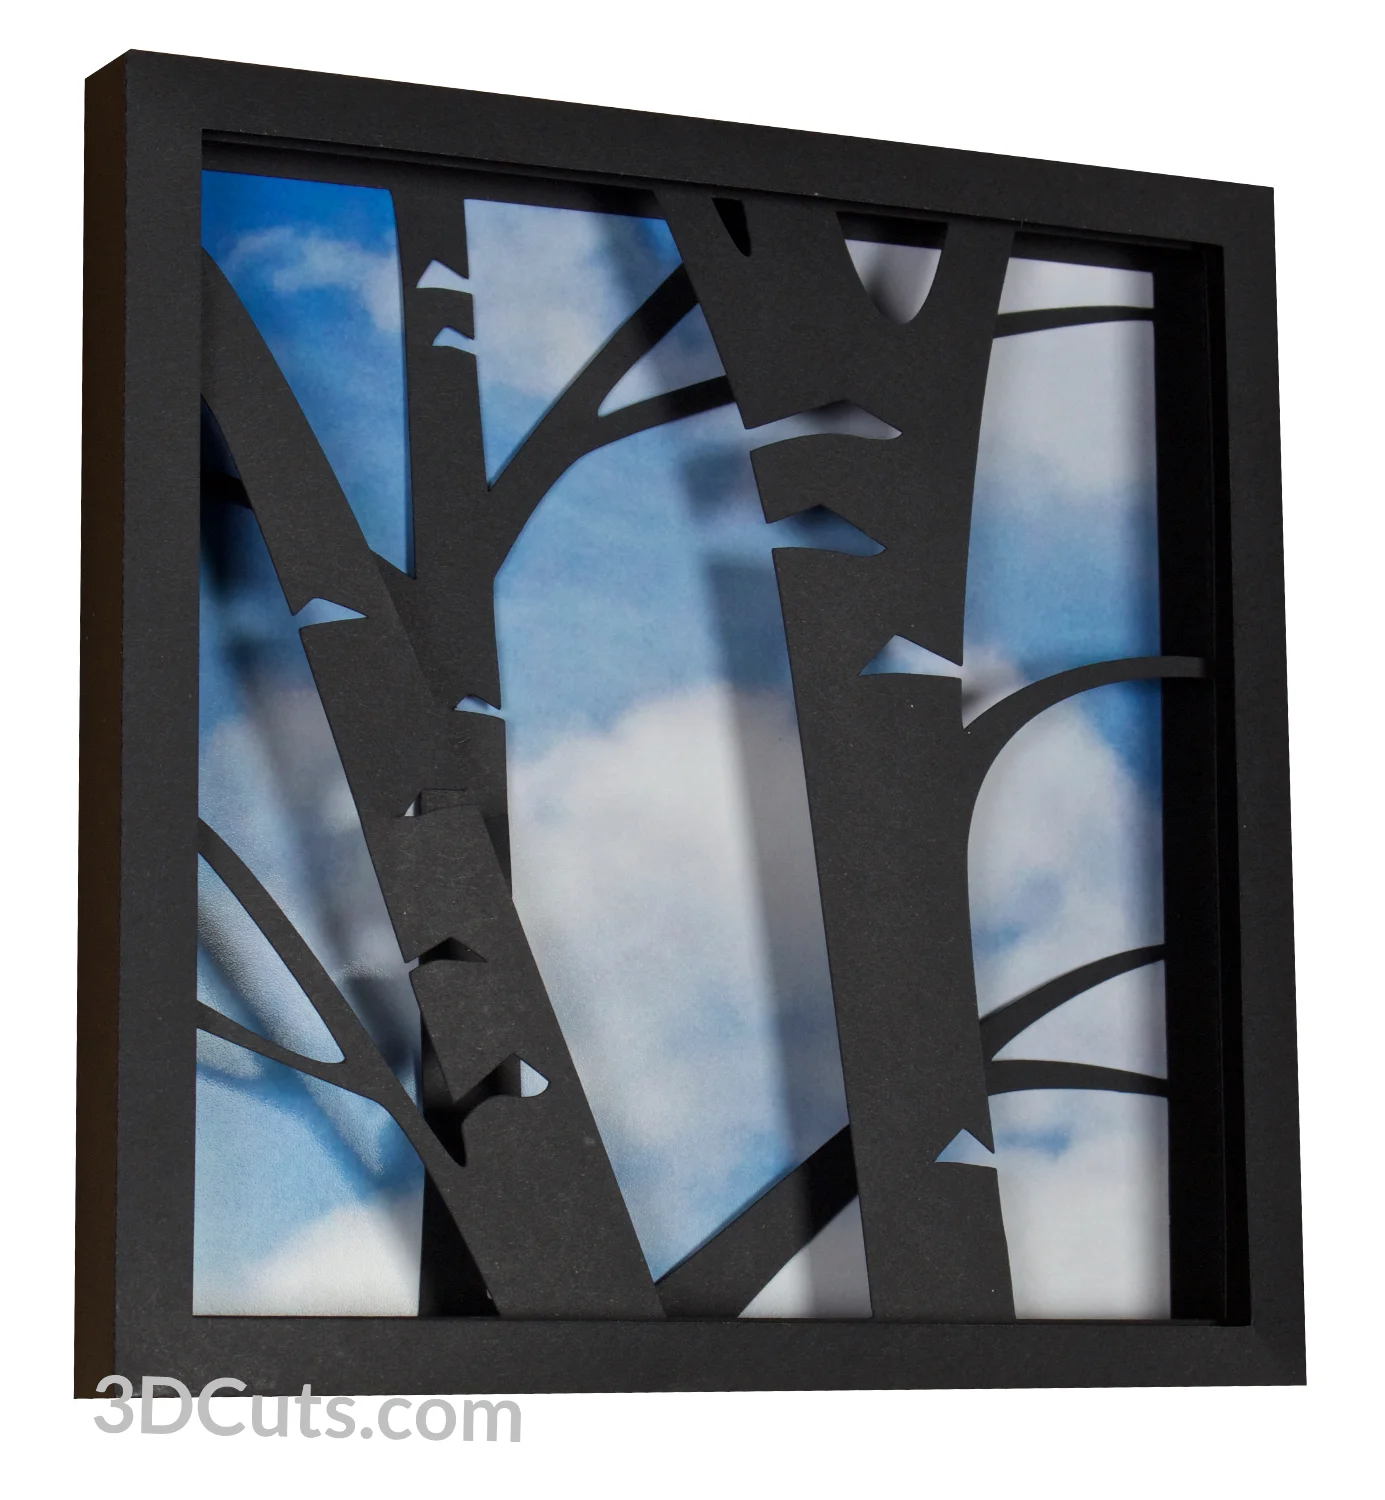
This tutorial is for creating the 4 section, 3 layer 3D aspen shadow box designed by Marji Roy of 3DCuts.com. It is constructed from card stock including the frames. It can be created with an open background to reveal the wall color behind or decorative papers can be added for a different effect. Here I show one example with a photo of a sky printed on an inkjet printer.
The finished design is 6.25"w x 28" h.
This is a relatively simple cutting file. Those without a cutting machine can cut this design by hand!
3D Aspen Tree Shadow Box - Tutorial
Supplies Needed:
- Cutting File from 3dCuts.com
- 12 sheets of 8.5 x 11" card stock - I used Recollections.
- 4 6.25"x 6.25" squares of decorative background paper (optional)
- Paper Adhesive - I like Glu Dots and Scoretape for this type of project but other adhesives work as well.
Steps for completing the Shadow Box:
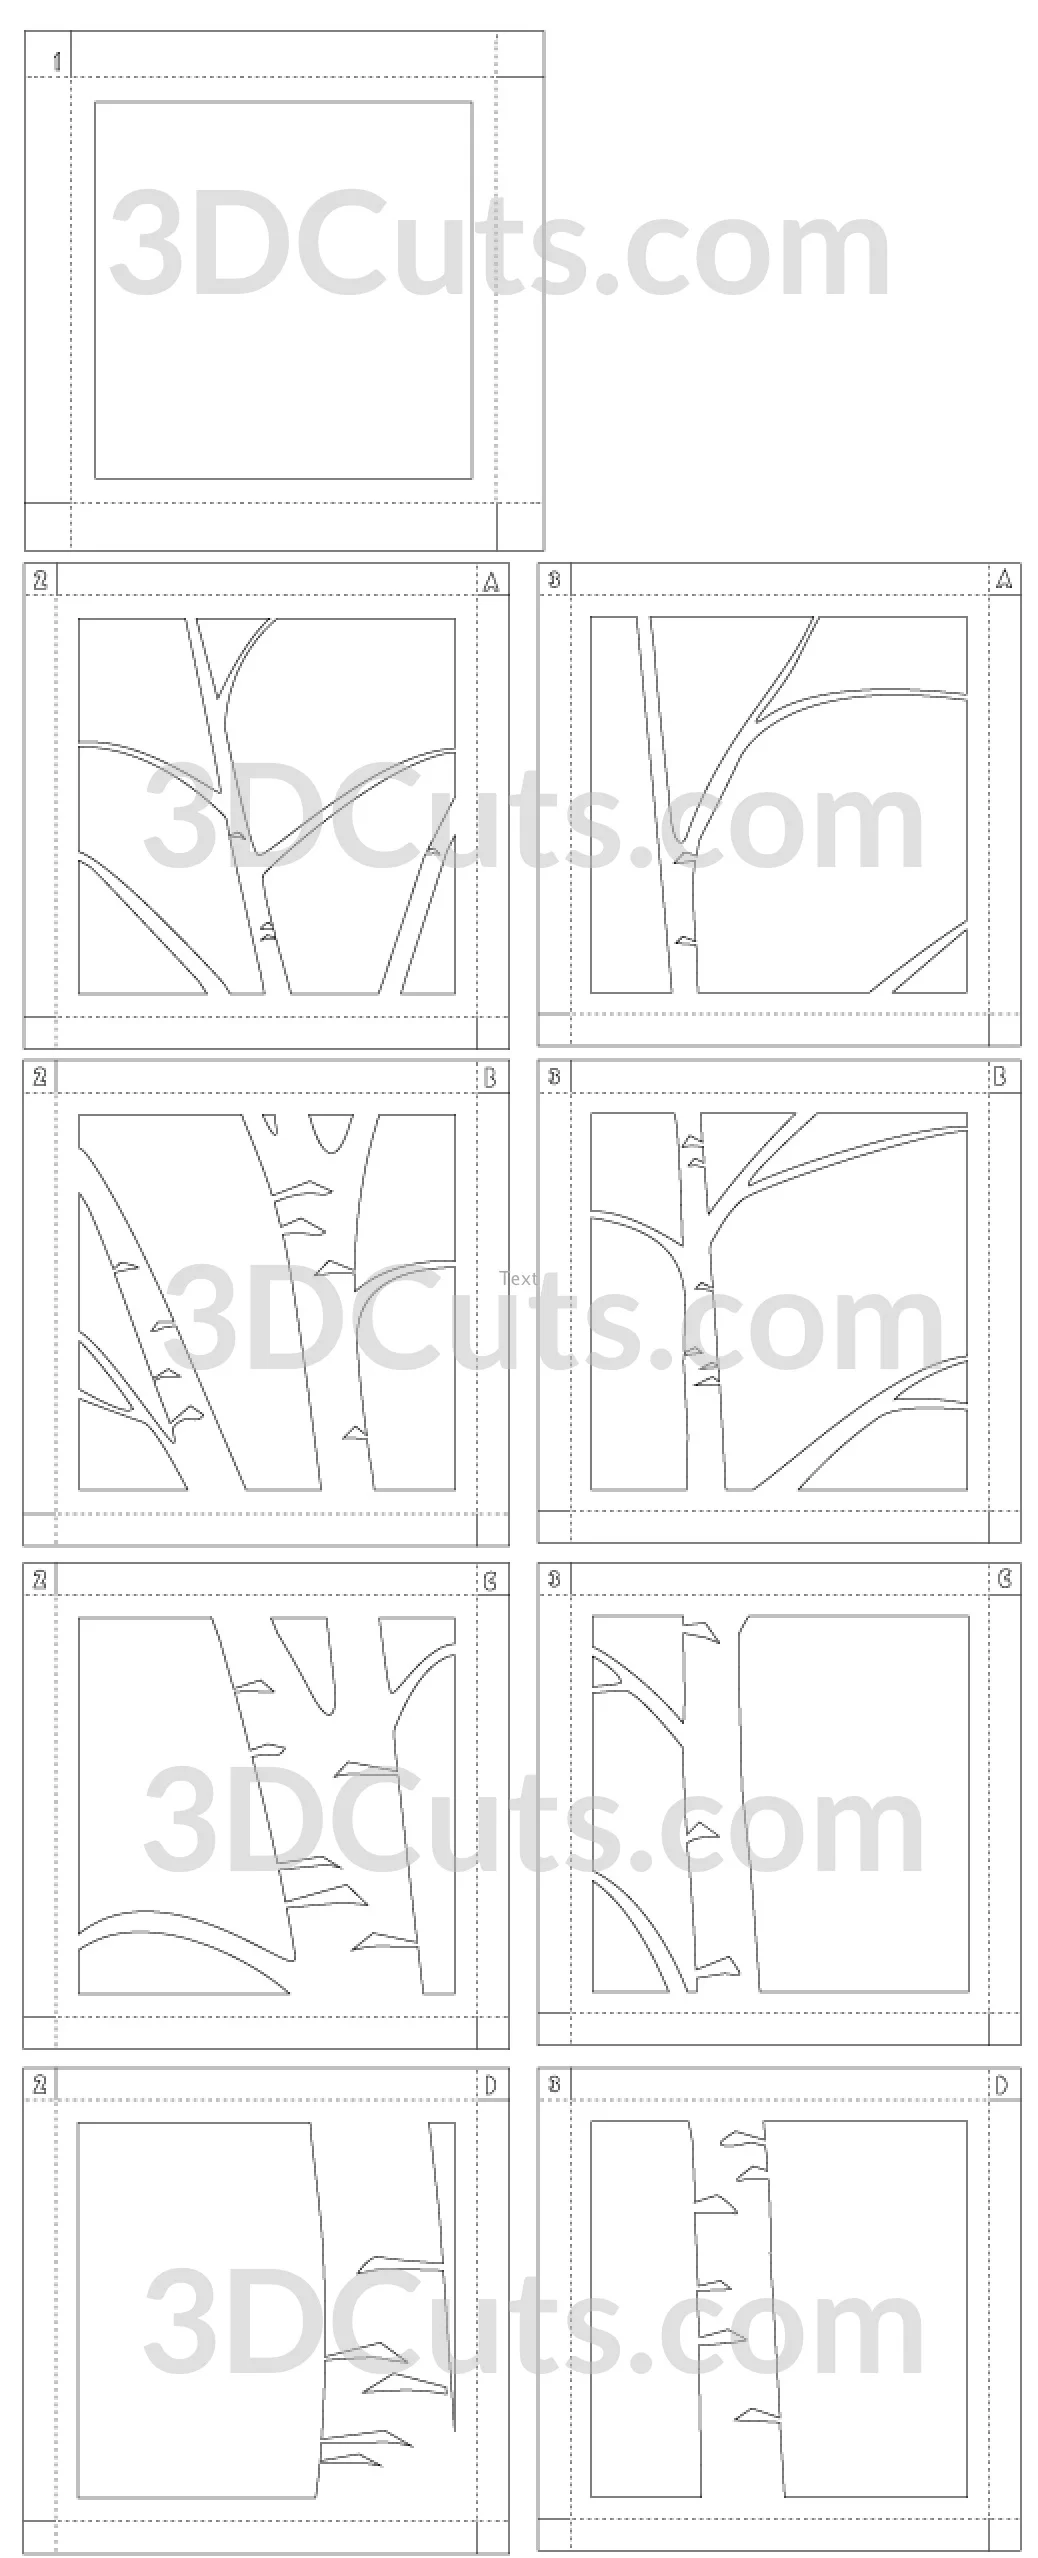
1. Download the cutting files for your cutting machine.
2. Load the files into your cutting software following the steps for your cutting machine.
3. Prepare the files:.
Helpful Hints:
- For the Silhouette: The SVG files from this site will need to be turned into cutting files. Click here for detailed steps on how to use SVG files on your Silhouette. http://www.3dcuts.com/tutorial-upload-svg-silhouette
- For the Silhouette files from the Silhouette online design store: This download comes in one long file with cut lines already enabled. You will need to ungroup the file and then copy and paste the parts into separate page sized files to cut. All the text instructions are non cutting items.
- For Cricut Explore: Here is a guide for importing into Cricut Design Space. http://www.3dcuts.com/tutorial-adding-3dcuts-files-to-cricut
- Sizes - if needed:
- Layer 1 - 8.0175 x 8.0175 inches
- Layer 2 - 7.496 x 7.496 inches
- Layer 3 - 7.45 x 7.45 inches
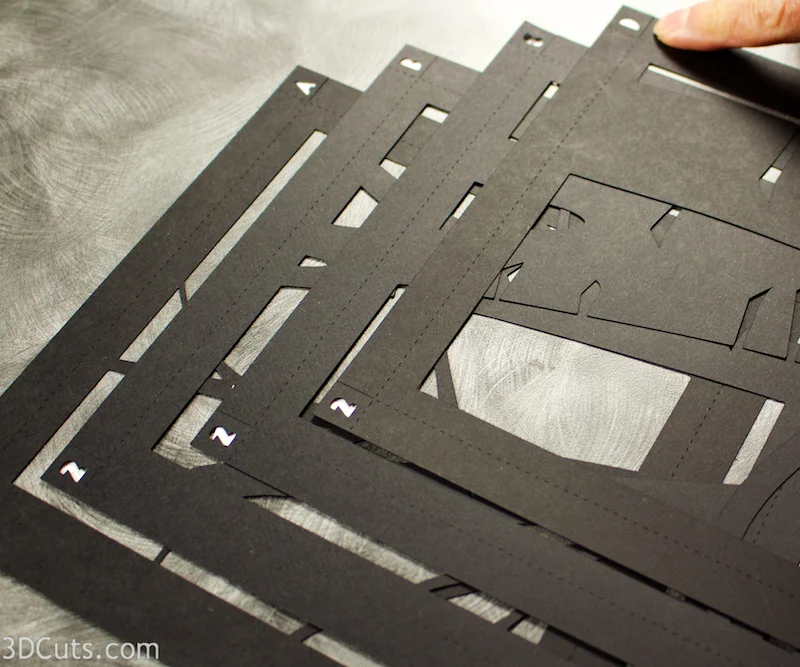
4. Cut the shapes.
- Layer 1 must be cut 4 times.
- Layers 2 and 3 each have 4 frames, A, B, C, and D. Each needs to be cut once.
- If cutting background papers, cut them on a paper cutter to be about 6 3/8" square.
5. Construct all 4 box frames.
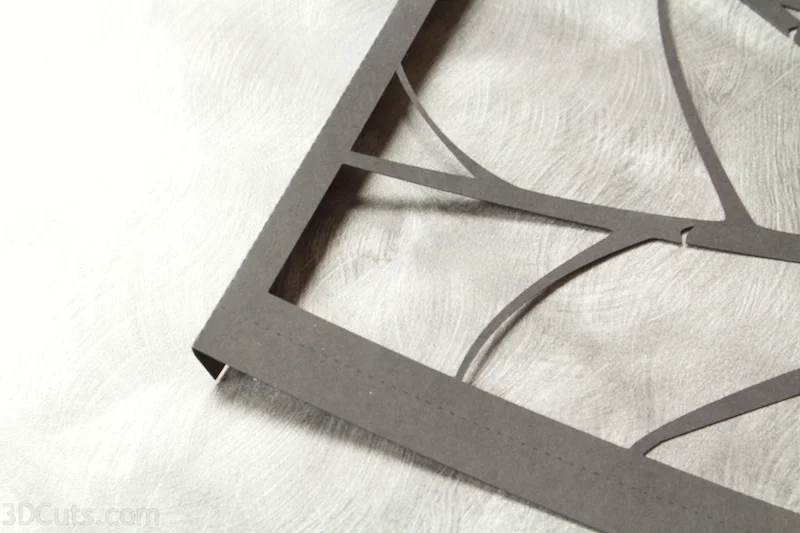
- Notice there is a cut-out number in one corner of each frame and a letter in some of the others. Use these as a guide. It will help in identifying the layers, identifying front or back, and knowing which corner should be in the upper left.
- I design these so that the number is always in the upper left.
- The frames are numbered as they will be when complete. Number 1 is the front frame, 2 next, 3 is in the back. You will not assemble them in that order though.
6. Start with frame 3 for the top box which is A.
- Choose the frame with 3 in the upper left and A in the upper right.
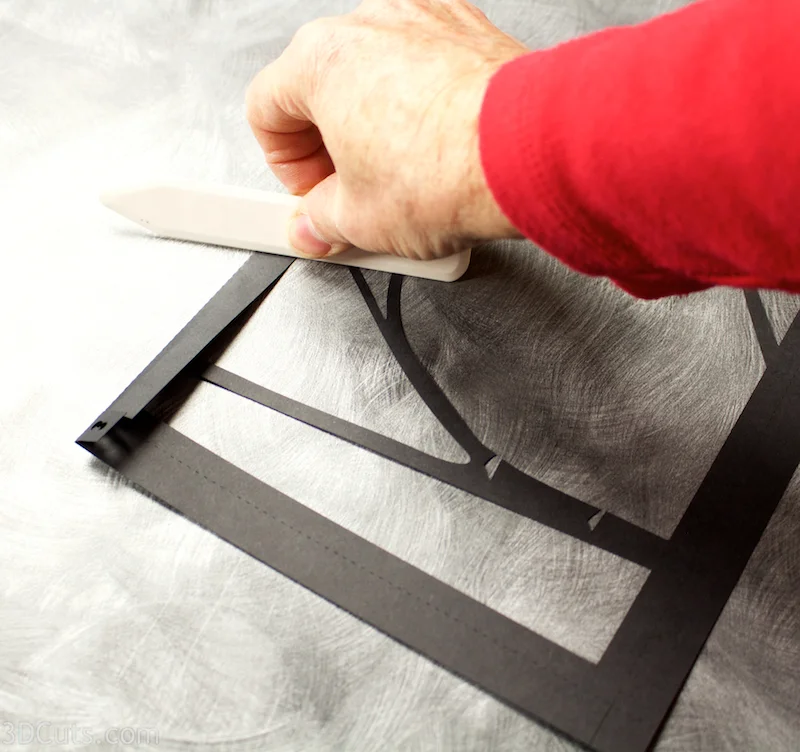
- Place the 3 in the upper left corner and fold on all dotted fold lines. You will fold the 4 edges forward for layer 3.
- Make nice, crisp folds.
- Use your adhesive of choice to glue the tabs outside of each corner. I like to use Glue Dots because it keeps my fingers clean. Other adhesives work as well.
- On the this frame - frame 3, I used 1 mini glue dot in each corner. It will be held together by other outer frames so you don't need to waste many glue dots here.
- Make sure the edges line up. It is important to make good, even square corners.
- Glue all 4 corners of layer 3 A.
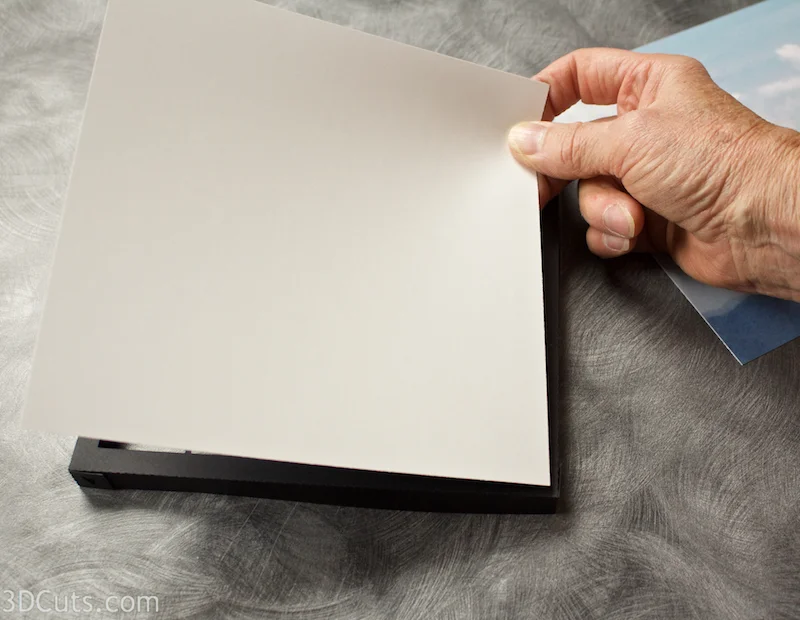
- If you would like to add optional backing paper to your shadow box, choose an appropriate paper and cut 4 squares 6.25" x 6.25".
- Put adhesive on the back side of frame 3 and glue the paper in place.
7. Construct Frame 2-A.
- Remember to position the #2 in the upper left corner.
- For frame 2, fold all 4 edges back away from you. (This is the opposite direction for frame 3.)
- Use glue dots and glue all 4 corners again being sure to keep them square.

- Frame 2 will be fitted over frame 3. You might want to make sure they fit before applying adhesive. It is a close fit but frame 3 is slightly smaller than frame 2 and should slide inside.
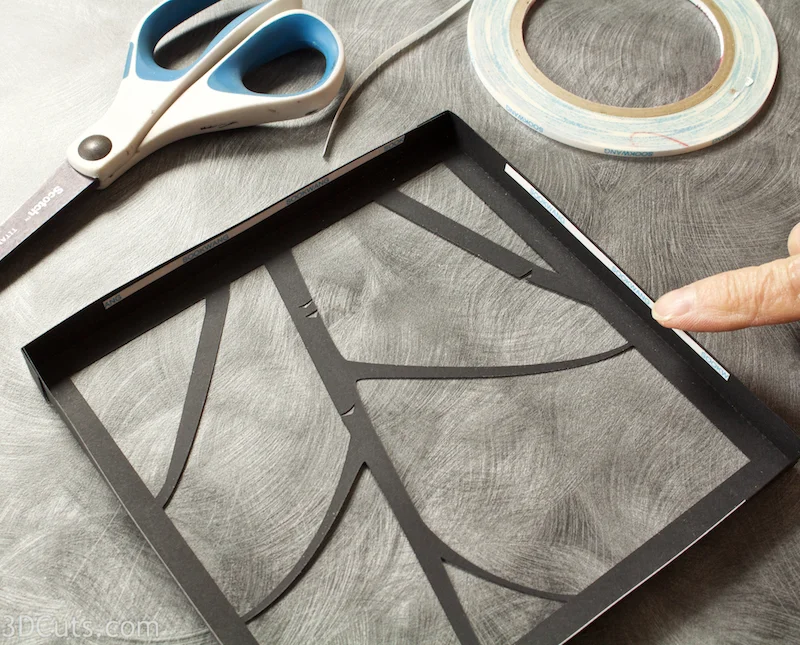
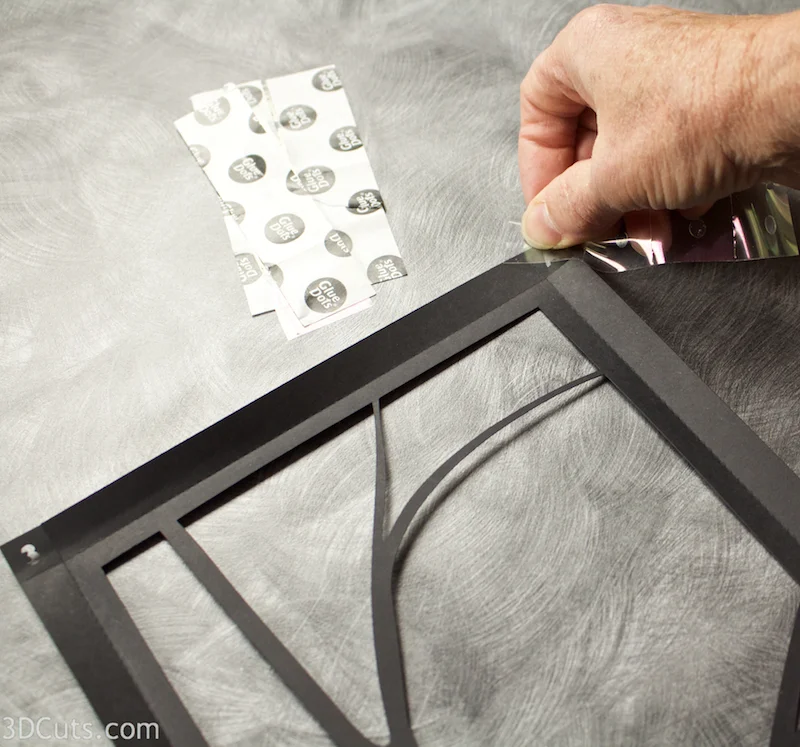
8. Adhere frame 2 A around Frame 3 A.
- I like to use ScorTape for this type of job. Put a strip of ScorTape about 3" long along the inside edge of each side of frame 2 A.
- The tape should be positioned right along the edge.
- Do not peel the protective backing tape off.
- Slide frame 2 A around frame 3 A being sure to keep the numbered corners for both frames in the upper left.
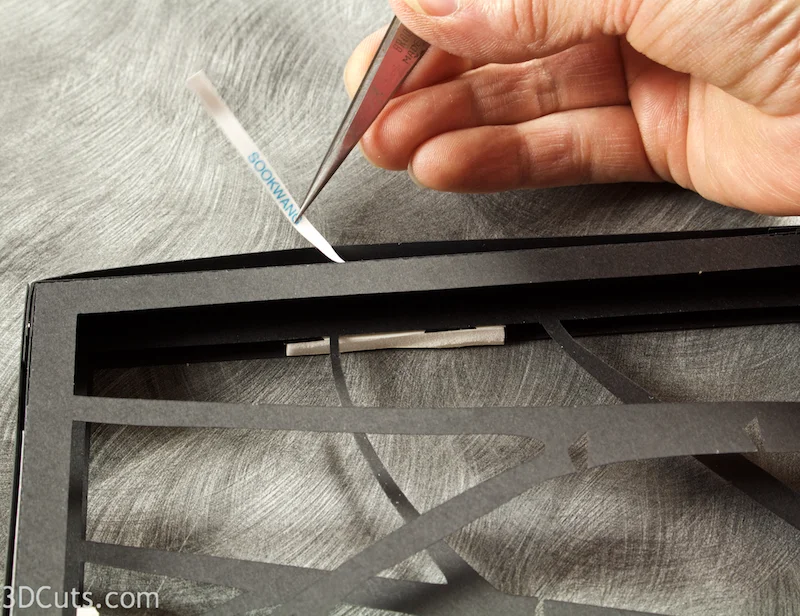
- Turn the frame over and reach in between the layers. Peel off the covering of the score tape, one side at a time, and glue each side of the layers together.
- Waiting to peel the score tape allows you to correctly position the frame before sticking in place.
- Tweezers can help with this step.
- I have also used hot glue for this step. First I put the frames together and then in squirt some hot glue into the seam between them from the back-side. I dislike the strings of hot glue so I prefer working with Scor-Tape although it costs more.

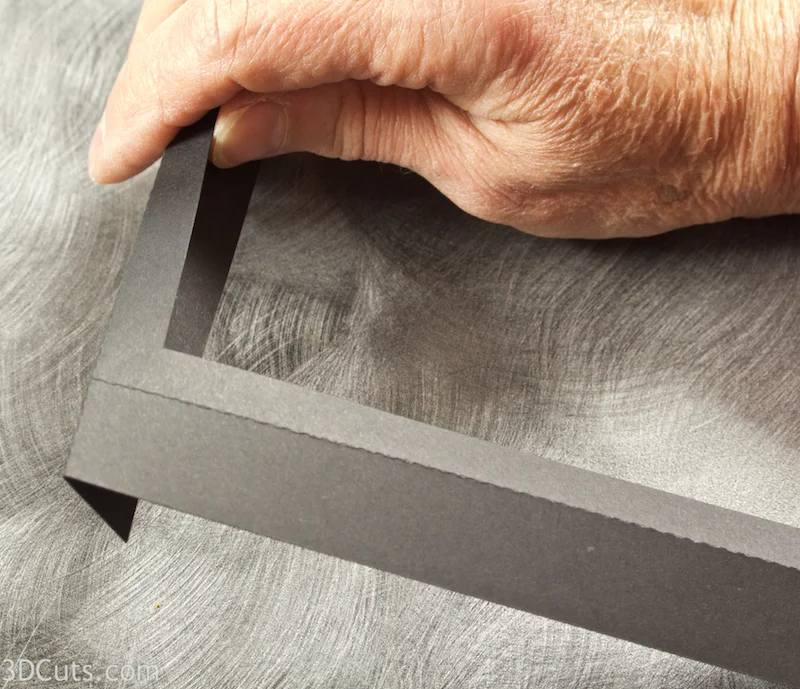
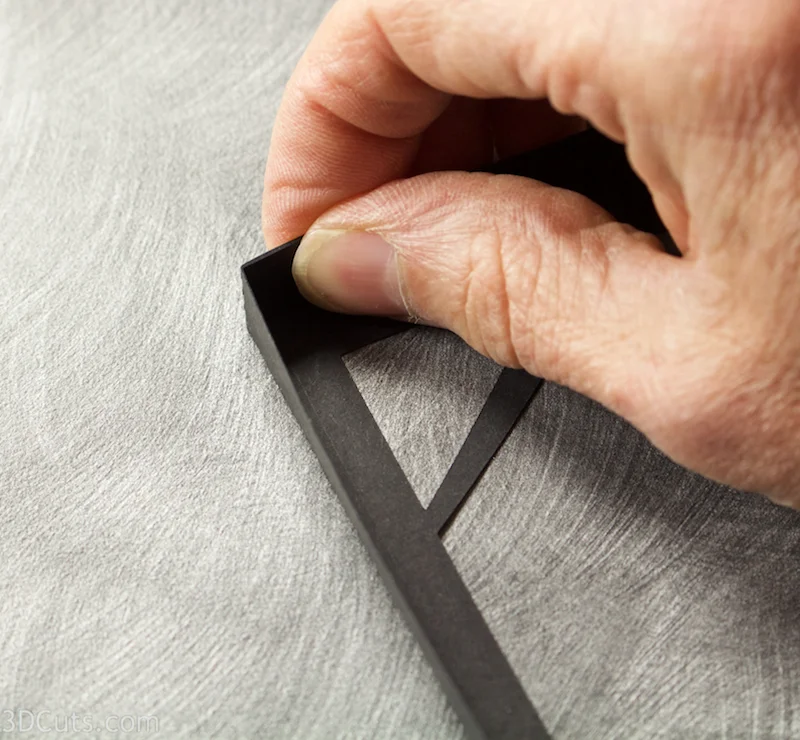
9. Construct frame 1.
- All 4 Layer 1 frames are the same. They have no letter in the upper right corner.
- Fold the edges toward the BACK on Layer 1.
- Use glue dots on all corners. These edges are exposed so use 2-3 glue dots or Scor-Tape on each corner.
- Adhere all 4 corners.
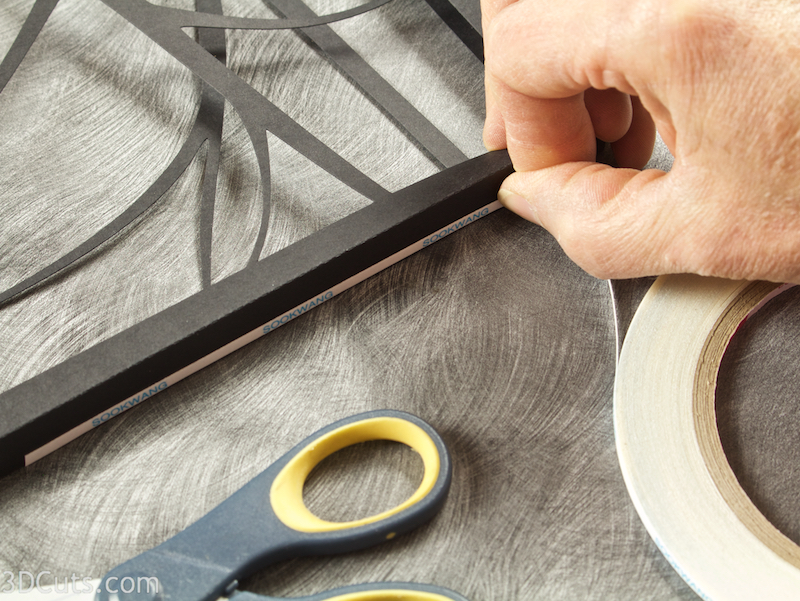
10. Attach Frame 1 to combined frames 2 and 3.
- Frame 1 is placed over frames 2 and 3 from the front.
- The back of frame 1 should align with the back of frame 2. Layer 2 will be recessed behind layer 1.
- Add Scor-tape to all 4 sides of frame 2 along the outside, back edge (edge near wall).
- Do not peel off the backing yet.
- Don't apply it all the way into the corners. Leave a gap of about 1.5" at each corner. It is impossible to peel if you apply to the corners.
- Place layer 1 over the other layers and again, reach in to the space, grab the backing of the score tape and peel off one side.
- Be sure the inner frames are aligned with the BACK edges of the outer frame before pressing in place.
- Notice I have a white foam spacer I made to hold the frames in alignment while I adhered. This is optional but a helpful hint.
- Repeat for all 4 sides.
- Section A is complete.
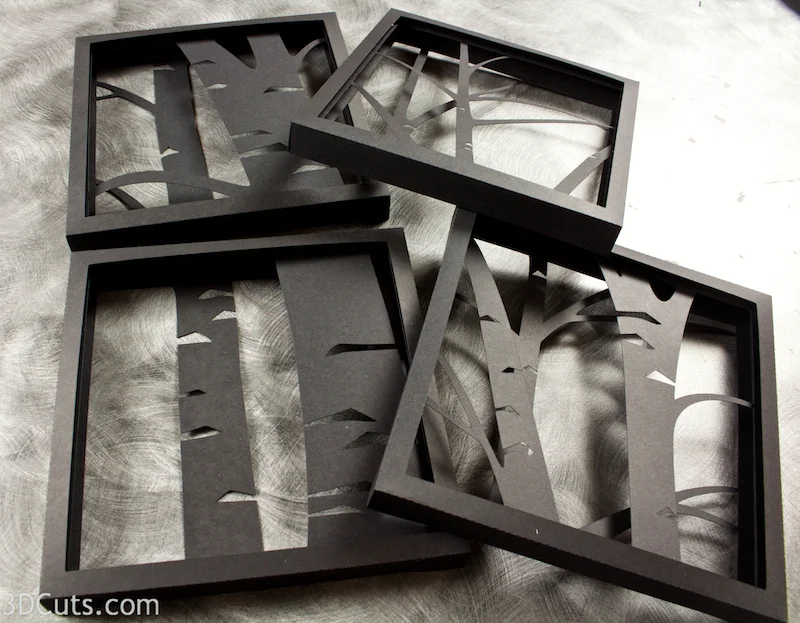
11. Make sections B, C and D following exactly the same steps as you used for Section A.
Adding backgrounds is optional. I did create a 4 part sky background for use with the shadow box. It is included with the download from 3Dcuts.com (Not from the SIL store).
12. Attach to wall
- I use an adhesive putty like BlueTack to place paper shadow boxes on the wall.
- The design flows best when there is a gap of 1" between the boxes.
©2017 Marji Roy, 3dcuts.com