Accordion Christmas Card • Tutorial
Project Description:
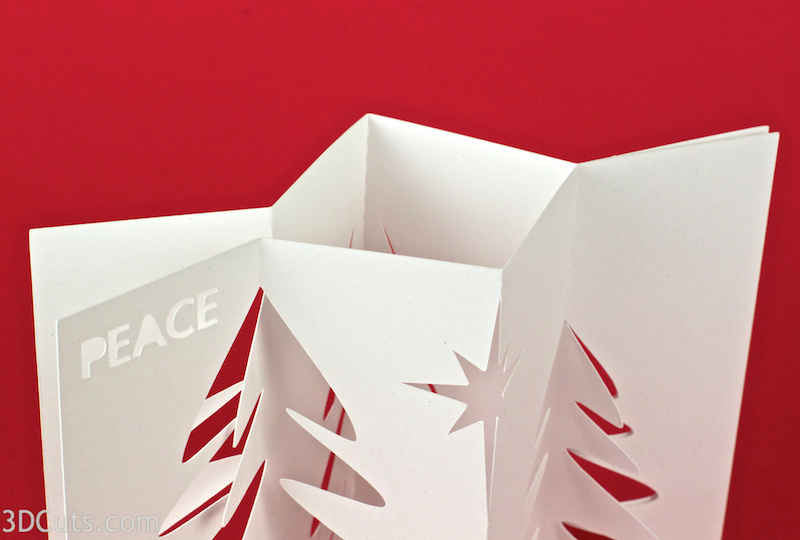
Every year for over 30 now I have design a handcrafted Christmas Card. This was the design for my 2013 card.
It is simply 2 cut files, folded and glued together, quick and easy yet fascinating because of the interplay between the two layers. The accordion fold allows it to stand on its own. The design is sized to fit in a standard A2 invitation envelop. I cut my card from 8.5 x 11 white index card stock and used a dark green envelope.
Accordion Christmas Card - Tutorial
Supplies Needed:
- Cutting File here
- 8.5 x 11" card stock - I used the 110lb Neenah Cardstock from Amazon.
- Spray Glue
- A2 Size invitation envelope
- 4 x 8 piece of scrap cardboard
Parts sizes: (For those importing into Design Space) - in inches
- Card Back 7.9784" w x 5.3282" h
- Card Front 7.9784" w x 5.3282" h
Order supplies from Amazon:
Steps for completing the Accordion Christmas Card:
Special Note: I update the instructions online. Check here for adjustments and additional information. Don't just rely on the pdf file that comes with the download. This file is located at http://3dcuts.com/accordion-christmas-card-tutorial.
1. Download the cutting files for your cutting machine from the 3dcuts.com store here.
2. Load the files into your cutting software following the steps for your cutting machine.
3. Prepare the files:.
- For the Silhouette: The SVG files from this site will need to be turned into cutting files. Click here for detailed steps on how to use SVG files on your Silhouette. http://www.3dcuts.com/tutorial-upload-svg-silhouette
- For Cricut Explore: Here is a guide for importing into Cricut Design Space. http://www.3dcuts.com/tutorial-adding-3dcuts-files-to-cricut
4. Cut the files.
- Both pieces are cut from card stock. Both will fit on one 8.5 x 11" piece if carefully positioned.
5. Remove the cutting mat carefully. I find the paper curls less if I peel the mat away from the paper and not the other way around.
6. Fold each piece on the dotted lines as shown.
- Fold along the dotted fold lines.
- The top piece folds back on the center star fold and up on the two side folds as shown.
- The back piece folds the opposite way, forward on the center fold and back on the two side folds as shown below.
- Practice intertwining the two halves together BEFORE you apply adhesive. You want to understand how they nest together so you can accurately place them once glued.
- The front goes over the back, lining up outside corners. The two trees on the back protrude through the front layer.
7. Now glue the two layers together.
- I have a cardboard box set up as a spray glue station. You can use regular paper glue if making just 1 or 2 cards. I will be making 70 so I work for mass production!
- Glue is to be applied to only the two outside panels of the the front piece. I cut a piece of heavy cardboard 4" x 8".
- Place the cardboard over the center two panels of the backside of the front card section and apply spray adhesive. Work carefully to not get ANY glue on the center 2 portions.
- Don't use the Super 77 shown. It is too tacky. I like Aleene's Tacky spray because you have about 60 seconds for positioning.
Working quickly ...
- Place the card front over the card back, making sure the trees protrude through, then carefully line up the corners of the left side and press in place.
- Move to the right side and line up those corners and press in place.
- This is what the card looks like from the top when properly assembled. Bend it back and forth to make sure everything is correctly lined up. Correct if things are binding.
- The card is designed to fit into a standard A2 invitation available from Amazon. I used the darker green. How many will you make for your Christmas list?
Card Design © 2014 • 3DCuts.com • Marji Roy
Tutorial © 2017 • 3DCuts.com • Marji Roy


