
Tutorial - 3D Steampunk Gears

Project Description:
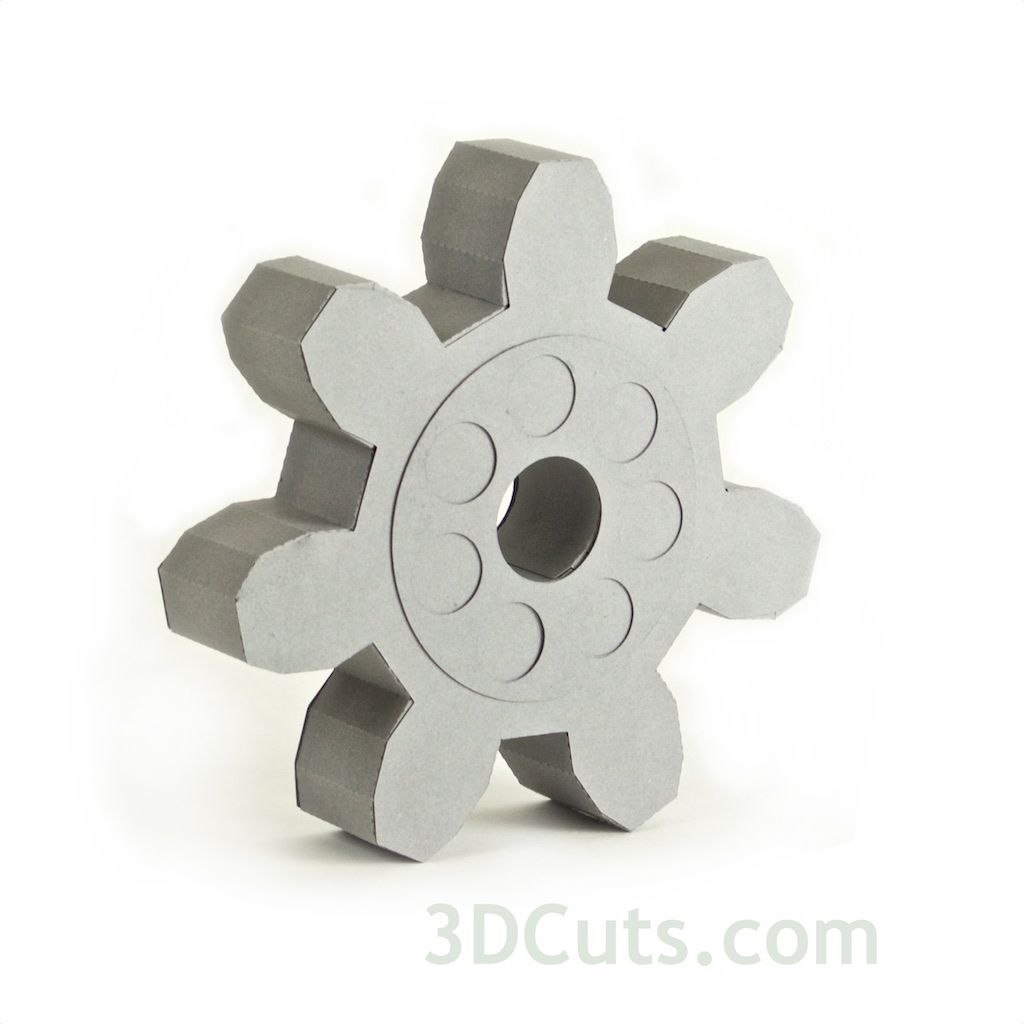
Using Card stock and your cutting machine create this pair of steampunk gears for your decor. The large one is about 8.25" tall and the smaller one is 6.5" tall. The small one is easier and should be your starting place. The assembly of this project is more complicated than many of my other designs and step-by-step instructions follow.
This tutorial is for both gears. They are assembled using the same techniques. The small gear does not have the additional interior slots so it is easier to make. The photos are from the assembly of the large gear.
Supplies Needed:
- Cutting File from 3dcuts.com
- 8.5 x 11" card stock - gray
- Permanent Paper adhesive I used:
- Scotch Tape Runner
- Spray Glue (Aileen's Tacky Spray)
- Tape Adhesive (Scor Tape)
- Scotch Quick Dry Adhesive
Part Sizes:
- Note- measurements are based on the orientation of a file as imported. If you rotate the gears the measurements will no longer apply.
- Steampunk Gear Large - 9 tooth
- Gear and gear coverings - 8.1425"w x 8.0205"h
- Gear center cover - 5.197"diameter
- Gear tooth outside wall - 4.2959"w x 1.75" h
- Center hole side wall - 4.056"w x 2.152"h
- Slot side wall - 6.9602"w x 1.736"h
- Steampunk Gear- Medium - 7 tooth
- Gear and gear coverings - 6.3867"w x 6.5498"h
- Gear center cover - 3.3845" diameter
- Gear tooth outside wall - 4.3616"w x 1.75" h
- Center hole side wall - 4.1346"w x 1.7361"h

Number of each part to cut for large 9 toothed gear.

Number of each part to cut for medium 7 toothed gear.
Steps for assembly of the Gears-
1. Download the cutting files for your cutting machine.

2. Load the files into your cutting software following the steps for your cutting machine.
3. Prepare the files:.
- Click here for detailed steps on how to use .SVG files on your Silhouette (with Design Studio).
- Click here for steps on how to use these .SVG files in Design Space with your Cricut Explore.
4. Cut the shapes.
- I used gray card stock but you can certainly experiment with other card stocks. Metallics would be interesting. Above are guide sheets so yo will know how many of each shape to cut.

5. Apply Adhesive

- The cutting files comes with 4 gears that are the same size. Two of these gear shapes have extra finger holes. These are the interior support gears. No part of these gears will be visible when the project is complete. Apply adhesive to one side of both large gear wheels that have the additional holes. The tabs of the sides walls will be adhered to this sticky surface. There will be tabs around the center circle, the 3 slots (large gear only), and all edges of the gear teeth. The edges of all these shapes need to have adhesive applied. I have successfully completed this step using 2 different methods. I'll explain both and you can choose your favorite.
- 1. For the first method I put my gear on an old slightly sticky cutting mat. That helped hold it in place. I then used my Scotch ATG 700 tape gun to apply adhesive all over the 1 side. It is ok if it runs over the ends. Just fold the over run back on to the paper.
- 2. The second method was to use 1/4" Score-Tape. I applied the Score-Tape along all affected edges. That is all edges except the 7 round finger holes. I left all the backing on the Score-Tape. This method was easier but took a lot longer. I recommend this method if you don't have a tape runner. I peeled the backing off in each area as I worked it.
- Apply the adhesive to one side of both gears with extra holes. Place them sticky side and proceed with care. You don't want then to accidentally stick to random paper surfaces! Keeping the sticky surface free is the most challenging part of this assembly.
- The gear will be assembled from the center out.


6. Insert Center side wall.
- The center side wall piece is the only wall pice that you cut only once. Its tabs are all similar in size.
- Once you have identified it, pull it over the edge of your table to give it a natural curve.
- Apply a strip of Score-Tape along the end tab but leave the backing on.
- Do not fold the tabs out yet.
- Roll this up so it will slide into the center hole of one of the sticky gears.
- Position it so the tab of the cylinder will be on the outside of the cylinder and not show in the center hole. When the gear is finished the interior of the center hole is visible and the outside of that cylinder is not.
- Once inside the hole, you will be able to judge the exact size for this cylinder.
- Peel the backing tape off the Score-Tape only on the cylinder tab and press in place being carefully to keep the seam square to the edges. You want the cylinder to have the same diameter at both ends.

- Fold the tabs of one end of the cylinder out.....
- And slide down and stick in place to the sticky side ot the gear wheel.


- Slide the second sticky gear onto the center shaft (adhesive side facing out) being careful to watch for alignment of the spokes of the wheel. (No spokes in small gear.)
- There are 3 spokes and the two sticky wheels must be placed on the center shaft so these are in alignment.
- Do NOT fold over the tabs of the second end of the center shaft until you have positioned one side wall of the slot to help with this alignment. (next step)
- You may fold over the tabs on the medium 7 tooth gear at this point and skip step 7- Prep and install slot Side Walls. Move right to step 8 because the medium gear has no slots.

7. Prep and insert slot side wall. (Skip on medium gear)
- There are 3 side wall pieces that match. These are for the side walls of the 3 slots.
- Fold along the 4 cross-wall fold lines as shown in the diagram. One side is noticeably shorter.

- Apply Score-Tape to the inside of the 1/4" tab, peel the backing and fold it over to adhere to the outside of the other end.


- Slide the slot side wall into one slot of both layers of the sticky gears. Use the slot side wall to help align the spokes between the top and bottom sticky gears.
- Fold over all tabs on one side of the slot wall and stick into place. Fit is important and take your time to line things up.

- Now work on the other side. I found it helpful to place the sticky gear up on the lip of an empty jar as I worked. Then the sticky down side would not adhere to the wrong things.
- Make sure the spokes line up and adhere the tabs of the slot side wall. I started by folding and adhering the 2 ends first and then the 2 curved edges.
- It is important to press all tabs well. I had one hand inside pressing up and the other outside and pressing down.

- Remember as you work that the side walls will show on the finished project but the flat surfaces will not.
- Here I noticed some spots that didn't have good adhesive coverage. I simply added a drop of Scotch Quick dry adhesive and held it for a few moments to hold tabs in place.
- Be careful to not get glue on the visible surfaces though.

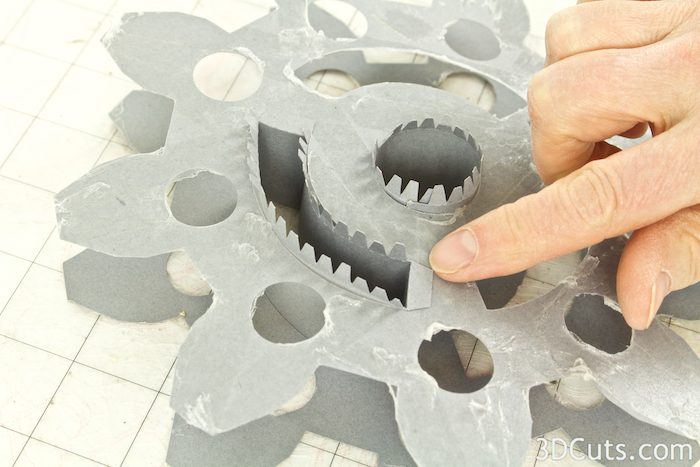
- Now that you are sure the spokes are lined up you can bend over and adhere the tabs of the other end of the center cylinder.

- Repeat step 7 for the remaining two slot side walls.

- As you work some of the tabs may tend to become unstuck. Keep pressing them back in place.
- If you have some stubborn areas it is fine to add a little scotch tape to hold them in place.
- I used regular scotch tape cut in half, and applied tabs in places that needed extra stick.
- Don't allow the tape to hang over edges. It will show.

- At this point your gear should be starting to feel a little more solid and it gets easier to handle because there are an increasing number of surfaces that aren't sticky.
- All 3 slots should have side walls. The center should have a side wall and all tabs should be glued down.
- As you start adding the walls to the gear teeth you will lose access to these areas.

8. Prepare and insert the gear teeth side walls.
- (Medium Gear assembly directions resume here.)
- There 9 gear teeth on the large gear and 7 on the medium one. You should have cut the matching number of side wall pieces.
- Fold one to resemble the folds to the right.
- All folds are in the same direction except for the last two folds on the end with the glue tab. Those fold in the opposite direction.

- It is easiest to position the gear tooth wall by starting at the base of the tooth and placing the longest piece in position at the bottom of the notch.
- Fit this section carefully making sure it is seated all the way down into the notch before adhering the two side tabs. If your fit is poor on this piece, the entire tooth will not fit well.
- Press the side tabs firmly in place on both the front and back sticky gear.

- Position each facet of the gear tooth side wall, one tab at a time moving out along the gear tooth, across the top and down the other side. Adhere both the front and back tabs. Press firmly in place while you have access to these tabs. Access will become more limited as more wall is attached.
- The outside edges of these gear teeth will be visible when finished so keep them clean.

- The round holes in the gear are there to provide you with inside access. Using a pinky finger you can reach in to help apply pressure to tabs from the inside.

- Prepare the next gear tooth side wall by folding in the same way as you folded the first (See 8 above).
- Apply Score-Tape adhesive NOT to the tab but to the inside of the last panel at the end OPPOSITE the tab. This will adhere to the previous tab.
- Peel the backing tape

- This panel that has the Score-tape on its back side will get positioned over the tab at the end of the previous side wall you put in place.
- Align it carefully making sure it is snug in the corner and press in place.

- Again, position each facet of the gear tooth side wall, one tab at a time moving out along the gear tooth, across the top and down the other side. Adhere both the front and back tabs. Press firmly in place while you have access to these tabs.

- Continue around the gear adding teeth.
- Notice in the photo some of the tabs are coming up. I just kept pressing them down or adding tape if needed. The final steps covers all of those to hold them in place so they aren't a huge worry as long as things are secure.

- The process for inserting the final gear tooth side wall is a little different.
- Put tape adhesive on the top of the tab in addition to the tape adhesive on the backside of the last panel.
- Peel both. The tab gets slid behind the end panel of the first wall that went in and pressed in place, and then position the panels around the tab and press the other end in place.

- Go back an press all the side tabs in place.
- Inserting your pinky into the holes to gain access to the underside and apply pressure is helpful.

9. Apply Gear sides.
- Use spray adhesive to cover one side of the gear side covering with adhesive. I like to use Aileen's Tacky Spray adhesive because it takes about 30 seconds to dry leaving you a little time to slide a piece into place.
- Repeat on the flip side.

- Also using spray adhesive adhere the center cover. This overlaps the edges slightly so if your placement of the side walls wasn't perfect it will help hide some of the tab edges.
- Repeat on flip side.

Congratulations! Now try the other gear and make a meshing pair. How will you display them?
