
3D 4 Layer Shadow Box • Tutorial
Project Description:
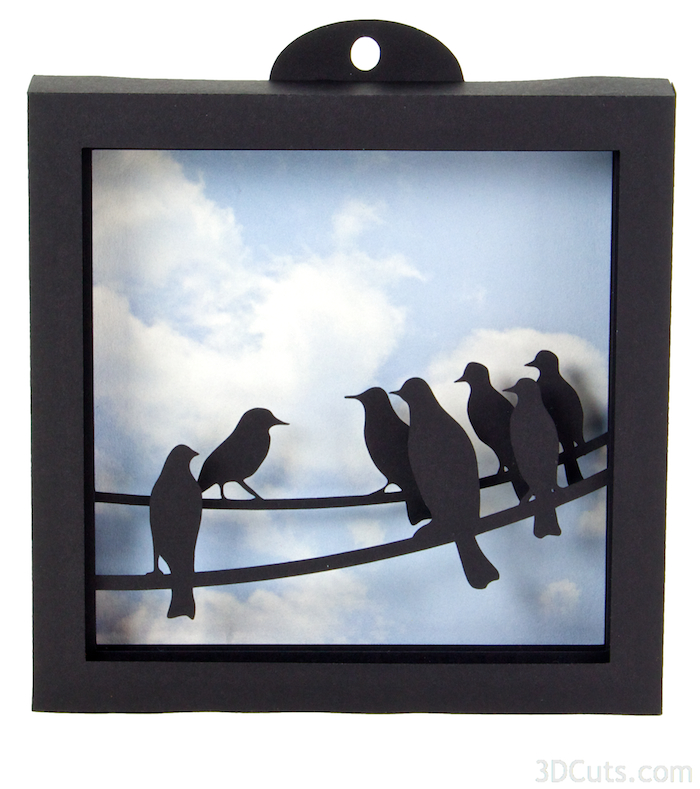
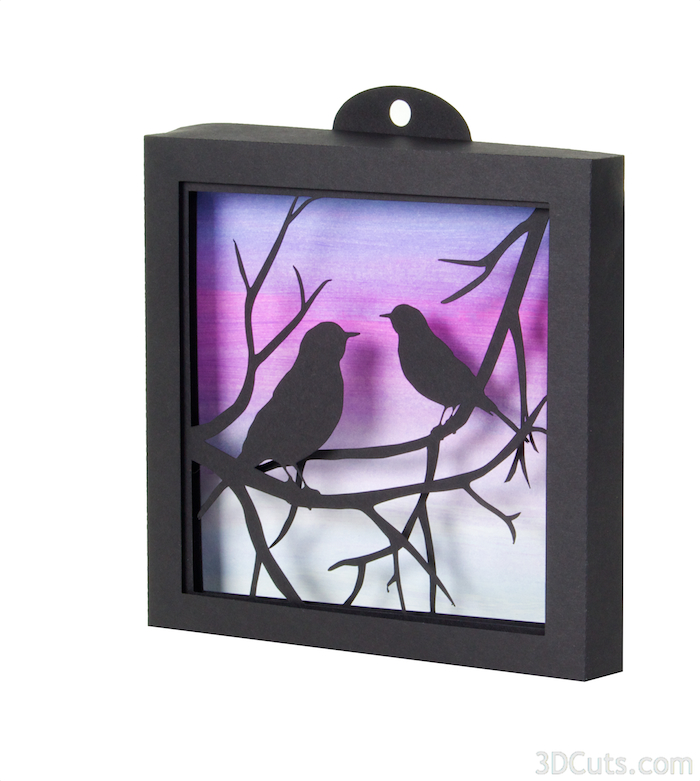
The shadow box continues to be a form I use often in my 3D paper designs. This tutorial is for any of the 4 layer shadow boxes. I photographed the Birds on a Wire shadow box as I made the tutorial but you can also use this for other designs as well. More will be coming!
3D Shadow Box with Four Layers - Tutorial
Supplies Needed:
- Cutting File from 3dCuts.com
- The two displayed in this tutorial are:
- Birds on a wire
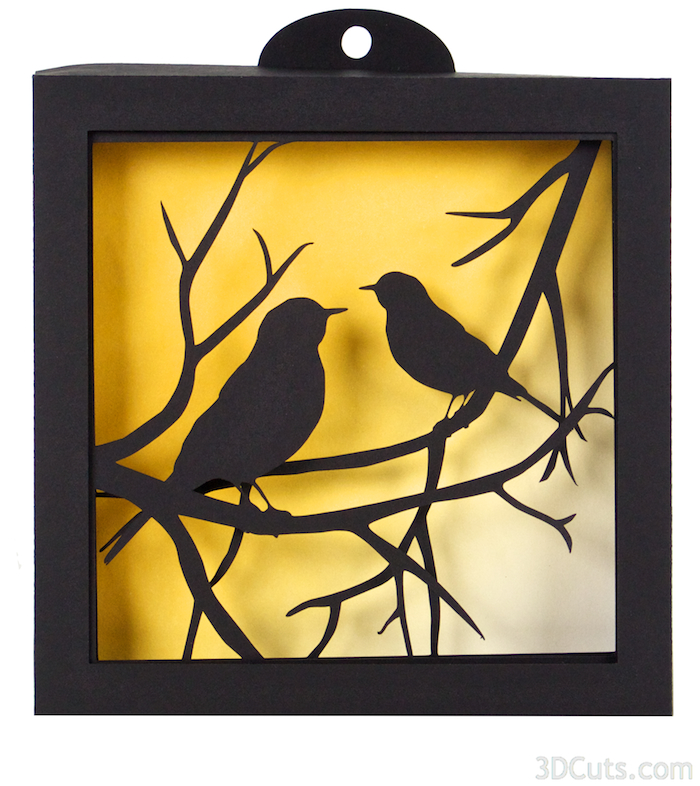
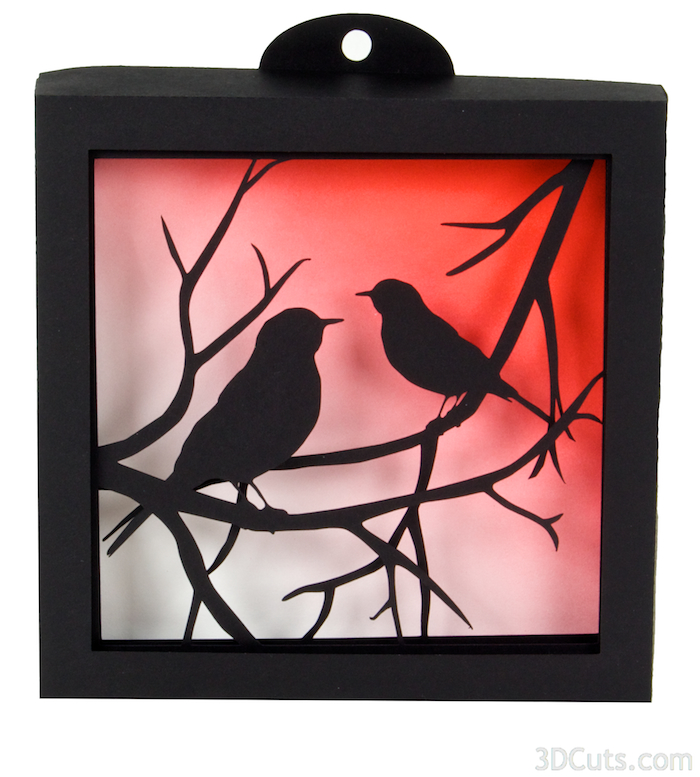
- Robins in Branches
- 8.5 x 11" card stock - I used the 65lb Cardstock from Recollections.
- 1 6"x6" square of decorative background paper. The photos included show a variety of backgrounds with the same cutting file. Notice how it changes the impact.
- Paper Adhesive - I like Glu Dots and Scoretape for this type of project but other adhesives work as well.

Steps for completing the Shadow Box:
1. Download the cutting files for your cutting machine.
2. Load the files into your cutting software following the steps for your cutting machine.
3. Prepare the files:.
Helpful Hints:
- For the Silhouette: The SVG files from this site will need to be turned into cutting files. Click here for detailed steps on how to use SVG files on your Silhouette. http://www.3dcuts.com/tutorial-upload-svg-silhouette
- For Cricut Explore: Here is a guide for importing into Cricut Design Space. http://www.3dcuts.com/tutorial-adding-3dcuts-files-to-cricut
4. Cut the shapes.
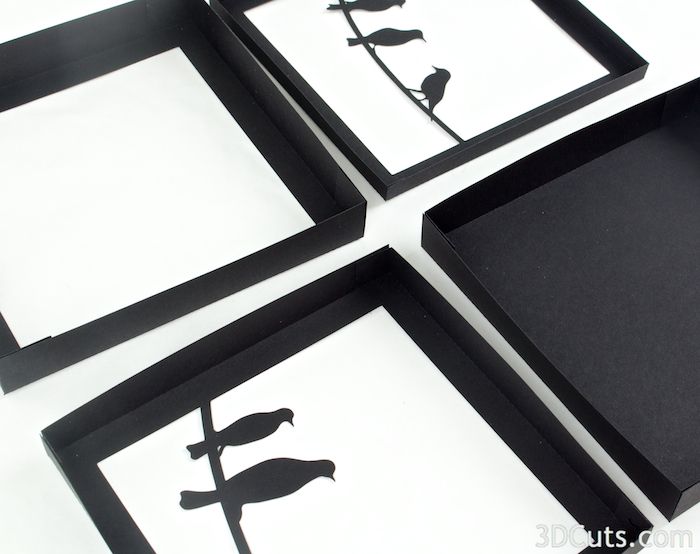
- It depends on the specific file you are cutting but most will have 4 box layers, 1 back ground piece and an optional hanger. Some designs might have accessories that get added as embellishments.
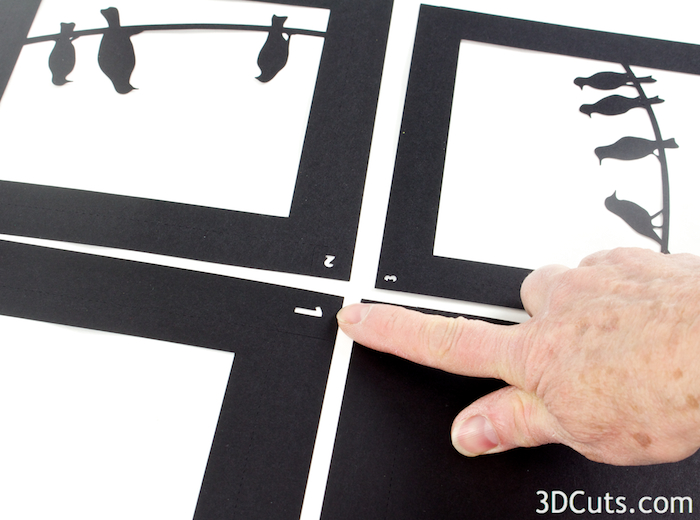
5. Construct all 4 box frames.
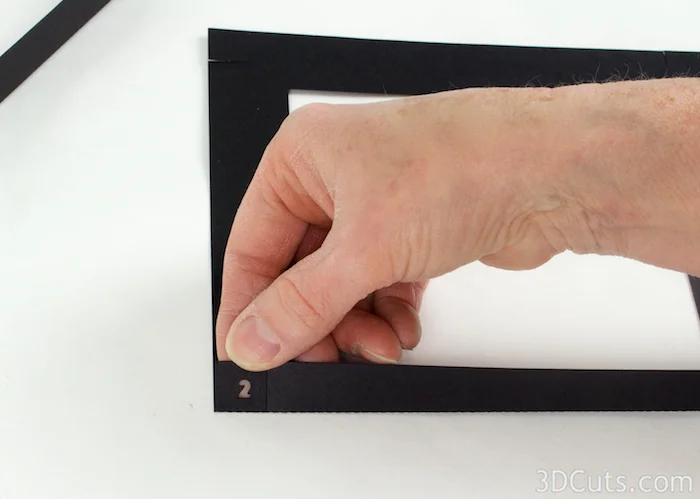
- Notice there is a cut-out number in one corner of each frame. Use this a guide. It will help in identifying the layers, identifying front or back, and knowing which corner should be in the upper left.
- I universally design these so that the number is always in the upper left. On some frames it doesn't matter but on others it does. If you always have the number in the upper left as you work you will know you are assembling things correctly.
- The frames are numbered as they will be when complete. Number ! is the front frame, 2 next, 3 next and 4 in the back. You will not assemble them in that order though.

- Start with frame 1.
- Place the 1 in the upper left corner and fold on all dotted fold lines. You will fold the 4 edges back and away from you on frames 1,2 and 3.
- Make nice, crisp folds.
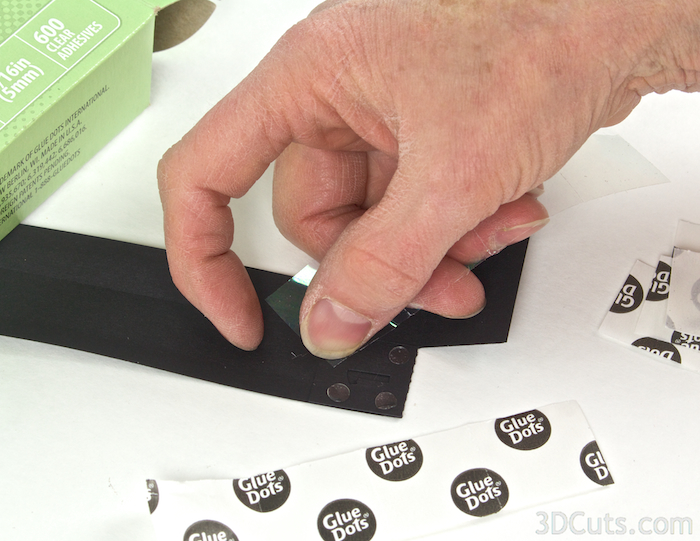
- Use your adhesive of choice to glue the tabs inside of each corner. I like to use Glue Dots because it keeps my fingers clean. Other adhesives works as well.
- On the first frame I put 4 mini glue dots in each corner.
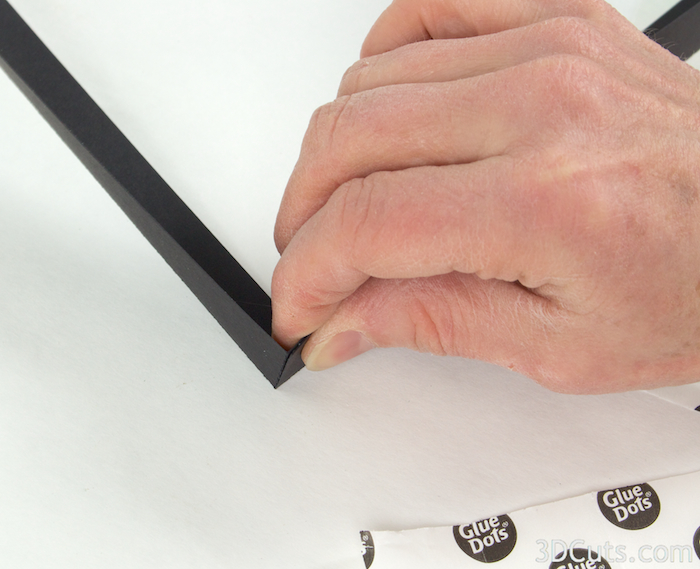
- Make sure the edges line up.It is important to make good, even square corners.
- Glue all 4 corners of layer 1.

- Glue together layers 2 and 3 the same way as you completed layer 1.
- These are inside and 1 glue dot per corner is enough.
- On layer 4, reverse the fold. All the edges of layer 4 will be folded up toward you.
- You should now have all 4 shadow box frames folded and glued together.

6. Add embellishments.
- Some shadow boxes may have embellishments on some layers. This would be a good time to add those, before you combine the layers.
- Is your shadow box going to have a background design? If so adhere that to the inside bottom of layer 4. I like to use spray adhesive for this step because it keeps this layer flat.
- You can tell from this tutorial that I have experimented with many types of paper for the background. Some, like the clouds are stock papers but I also used watercolors, acrylics and spray paint to created interesting new papers as well.

- The cutting file includes and optional hanger. If you want to use it, glue that into the top of layer 1 so the hole folds up to the outside.
- I used ScorTape here although any tape runner with permanent adhesive would work.
- Be sure to center the hook along the top edge of layer 1.
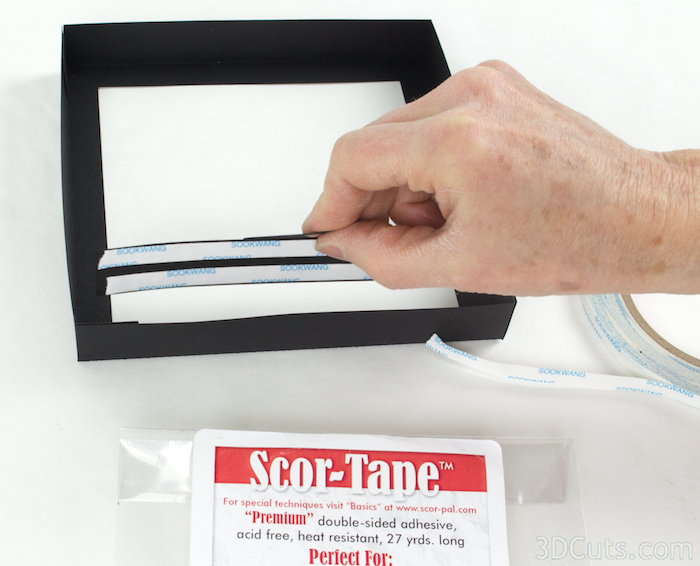
7. Adhere frame 3 into frame 2.

Frame 3 gets adhered inside frame 2 using Glue Dots or another adhesive.

I used Scor-Tape for this step.

Make sure the back edges of each side line up evenly. This forms the space between frames 2 and 3.

8. An aside on spacers.
- With some shadow boxes it is wise to add a few well placed spacers. If the design has areas that don't seem to be well supported and might sag over time, inserting a spacer behind it and attaching that to the back layer will make your shadow box stronger.
- Different things can be used for spacers depending on the location. Certainly white foam dots work well on a white design. I have also used self-adhesive weather-stripping foam.
- I also will make tiny paper "springs" in matching paper if it might be visible.
- For the Birds on a Wire shadow box I did make some paper spacers to help secure the center of the design. The wire is the only support and I expect the birds will sag over time.
- To make 1 type of paper spacer, cut some 1/4" strips from the background paper. I used the cloud paper which was clouds on one side and white on the other.
- Use a single glue dot to glue the two ends together at right angles.
- Fold the bottom strip over the top, back and forth creating the zig-zag paper spring.
- When it is the proper depth for your shadow box, add a glue dot to seal the end and cut the long remaining strips of paper off thus creating a little spring.


- In the Birds on a Wire shadow box I added 2 little spacers.
- The first is made from the background paper and connected the bird closest to the center on layer 3 to the back ground. This added strength to the back wire.
- I made a second out of black paper and placed that behind the largest bird on the front line and connected it to the wire behind it. That added a bit of strength to the front line.
- Not all designs need this type of paper engineering. It is needed when there are few connectors to the edges, or long skinny areas that are not supported.

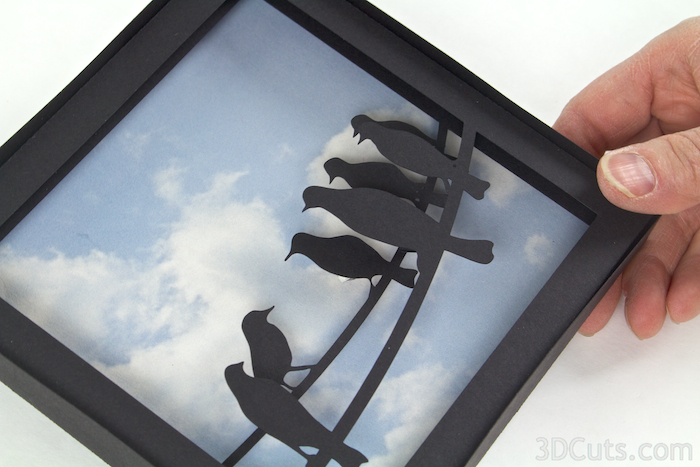
9. Insert frames 2 and 3 into frame 4.
- Frames 2 and 3 have already been glued together so their back edges are even. This unit gets slid into frame 4 and positioned against the background. You want the edges of frame 3 to be snug with the background on all four sides.
- It is at this stage that I experiment with different backgrounds before finalizing my choice.
- You do need to glue this in place using Glue Dots so it won't slide out while on display. But be sure of your background before gluing!
10. Adhere frame 1 around frame 4.
- Frame one should fit snuggly around frame 4.

I added Scor Tape to all four edges of frame 1 but didn't peel the covering until the frames were placed together.
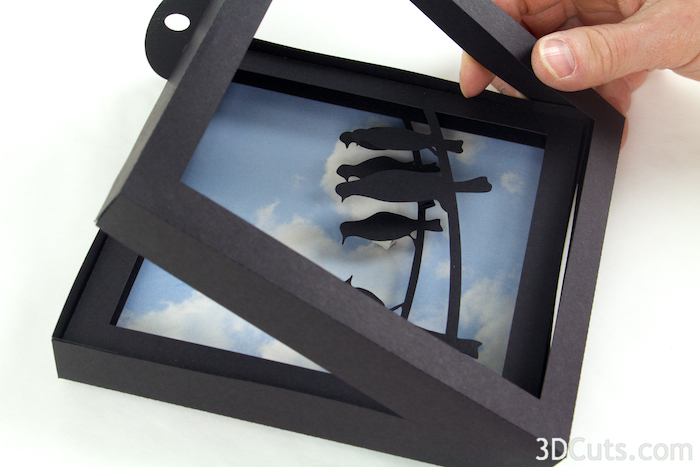
I slide frame 1 over 4.

I reached in to each side, peeled off the covering and pressed to adhere.
The shadow box is now complete and ready for display!

Copyright 2015 • 3DCuts.com • Marji Roy