3D 5 Layer Shadow Box - Tutorial
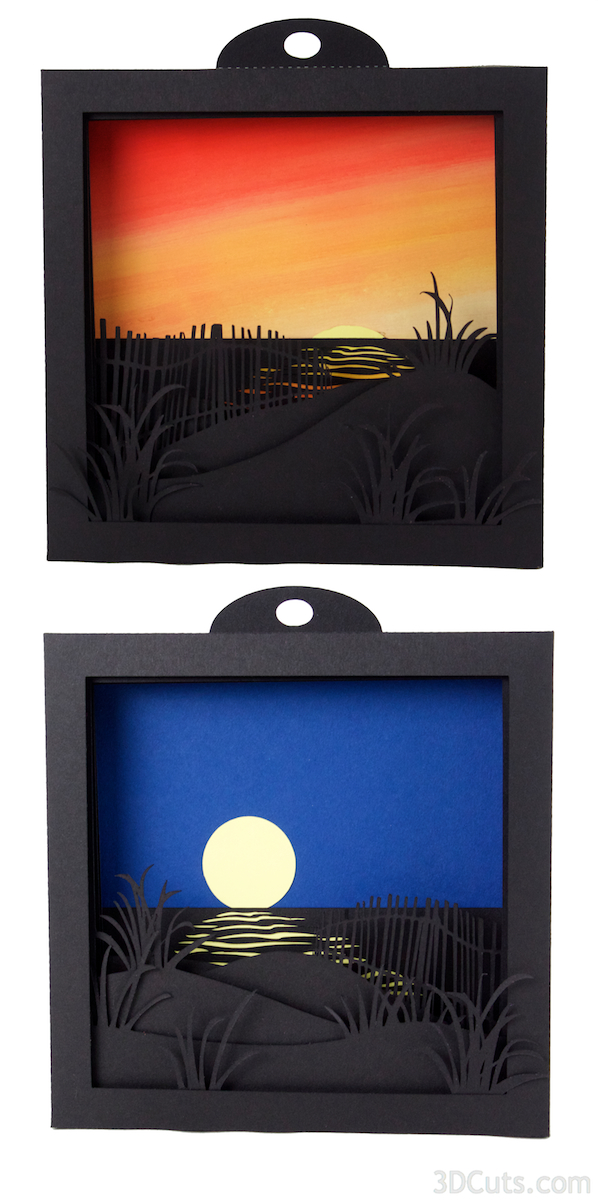
Sunrise or Moonrise Shadow Boxes
Project Description:
This tutorial is for the 5 layer shadow boxes designed by 3dcuts.com.
I am constructing both the Sunrise Shadow Box and the Moonrise Shadow Box as I take these photos but these directions can apply to the process for other 5 layer designs as well.
These shadow boxes are about 6 1/8" square when complete. All parts are sized to fit on 8.5 x 11" paper although they can be resized for 12X12 paper.
3D 5 Layer Shadow Box Tutorial
Supplies Needed:
Cutting File from 3dcuts. com.
8.5 x 11" card stock - I used the 65lb Cardstock from Recollections. Each shadow box takes 5 sheets of black plus 1 sheet for the sky. Yellow is needed for the sun and moon.
Adhesive - I use Scor-Tape, Zig 2-way glue, and glue dots although other adhesives would work.
Scotch tape
Parts Sizes - moonrise:(Needed for dxf files)
Layer 1 Group - 7.8347” w x 9.3514”h
Layer 2 group - 7.1668” w x 9.7951”h
Layer 3 - 6.7116”w x 6.7104”h
Layer 4 group - 7.6272”w x 9.399”h
Layer 5 - 7.7198” w x 7.7198” h
Parts Sizes - Sunrise:(Needed for dxf files)
Layer 1 Group - 7.8344” w x 7.8344” h
Layer 2 - 7.1631” w x 7.172”h
Layer 3 - 6.7116”w x 6.7104”h
Layer 4 group - 6.4006”w x 9.7834” h
Layer 5 - 7.7198” w x 7.7198” h
Steps for completing the shadow box:
1. Download the cutting files for your cutting machine from the 3dcuts.com store.
2. Load the files into your cutting software following the steps for your cutting machine.
3. Prepare the files:.
For the Silhouette: The SVG files from this site will need to be turned into cutting files. Click here for detailed steps on how to use SVG files on your Silhouette. http://www.3dcuts.com/tutorial-upload-svg-silhouette
For Cricut Explore: Here is a guide for importing into Cricut Design Space. http://www.3dcuts.com/tutorial-adding-3dcuts-files-to-cricut
4. Cut the shapes.
It depends on the specific file you are cutting but most will have 5 box layers, 1 back ground piece and an optional hanger. Some designs might have accessories that get added as embellishments.
Several of these cutting files have very fine lines. When cutting fine lines I find it best to have a good blade, a good mat and to slow down the speed.
On my Silhouette, using Michael's Recollections Card stock, I cut a depth of 3, thickness of 27 and speed of 3. I slowed the speed to 1 for the fence pieces and the ripples. Remember all blades are different but this will give you a guideline if working on Silhouette.

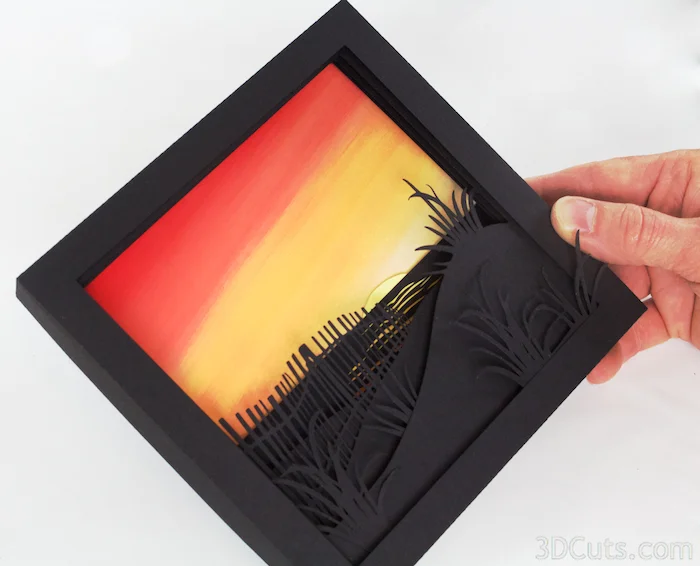
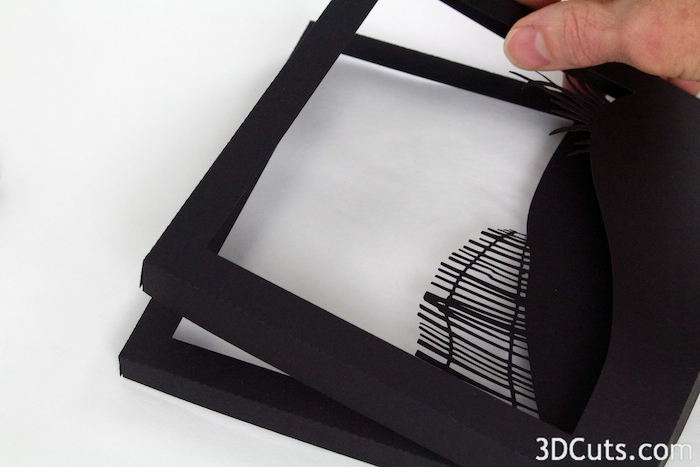
5. Construct all 5 box frames.
Notice there is a cut-out number in one corner of each frame. Use this a guide. It will help in identifying the layers, identifying front or back, and knowing which corner should be in the upper left.
I universally design these so that the number is always in the upper left. On some frames it doesn't matter but on others it does. If you always have the number in the upper left as you work you will know you are assembling things correctly.
The frames are numbered as they will be when complete. Number 1 is the front frame, then 2,3 and 4 and 5 in the back. You will not assemble them in that order though.

Start with frame 5.
Place the 5 in the upper left corner and fold on all dotted fold lines. You will fold the 4 edges TOWARD you on frame 5. (All other frames fold in the opposite direction.)
Make nice, crisp folds.

Use your adhesive of choice to glue the tabs inside of each corner. I like to use Scor-Tape or Glue Dots because it keeps my fingers clean. Other adhesives works as well.
Note- frame 2-5 will be inside each other and out of sight. You can use a single glue dot in each corner. Frame 1 is the outside frame and I recommend good glue coverage on this layer. I used Scor-tape here.
Now glue frames 1,2,3 and 4.
These frames all get folded Away from you on the fold lines.
Make sure the edges line up.It is important to make good, even square corners.
You should now have all 5 shadow box frames folded and glued together.


6. Attach frames 2,3 and 4 together.
1. Place frame 2 over frame 3. Align back edges so there is a space between the two,

3. Place the combined 2and 3 frames over frame #4.

2. On the backside apply scotch tape to the inside edge, fold it over and tape the back edges together. Do this on all four sides.

4. Again, tape on all four sides being sure to keep back edges aligned.

3d Shadow boxes by 3dCuts.com, Moonrise, Sunrise, Marji Roy, 3D cutting files in .svg, .dxf, and .pdf formats for use with Silhouette and Cricut cutting machines
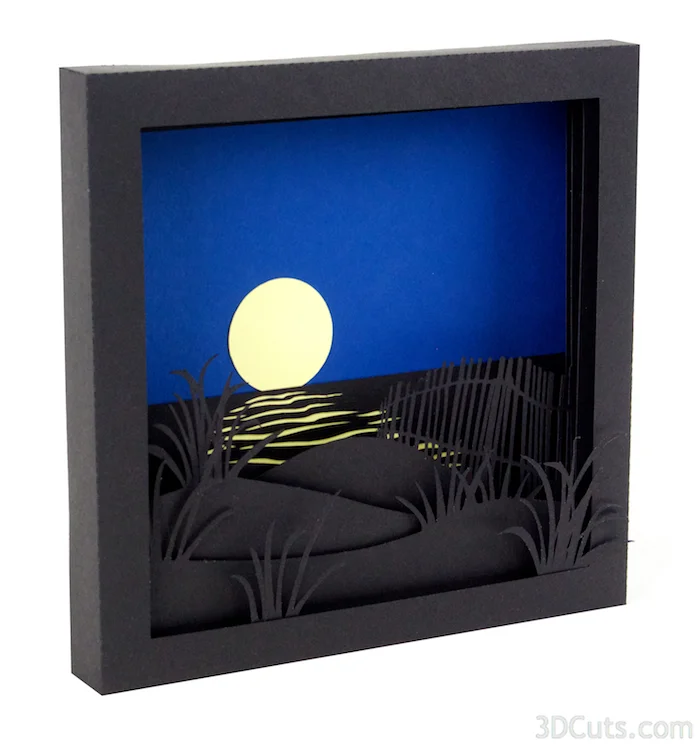
7. Prep the background layer - Moonrise
Steps vary here depending on your shadow box theme.
I'll include step-by-step for both the sunrise and the moonrise.
Cut a rectangle of paper to match the moon paper. It needs to cover all the ripples. 4 1/2" x 1 3/4" will work.
Glue that on the backside of the the ripples paper. I used a quick drying, non-wrinkling paper glue.
Be sure to cover all the ripples but don't let the yellow show above the top edge. Try to keep it a very tiny bit below the top edge.

Cut a 6" square of Navy blue card stock.
Glue the ripples piece to the front of your background paper. The bottom edges should align.
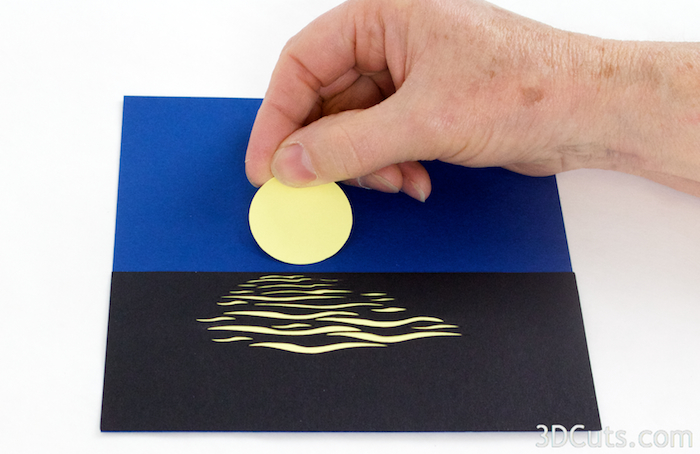
Position the moon and glue it in place. You can use personal preference here. Do you want the moon above the horizon, or just rising up?

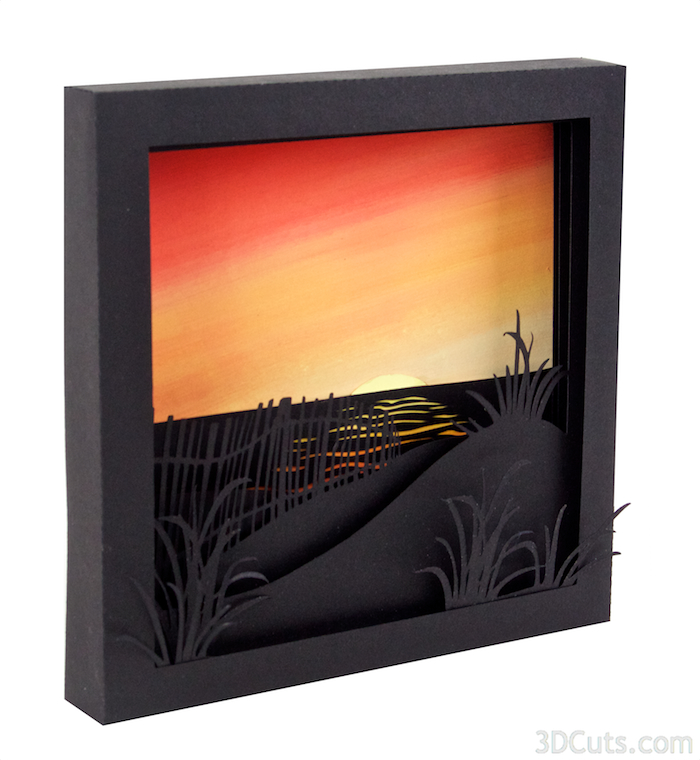
7. Add the background layer - Sunrise.
What have you decided to use as a background layer? I have used many different types of paper on the shadow boxes I have created. You can use a solid color like on Moonrise. A rose pink would work. I created my own sunrise paper for the Sunrise shadow box. I have also purchased sky papers at speciality shops.
I often create papers with gradated colors on them using either acrylic or water color paints. I tape card stock to a tray, and using a number of brushes I quickly add paints to a wet surface blending them together. When I set up to make skies, I make a whole series and then let them dry for use in my projects.
If the paper is curled, I spray glue it to a square of cardboard before inserting it into the shadow box.

Cut a 6" square for your background. I also cut a rectangle (4 1/2" x 1 3/4") to back the ripples .
If using a gradated for the sky be sure to reverse the gradation for the ripples.
Glue the colored paper behind the ripples and then attach the sun to the horizon right above the converging ripples.
Attach the ripples to the background matching bottom edges.
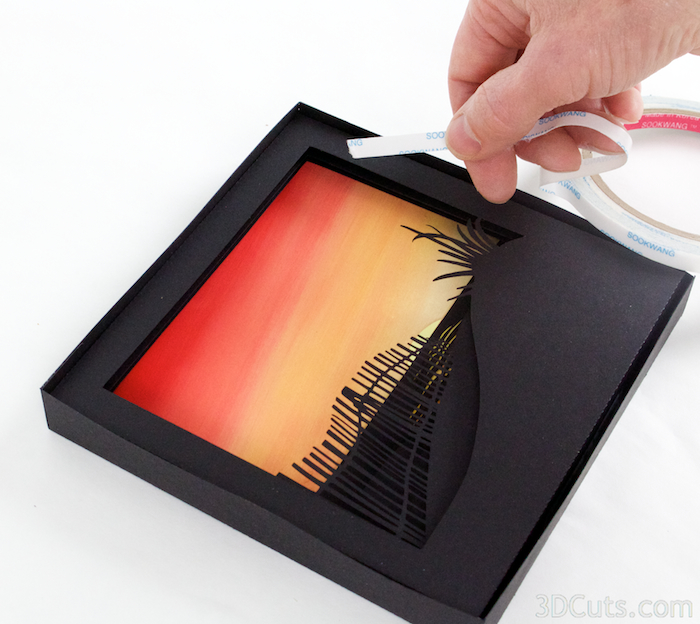
Glue the completed background inside frame 5.

8. Combine layers 2,3,4 and 5.
The combined 2,3 and 4 layers will be glued inside frame 5 on top of the background.
I like to use Scor-Tape for this step. I apply Scor-tape to all 4 outside edges of frame 2 but leave the backing on the Scor-Tape.
I then place it in frame 5 and using tweezers, I reach into the seam and pull off the Scor-Tape backing.
I then press it in place.
I have also used hot glue for this step. It is messier but works.
9. Various Optional Additions
Extra layers
I added an extra layer to the front of Frame 2 in Moonrise.
It gets applied to the front of frame 2 using either glue dots or foam tape.


Hanger
A hanger is included in the cutting file.
This gets glued inside the top of frame 1. It is optional. The shadow boxes are easier to hang on the wall with the hanger but can also be placed on a shelf.


Extra grasses.
The cutting files includes a number of extra clumps of grass.
These can be attached using glue dots to various corners of the shadow box.
I generally like to add them to the back of frame 1 before attaching it.
Use your creative judgement in location and number. You do not need to use them all.

10. Attach Frame 1
Put Scor-Tape on the 4 outside edges of frame 5 leaving the backing in place.
Slide frame 1 over it.
Pull the backing off the Scor-Tape using tweezers and press in place.

Which shadow box did you make first? How about the second?

©2015 Marji Roy, 3dcuts.com