
Gear Cards for Guys • Tutorial
Project Description

Finding a good card design to give to guys (or girls that dislike frills) can be a challenge. I have designed some cards that are aimed at that difficult group. These Gear Cards not only have a mechanical flair to them, the gears actually work!! By layering paper to make parts, you can create meshing gears! Add some appropriate phrases and you have a guy card!
I photographed the Valentine as I completed this tutorial but other cards are assembled using the same techniques. This tutorial is also for the Geared Up birthday card.


Supplies Needed:
- Cutting File from 3dcuts.com
- 8.5 x 11" card stock
- Spray Glue (Aileen's Tacky Spray)
- Paper Adhesive liek Zig 2-way glue
- 1/2" paper fastners
Steps for assembly of the Gear Card
1. Download the cutting files for your cutting machine.
2. Load the files into your cutting software following the steps for your cutting machine.
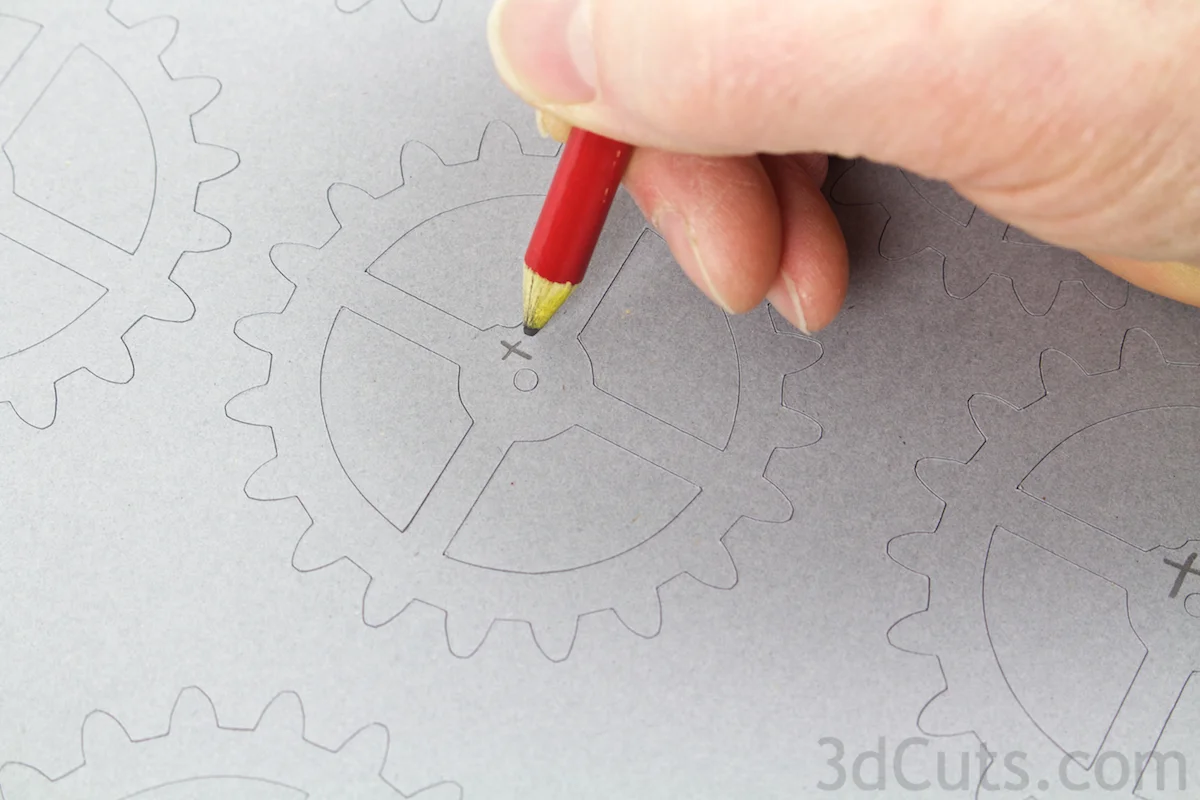
3. Prepare the files:.

4. Cut the shapes.
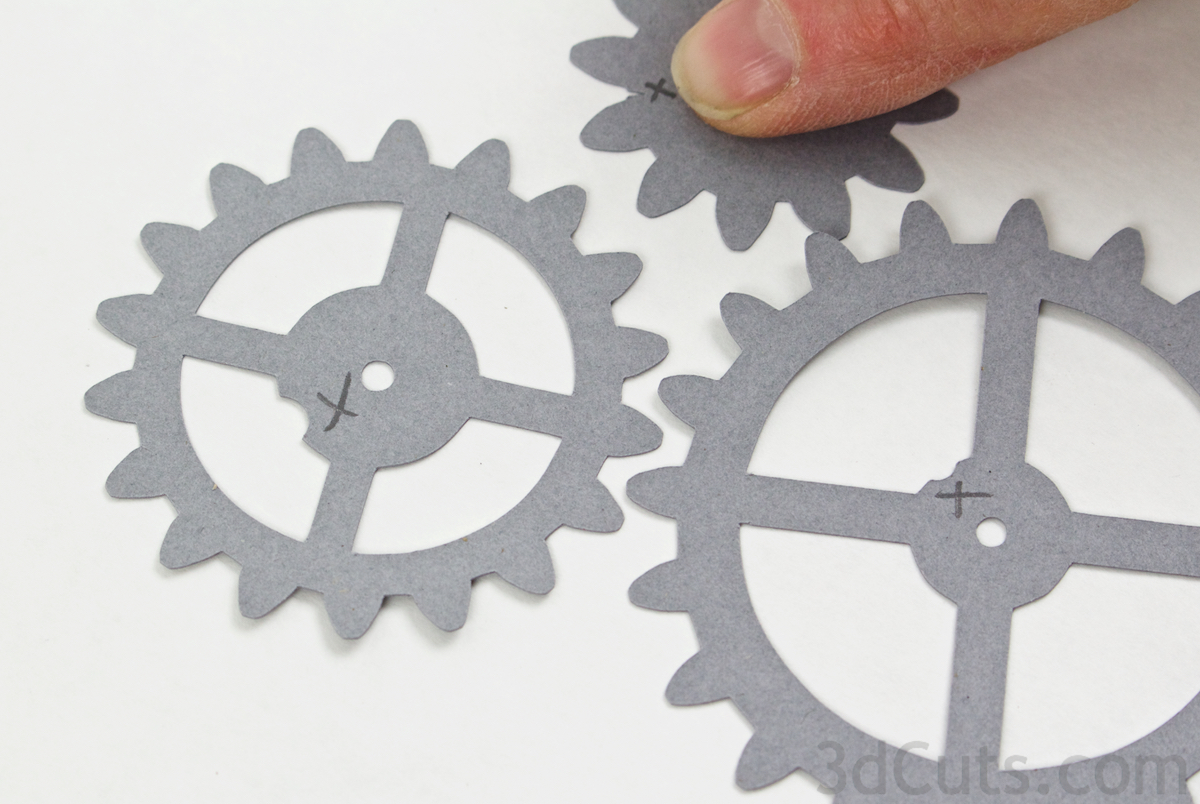
- Cut 6 identical gears for each 3d-working gear your design will include. It will help in placement if you mark the backside of each before taking it off the mat. This just makes lining them up for glueing easier.
- Carefully place the background piece because it uses almost the entire piece of card stock. Use good quality card stock if you want the letters to cut cleanly.
- To the right is the parts information for the triple gear birthday card.
5. Assemble all 3D gears.
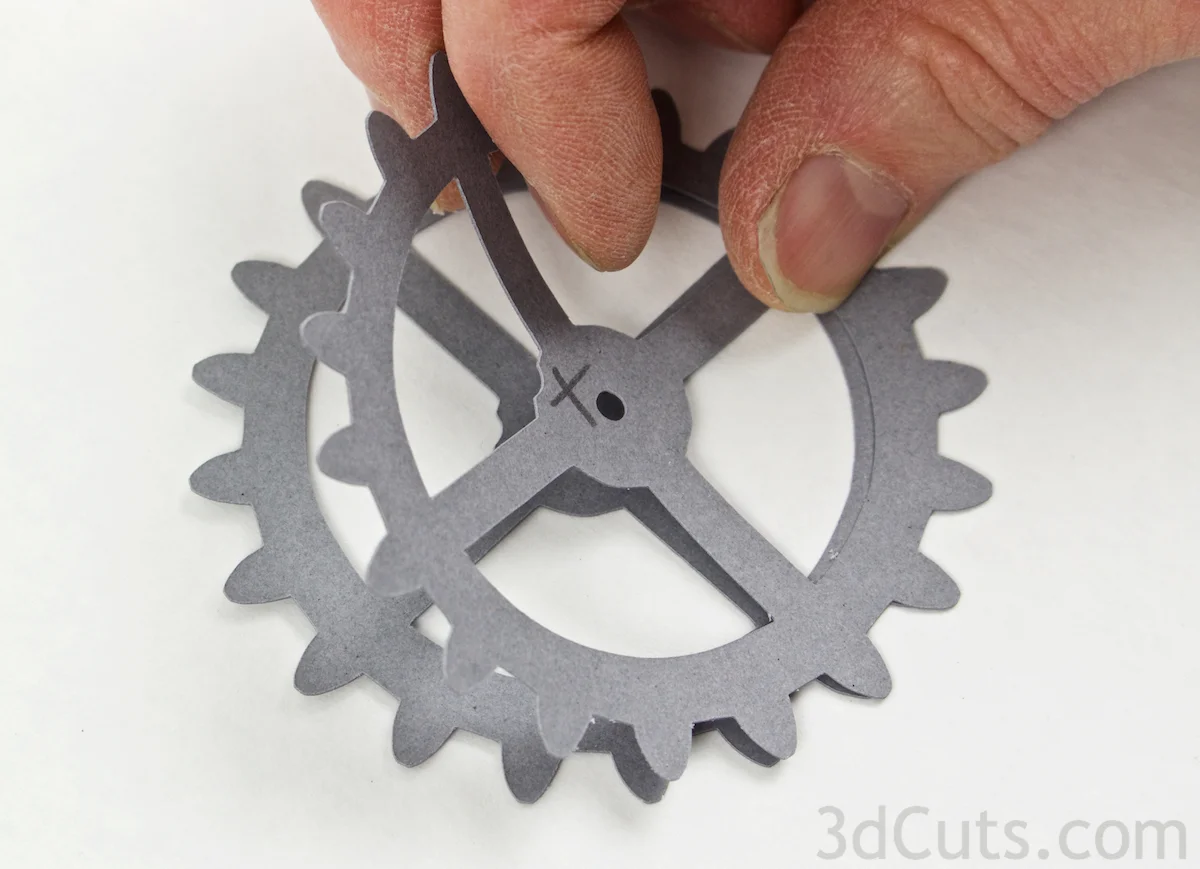
- The 3D gears are each made up of 6 layers glued together. Alignment is important. You will note that each gear has a notch to help with alignment. On the gears with cut out centers, the notch is on the center ring. On the smallest gear it is tiny and at the base of one of the notches.
- I used Aileen's Spray Tacky glue to assemble the gears. It is important to get a good solid coverage of glue on each and every gear. I like Aileen's because it gives about 60 seconds of time to slide the pieces after placement.
- Spray glue on the front of one gear and attach it to the back of another.
- Move your fingers around the outer edge making sure the gear teeth align all the way around.
- Press the pieces together on all teeth so there will be no separation later.
- Continue spraying and layering until the gear is 6 layers thick.
- Make all the 3D gears for your design - 3 for the birthday card and 2 for the valentine.
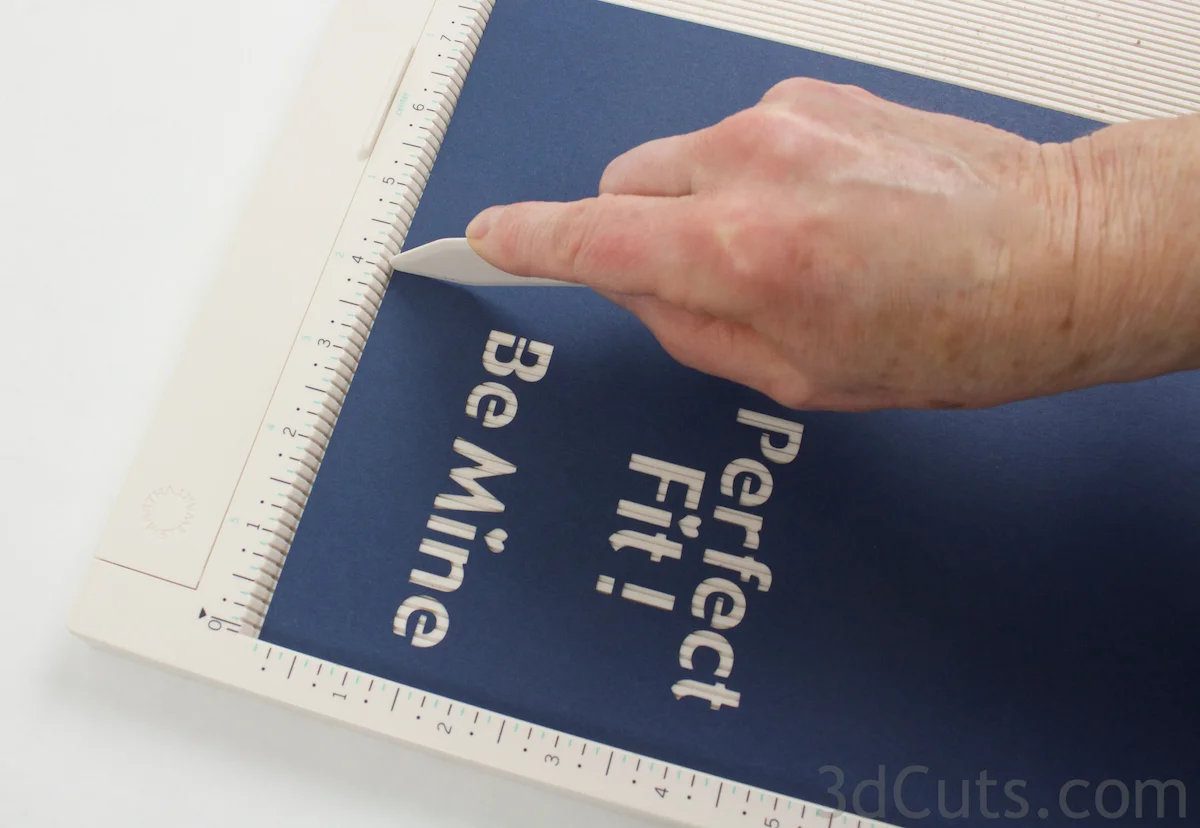
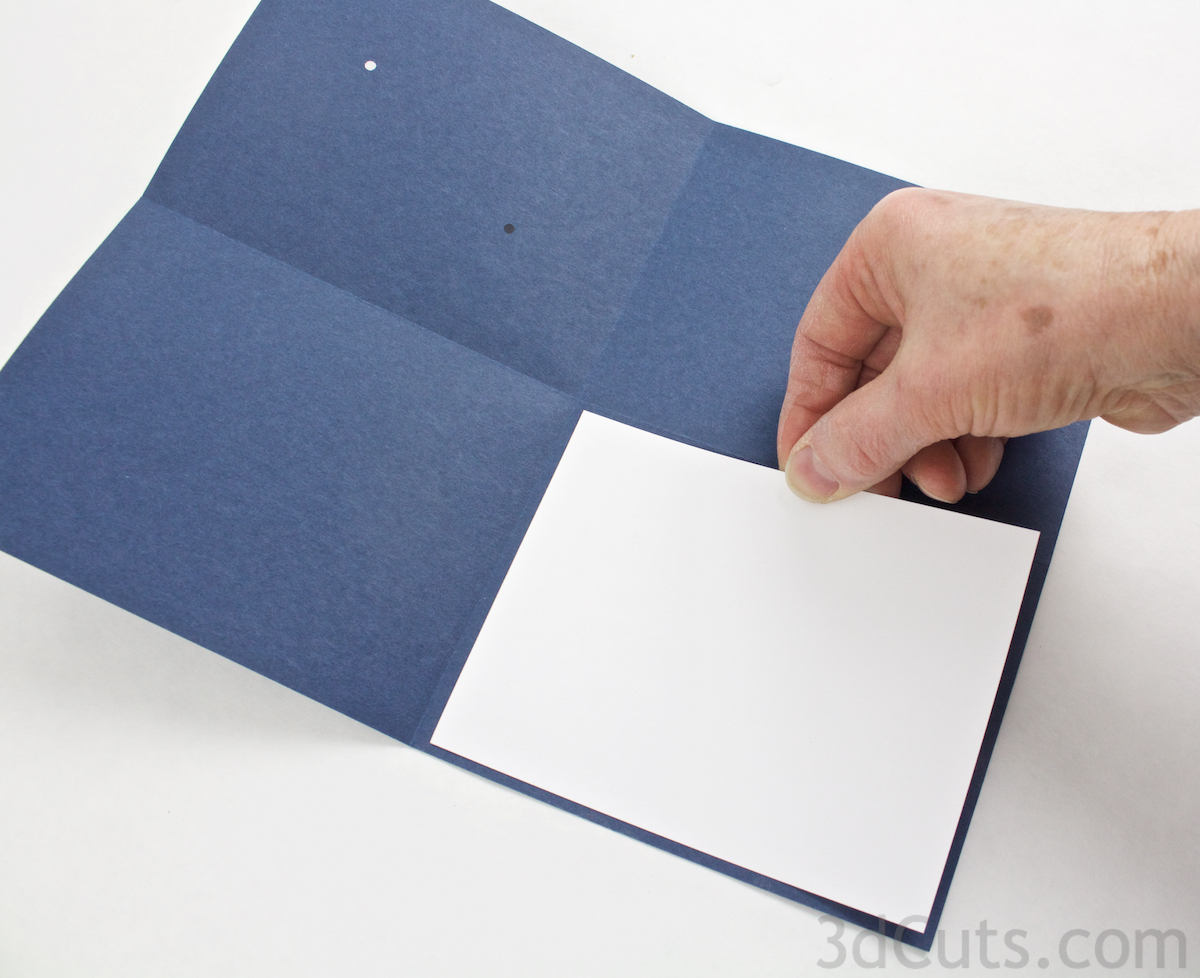
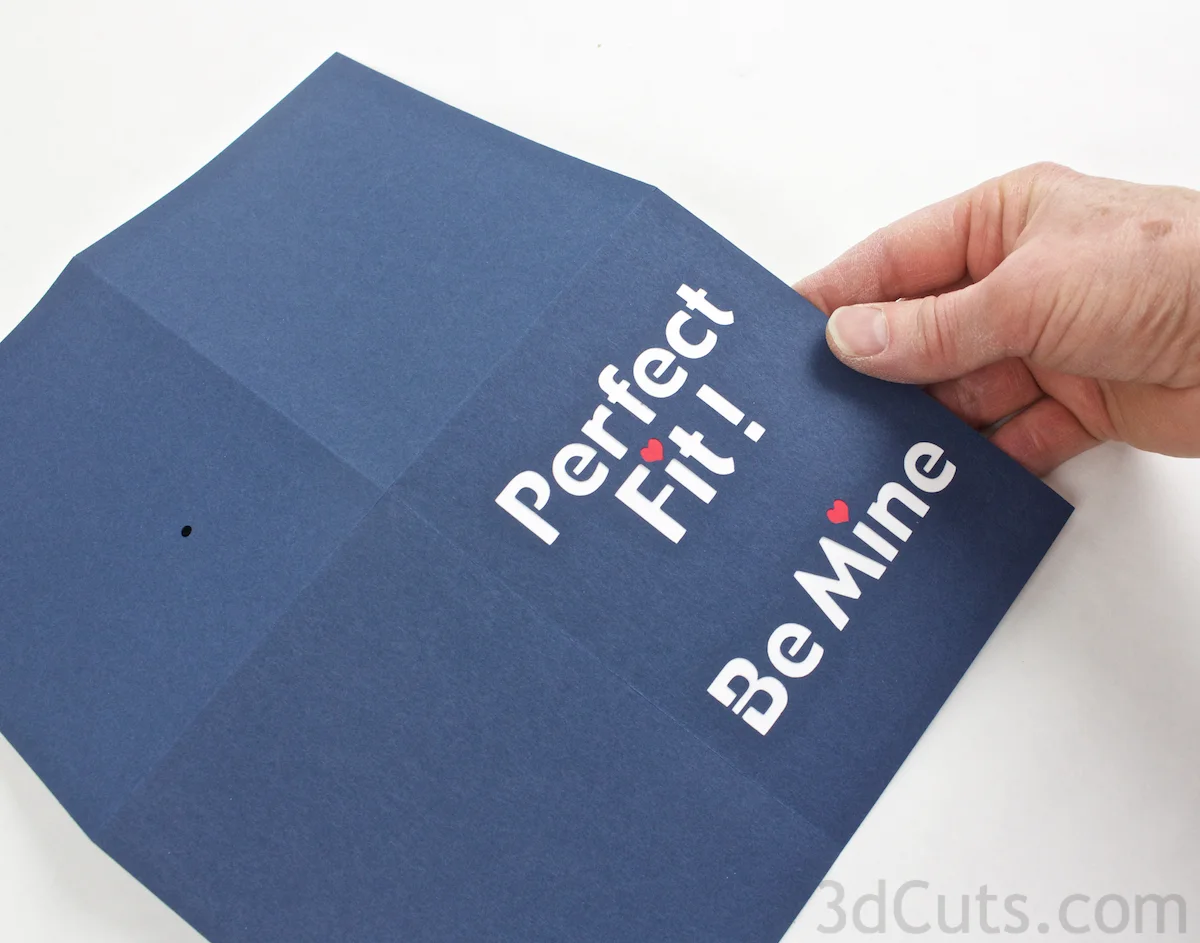
6. Prepare the card base.
- The card base is cut because placement of the tiny holes for the gears is critical.
- The lettering has been designed into some of the bases, but you can remove that and add your own wording to customize the card.
- Score the vertical fold line at the 4 1/8" mark. I use a Martha Stewart Score board but any number of tools will do this effectively.
- The horizontal score mark is at 5 3/8"

- Fold along the score lines .

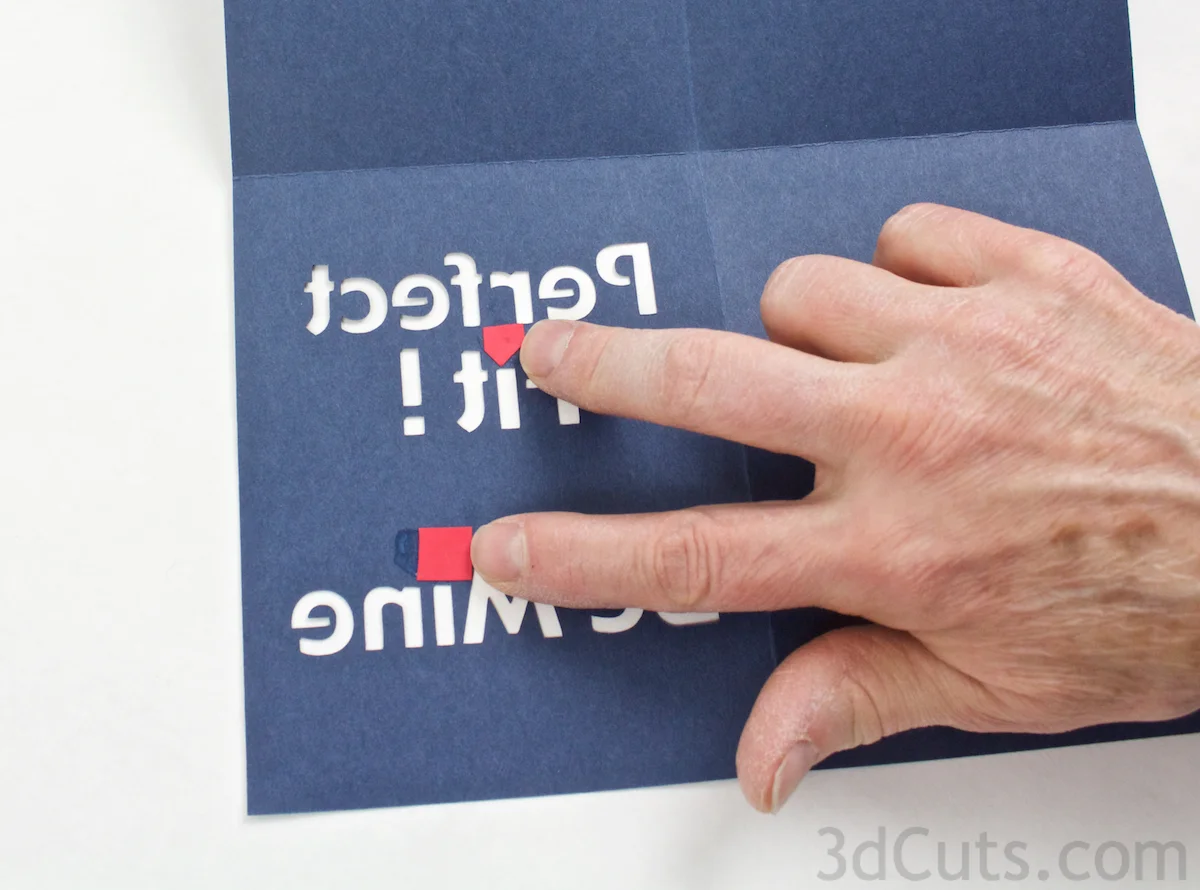
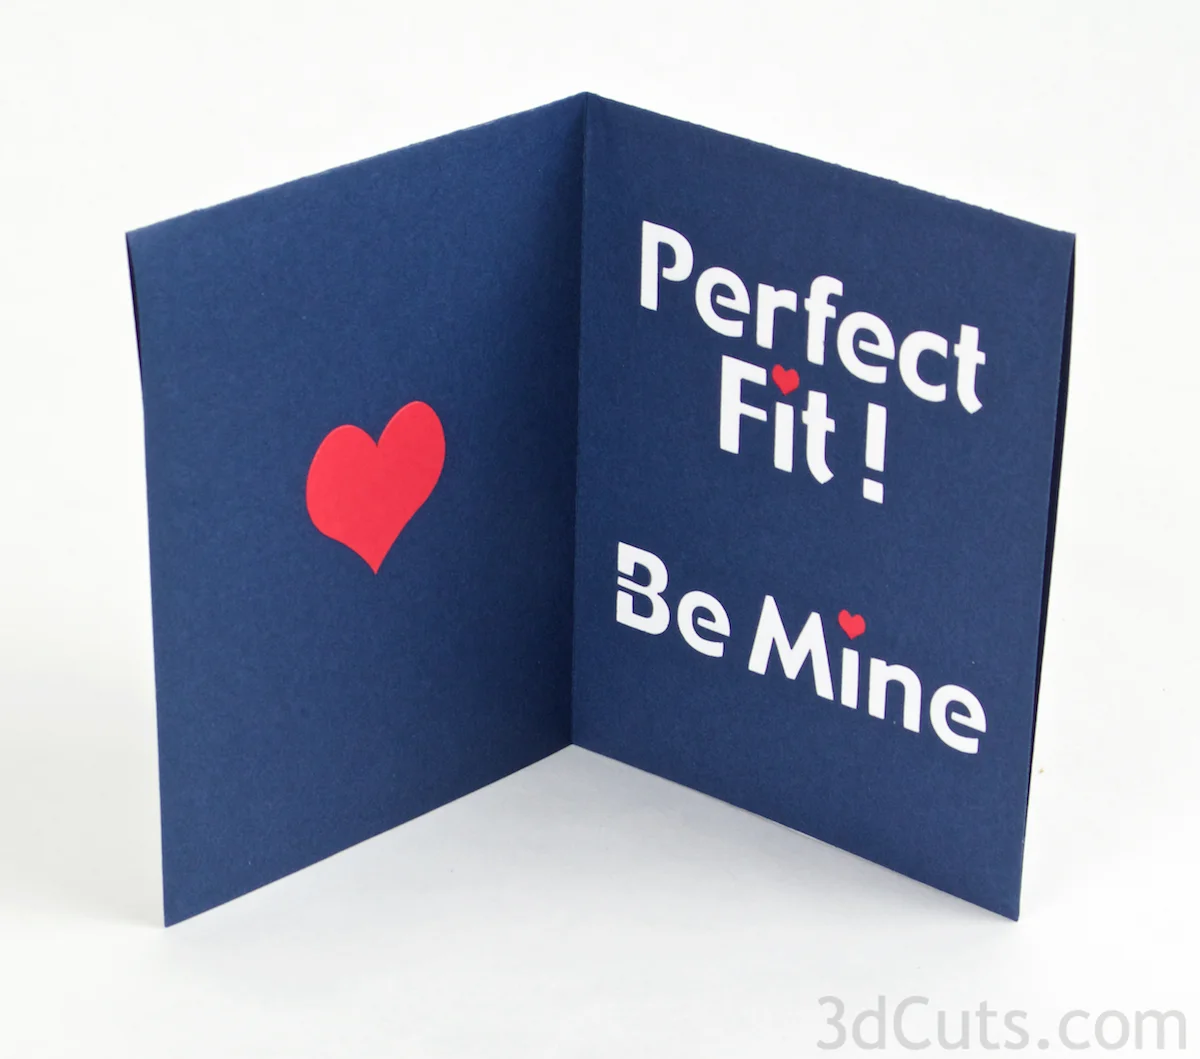
- Back the lettering on the back side of the card. For the valentine, I chose to back the hearts with red and the text with white.
- I applied Zig glue and a piece of card stock.
- For the white letters I covered all areas I didn't want to get glued (the 3 other quarters) and sprayed glue onto the back side of the blue card in just the quarter with the lettering.
- Apply the white card stock there to cover the lettering.
- Here is the completed card inside.

Variations
- For the Geared Up birthday card, the lettering on the front (Geared Up) is cut out and needs to be backed with white card stock.
- The inside is a message just printed on paper and folded and glued into place. This allows you to personalize the message. The message is included in the Silhouette file but not in the svg file through 3dcuts. This is because it is problematic to upload text into some versions of the Cricut software.
- To make the inside message, print your message on white paper. I have a rectangle that is 5 3/4" wide and 3 3/8" high. I used Boulder font, 40 pt. You can vary it.
- The inside gears are just single layer gears glued in place.
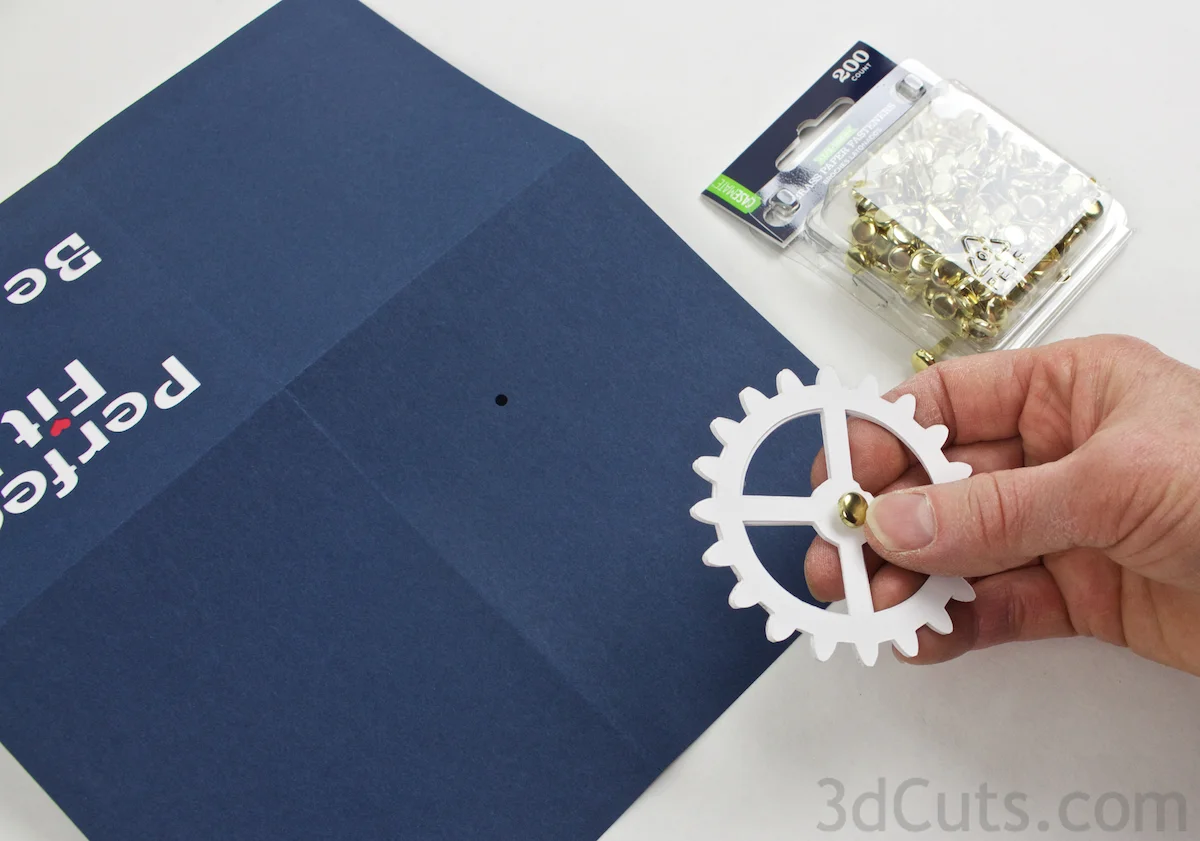
7. Add the Gears to the Card
- Put a Paper fastener through the center hole of a 3D gear.
- One gets put into each hole in the front of the cover.
- Placement is important. Look at the photos of the finished cards to understand placement on the Gear Up card.
- The gears on the Valentine are identical.
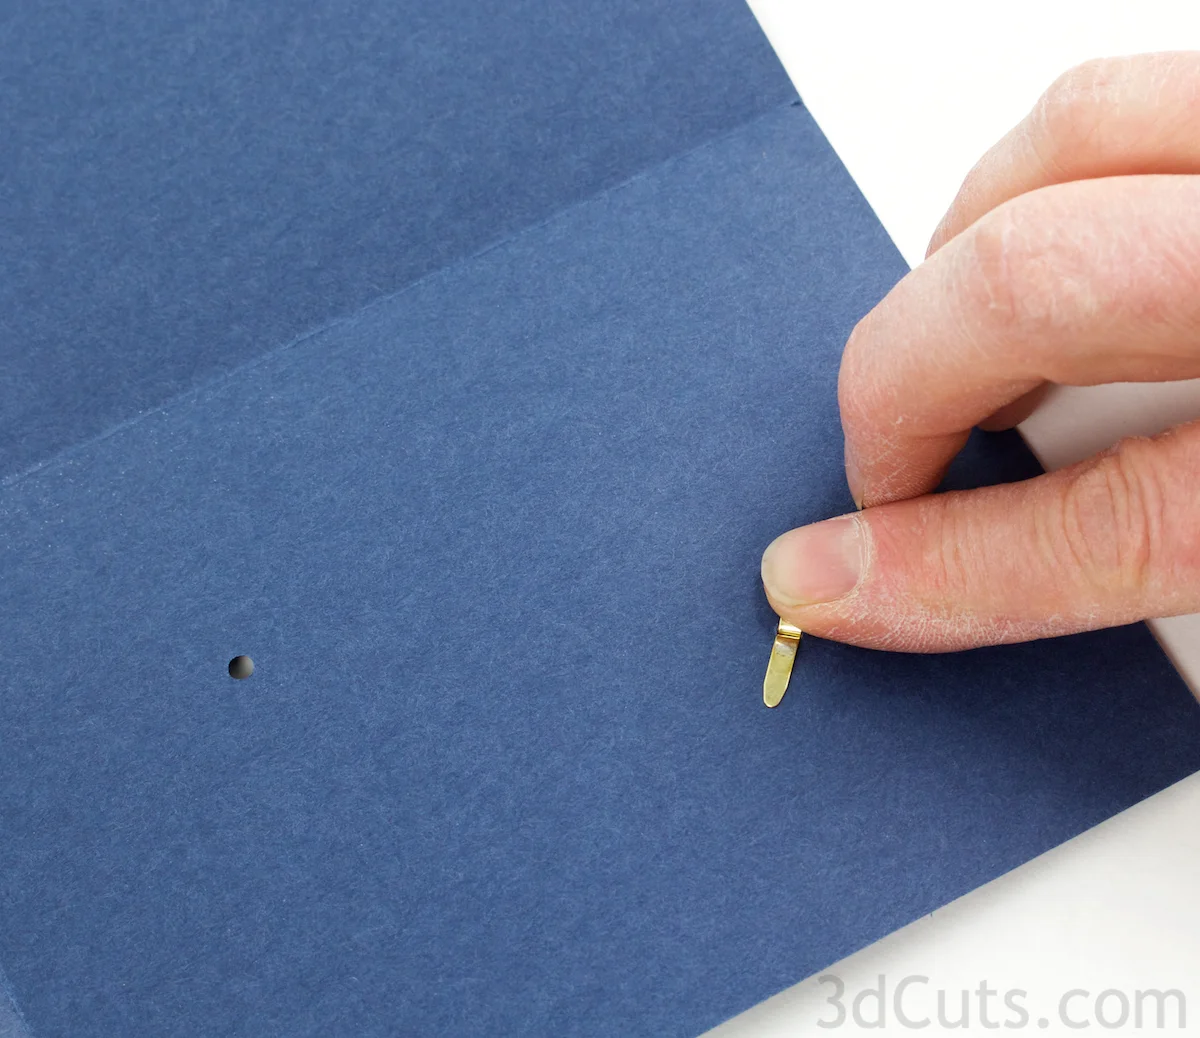
- Spread the wings of the paper fastener on the inside of the card.
- Repeat with all 3D gears.
- The gears should mesh together and spin. By turning one gear the other should move.
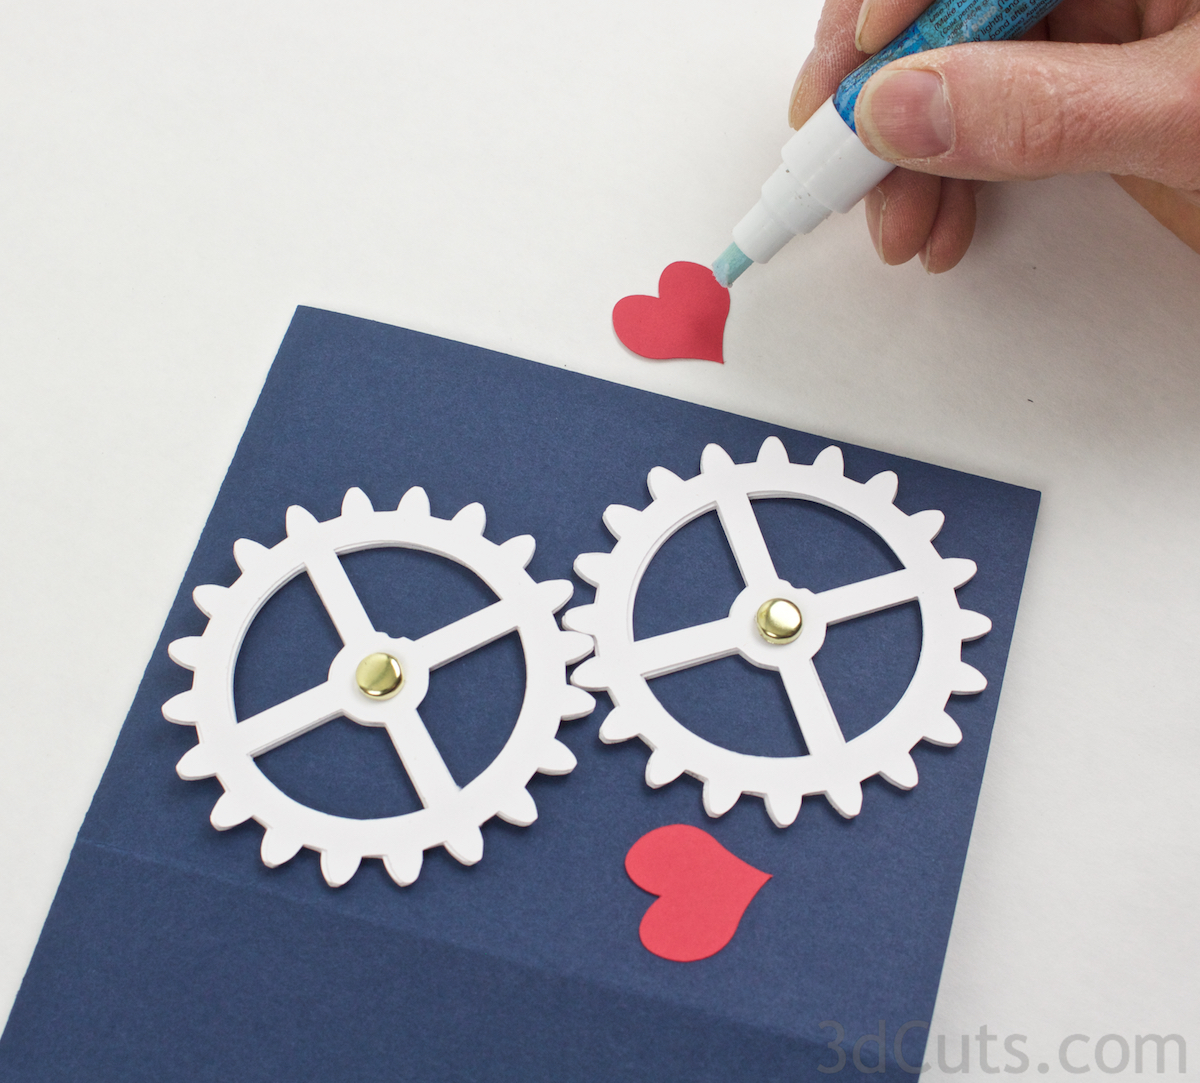
8. Add Embellishments.
- Here you can certainly be creative and do your own thing.
- I added 2 red hearts to the front using Zig glue.
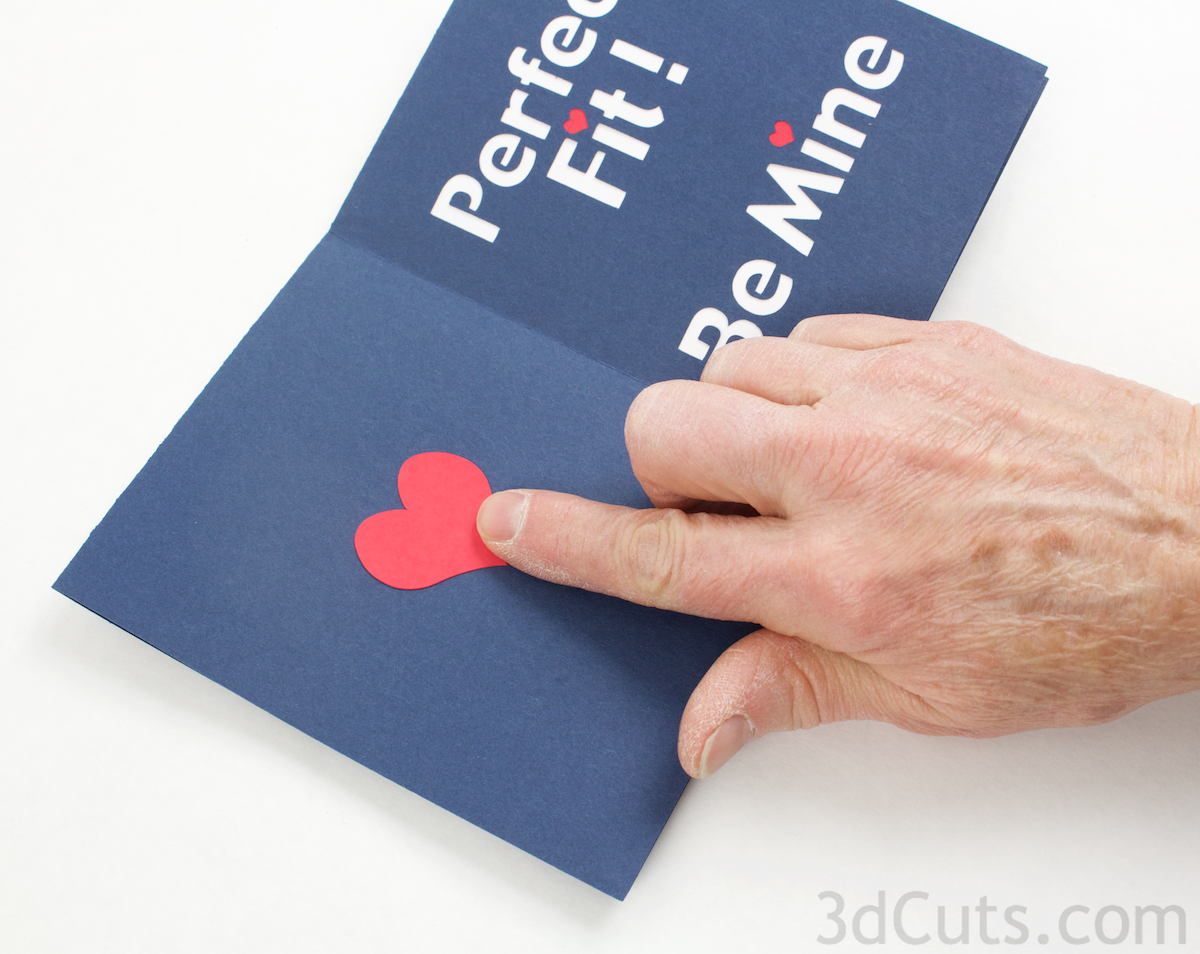
- And I added one to the inside on the left part.
Enjoying giving this card to someone you care about!
©2016 3dCuts.com, Marji Roy